Table of Contents
Advertisement
Instruction book
Atlas Copco Stationary Air Compressors
ZT15, ZT18, ZT22, ZT30, ZT37, ZT45
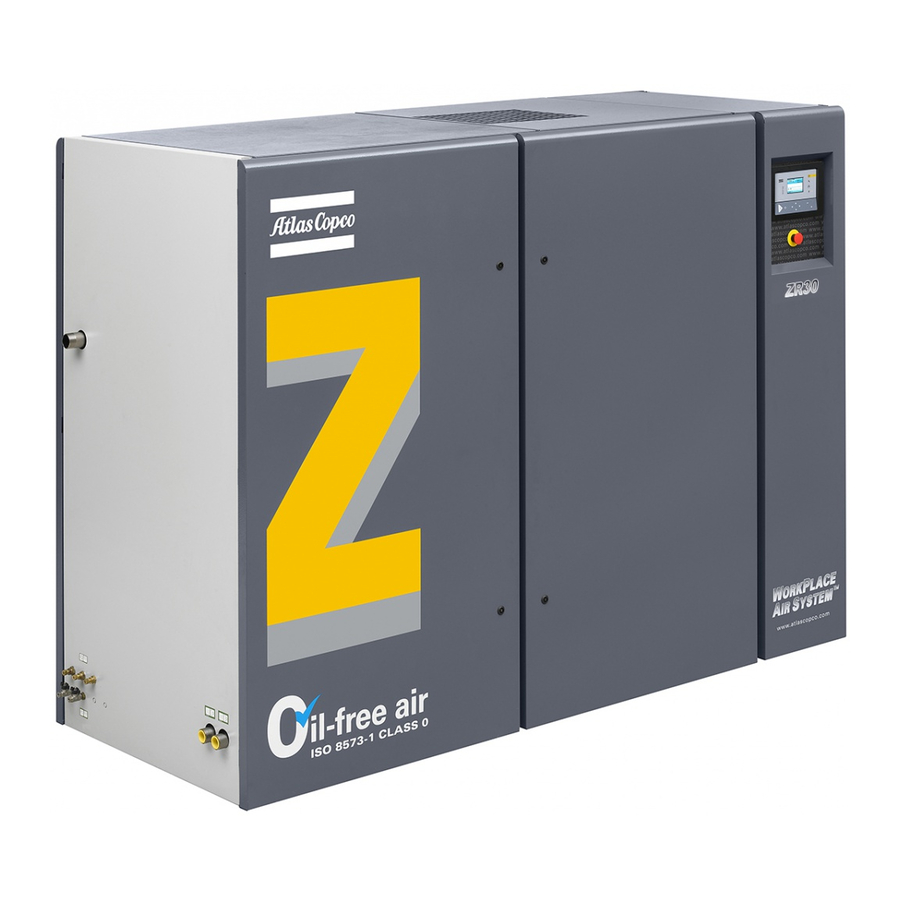
ZR30, ZR37, ZR45
Instruction book
Copyright 2004, Atlas Copco Airpower n.v., Antwerp, Belgium.
Any unauthorized use or copying of the contents or any part thereof is prohibited. This applies in
particular to trademarks, model denominations, part numbers and drawings.
This instruction book meets the requirements for instructions specified by the machinery directive
98/37/EC and is valid for CE as well as non-CE labelled machines
No. 2920 1472 03
Replaces 2920 1472 02
Registration code: APC Z<55 + VSD / 38 / 392
2004-05
www.atlascopco.com
2920 1472 03
1
Advertisement
Table of Contents

Related Manuals for Atlas Copco ZT Series


Summary of Contents for Atlas Copco ZT Series
- Page 1 ZT15, ZT18, ZT22, ZT30, ZT37, ZT45 ZR30, ZR37, ZR45 Instruction book Copyright 2004, Atlas Copco Airpower n.v., Antwerp, Belgium. Any unauthorized use or copying of the contents or any part thereof is prohibited. This applies in particular to trademarks, model denominations, part numbers and drawings.
- Page 2 Atlas Copco. Follow all applicable safety precautions, amongst others those mentioned in this book. Repairs must be carried out by trained personnel from Atlas Copco who can also be contacted for any further information.
-
Page 3: Table Of Contents
Instruction book 1 LEADING PARTICULARS........................5 1.1 General description........................5 1.2 Air flow (Figs. 1.6/1.7) ........................10 1.3 Condensate drain system (Figs. 1.6/1.7)..................10 1.4 Oil system (Figs. 1.6/1.7) ......................10 1.5 Cooling system (Figs. 1.6/1.7) ..................... 10 1.6 Air dryer on Full-Feature ......................17 1.6.1 Compressors with an ID dryer (Figs. - Page 4 Instruction book 5.1 Air filter (AF-Fig. 1.3)........................54 5.1.1 Recommendations ........................ 54 5.1.2 Servicing..........................54 5.2 Oil and oil filter change (Fig. 3.3)....................54 5.3 Safety valves..........................54 6 PROBLEM SOLVING ........................55 7 PRINCIPAL DATA ..........................56 7.1 Readings on display (2-Fig. 3.4)....................56 7.1.1 ZT15 up to ZT22........................
-
Page 5: Leading Particulars
Instruction book 1 LEADING PARTICULARS 1.1 General description ZT15 up to ZT45 and ZR30 up to ZR45 are two-stage tooth compressors, driven by an electric motor. The compressors deliver oil-free air. ZT are air-cooled and ZR are water-cooled. The compressors are enclosed in a sound-insulated bodywork and include mainly (Figs. 1.2 up to 1.4): Air filter (AF) Load/no-load valve (TV) Low-pressure compressor element (El) - Page 6 Instruction book Aftercooler Intercooler Oil cooler High-pressure compressor element Oil filler plug Drive motor Fan motor Oil filter Oil level sight-glass Low-pressure safety valve Emergency stop button Elektronikon regulator Fig. 1.2 Front view 2920 1472 03...
- Page 7 Instruction book Air filter Aftercooler Intercooler Oil cooler High-pressure compressor element Low-pressure compressor element Cooling fan Condensate trap, intercooler Fan motor Load/no-load valve ID dryer Fig. 1.3 Rear view, Full-Feature (ID dryer) 2920 1472 03...
- Page 8 Instruction book Air filter Aftercooler Cooler, regeneration air Intercooler Oil cooler High-pressure compressor element Low-pressure compressor element Cooling fan Condensate trap, intercooler Fan motor High-pressure safety valve Load/no-load valve IMD dryer Fig. 1.4 Rear view, Full-Feature (IMD dryer) 2920 1472 03...
- Page 9 Instruction book 1 Safety valve 2 Shut-off valve, regeneration air 3 Safety valve 4 Inlet regeneration air 5 Inlet pipe, wet compressed air 6 Condensate trap, aftercooler 7 Dryer inlet valve 8 Manual drain valve 9 Dryer by-pass valve 10 Dryer outlet valve 11 Moisture indicator Fig.
-
Page 10: Air Flow (Figs. 1.6/1.7)
Instruction book 1.2 Air flow (Figs. 1.6/1.7) Air drawn through filter (AF) is compressed in low-pressure compressor element (El) and discharged to intercooler (11). The cooled air is further compressed in high-pressure compressor element (Eh) and discharged through pulsation damper (AS) and aftercooler (15). A check valve (CV) is provided downstream of the pulsation damper. - Page 11 Instruction book Elektronikon AIR INLET (1) AIR FLOW (2) OIL FLOW (3) AIR OUTLET (5) REFRIGERANT FLUID (6) REFRIGERANT GAS (7) 55347D EWDi Fig. 1.6a ZT compressors with an ID dryer 2920 1472 03...
- Page 12 Instruction book Elektronikon AIR INLET (1) AIR FLOW (2) OIL FLOW (3) WATER FLOW (4) AIR OUTLET (5) REFRIGIRANT FLUID REFRIGERANT GAS EWDi 55346D Fig. 1.6b ZR compressors with an ID dryer 2920 1472 03...
- Page 13 Instruction book Air filter Pulsation damper Air outlet valve (customer’s installation) Control module Check valve High-pressure compressor element Low-pressure compressor element EWDi Electronic drain, low-pressure element Fan, compressor coolers Fan, condenser Fan motor, compressor coolers Refrigerant compressor Condensate trap, intercooler Oil filter Oil pump Safety valve, high-pressure element...
- Page 14 Instruction book Elektronikon AIR INLET (1) AIR FLOW (2) OIL FLOW (3) AIR OUTLET (5) EWDi 55365D Fig. 1.7a ZT compressor with IMD dryer 2920 1472 03...
- Page 15 Instruction book Elektronikon AIR INLET (1) AIR FLOW (2) OIL FLOW (3) WATER FLOW (4) AIR OUTLET (5) EWDi 55364D Fig. 1.7b ZR compressor with IMD dryer 2920 1472 03...
- Page 16 Instruction book Air filter Pulsation damper Air outlet valve (customer’s installation) Elektronikon regulator Check valve High-pressure compressor element Low-pressure compressor element EWDi Electronic water drain, intercooler Cooling fan Condensate trap, aftercooler Condensate trap, intercooler Oil filter Oil pump High-pressure safety valve Low-pressure safety valve Load/no-load valve Unloader...
-
Page 17: Air Dryer On Full-Feature
This condition continues until the fault is remedied. If the fault is not remedied automatically, maintenance is required. Consult your Atlas Copco Customer Centre. 2920 1472 03... -
Page 18: Electrical System
Instruction book Testing the EWD Functional test Briefly press the TEST button (Fig. 1.8) and check that the valve opens for condensate discharge. Checking the alarm signal Press the test button for at least 1 minute Check that the alarm LED flashes Release the test button. -
Page 19: Elektronikon Control System
The regulator has a built-in function to automatically restart the compressor if the voltage is restored after voltage failure. For compressors leaving the factory, this function is made inactive. If desired, the function can be activated. Consult Atlas Copco. 2920 1472 03... -
Page 20: Control Panel
Instruction book Warning If activated and provided the module was in the automatic operation mode, the compressor will automatically restart if the supply voltage to the module is restored within a programmed time period. The power recovery time (the period within which the voltage must be restored to have an automatic restart) can be set between 1 and 255 seconds or to Infinite. -
Page 21: Display
To return to a previously shown option or menu Cancel To cancel a programmed setting when programming parameters Delete To delete compressor start/stop commands Help To find the Atlas Copco internet address Limits To show limits for a programmable setting Load To load the compressor manually Mainscreen To return from a menu to the main screen (Fig. -
Page 22: Emergency Stop Button (S3-Fig. 1.10)
Instruction book 1.9.4 Emergency stop button (S3-Fig. 1.10) In case of emergency, press the button to stop the compressor immediately. Pressing the button breaks the circuit to the drive motor. The circuit to the control circuit and other electrical components is not broken. Warning Before starting any maintenance or repairs: Stop the compressor and close the air outlet valve. -
Page 23: Main Screen
Instruction book 1.10.2 Main screen When the voltage is switched on, the main screen is shown automatically, showing in short the operation status of the compressor. Compressor Outlet 7.0 bar Automatically Loaded ↓ Menu Fig. 1.12 Main screen, typical example If the function keys or arrow keys are not used for some minutes, the display will automatically return to the Main screen. - Page 24 Instruction book -Oil Injection Temperature -Motor Starts -Regeneration Air Outlet -Module Hours -Wet Air Inlet -Load Relay -Emergency Stop Automatic Operation Maximum Pressure 8.3 bar ↑ -Compressor Outlet Compressor Outlet 5.4 bar -Remote Start/Stop -Dp Air Filter Local Control -Overload Motor Running Hours 1016 hrs -Oil Pressure...
-
Page 25: Installation
Instruction book 2 INSTALLATION 2.1 Dimension drawings (25) (21) (19) (11) (10) (12) (14) (16) (17) (15) (19) (13) (27) (28) 9820 3707 00/02 55356D See page 30 for the list of texts on this figure. Fig. 2.1 Dimension drawing, ZT15 up to -22 2920 1472 03... - Page 26 Instruction book (21) (25) (19) (11) (10) (12) (14) (16) (17) (15) (13) (27) (28) 9820 3711 00/02 55358D (19) See page 30 for the list of texts on this figure. Fig. 2.2 Dimension drawing, ZT15 up to -22 WorkPlace Air System 2920 1472 03...
- Page 27 Instruction book (20) (25) (21) (19) (11) (10) (12) (14) (16) (15) (17) (19) (13) 9820 3708 00/02 (27) (28) 55361D See page 30 for the list of texts on this figure. Fig. 2.3 Dimension drawing, ZT30 up to -45 2920 1472 03...
- Page 28 Instruction book (25) (20) (21) (19) (11) (10) (12) (14) (16) (15) (17) (19) (13) (27) (28) 9820 3712 00/02 55362D See page 30 for the list of texts on this figure. Fig. 2.4 Dimension drawing, ZT30 up to -45 WorkPlace Air System 2920 1472 03...
- Page 29 Instruction book (22) (25) (23) (24) (20) (21) (19) (11) (10) (14) (12) (16) (17) (15) (19) 9820 3821 00 (13) 52637D See page 30 for the list of texts on this figure. Fig. 2.5 Dimension drawing, ZR30 up to -45 2920 1472 03...
-
Page 30: Installation Proposal (Figs. 2.6/2.7)
Instruction book Text on figures 2.1 up to 2.5 Right side view Prepared for ID dryer air inlet Cooling air outlet Front view Compressed air outlet Voltage supply entrance Compressor air and cooling air inlet Opening for transportation Rear view (10) Prepared for ID dryer air outlet (11) - Page 31 Instruction book The inlet grids and ventilation fan should be installed in such a way that any recirculation of cooling air to the compressor is avoided. The air velocity to the grids should be limited to 5 m/s. The required ventilation capacity (per compressor installed) to limit the compressor room temperature can be calculated as follows: 1.16 N / dT for ZT15 up to ZT22 (1.16 N + 3.2) / dT for ZT15 up to ZT22 Full-Feature...
- Page 32 Instruction book 9820 3718 00/2 52654D Text on figure 2.6 Common ducting for multiple units is not allowed Minimum free area Ventilation proposal Ventilation proposal for WorkPlace Air System Fig. 2.6 Installation proposal, ZT 2920 1472 03...
- Page 33 Instruction book 9820 3823 00 52638D Text on figure 2.7 Common ducting for multiple units is not allowed Minimum free area Ventilation proposal Fig. 2.7 Installation proposal, ZR30 up to ZR45 2920 1472 03...
-
Page 34: Electric Cables
Instruction book 2.3 Electric cables Mains + earth cable 2.3.1 ZT15 up to ZT22 IEC Compressor Voltage Frequency Supply cables ZT15 200/220V 50/60 Hz 25 mm² ZT15 230V 50/60 Hz 25 mm² ZT15 380V 60 Hz 10 mm² ZT15 400V 50 Hz 10 mm²... -
Page 35: Zt/Zr30 Up To Zt/Zr45 Iec
Instruction book 2.3.3 ZT/ZR30 up to ZT/ZR45 IEC Compressor Voltage Frequency Supply cables ZT/ZR30 200/220V 50/60 Hz 70 mm² ZT/ZR30 230V 50/60 Hz 70 mm² ZT/ZR30 380V 60 Hz 35 mm² ZT/ZR30 400V 50 Hz 35 mm² ZT/ZR30 460V 60 Hz 25 mm²... - Page 36 Instruction book Fig. 2.8 Electrical diagram 2920 1472 03...
- Page 37 Instruction book Text on figure 2.8 Customer's installation (13) Remote pressure sensing (link = Remote emergency stop remote) All voltages (50 and 60 Hz) except: (14) Overload, main motor 440-460 V 60 Hz (15) Overload, fan motor (only ZT) Star connection: all other voltages (16) Fault, electronic water drain ID dryer...
-
Page 38: Pictographs (Figs. 2.9 And 2.10)
Instruction book 2.4 Pictographs (Figs. 2.9 and 2.10) Fig. 2.9 Pictographs on control panel Fig. 2.10 Pictographs at other locations Reference Description Start Scroll keys Tabulator key Voltage on Alarm Automatic operation Stop Automatic condensate outlets Manual condensate outlets Warning: under tension Read Instruction book before starting the compressor Switch off the voltage and depressurize the compressor before maintenance or repair Before connecting the compressor electrically, consult the Instruction book for the motor... -
Page 39: Cooling Water Requirements
Instruction book Reference Description Torques for steel (Fe) or brass (CuZn) bolts Consult the Instruction book before greasing Switch off the voltage before removing the protecting cover inside the electric cabinet Oil the gaskets, screw on the filters and tighten by hand (approx. one half turn) Consult the Instruction book before maintenance or repair Cooling water outlet Cooling water inlet... - Page 40 Instruction book C : depends on the calcium hardness (ppm CaCO D : depends on the HCO concentration or M-alkalinity (mval/l). The values from A, B, C and D are found in the table below. Total Temperature M-Alkalinity dissolved hardness solids (mg/l) (°C)
- Page 41 Instruction book A more detailed interpretation follows below : Tendency of the water Action RSI < 3.9 Very high scale formation Water cannot be used 4.0 < RSI < 5.5 High boiler scale formation Regular control and descaling operation necessary 5.6 <...
- Page 42 Instruction book Carbonate hardness Closed cooling system: 50-1000 ppm CaCO Open cooling system: 50-500 ppm CaCO / SO should be > 1 Ammonia < 0.5 ppm Copper < 1 ppm Iron and manganese < 1 ppm Organics No algae. No oil. Suspended solids Non-soluble particles, size <...
-
Page 43: Operating Instructions
Instruction book 3 OPERATING INSTRUCTIONS Safety precautions The operator must apply all related safety precautions, including those mentioned in this book. Ambient conditions Consult section 7 for the limitations with regard to the ambient conditions and altitude operation. Moving/lifting The compressor can be moved by a lift truck using the slots in the frame. Make sure that the forks protrude from the other side of the frame. - Page 44 Instruction book Text on figures 3.1 Gear casing side Motor side Frame Components Bolt Bolt Bush Fig. 3.1a Vibration dampers on earlier production units Motor support or gear casing Fig. 3.1b Transport fixations on recent production units 2920 1472 03...
- Page 45 Instruction book The compressor and motor are secured to the frame, immobilizing the vibration dampers during transport (Figs. 3.1). After installing the compressor: On earlier production units (Fig. 3.1a) loosen the nuts (2 and 4) of the long central bolt of each damper, screw the bolts (1 and 3) as far out as indicated and tighten the nuts again.
- Page 46 (-) at any time above the level in the leg marked (+). When the average difference is set at 11 mm and the level in the leg marked (-) does not stay at any time above the level in the leg marked (+), consult Atlas Copco. Check the dryer connections for air leaks.
- Page 47 Instruction book Open drain valve (8-Fig. 1.5). Oil cooler Oil drain valve, gear casing Oil filler cap Oil filter Oil level sight-glass Arrow, indicating correct rotation direction of drive motor Fig. 3.3 Oil system components Start button Voltage on LED Display General alarm LED Scroll keys...
-
Page 48: Starting (Fig. 3.4)
5°C. If it exceeds the 5°C, check that the difference between the highest element temperature and the surrounding temperature does not exceed 185°C. If the value should be exceeded, contact Atlas Copco. Warning When the compressor is stopped and automatic operation LED (8) is alight, the compressor may start automatically. - Page 49 Instruction book Manual condensate drain, aftercooler Prepared for electronic drain (only for Electronic condensate drain, intercooler IMD) Automatic condensate drain, aftercooler Fig. 3.5 Condensate drains Water flow regulating valve, oil cooler Intercooler and intercooler Water flow regulating valve, aftercooler Oil cooler Aftercooler Fig.
-
Page 50: On Compressors With An Imd Dryer (Fig. 1.5)
Instruction book 3.3.2 On compressors with an IMD dryer (Fig. 1.5) The dewpoint of the air leaving the dryer will be higher than normal after starting. The normal operating condition will be reached after approx. 15 minutes. Avoid short loading periods and operation at very low working pressures as the performance of the dryer will diminish. -
Page 51: Maintenance
3.2 4.1.2 Service kits Atlas Copco Customer Centres will be glad to provide you with a wide range of service kits. Service kits comprise all parts needed for servicing components and offer the benefits of genuine Atlas Copco parts while keeping the maintenance budget low. -
Page 52: Service Plan
When reaching a level, a message will appear on the screen. After carrying out all service actions, the interval timers are to be reset using the key "Reset" in menu "Service". Consult your Atlas Copco Customer Centre. 4.2 Motor greasing 4.2.1 Fan motor (ZT) - Page 53 Instruction book Atlas Copco Roto-Z oil Atlas Copco Roto-Z oil can be ordered in following quantities: Quantity Ordering number 5-litre can 2908 8503 00 20-litre can 2908 8501 01 209-litre drum 2908 8500 00 2920 1472 03...
-
Page 54: Servicing Procedures
5.3 Safety valves Testing The valves can be tested on a separate compressed air line. If a valve does not open at the pressure specified in section 7.2, consult Atlas Copco. Warning Never run the compressor without safety valves. No adjustments are allowed. -
Page 55: Problem Solving
Check water temperature and increase cooling water flow On ZR, restriction in cooling water system due to formation of scale or settling down of dirt Consult Atlas Copco Condensate is not discharged from condensate traps during operation Discharge flexible clogged... -
Page 56: Principal Data
Instruction book 7 PRINCIPAL DATA 7.1 Readings on display (2-Fig. 3.4) Outlet pressure bar(e) Depends on pressure setpoint Maximum working pressure bar(e) See section 7.4 7.1.1 ZT15 up to ZT22 Unit ZT15 ZT18 ZT22 Dp of air filter, approx. Below 0.050 Below 0.050 Below 0.050 Oil pressure... -
Page 57: Settings Of Overload Relay - Circuit Breakers - Fuses
Instruction book 7.3 Settings of overload relay - circuit breakers – fuses 7.3.1 ZT15 up to ZT22 IEC Compressor Voltage Frequency Overload Circuit Main fuses type supply relay breaker (customer's installation) gL/gG (IEC) ZT15 200 V 50 Hz 38.8 A 2.5 A 80 A ZT15... -
Page 58: Zt/Zr30 Up To Zt/Zr45 Iec
Instruction book 7.3.3 ZT/ZR30 up to ZT/ZR45 IEC Compressor Voltage Frequency Overload relay Circuit Main fuses type supply breaker (customer's installation) (ZT only) gL/gG (IEC) ZT/ZR30 200 V 50 Hz 77.7 A 5.4 A 160 A ZT/ZR30 200/220 V 60 Hz 71.6 A 5.5 A 160 A... -
Page 59: Compressor Specifications
Instruction book Notes For 50 Hz compressors, according to Directive 73/23/EEC (low-voltage directive) EN 60204 For 60 Hz compressors, according to CSA standards C22,2 Nos. 0; 0.4; 0.5; 0.12; 14; 68; and UL508 7.4 Compressor specifications 7.4.1 Reference conditions Absolute inlet pressure bar(a) Relative air humidity Air inlet temperature... -
Page 60: Specific Data Of Zt30 Up To Zt45
Instruction book 7.4.4 Specific data of ZT30 up to ZT45 Unit ZT30-7.5 ZT30-8.6 ZT37-7.5 ZT37-8.6 ZT45-7.5 ZT45-8.6 Nominal bar(e) working pressure Maximum bar(e) working pressure Maximum bar(e) 7.25 8.35 7.25 8.35 7.25 8.35 working pressure, Full- Feature Minimum bar(e) working pressure Installed motor power... -
Page 61: Conversion List Of Si Units Into British/American Units
Instruction book 7.5 Conversion list of SI units into British/American units 1 bar = 14.504 psi 1 g = 0.035 oz 1 kg = 2.205 lb 1 km/h = 0.621 mile/h 1 kW = 1.341 hp (UK and US) 1 l = 0.264 US gal 1 l = 0.220 Imp gal (UK) 1 l = 0.035 cu.ft 1 m = 3.281 ft... -
Page 62: Instructions For Use Of Pulsation Damper
Instruction book 8 INSTRUCTIONS FOR USE OF PULSATION DAMPER This vessel can contain pressurized air; be aware of its potential danger in case of misuse. This vessel shall only be used as compressed air pulsation damper and be operated within the specified limits as mentioned on the data plate. - Page 63 Instruction book Notes: 2920 1472 03...
- Page 64 Instruction book Notes: 2920 1472 03...
- Page 65 Atlas Copco compressor instruction book: ....Atlas Copco air dryer instruction book: ......
- Page 66 .
Need help?
Do you have a question about the ZT Series and is the answer not in the manual?
Questions and answers
what could be some causes of fan motor overload on ZT 75 compressor?
@Rerem Tavul what could be some causes of fan motor overload on ZT 75 compressor?