Table of Contents
Advertisement
Quick Links
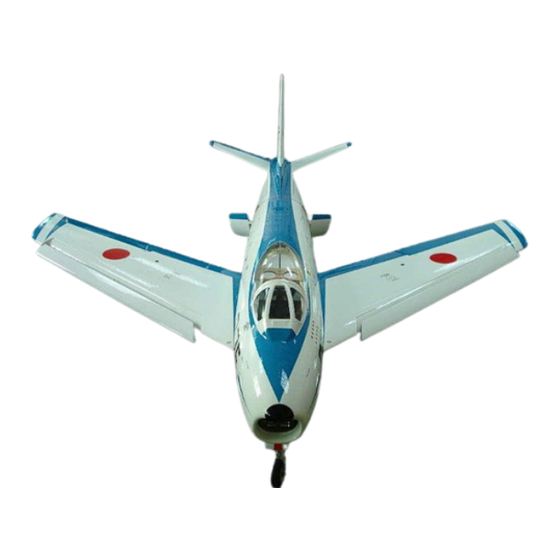
1/5 Scale Almost-Ready-To-Fly RC Jet
Assembly and operations manual
Spesifications
Type
: T.A.V.S ARF PRO
Scale : 1/5th
Length : 90.2": (2230mm)
Span
: 91": (2310mm)
Weight : 42—46 Lbs ( 14—21 Kg)
Engine : 32—38 Lbs (10—17 Kg) trust
Radio : 12 Channel (12—16 servo's)
The F-86F Sabre by Skymaster
Thank you very much for purchasing our Skymaster ARF PRO F-86F . Please note that the photos in this instruc-
tion manual show certain views from the prototypes. Some modifications and upgrades might have taken place by
the release of the model. We have tried to produce a very scale replica of this classic jet. Many scales options are
available from Details 4 Scale. (see page 28) This manual describes the assembling of " PRO" model. Sliding
canopy, speed brakes, landing gear and doors are factory installed. Before you start building and setting-up your
aircraft, please make sure you have read this instruction manual, and understood it. If you have any questions,
please don't hesitate to contact us. Below are the contact details:
Office Taiwan:
No.9.39 Lane,Yuag-Chang 2nd Street, Ren-Wu Hsiang, Kaohsiung Hsien, 814, Taiwan, R.O.C.
TEL: +886 9 3299 7923
FAX: + 886 7373 1215
http://www.skymasterjet.com
Sales : skymaste@skymasterjet.com
Technical support : morne.m@pixie.co.za
SM © 2009
Advertisement
Table of Contents

Related Manuals for Skymaster Plus Pro F86F Sabre


Summary of Contents for Skymaster Plus Pro F86F Sabre
- Page 1 The F-86F Sabre by Skymaster Thank you very much for purchasing our Skymaster ARF PRO F-86F . Please note that the photos in this instruc- tion manual show certain views from the prototypes. Some modifications and upgrades might have taken place by the release of the model.
-
Page 2: Table Of Contents
Assembly & Operation Manual Index: INTRODUCTION............................3 DISCLAIMER..............................3 WARNING…...............................3 ARF PAINT..............................4 FINISHING YOUR WHITE VIPER ARF......................4 HANDLING & TRANSPORTING .......................5 LIVE HINGE ……………………………..………..................5 TOOL LIST..............................6 HEALTH…..............................7 GENERAL ASSEMBLY TECHNIQUES....................…7 RADIO EQUIPMENT & ACCESSORIES…………….................8 KIT CONTENTS…….…………….......................9 OPTIONAL PARTS………………..………………..................10 CONTROL LINKAGES ..........................12 WINGS..............................12 STABILIZERS............................15 FIN &... -
Page 3: Introduction
INTRODUCTION Thank you for purchasing Skymaster arf pro Sabre! We have put a lot of effort and time into this model. We at Skymaster strive to be a market leader in the ARF— jet market. We were the first company to produce ARF—jets in the world and we would like to continue being amongst the best. -
Page 4: Arf Paint
Assembly & Operation Manual ARF Paint The color finish on your Skymaster Sabre arf pro model was applied out of the mould. We have used only the highest standard automotive paints to finish your model. Should you damage the finish, Skymaster stock the color paint and hardener required for the repair. -
Page 5: Handling & Transporting
Always support these structures on clean soft foam rubber. LIVE HINGE Skymaster utilize this system of hinging control surfaces because it is a very strong hinge system and is accomplished at the factory. Occasionally, because of climatic changes, the bottom surfaces may “catch” or inter- fere with control travel surface actuation. -
Page 6: Tool List
This is a fairly quick and easy plane to build, for a jet model, not requiring difficult techniques or special equip- ment, but even the building of Skymaster aircraft requires some suitable tools! You will probably have all these tools in your workshop anyway, but if not, they are available in all good hobby shops, or hardware stores like "Home Depot"... -
Page 7: Health
The glass cloth side of parts to glue, should be sanded with #80 grit paper for best glue adhesion. Support the fuselage on foam pads. Skymaster makes every attempt to insure that the parts fit. However, due to manufac- turing tolerances, some parts may fit a little tight. Always trial fit parts and adjust if needed. -
Page 8: Radio Equipment & Accessories
Assembly & Operation Manual Radio equipment Failure to use the recommended servos, output arms, extensions, and hardware may result in a loss of con- trol! Throughout this manual we make use of various types of servos and radio equipment! We have used JR equipment during the installation process. -
Page 9: Kit Contents
Kit Contents Assembly & Operation Manual F86L ARF PRO Contents: Right wing including L/G + Doors installed. Include flap + aileron + slat (F86L01) Left wing including L/G + Doors installed. Include flap + aileron + slat (F86L02) Canopy frame including sliding mechanism and cylinder (F86L03) Fuselage front including nose gear + door installed. -
Page 10: Optional Parts
Assembly & Operation Manual OPTIONAL PARTS Sabre drop tanks. Sabre pylons. Photo 1 3 x Air Tanks 1 x Retract Valve 2 x Filler & 2 x Pressure Gauges 1 x Electronic Brake Valve 5 x Air Tubing, 10 x Quick Disconnect Photo 2 Fuel Tank (3) 5.4L Pushrod Set... - Page 11 Assembly & Operation Manual Servo moun ng hardware Photo 8 Bolts & Accessory pack Photo 9 Belcrank wire Belcranks (3) Photo 10 Photo 11 Pin Hinges Photo 12 Tygon Tubing Tank Hardware Photo 13 Photo 14 P-11...
-
Page 12: Control Linkages
Assembly & Operation Manual CONTROL LINKAGES Flaps : 80mm (2) Aileron : 75mm (2) Slats : 75mm (4) Elevator : 500mm (2) Rudder : 230mm Steering: 50mm Photo 15 WINGS NOTE: Make sure to have some sort of protective foam on the work bench. This will protect the paint surface from unwanted dents. - Page 13 Assembly & Operation Manual Fit 2 L-shape servo brackets to 2 x JR DS8511 (flap + aileron) and 2 x JR DS8401 (slats) servos. All servos must be mounted with horns facing down. For the flaps and slats the horn must be closest to control surface and furthest away for aileron.
- Page 14 Assembly & Operation Manual Draw line perpendicular across flap hinge line. Cut hole in trailing edge of wing for flap pushrod. Trial fit flap and mark loca on of horn on flap. (make sure horn clear wing when flap in “up” posi on. Remove flap and cut slot for horn.
-
Page 15: Stabilizers
Assembly & Operation Manual STABILIZERS NOTE: Make sure to have some sort of protective foam on the work bench. This will protect the paint surface from unwanted dents. Assemble both stabilizers simultane- ously. All linkages are hidden. If you have a transport problem it maybe necessary to remove stabilizers for transportation. - Page 16 Assembly & Operation Manual STABILIZERS Feed pushrods through formers and secure to belcranks. Use safety clips. Fit L-brackets to 2 x DS8511 servos. Secure servos back to back on servo mount. Secure pushrods to servos. Check operation of elevator servos. Make sure no slop in system.
-
Page 17: Fin & Rudder
Assembly & Operation Manual FIN & RUDDER NOTE: Make sure to have some sort of protective foam on the work bench. This will protect the paint surface from unwanted dents. Mark √ each step. Locate all parts needed for this section. Make up rudder push- rod. -
Page 18: Fuselage
Assembly & Operation Manual FUSELAGE Make sure you have a good stand for fuselage. You will need to assemble the rest of the Sa- bre on this stand. Locate the 4 x M5 bolts and washers for fuselage. Align fuselage and secure with 4 bolts. Check fit all around seem for sound joined. -
Page 19: Tailpipe
Assembly & Operation Manual TAIL PIPE Dril holes in mounting lugs of tail pipe. Make 90 degree bend in each mounting lug. Slide tail pipe through nose into position. Note: The rear of pipe must just exit the rear former by 10mm. Photo 44 Mark location of screws on turbine rail. -
Page 20: Fuel Diagram
Assembly & Operation Manual FUEL CELL DIAGRAM Photo 49 P-20... -
Page 21: Air System
Assembly & Operation Manual AIR SYSTEM There are 2 options available for the air system: Mechanical or Electronic. For mechanical you will need 4 x 2 way and 1 x 1way valve with 5 servos and sequencer. For electronic you will need 1 x EV5U and 2 x EV2U. Glue the air tanks with silicon glue in the front nose section. -
Page 22: Air Diagram
Assembly & Operation Manual For scale functions such as speed brake and sliding canopy you will require addi- tional 2 way electronic valves. The main doors in the fuselage will stay close before and after retraction. This can easily be programmed with EV5U. Photo 53 2 way AIR DIAGRAM... -
Page 23: Turbine Installation
Assembly & Operation Manual TURBINE INSTALLATION Please follow the instructions supplied with your turbine. Secure turbine to turbine rail via hatch at bottom of fuselage. Leave gap of 25mm between NGV and tailpipe. Run all turbine wires and power cables on opposite side of servo wires. -
Page 24: Cockpit & Canopy
Assembly & Operation Manual COCKPIT AND CANOPY (a er pain ng) Check free operation of sliding canopy. Plumb air line and fit 2 x quick disconnects. Fit rear cockpit to sliding floor. Trace the shape of rear canopy and cut Photo 58 Photo 59 to fit. -
Page 25: Equipment Installation Into The Sabre Arf
Assembly & Operation Manual EQUIPMENT INSTALLATION INTO SABRE Equipment installation is a personal venture. There is one golden rule: Do it as neat and logical as possible! This will make faultfinding and service of components easi- er. The Sabre basically consist of 6 circuits! 1. -
Page 26: Before You Fly
Assembly & Operation Manual BEFORE YOU FLY It is assumed that the builder of this kit has acquired the basic skills and knowledge necessary to make a safe and functional radio control installation into a model. Therefore, these notes are intended only to assist that experience. When inserting the main spar into wing, make sure it only enters the amount required. - Page 27 Taxi back and do necessary adjustments to customize Sabre for your need! We at Skymaster wish you many happy flights with your Sabre! Add some more scale options like drop tanks etc. Before and after landing slide open canopy for extre real- ism.
-
Page 28: Optional Scale Parts
Assembly & Operation Manual OPTIONAL SCALE PARTS The following items are available from Details4Scale. Please contact them on their online web store: www.details4scale.com Photo 67 Photo 68 Photo 69 Photo 70 Gun bay. Speed brake tub Wing tip antenna Fuel dump post Scale light system Retractable landing light Bombs and missile rack...
Need help?
Do you have a question about the Plus Pro F86F Sabre and is the answer not in the manual?
Questions and answers