
Subscribe to Our Youtube Channel
Related Manuals for Elenos ET30000-5


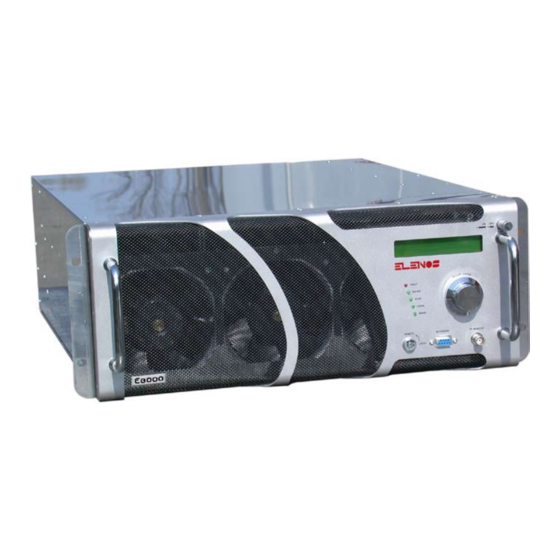
Summary of Contents for Elenos ET30000-5
- Page 1 ET30000-5 ET25000-5 ET20000-5 ET15000-5 ET10000-5 ET5000 ET3500 ET2500 (list of variations available in the manual) SOLID STATE FM TRANSMITTER Rev. 00- 17/11/2013 Cod. MAN1029UUK USER MANUAL...
- Page 2 Elenos s.r.l. declares that the equipment described in this document is compliant with the 1999/05/EC Directive. 0051 For details please refer to the “EC Marking” section. All rights reserved. No part of this manual can be reproduced in any form without prior written authorization from Elenos S.r.l.
- Page 3 EC Declaration of Conformity According to Directive 1999/5/EC (R&TTE) We : ELENOS s.r.l. - via G.Amendola, 9 – 44028 Poggio Renatico (FE) - Italy Declare under our sole responsibility that the product: ET30000-5, ET27000/30-5, ET25000/30-5, ET20000/30-5, ET18000/30-5, ET15000/30-5, ET12000/30-5, ET10000/30-5, ET8000/30-5,...
- Page 5 Revisions No. Date Description 17/12/2013 Original version Revisions...
- Page 6 Series models Transmitter Amplifier Middle amplifier Combiner way Maximum Driver stage number output power ET30000-5 E30000-5 E5000 30KW ETG20 ET27000/30-5 E27000/30-5 E5000 ET25000/30-5 E25000/30-5 E5000 ET20000/30-5 E20000/30-5 E3500/5 ET18000/30-5 E18000/30-5 E3000/5 ET15000/30-5 E15000/30-5 E2500/5 ET12000/30-5 E12000/30-5 E2000/5 Equal to the...
- Page 7 ET15000-5 E15000-5 E5000 15KW ETG20 ET12000/15-5 E12000/15-5 E4000/5 ET10000/15-5 E10000/15-5 E3500/5 ET8000/15-5 E8000/15-5 E3000/5 ET7000/15-5 E7000/15-5 E2500/5 ET5000/15-5 E5000/15-5 E1800/5 Equal to the ETG20 ET4000/15-5 E4000/15-5 E1500/5 rated value ET3500/15-5 E3500/15-5 E1200/5 ET3000/15-5 E3000/15-5 E1000/5 ET2500/15-5 E2500/15-5 E1000/5 ET2000/15-5 E2000/15-5 E800/5 ET10000-5 E10000-5...
- Page 8 ET5000 E5000 E5000 ETG20 ET4000/5 E4000/5 E4000/5 ET3500/5 E3500/5 E3500/5 ET3000/5 E3000/5 E3000/5 ET2500/5 E2500/5 E2500/5 ET2000/5 E2000/5 E2000/5 Equal to the ET1800/5 E1800/5 E1800/5 ETG20 rated value ET1500/5 E1500/5 E1500/5 ET1200/5 E1200/5 E1200/5 ET1000/5 E1000/5 E1000/5 ET800/5 E800/5 E800/5 ET500/5 E500/5 E500/5...
-
Page 9: Table Of Contents
1.6 Checking the product purchased ..................14 2 Product description ......................... 15 2.1 Combiner/Splitter unit ....................15 2.2 Control unit (ET30000-5, ET25000-5, ET20000-5) ............17 2.2.1 External connectors pin-out ..................19 2.2.1.1 Interface connector ..................19 2.2.1.2 Profiles connector ..................... 19 2.2.1.3 TC/TS connector.................... - Page 10 3.1.1.3 Input password....................59 3.1.1.4 Profile ........................ 59 3.1.1.5 Main alarm ......................59 3.1.1.6 Temperatures ....................60 3.1.1.7 Main view......................60 3.1.1.8 Events list ......................60 3.1.1.9 Events history ....................60 3.1.1.10 Dual drive ......................61 3.1.1.11 Dual drive drive ....................61 3.1.1.12 Dual drive handler ..................
- Page 11 3.4.1.3 Exciter hyperterminal interface ..............102 3.4.2 Connection to telemetry ..................103 3.4.3 Connection to exchange unit and/or audio matrix ..........104 3.4.4 Connection to Elenos E.BOX module ..............107 4 Maintenance ......................... 109 4.1 Device overview ......................109 4.1.1 ET30000-5 ....................... 110 4.1.2 6-way combiner .....................
- Page 12 Contents...
-
Page 13: General Information
The available options are as follows: STEREO, AES/EBU (both with integrated MPX), ac- cording to the relative modulator version. The distinctive characteristics of Elenos products remain constant: ECOSAVING, ICEFET, VSWR PEAK HOLD, monitoring possibility, protection against corrosion, etc.. The LIFEXTENDER functionality can be added. -
Page 14: Decommissioning And Disposal
It may also contain: • n°1 “User” manual; • n°1 CD containing all the documentation relative to Elenos s.r.l. manuals; • n°1 PC connection cable. Cables, spare parts and other accessories may be requested from Elenos S.r.l. or Elenos retailers. General information... -
Page 15: Product Description
2 Product description 2.1 Combiner/Splitter unit Product description... - Page 16 1 FAN - cooling fans. There are two, 12-28Vdc, 306M3/h max. 2 GRILL - ventilation grille. 3 RF OUT - RF output connector 3”+1/8 4 PWS - 3W3 connector for the fan power supply. 5 AUX1 - unused connector. 6 SPLITTER IN - N connector for RF splitter input. 7 LOAD - four 7/16 connectors for unbalanced load outputs.
-
Page 17: Control Unit (Et30000-5, Et25000-5, Et20000-5)
2.2 Control unit (ET30000-5, ET25000-5, ET20000-5) Product description... - Page 18 1 GRILL - ventilation grille. 2 DISPLAY - display showing the operating parameters and selected functions using the encoder. 3 ENCODER - multifunction knob allowing navigation through the function menus and modification of the operating parameters. 4 KEY SELECTOR - it can be set to LOCAL (controllable through the front panel) or REMO- TE (controllable via PC) mode, by turning the key supplied with the equipment.
-
Page 19: External Connectors Pin-Out
2.2.1 External connectors pin-out 2.2.1.1 Interface connector Connector Meaning Notes With a cable to CN3 TX_1 Filtered output 485 on E3K 7A044 board Differential signal “positive” /TX_1 Filtered output 485 Differential signal “negative” RX_1 Filtered input 485 Differential signal “positive” / RX_1 Filtered input 485 Differential signal... -
Page 20: Tc/Ts Connector
The operation is af- fected by settings of the machine Reset alarm Command pulse Pin grounded = active command Reserved for Elenos Reserved for Elenos Forward power Output in voltage See full scale values Common ground Connected to the frame... -
Page 21: Full Scale Values
“Closed to ground” status --> Remote signal active 2.2.1.4 Full scale values The nominal full scale corresponds to +4 V, with over stroke of up to more than +4.5 (max +5 V). ET30000-5 Parameters Full scale Scale factor Resolution Forward power... -
Page 22: Master Connector
2.2.1.5 Master connector Connector Meaning Notes CN2 on E3K NA041 TS_INTLCK Interlock board TS_FLTAUDIO_TX1 Fault audio exciter1 Free TC_TX2_STATUS Status exciter2 TC_TX1_STATUS Status exciter1 TX0- Not connected RX0- Free TS_FLTAUDIO_TX2 Fault audio exciter2 TS_COAX_TX1 Interlock exciter1 TS_TX2_OFF Turn off exciter2 TS_TX1_OFF Turn off exciter1 TS_ALM_RST... -
Page 23: Aux1 Connector
2.2.1.7 Aux1 connector Connector Meaning Notes With a cable to J9 on +12V E20K0A912 board Common ground TEMP Common ground Not connected Not connected Not connected Not connected Not connected 2.2.1.8 Dummy Load connector Connector Meaning Notes With a cable to CN5 Common ground on E3K FA044 board +12V... -
Page 24: Control Unit (Et15000-5, Et10000-5)
2.3 Control unit (ET15000-5, ET10000-5) Product description... - Page 25 11 20 Product description...
- Page 26 1 GRILL - ventilation grille. 2 DISPLAY - display showing the operating parameters and selected functions using the encoder. 3 ENCODER - multifunction knob allowing navigation through the function menus and modification of the operating parameters. 4 KEY SELECTOR - it can be set to LOCAL (controllable through the front panel) or REMO- TE (controllable via PC) mode, by turning the key supplied with the equipment.
-
Page 27: Dummy Load
2.4 Dummy load Product description... -
Page 28: External Connectors Pin-Out
1 GRILL - ventilation grille. 2 FAN - cooling fans. There are six, 12-28Vdc, 441M3/h max. 3 DUMMY LOAD - DB9 M connector for control unit connection. 4 PWS DUMMY LOAD - 3W3 connector for power supply. 5 RF IN - four 7/16 connectors for RF combiner inputs. 2.4.1 External connectors pin-out 2.4.1.1 Dummy Load connector Connector... -
Page 29: Amplifiers
2.5 Amplifiers 14 15 16 Product description... - Page 30 1 GRILL - ventilation grille. 2 DISPLAY - display showing the operating parameters and selected functions using the encoder. 3 ENCODER - multifunction knob allowing navigation through the function menus and modification of the operating parameters. 4 KEY SELECTOR - it can be set to LOCAL (controllable through the front panel) or REMO- TE (controllable via PC) mode, by turning the key supplied with the equipment.
-
Page 31: External Connectors Pin-Out
2.5.1 External connectors pin-out 2.5.1.1 EIA485/TELEMETRY connector Connector Meaning Notes CN3 on TG5K2A881 Com1 TX+ EIA485/422 board Com1 TX- EIA485/422 Com1 RX+ EIA485/422 Com1 RX- EIA485/422 Common ground Connected to the frame Common ground Connected to the frame Common ground Connected to the frame Common ground... -
Page 32: Tc/Ts Connector
Reset alarm Command pulse Pin grounded = active command UPS target Command to state Reserved for Elenos Forward power Output in voltage See full scale values Common ground Connected to the frame Com2 EIA485/422... -
Page 33: Profiles Connector
Bad audio Signaling output The pin must be po- open wered externally. collector “Closed to ground” status → Active alarm /FLT (reversed pola- Signaling output rity) The pin must be po- open wered externally. collector “Open” Status → Acti- ve alarm The operation can be affected by the set- tings of the machine... -
Page 34: Tcp/Ip, Reserved Connector
2.5.1.4 TCP/IP, RESERVED connector Connector Meaning Notes CN3 on TG2U2A899 ETHERNET interface board 10Base-T or 100Base- CN2 on TG2U2A899 Reserved board 2.5.1.5 EIA485 connector Connector Meaning Notes CN2 on board Com1 TX+ EIA485/422 TG2U1A899 Com1 TX- EIA485/422 Com1 RX+ EIA485/422 Com1 RX- EIA485/422 Common ground... -
Page 35: Exciters
2.6 Exciters For further information, please consult the specific manual for the exciters. 2.7 System connections For further information, please consult the “Composition” paragraph in the Quick Start manual. Product description... -
Page 36: Technical Datasheet
2.8 Technical datasheet FM TRANSMITTER HIGH POWER | ET30000 Datasheet COMPOSITION Exciter (Indium series) n°1 Exciter Indium Series single drive configuration n°2 Exciter Indium Series dual drive configuration Amplifier n°6 Amplifier E5000 Indium Series Combiner n°1 6-way combiner IN 5000 - OUT 30000 with external CPU/control unit and load (4U) Dummy load n°1 dummy load (4U) - Page 37 FM TRANSMITTER HIGH POWER | ET30000 Stereo Crosstalk (typical) 60 dB @ 400 Hz to 10 KHz Linear crosstalk >60 db 20 Hz to 15 KHz Intermodulation distortion <0.05% Measured with two of tones 1 KHz & 1.3 KHz, ratio 1:1 at 100% modulation Class of emission Stereo emission According to ITU-R reccomendation...
- Page 38 FM TRANSMITTER HIGH POWER | ET25000 Datasheet COMPOSITION Exciter (Indium series) n°1 Exciter Indium Series single drive configuration n°2 Exciter Indium Series dual drive configuration Amplifier n°5 Amplifier E5000 Indium Series Combiner n°1 5-way combiner IN 5000 - OUT 25000 with external CPU/control unit and load (4U) Dummy load n°1 dummy load (4U)
- Page 39 FM TRANSMITTER HIGH POWER | ET25000 Stereo Crosstalk (typical) 60 dB @ 400 Hz to 10 KHz Linear crosstalk >60 db 20 Hz to 15 KHz Intermodulation distortion <0.05% Measured with two of tones 1 KHz & 1.3 KHz, ratio 1:1 at 100% modulation Class of emission Stereo emission According to ITU-R reccomendation...
- Page 40 FM TRANSMITTER HIGH POWER | ET20000 Datasheet COMPOSITION Exciter (Indium series) n°1 Exciter Indium Series single drive configuration n°2 Exciter Indium Series dual drive configuration Amplifier n°4 Amplifier E5000 Indium Series Combiner n°1 4-way combiner IN 5000 - OUT 20000 with external CPU/control unit and load (4U) Dummy load n°1 dummy load (4U)
- Page 41 FM TRANSMITTER HIGH POWER | ET20000 Stereo Crosstalk (typical) 60 dB @ 400 Hz to 10 KHz Linear crosstalk >60 db 20 Hz to 15 KHz Intermodulation distortion <0.05% Measured with two of tones 1 KHz & 1.3 KHz, ratio 1:1 at 100% modulation Class of emission Stereo emission According to ITU-R reccomendation...
- Page 42 FM TRANSMITTER HIGH POWER | ET15000 Datasheet COMPOSITION Exciter (Indium series) n°1 Exciter Indium Series single drive configuration n°2 Exciter Indium Series dual drive configuration Amplifier n°3 Amplifier E5000 Indium Series Combiner/Control unit n°1 3-Way Combiner IN 5000 - OUT 15000 with an internal load composed by 3 group of 6 resistance of 800 W 50 Ω...
- Page 43 FM TRANSMITTER HIGH POWER | ET15000 Class of emission Stereo emission According to ITU-R reccomendation 450 (pilot tone) EXCITER PERFORMANCE PLL lock time <10 sec Frequency deviation +/- 75 KHz 0.1 dB steps adjustable Maximum frequency deviation +/- 150 KHz Frequency stability 1 ppm RF Frequency steps...
- Page 44 FM TRANSMITTER HIGH POWER | ET10000 Datasheet COMPOSITION Exciter (Indium series) n°1 Exciter Indium Series single drive configuration n°2 Exciter Indium Series dual drive configuration Amplifier n°2 Amplifier E5000 Indium Series Combiner/Control unit n°1 2-way combiner IN 5000 - OUT 10000 with an internal load composed by 1 group of 6 resistance of 800 W 50 Ω...
- Page 45 FM TRANSMITTER HIGH POWER | ET10000 Class of emission Stereo emission According to ITU-R reccomendation 450 (pilot tone) EXCITER PERFORMANCE PLL lock time <10 sec Frequency deviation +/- 75 KHz 0.1 dB steps adjustable Maximum frequency deviation +/- 150 KHz Frequency stability 1 ppm RF Frequency steps...
- Page 46 < -80 dBc AUDIO AND EXCITER PERFORMANCE Driving power 2W * INSTALLATION REQUIREMENTS Power supply 230/400 Threephase-Singlephase Version 50-60 Hz VAC Power consumption (typical) 7.1 KW * Elenos suggests to drive this amplifier with ETG20 Elenos Indium Series Product description...
- Page 47 FM AMPLIFIER MEDIUM POWER | E5000 Overall efficiency (typical from -3dB to Pnom) > = 70% Power factor > 0.95 Current Consumption @ 230VAC/single phase 31 Amp Magneto-thermic capacity @ 230VAC/single phase 45 Amp Conductor size @ 230VAC/single phase 10 sqrt.mm Conductor size @ 230VAC/single phase 7 AWG Current Consumption @ 230VAC/three phase...
- Page 48 < -80 dBc AUDIO AND EXCITER PERFORMANCE Driving power 2W * INSTALLATION REQUIREMENTS Power supply 230/400 Threephase-Singlephase Version 50-60 Hz VAC Power consumption (typical) 4.9 KW * Elenos suggests to drive this amplifier with ETG20 Elenos Indium Series Product description...
- Page 49 FM AMPLIFIER MEDIUM POWER | E3500 Overall efficiency (typical from -3 dB to Pnom) > = 70% Power factor > 0.95 Current Consumption @ 230VAC/single phase 21.3 Amp Magneto-thermic capacity @ 230VAC/single phase 32 Amp Conductor size @ 230VAC/single phase 10 sqrt.mm Conductor size @ 230VAC/single phase 7 AWG...
- Page 50 < -80 dBc AUDIO AND EXCITER PERFORMANCE Driving power 2W * INSTALLATION REQUIREMENTS Power supply 230/400 Threephase-Singlephase Version 50-60 Hz VAC Power consumption (typical) 3.5 KW * Elenos suggests to drive this amplifier with ETG20 Elenos Indium Series Product description...
- Page 51 FM AMPLIFIER MEDIUM POWER | E2500 Overall efficiency (typical from -3 dB to Pnom) > = 70% Power factor > 0.95 Current Consumption @ 230VAC/single phase 15 Amp Magneto-thermic capacity @ 230VAC/single phase 32 Amp Conductor size @ 230VAC/single phase 6 sqrt.mm Conductor size @ 230VAC/single phase 9 AWG...
-
Page 52: Protections
2.9 Protections The equipment has an integrated protection system both for the hardware and the software. 2.9.1 Software protections 2.9.1.1 IPF (Intelligent Proportional Foldback) Mechanism which is activated on the control unit and works on each individual machi- The IPF is an intelligent system which reduces the equipment’s output power in the event of strong load mismatch, thus preventing the machine from turning off. - Page 53 If the second derating is ineffective (in case of external conditions which are not com- patible with the safe operation of the equipment) the equipment switches off. In this case, if the temperature decreases, the power is raised again proportionally. If it decreases by 20°C the derating feature is exited and full power is restored.
-
Page 54: Hardware Protections
Fault management on RF modules (Lifextender) ® It is provided on amplifiers and exciters. This manages the maximum deliverable power according to the number of RF amplifier modules considered to be operating correctly. If one or more MOSFETs are considered faulty (this happens when the absorbed current is 10% below the average value), the RF output power is reduced to the expected value when a fault occurs. -
Page 55: Options
2.10 Options The equipment in this series can be purchased with different options included: Version with modulating Purchase information: please request the following codes signal input 00T-6LLVVX-10 (ET30000-5 D.D.) 00T-6LLV0X-10 (ET30000-5 S.D.) Inputs: 00T-5LLVVX-10 (ET25000-5 D.D.) • 00T-5LLV0X-10 (ET25000-5 S.D.) •... - Page 56 Product description...
-
Page 57: Use Instructions
3 Use instructions 3.1 User interface 3.1.1 Control unit user interface The controls and display views of the control unit (representing the combined system interface as a whole) are described below. Please note that in order to have complete visibility of all the available interfaces, the equipment must be set to LOCAL mode and it must be accessed with the specific passwords. - Page 58 POWER SETTING VOLTAGES GSM FIELD STRENGTH FREQUENCY SETTING SYSTEM INFO -3dB ALARM SETTING INPUT PASSWORD SYSTEM TIME STRING ID/PAGER ID PROFILE CLOCK PWR TARGET PHONE N.1..5 MAIN ALARM COM.ID LC/RT DISP MODE EXIT TEMPERATURES TEMPERATURE UNIT MAIN VIEW MAX REFLECTED POWER EVENTS LIST SWR FOLDBACK SETTING EVENTS HISTORY...
-
Page 59: Power Setting
3.1.1.1 Power setting Indication on the forward and reflected power. Setting the desired target power, activating the transmission and enabling the profile. 3.1.1.2 Frequency setting Setting the desired frequency. 3.1.1.3 Input password Some items are reserved and therefore can only be viewed and/or edited depending on the user authorisations. -
Page 60: Temperatures
3.1.1.6 Temperatures Indication of the dummy load temperature, environment temperature, reserve exciter load temperature, fan speed. The temperature indications depend on the presence of probes inside the equipment. Therefore, for certain types of equipment, some of these values may not be available. 3.1.1.7 Main view Displaying the following parameters: forward power, reflected power, efficiency, current and voltage. -
Page 61: Dual Drive
3.1.1.10 Dual drive Setting the exchange between the exciters in manual/automatic mode, as well as the maximum number of times for the exchange. Indication of which exciter is on the antenna and which is on the load. By selecting “CHANGE” here, it is possible to force the exchange. -
Page 62: Speed Set
3.1.1.14 485 speed set Setting the front and rear serial port 485 speed. 3.1.1.15 Voltages Displaying the voltage values. 3.1.1.16 System info Indication of the software version, the protocol version and the equipment activity time. 3.1.1.17 System time Setting the day of the week, the date and the time. Use instructions... -
Page 63: Clock Pwr Target
3.1.1.18 Clock pwr target As well as the standard power adjustment, it can also be set according to time slots in order to save energy. For the power delivered to be set according to individual time slots, the option which makes it fixed for 24 hours must be deactivated. -
Page 64: Max Reflected Power
3.1.1.22 SWR foldback setting Foldback activation. Algoritmo foldback The Elenos devices feature two different and independent protections which are activa- ted when there is excess reflected power. The first is a hardware threshold which operates when the reflected power exceeds 10% of the maximum rated output power of the transmitter in a very short space of time. -
Page 65: Password Setting
If you lose your password, please contact Elenos. Elenos must be given the “Unlock code” displayed on this screen. Elenos will provide a password valid for 24 hours to be entered on the same screen under the “Password Recovery” item. -
Page 66: Uart 0,1,2 Info
3.1.1.27 Uart 0,1,2 info Control menu for checking the serials. Use instructions... -
Page 67: Gsm Field Strength
3.1.1.28 GSM field strength Indicating if the equipment is enabled to broadcast and receive SMSs, if it is in calling mode through the modem analog line. The GSM coverage field is shown. For further details, please see the “SMS list” paragraph. 3.1.1.29 -3dB alarm setting Enabling the alarm -3dB to be sent by SMS. -
Page 68: Amplifier User Interface
3.1.2 Amplifier user interface SYSTEM CONFIG GSM AND MODEM SERVICE SYSTEM CONFIG 1 PHONE N.1 TO 4/PHONE N.5 TO 8 TX CONTROL PANEL COMMUNICATION PORT SET EXIT VIEW TX PARAMETERS 1 SYSTEM INFO VIEW TX PARAMETERS 2 SYSTEM TIME ALARMS LIST CLOCK PWR TARGET 1 OF 2 EVENTS HISTORY CLOCK PWR TARGET 2 OF 2... -
Page 69: Tx Control Panel
3.1.2.1 TX control panel Main screen which appears automatically when turning on in LOCAL mode. It is used to set and check the main operating parameters (target power, forward power, reflected power, interlock led, reduction power led). 3.1.2.2 View TX parameters 1 Display only screen. -
Page 70: Alarms List
3.1.2.4 Alarms list Display only screen. It is possible to monitor the list of most recent alarms. The alarms indicated by the letter “A” are still active. In order to understand the meaning of the alarms, please refer to paragraph “Alarms/ events list”. -
Page 71: Password Recovery
(PAbias), maximum settable power full scale (Max Target Pwr). Power oscillation algorithm In Elenos devices, if there is a power variation of “n” W (“n” being defined in specific tables) at least 3 consecutive times within 15 seconds, the “035” alarm is activated and the three block out mechanism is triggered (if this mechanism fails, the “003”... -
Page 72: System Config 1
3.1.2.10 System config 1 Setting and display screen. The alarm signal, caused by wrong output power, snaps by default at -3dB of target power and disappears when you reach the 2/3 of that. The “Min Level Fwr Pwr Fault” additional parameter, set here, acts in an AND condition with the standard algorithm: so, the alarm will snap when there is the first between the two conditions “-3dB”... -
Page 73: System Time
3.1.2.13 System time Setting and display screen. The following parameters can be set by the user: the day of the week, date and time. 3.1.2.14 Clock power target Setting and display screen. As well as the standard power adjustment, it can also be set according to time slots in order to save energy. -
Page 74: Enable Alarms Sms
3.1.2.15 Enable alarms SMS Setting and display screen. Besides the alarm management “by status”, it is possible to have alarm management “by event”. The alarms for which this management mode is enabled merge in a buffer. If the value “0” is attributed to the relative alarm, it means that is deactivated, while the value “1”... -
Page 75: User Alarms Data
3.1.2.17 User alarms data Setting and display screen. Some alarms can be set according to activation conditions. The current value of the alarm condition parameter (ambient temperature, RF tem- perature, RF current, power supply temperature, power supply current, direct power, reflected power) can be monitored. -
Page 76: Lifextender
Setting and display screen. The parameters relative to the Lifextender option can be monitored: equipment serial number, equipment code (parameter to be notified to Elenos should the user require the activation/deactivation of this function), activation/deactivation code (parameter supplied by Elenos to be entered for the function activation/deactivation), function sta- tus, work days in good operating conditions, work days in critical operating conditions. -
Page 77: Phone N.1 To 4 / N.5 To 8
3.1.2.21 Phone N.1 to 4 / N.5 to 8 Setting and display screen. The equipment can “communicate” with up to 8 SIM cards. The telephone numbers and authorizations can be defined in international format The number can be globally enabled for SMS transmission and reception SMS (En.), be enabled to send commands (Cmd), be enabled to request and receive the machine sta- tus (Sts), be enabled to receive the echo any of commands sent by other numbers (Glb) and be enabled to receive SMSs in text or digital format (PC.). -
Page 78: Exciter User Interface
3.1.3 Exciter user interface For further information, please consult the specific manual for the exciter. Use instructions... -
Page 79: Alarms/Events List
3.2 Alarms/events list There is an “Alarm management” module. In order to check the alarm conditions, physical and logical digital inputs are used. The status of each input is sampled and the condition is then logically processed by a combinational network so as to establish whether the alarm or signalling is active. The minimum intervention time is 100ms. -
Page 80: Amplifier Alarms/Events List
“017 TIMEOUT SLAVE AMPLIFIER” This indicates that one or more amplifiers have communication problem. “018 EXCITER 1 FAULT” This indicates that exciter 1 is fault. “019 EXCITER 2 FAULT” This indicates that exciter 2 is fault. “020 UPS ACTIVE” This indicates that UPS is active. “021 SW INTERLOCK INCORRECT WORK”... - Page 81 “AMP_022 PSU THERMAL FAULT” This indicates power supply overheating with subsequent switching off of the machine. For ELENOS equipment with more than one power supply, the intervention of this protection aims to allow operation at reduced power, should a power supply be disconnected to protect the hardware from excessive tempe- rature.
- Page 82 “AMP_026 SWR FOLDBACK” This indicates that the machine is having a power reduction since the reflected power detected is too high. “AMP_030 OVER 2/3 CARRIER” This indicates that 2/3 of the power set has been exceeded. “AMP_031 PREAMPLIFIER NOT CONNECTED” This indicates 100% reflected power.
-
Page 83: Exciter Alarms/Events List
“AMP_059 RTC USER UPDATED” This indicates a date updates. “AMP_060 RTC AUTOMATIC RECOVERY” This indicates that there is a misalignment of more than 5 seconds between the time / date hardware and firmware. 3.2.3 Exciter alarms/events list For further information, please consult the specific manual for the exciter. Use instructions... -
Page 84: Sms List
3.3 SMS list 3.3.1 SMS commands (submit) It is possible to submit SMSs in order to perform the following commands: Command SMS text Power setting to xxxxx PWR xxxxx Stand-by setting STBY Stand-by setting On Air setting Status demand Reset demand Exciter 1 On air EXC1 Exciter 2 On air... - Page 85 Exxxx ID xx SMS String +39xxxxxxxxxx Command No mains xx m xxx Messaggio di segnalazione FWD yyyyy W REFL yyyyy W UMB PWR yyyyy W TEMPMAX yyyyy F/C DUMMY LOAD TEMPENV yyyyy F/C Exc. x Exxxx ID xx SMS String +39xxxxxxxxxx RedPwr No mains xx m...
-
Page 86: Externally Connectable Optional Equipment
To PC connection an interface must be inserted into the “Interface” connector, DB9, on the front panel of amplifiers and combiner; and add an other cable (ELENOS code CAB0068-0) to insert to PC. -
Page 87: Control Unit Hyperterminal Interface
3.4.1.1 Control unit hyperterminal interface The Hyperterminal pages have a very similar structure to the display view, hence they will not be further described herein. Since there is more available space, there could be additional parameters. Main Menu Main Menù Main RF Data (M) Use instructions... - Page 88 Main Menù Profiles (O) Main Menù Temperatures (T) Main Menù Password (K) Use instructions...
- Page 89 Main Menù Events/Status (S) Main Menù Events History (H) Main Menù Clock Power Set (C) Use instructions...
- Page 90 Main Menù SMS Phone Set (P) Main Menù System Settings (X) Main Menù Password Reset (Z) Use instructions...
- Page 91 Main Menù Dual Drive (D) Main Menù RF Mode Menù (E) Main Menù RF Mode Menù (E) Amplifiers Status (S) Use instructions...
- Page 92 Main Menù RF Mode Menù (E) Amplifiers Data (W) Main Menù RF Mode Menù (E) Amplifiers Data 2 (V) Main Menù RF Mode Menù (E) Exciters Data (T) Use instructions...
- Page 93 Main Menù RF Mode Menù (E) Amplifier 1...6 Data (A,C,E,G,I,K) Main Menù RF Mode Menù (E) Amplifier 1...6 Modules (B,D,F,H,J,L) Main Menù RF Mode Menù (E) Exciter 1...2 data (M,N) Use instructions...
- Page 94 Main Menù Status (W) Main Menù User Warning (F) Main Menù Enable Alarms (V) Use instructions...
-
Page 95: Amplifier Hyperterminal Interface
3.4.1.2 Amplifier hyperterminal interface Main Menu Main Menù Main RF Data (M) Use instructions... - Page 96 Main Menù Status/Alarms (S) Main Menù Events History (H) Main Menù Password (K) Use instructions...
- Page 97 Main Menù Password (K) Password (K) Main Menù Password (K) Password reset (R) Main Menù Password (K) Password settings (P) Use instructions...
- Page 98 Main Menù System (Y) Main Menù System (Y) System settings (X) Main Menù System (Y) Clock power set (C) Use instructions...
- Page 99 Main Menù System (Y) SMS phone set (P) Main Menù System (Y) User warning (F) Main Menù System (Y) En. 0-31 alrm SMS (V) Use instructions...
- Page 100 Main Menù System (Y) En. 32-63 alrm SMS (B) Main Menù System (Y) Lifextender (L) Main Menù Debug (D) Use instructions...
- Page 101 Main Menù Debug (D) GSM debug (G) Main Menù Debug (D) Uarts (F) Main Menù Debug (D) Uarts (F) Uart 0 Use instructions...
-
Page 102: Exciter Hyperterminal Interface
Main Menù Debug (D) Uarts (F) Uart 1 Main Menù Debug (D) Uarts (F) Uart 2 3.4.1.3 Exciter hyperterminal interface For further information, please consult the specific manual for the exciter. Use instructions... -
Page 103: Connection To Telemetry
To telemetry connection a cable (ELENOS code CAB0281-0) must be inserted into “EIA485” connector, DB9, on the rear panel of exciters and combiner. -
Page 104: Connection To Exchange Unit And/Or Audio Matrix
In order to connect to an N+1 exchange unit, if the equipment is not a spare, insert a standard extension cable into a “TC/TS” connector, DB25, located on the rear panel of the control unit (ELENOS code CAB0324-0). CAB0324-0 Use instructions... - Page 105 If the equipment is used as a spare, also provide an additional standard extension cable to be inserted into the “PROFILES” connector, DB25, located on the rear panel of the control unit (ELENOS code CAB0324-0). CAB0324-0 CAB0324-0 Use instructions...
- Page 106 If the system has an audio matrix, this latter cable must be connected the matrix itself and not to the exchange unit. These cables are supplied with the exchange unit. The signal cables can also be connected when the equipment is working, exclu- ding all RF cables.
-
Page 107: Connection To Elenos E.box Module
Ethernet network. To connect to the E.BOX module, insert a standard extension cable into the “EIA485” connector, DB9, located on the front or rear panel of the control unit (Elenos code ETGSAL33). This cable is supplied with the module. - Page 108 Use instructions...
-
Page 109: Maintenance
If necessary, refer to these to restore the configuration of the transmitter. The figures are relative to the more complex case of ET30000-5 and its subparts. For more details, to carry out repairs, if you are an authorized technician or bodies, you can request at the Manufacturer the Service Manual, including wiring diagrams. -
Page 110: Et30000-5
4.1.1 ET30000-5 Maintenance... -
Page 111: 6-Way Combiner
4.1.2 6-way combiner Maintenance... - Page 112 Maintenance...
-
Page 113: Control Unit
4.1.3 Control unit Maintenance... - Page 114 Maintenance...
- Page 115 Maintenance...
-
Page 116: Etg20 Exciter
4.1.4 ETG20 exciter Maintenance... - Page 117 Maintenance...
-
Page 118: E5000 Amplifier
4.1.5 E5000 amplifier Maintenance... - Page 119 Maintenance...
- Page 120 Maintenance...
-
Page 121: 6-Way Dummy Load
4.1.6 6-way dummy load Maintenance... - Page 122 Maintenance...
-
Page 123: Settings
4.2 Settings 4.2.1 System addresses In the case of single combined transmitter (not in a N+1 system), addressing rules are those in the diagram below. For operation in an N +1 system, however, refer to Technical Bulletin N°142. Control unit FRONT ID : 00 TC/TS ID : 00 FRONT ID : 18 (10+8) -
Page 124: Power Supply Dip-Switch In E5000 Amplifier
4.2.2 Power supply Dip-switch in E5000 amplifier In the amplifier inside the system there are three 3KW power supplies. On the power supplies must set the operating mode (analog, digital), using the dip- switch SW1, and the address, using the dip-switch SW2. Switch1 Switch2 Switch3... - Page 125 Maintenance...
-
Page 126: Spare Parts And Mounting
4.3 Spare parts and mounting Refer to the Spare Parts manuals, technical bulletins, e-learning videos and training courses provided by the Manufacturer. 4.4 Routine maintenance (cleaning, replace- ments, checks) During normal operation, we recommend performing routine checks in order to verify that there are no critical operating conditions. -
Page 127: Operating Faults (Symptoms, Causes And Remedies)
4.5 Operating faults (symptoms, causes and remedies) Fault Cause Remedy The equipment does not start • Incorrect connection to • Replace the cables (if not the mains ok) and fix its appropria- tely • Circuit breaker is not • Arm circuit breaker armed •... - Page 128 • Set the correct address metria/PC rect • Connection cable not • Verify that the cable used suitable is that provided by Elenos or an equivalent • Parameters setting incor- • Check correct parameters rect (please see User Manual) •...
Need help?
Do you have a question about the ET30000-5 and is the answer not in the manual?
Questions and answers