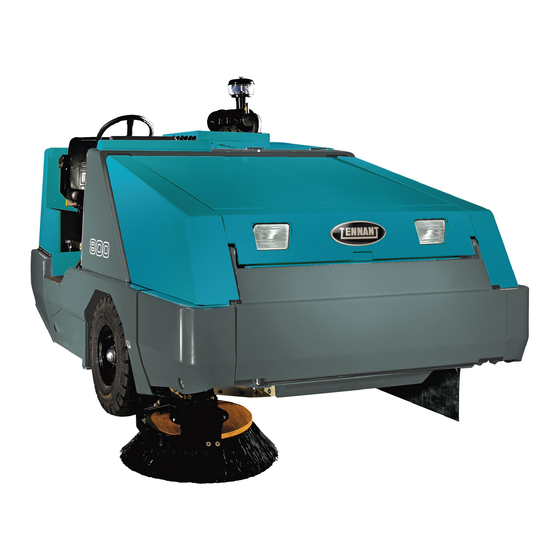
Tennant 800 Service Manual
Gas/lp/diesel
Hide thumbs
Also See for 800:
- Operator's manual (100 pages) ,
- Instruction bulletin (4 pages) ,
- Operator's manual (84 pages)
Table of Contents
Advertisement
Quick Links
Advertisement
Chapters
Table of Contents
Troubleshooting

Related Manuals for Tennant 800


Summary of Contents for Tennant 800
- Page 1 800/810 Gas/LP/Diesel Service Manual MM337 Rev. 04 (6- -01)
- Page 2 This service manual is intended to be an aid for the disassembly and reassembly of your TENNANT Model 800/810. The set is organized into eight major groups: General Information, Chassis, Sweeping, Electrical, Hydraulics, Engine--G/LPG, Engine--D, Perkins 200 Series, and Engine--D, Perkins 700 Series.
-
Page 3: Table Of Contents
METRIC BOLT TORQUE CHART . . . 1--18 BOLT IDENTIFICATION ... . 1--19 THREAD SEALANT AND LOCKING COMPOUNDS ..1--19 1-- 1 800/810 MM337 (6- -01) - Page 4 GENERAL INFORMATION 1-- 2 800/810 MM337 (8- -97)
-
Page 5: Safety Precautions
- - use cardboard to locate leaking understood. hydraulic fluid under pressure. - - if it is not in proper operating - - use tennant supplied or approved condition. replacement parts. - - in flammable or explosive areas unless designed for use in those areas. - Page 6 LOCATED ON THE RADIATOR SHROUD. 07623 HOPPER SUPPORT BAR LABEL - - LOCATED HOPPER LIFT ARMS LABEL - - LOCATED ON THE HOPPER LIFT ARMS CROSS-TUBE ON BOTH HOPPER LIFT ARMS. AND ON BOTH HOPPER LIFT ARMS. 1-- 4 800/810 MM337 (8- -97)
-
Page 7: Pushing, Towing, And Transporting The Machine
08576 Turn the bypass valve 90_ from the normal position before pushing or towing the machine. The illustration shows the bypass valve in the pushing or towing position. 1-- 5 800/810 MM337 (6- -01) -
Page 8: Machine
3. To winch the machine onto the truck or trailer, attach the winching chains to the rear tie down locations. The rear tie-down locations are through the U--bolt section of the main frame under the side bumpers toward the rear. 1-- 6 800/810 MM337 (6- -01) - Page 9 FOR SAFETY: When unloading machine off truck or trailer, use winch. Do not drive the machine off the truck or trailer unless the loading surface is horizontal AND 380 mm (15 in) or less from the ground. 1-- 7 800/810 MM337 (6- -01)
-
Page 10: Machine Jacking
STORING MACHINE Before storing the machine for an extended period of time, the machine needs to be prepped to lessen the chance of rust, sludge, and other undesirable deposits from forming. Contact TENNANT service personnel. 1-- 8 800/810 MM337 (6- -01) -
Page 11: Specifications
16 kmh15.9 kmh (10 mph) Maximum reverse speed 7.3 kmh (4.5 mph) Minimum aisle turn width, left 3450 mm (135 in) Minimum aisle turn width, right 4675 mm (184 in) Maximum rated climb and descent angle 8.5_ 1-- 9 800/810 MM337 (2- -94) -
Page 12: Power Type: Gas/Lp
1 to 1.1 mm (0.042 to 0.046 in) 1--3--4--2 Engine lubricating oil with filter (10W30 SAE--SG/SH) 4.7 L (5 qt) (LSG) Ford LRG 2.3 -- 4.7 L (5 qt) Ford LRG 2.5 -- 4.26 L (4.5 qt) 1-- 10 800/810 MM337 (6- -01) -
Page 13: Power Type: Diesel
Diesel--1.4 gph Oil Pressure: Gas/LP--10 psi at idle, 35 -- 40 psi at operating rpm Diesel-- 7 psi at idle, 29 psi at operating rpm Vacuum system; CFM -- 585 (16565 L / min) 1-- 11 800/810 MM337 (6- -01) -
Page 14: Steering
System Capacity Fluid Type Hydraulic reservoir 47.3 L (12.5 gal) TENNANT part no. 65869 -- above 7_ C (45_ F) TENNANT part no. 65870 -- below 7_ C (45_ F) Hydraulic total 56.8 L (15 gal) HYDRAULIC PUMPS: CHAR- -LYNN Propelling 23.2 GPM (88 L / min) -
Page 15: Hydraulic Motors: Gas/Lp
Location Type Size Pressure Front (2) Pneumatic 6.5 x 23.5 in 690 -- 758 kPa (100 -- 110 psi) Rear (1) Pneumatic 6.5 x 23.5 in 690 -- 758 kPa (100 -- 110 psi) 1-- 13 800/810 MM337 (2- -94) -
Page 16: Maintenance -- Gas/Lpg
Check brush pattern Check for damage, wear, and Side brush adjustment Check brush pattern Hopper dust filter Shake Main brush Rotate end-for-end 50 Hours Hopper dust filter Check or clean Main brush adjustment Lubricate 1-- 14 800/810 MM337 (6- -01) - Page 17 HYDO Tennant Company or approved hydraulic fluid . . . Special lubricant, Lubriplate EMB grease (TENNANT part no. 01433--1) . . . Water and permanent-type ethylene glycol anti-freeze, --34_ C (--30_ F) NOTE: Also check procedures indicted (H) after the first 50-hours of operation.
-
Page 18: Maintenance -- Diesel
Check for damage, wear, and Side brush adjustment Check brush pattern Hopper dust filter Shake Main brush Rotate end-for-end 50 Hours Hopper dust filter Check or clean Fuel lines Check for wear and leaks Main brush adjustment Lubricate 1-- 16 800/810 MM337 (6- -01) - Page 19 HYDO Tennant Company or approved hydraulic fluid . . . Special lubricant, Lubriplate EMB grease (TENNANT part no. 01433--1) . . . Water and permanent-type ethylene glycol anti-freeze, --34_ C (--30_ F) NOTE: Also check procedures indicted (H) after the first 50-hours of operation.
-
Page 20: Hardware Information
32 (43) 47 (64) 58 (79) 83 (112) 94 (127) 133 (180) 144 (195) 196 (265) 260 (352) 336 (455) 470 (637) 664 (900) NOTE: Decrease torque by 20% when using a thread lubricant. 1-- 18 800/810 MM337 (2- -94) -
Page 21: Bolt Identification
Thread sealants and locking compounds may be used on this machine. They include the following: Locktite 515 sealant -- gasket forming material. TENNANT Part No. 75567,15 oz (440 ml) cartridge. Locktite 242 blue -- medium strength thread locking compound. TENNANT Part No. - Page 22 GENERAL INFORMATION 1-- 20 800/810 MM337 (6- -01)
- Page 23 ......2--10 TO REPLACE REAR WHEEL HOUSING PIVOT BEARINGS . . . 2--11 2-- 1 800/810 MM337 (8- -97)
-
Page 24: Chassis
CHASSIS 2-- 2 800/810 MM337 (8- -97) -
Page 25: Seat
SEAT The seat assembly is removable on both the 800 and the 810. The seat can also be adjusted on both models. Tools are needed to remove the seat. -
Page 26: To Adjust Seat Position
A static drag chain prevents the buildup of static electricity in the machine. The chain is attached to the machine by a rear main brush skirt retaining bolt. Make sure the chain is touching the floor at all times. 08449 2-- 4 800/810 MM337 (8- -97) -
Page 27: Brakes And Tires
7. Remove the retainer clips holding the brake 08579 shoes to the backing plate. Remove and discard the old shoes. 8. Position the new brake shoes onto the backing plate. 9. Reinstall the retainer clips. 2-- 5 800/810 MM337 (8- -97) - Page 28 95 -- 115 Nm (70 -- 85 ft lb). 18. Remove the jack stands and lower the machine. NOTE: Always replace brake shoes in sets. 19. Repeat the procedure on the other wheel. 2-- 6 800/810 MM337 (8- -97)
-
Page 29: To Adjust Brakes
95 -- 115 Nm (70 -- 85 ft lb). 13. Remove the jack stands and lower the machine. 14. Operate the machine and check the brake pedal for proper adjustment. 2-- 7 800/810 MM337 (8- -97) -
Page 30: Front Tires And Wheels
12. Reinstall tire and wheel assembly. Tighten the six wheel nuts to 95 -- 115 Nm (70 -- 85 ft lb). 13. Remove the jack stands and lower the machine. 2-- 8 800/810 MM337 (8- -97) -
Page 31: Parking Brake (Foot Activated)
The parking brake is set with foot pedal on machines with serial numbers (0 -- 1102) on model 800 and (0 -- 2045) on model 810. Adjust the parking brake whenever it becomes very easy to set, when the machine rolls after setting the parking brake, and after every 200 hours of operation. -
Page 32: Rear Tire And Wheel, And Wheel Support
690 --758 kPa (100 -- 110 psi). Torque the rear wheel nuts to 122 -- 142 Nm (90 -- 105 ft lb) after the first 50-hours of operation, and every 800 hours thereafter. 08451 Torque the rear wheel hub nut to 270 -- 340 Nm (200 -- 250 ft lb). -
Page 33: To Replace Rear Wheel Housing Pivot Bearings
10. Remove and plug the hydraulic hoses from the drive motor. Mark the hoses for proper assembly orientation. NOTE: Observe hydraulic cleanliness requirements when opening hydraulic lines. 2-- 11 800/810 MM337 (8- -97) - Page 34 Tighten the five M20 hex screws to 300 -- 390 Nm (220 -- 290 ft lb). 19. Place the rear drive housing back under the machine. Raise the housing back in position with the floor jack. 2-- 12 800/810 MM337 (8- -97)
- Page 35 Sequence requirements when opening hydraulic lines. Lock 28. Install the hydraulic cylinder ball joint on Ring steering bracket. Torque the hex screw to Retainer 290 -- 380 Nm (215 -- 280 ft lb). Screw 2-- 13 800/810 MM337 (8- -97)
- Page 36 33. Reinstall access cover panel in operator’s compartment. 34. Reinstall seat assembly. See TO REPLACE SEAT ASSEMBLY instructions in this section. 35. Reconnect the battery cables. 36. Operate the machine and check for proper operation of the rear drive area. 2-- 14 800/810 MM337 (8- -97)
- Page 37 ..... 3--22 TO ADJUST SIDE BRUSH RIDE HEIGHT ....3--23 3-- 1 800/810 MM337 (8- -97)
- Page 38 SWEEPING 3-- 2 800/810 MM337 (8- -97)
-
Page 39: Introduction
The side brush sweeps debris into the path of the main brush. The main brush sweeps debris from the floor into the hopper. The vacuum system pulls dust and air through the hopper and the hopper dust filter. 3-- 3 800/810 MM337 (8- -97) -
Page 40: Regenerative Filter System (Rfs)
Check for any signs of dust tracking that may be caused by a bad seal or filter. Repair a necessary. Perform this check periodically while using the sweeper with the RFS option. 3-- 4 800/810 MM337 (8- -97) -
Page 41: Debris Hopper
7. Start the machine and open hopper dump door. 8. Remove the two M10 hex screws from the bottom front corners of the hopper. 9. Remove the five M10 hex screws from both sides of hopper. (accessed inside hopper) 3-- 5 800/810 MM337 (8- -97) - Page 42 Remove any ties holding the harness to the lift arm. 15. The hopper can now be lifted up and out of the lift arms using the over head hoist. 16. Set the hopper on the floor. 3-- 6 800/810 MM337 (8- -97)
-
Page 43: To Install Hopper
TO ADJUST AND LEVEL HOPPER HEIGHT 1. The two M12 hex screws at the rear of hopper should be set at 45 mm (1.75 in) from the head of bolt to the edge of bracket. 3-- 7 800/810 MM337 (8- -97) -
Page 44: Hopper Dump Door
11. Loosen the set screws on both centering sleeves on upper hopper door pins. 12. Remove the M12 hex screws and nyloc nuts. 13. The hopper door can now be removed from the machine. 3-- 8 800/810 MM337 (8- -97) -
Page 45: To Install Hopper Dump Door
1. Engage the parking brake and open the hopper dump door. 2. Use the two 0.50 in x 3.5 in hex screws located in the lower corner of front bumper to adjust hopper dump door in and out for proper seal. 3-- 9 800/810 MM337 (8- -97) -
Page 46: Hopper Dust Filter
1. Stop the engine and set the machine parking brake. FOR SAFETY: Before Leaving Or Servicing Machine; Stop On Level Surface, Set Parking Brake, Turn Off Machine And Remove Key. 2. Open the hopper cover. 3. Disconnect the shaker motor wire connectors. 3-- 10 800/810 MM337 (8- -97) - Page 47 Use three 0.125 in drill bits as gauges. The shaker ring is adjusted with the two jam nuts on the shaker stem. 08593 NOTE: Make sure that the jam nuts are TIGHT when the adjustment is complete. 3-- 11 800/810 MM337 (8- -97)
-
Page 48: Thermo Sentryt
3. Remove the two bolts holding the Thermo Sentryt to the vacuum fan housing. 4. Mount new Thermo Sentryt with existing hardware. 5. Connect the wires back to the Thermo Sentryt. 6. Close engine cover and side door. 3-- 12 800/810 MM337 (8- -97) -
Page 49: Brushes
8. Slide the main brush idler plate plug into the main brush. 9. Latch the idler plate on the machine frame. 10. Close the right side main brush access door. 08489 3-- 13 800/810 MM337 (8- -97) -
Page 50: To Check And Adjust Main Brush Pattern
65 to 75 mm (2.5 to 3.5 in). 00582 9. To increase the width of the main brush pattern, turn the main brush down pressure knob counter-clockwise, Heavy. 08442 3-- 14 800/810 MM337 (8- -97) - Page 51 If the brush is adjusted to a large pattern for an uneven surface or a depression, it should be returned to the lighter pattern as soon as possible. 08490 3-- 15 800/810 MM337 (8- -97)
-
Page 52: To Replace Main Brush Idler Plug Bearing
12. Apply RTV to contact area where plastic cap will fit one end of idle plug. Snap plastic cap into place. Note: If you replace idler arm latch, use blue locktite on hardware to hold in place. 3-- 16 800/810 MM337 (8- -97) -
Page 53: To Replace Main Brush Shaft Bearings
NOTE: Make sure bearing flanges are on the inside of main frame. 13. Align two remaining holes in bearing flanges with holes in main frame. Install M10 hex screws and tighten to 37 -- 48 Nm (26 -- 34 ft lb). 3-- 17 800/810 MM337 (8- -97) - Page 54 Note: If you are replacing the idler arm latch bracket, use blue locktite to hold the bolts in place. Tighten the bolts to 8 - - 10 Nm (6 - - 8 ft lb). 3-- 18 800/810 MM337 (8- -97)
-
Page 55: Power Throwt
Power Throwt. 8. Slide the brush idler plate plug onto the brush. 9. Reinstall the brush idler plate and hex screw. 10. Lower the hopper and operate the machine, 08584 checking for proper operation. 3-- 19 800/810 MM337 (8- -97) -
Page 56: To Replace Power Throwt Brush Idler Bearings
Tighten to 8 -- 10 Nm (5 -- 7 ft lb). 11. Reinstall the idler plate back on the machine. 12. Reinstall the brush, lower the hopper, and operate the machine. Check for proper brush operation. 3-- 20 800/810 MM337 (8- -97) -
Page 57: Side Brush
6. Remove the five hex screws holding the drive adaptor to the brush. Remove the drive adaptor and install it on the new brush. 7. Slide the new side brush on the side brush drive shaft. 3-- 21 800/810 MM337 (8- -97) -
Page 58: To Adjust Side Brush Tip Angle
7. Reconnect the side brush cable to the lift arms using the M10 hex screw and washer. Tighten to 52 -- 67 Nm (39 -- 51 ft lb). 8. Disengage prop arm, lower hopper and check side brush for proper operation. 3-- 22 800/810 MM337 (8- -97) -
Page 59: To Adjust Side Brush Ride Height
M10 hex screw and washer. Tighten to 52 -- 67 Nm (39 -- 51 ft lb). 8. Disengage prop arm, lower hopper and check side brush for proper operation. 3-- 23 800/810 MM337 (8- -97) -
Page 60: Skirts And Seals
7. Tighten the mounting bolts to 8 -- 14 Nm (6 -- 10 ft lb). 8. Start the engine. 9. Raise the hopper, disengage the hopper prop arm, and lower the hopper. 10. Operate the machine and check for proper operation. 3-- 24 800/810 MM337 (8- -97) -
Page 61: Brush Compartment Skirts
5 mm (0.25 in) off the floor. 9. Open the brush door and tighten M8 hex screws to 8 -- 14 Nm (6 -- 10 ft lb) 10. Repeat this on the other brush door. 3-- 25 800/810 MM337 (8- -97) -
Page 62: Rear Skirts
10. Reinstall the main brush. See TO REPLACE MAIN BRUSH instructions in this section. 11. Close the brush doors and operate the up to 19 mm machine. Check for proper rear skirt (up to 0.75 in) operation. 3-- 26 800/810 MM337 (8- -97) -
Page 63: To Replace And Adjust The Rear Deflector Skirt
This will help maintain proper sweeping performance. 13. Reinstall the main brush. See TO REPLACE MAIN BRUSH instructions in this section. 14. Close the brush doors and operate the machine. Check for proper deflector skirt operation. 3-- 27 800/810 MM337 (8- -97) -
Page 64: Brush Door Seals
HOPPER SEALS The hopper seals are located on the top and side portions of the machine frame that contact the hopper. Check the seals for wear or damage every 100 hours of operation. 08496 3-- 28 800/810 MM337 (8- -97) -
Page 65: To Replace Hopper Wheel Pocket Seals
8 -- 10 Nm (6 -- 8 ft lb). 10. Push the five plastic rivets in by hand. NOTE: The plastic rivets may need to be replaced if they were damaged during removal. 11. Repeat this procedure on the other side. 3-- 29 800/810 MM337 (8- -97) -
Page 66: Hopper Door Seals
HOPPER COVER SEAL The hopper cover seals are located on the inside of the hopper cover. They seal the hopper filter compartment. Check the seal for wear or damage every 100 hours of operation. 3-- 30 800/810 MM337 (8- -97) -
Page 67: Hopper Lift Arms
8. Lift arms must now be lifted with a chain or cable so the pins can be removed. 9. Once the pins are removed the lift arm assembly can be lifted out of the machine. 3-- 31 800/810 MM337 (8- -97) -
Page 68: To Install Hopper Lift Arm
37 -- 48 Nm (26 -- 34 ft lb). 5. Reconnect roll out and dump door hydraulic hoses to control valve. See schematic in the HYDRAULICS section of this manual. 6. Reinstall debris hopper. See TO INSTALL HOPPER instructions in this section. 3-- 32 800/810 MM337 (8- -97) -
Page 69: Hopper Vacuum Fan Seal
5. Open the engine cover and side door. NOTE: The vacuum fan must be removed from the machine to replace the hydraulic motor. 6. Remove the vacuum hose and bracket from the front of vacuum fan housing. 3-- 33 800/810 MM337 (8- -97) - Page 70 Reinstall 0.31 in. hex screws and tighten to 22 -- 27 Nm (16 -- 20 ft lb). NOTE: Tennant part no. 57543 plastic shims must be used for proper fan to housing clearance. Remove the shims through the fan intake after tightening screws.
- Page 71 (13 -- 18 ft lb). 20. Reconnect the electrical harness to the thermo sentryt. See schematic in HYDRAULICS section. 21. Start the machine and operate the vacuum fan. Check for leaks and proper operation. 3-- 35 800/810 MM337 (8- -97)
-
Page 72: Machine Troubleshooting
Contact TENNANT service personnel Hopper full Empty hopper Hopper floor skirts worn or Replace floor skirts damaged Hopper door partially or Close the hopper door completely open Wrong sweeping brush Contact TENNANT representative for recommendations 3-- 36 800/810 MM337 (8- -97) - Page 73 ....4--12 HOPPER DOOR INDICATOR . . . 4--104 Wire Harnesses Group 800--810 G/LPG DOWN FORCE ....4--105 (LSG ENGINE) .
- Page 74 ELECTRICAL 4-- 2 800/810 MM337 (8- -97)
-
Page 75: Electrical System
Never add acid to the batteries, only distilled water. Keep the battery caps on the batteries always except when adding water or taking hydrometer readings. FOR SAFETY: When Servicing Machine, Avoid Contact With Battery Acid. 4-- 3 800/810 MM337 (8- -97) -
Page 76: To Replace Battery On Lpg Machine And Gas/Diesel Serial # 002075 And Up
5. Clean the old cables and the posts on the new battery. 6. Lift the new battery up and onto the battery tray. 7. Reinstall the small battery hold down bracket. 8. Reconnect the positive then the negative battery cables. 4-- 4 800/810 MM337 (8- -97) -
Page 77: To Replace Battery On Gas / Diesel Machine Serial # 002074 And Down
6. Lift the new battery up and slide it into the battery tray. 7. Reinstall the battery hold down bracket. 8. Reconnect the positive then the negative battery cables. 9. Close the battery access door. 4-- 5 800/810 MM337 (8- -97) -
Page 78: Instrument Panel
Tighten to 8 -- 10 Nm (5 -- 6 ft lb). 11. Reinstall the three plastic knobs on valve handles. Hand tighten. 12. Reconnect the battery cables. 13. Start the machine and check for proper operation of the instrument panel. 4-- 6 800/810 MM337 (8- -97) -
Page 79: To Disassemble Instrument Panel
8. Any burned-out lamps can now be changed by turning them 1/4 turn counterclockwise and lifting them straight out. 9. To replace the hour meter, unplug the two wires and remove the two pan head screws. 4-- 7 800/810 MM337 (8- -97) -
Page 80: To Reassemble Instrument Panel
6. Reinstall the touch panel case onto the outer case. 7. Reinstall the twelve pan head screws and lightly hand tighten. 8. The instrument panel is now ready to be reinstalled in machine. See TO REPLACE INSTRUMENT PANEL instructions in this section. 4-- 8 800/810 MM337 (8- -97) -
Page 81: To Replace Machine Relay
M6 nuts and washers. 11. Drop the dust shield back in place. 12. Reconnect the battery cables. 13. Disengage the prop arm, lower the hopper and operate the machine. Check the new relay for proper operation. 4-- 9 800/810 MM337 (8- -97) -
Page 82: To Replace Machine Circuit Breaker
10. Reinstall the circuit breaker plate to the machine. Tighten the six M6 screws to 8 -- 10 Nm (5 -- 6 ft lb). 11. Reconnect the battery cables and start the machine, checking for proper circuit breaker operation. 4-- 10 800/810 MM337 (8- -97) -
Page 83: To Replace Governor Control Box
11. Drop the dust shield back in place. 12. Reconnect the battery cables. 13. Disengage the prop arm, lower the hopper and operate the machine. Check the new governor control box for proper operation. 4-- 11 800/810 MM337 (8- -97) -
Page 84: Electrical Schematic 800--810 G/Lpg (Lsg Engine)
ELECTRICAL Electrical Schematic 800- -810 G/LPG (LSG ENGINE) 4-- 12 800/810 MM337 (6- -01) - Page 85 ELECTRICAL Electrical Schematic 800- -810 G/LPG (LSG ENGINE) 4-- 13 800/810 MM337 (NIL)
- Page 86 ELECTRICAL Electrical Schematic 800- -810 G/LPG (LSG ENGINE) 4-- 14 800/810 MM337 (6- -01)
- Page 87 ELECTRICAL Electrical Schematic 800- -810 G/LPG (LSG ENGINE) 4-- 15 800/810 MM337 (6- -01)
- Page 88 ELECTRICAL Electrical Schematic 800- -810 G/LPG (LSG ENGINE) 4-- 16 800/810 MM337 (6- -01)
- Page 89 ELECTRICAL Electrical Schematic 800- -810 G/LPG (LSG ENGINE) 4-- 17 800/810 MM337 (6- -01)
- Page 90 ELECTRICAL Electrical Schematic 800- -810 G/LPG (LSG ENGINE) 4-- 18 800/810 MM337 (6- -01)
- Page 91 ELECTRICAL Electrical Schematic 800- -810 G/LPG (LSG ENGINE) 09918 4-- 19 800/810 MM337 (6- -01)
-
Page 92: Wire Harnesses Group 800--810 G/Lpg (Lsg Engine)
ELECTRICAL Wire Harnesses Group 800- -810 G/LPG (LSG ENGINE) 43/BLU 115/ORA 16/GRN 72/GRY 13B/BLK 90/ORA 15/BLU HYD. FILTER WATER 13A/BLK INDICATOR TEMPERATURE SWITCH SENDER (OPTION) ALTERNATOR 44/GRY PRESSURE COIL 13M/BLK ENGINE SWITCH REV. 89/BRN 13/BLK SWITCH BLACK 62D/YEL (OPTION) 13II/BLK 93/ORA L.P. - Page 93 ELECTRICAL Wire Harnesses Group 800- -810 G/LPG (LSG ENGINE) VAC FAN 27/YEL SHUT OFF 13V/BLK 84/GRN SWITCH 86/PUR L.H. HEADLIGHT 62G/YEL 5/PUR HORN 62H/YEL ACTUATOR 13AAA/BLK SOLENOID 24A/PUR THERMO 24/PUR BLOCK 13BBB/BLK SWITCH 23B/GRY 13JJJ/BLK 13HHH/BLK 39A/GRY 13DDD/BLK CIRCUIT 30B/ORA...
- Page 94 ELECTRICAL Wire Harnesses Group 800- -810 G/LPG (LSG ENGINE) RELAYS L.H. SIDE BRUSH M3 ELECTRONIC HARNESS INSTRUMENT PANEL (OPTION) M4 SHAKER MOTOR M5 VAC FAN SOLENOID M6 HEADLIGHTS M7 ROTATING/FLASHING LIGHTS M8 HOPPER LIFT CONDITIONER - - M9 FRONT BRUSH...
- Page 95 ELECTRICAL Wire Harnesses Group 800- -810 G/LPG (LSG ENGINE) CB- -8 CB- -7 (OPTION) (OPTION) 1G/RED DIRECTIONAL HARNESS (OPTION) 20B/BLU 1E/RED CB- -6 CB- -5 CB- -4 20A/BLU 1F/RED 20/BLU 21D/ORA 74/PUR 18/ORA 74E/PUR 74F/PUR CB- -3 1D/RED 2.5 A...
- Page 96 ELECTRICAL Wire Harnesses Group 800- -810 G/LPG (LSG ENGINE) 10C/GRY 10C/GRY 10/GRY 12B/BRN 12/BRN 12B/BRN NEUTRAL TO MAIN REV/FLSH LIGHT (ONLY) START HARNESS OHG/CAB HARNESS 76C/ORA 13PPP/BLK HYD. PUMP REV/FLSH LIGHT HARNESS 13PPP/BLK 13NNN/BLK 76C/ORA 76A/ORA 89/BRN TO TAIL LIGHT...
- Page 97 ELECTRICAL Wire Harnesses Group 800- -810 G/LPG (LSG ENGINE) 88/GRN 88A/GRN 13WWW/BLK 13TTT/BLK TURN LIGHTS LEFT HAND S.E. OPTION TURN LIGHTS LEFT HAND 88A/GRN 13TTT/BLK 13ZZZ/BLK 62G/YEL 13AAA/BLK TURN SIGNAL HARNESS 13BBB/BLK FLASHER L.H. HEADLIGHT 80/BLU REF. ONLY 79/YEL TO MAIN...
- Page 98 ELECTRICAL Wire Harnesses Group 800- -810 G/LPG (LSG ENGINE) COMPRESSOR CLUTCH BLUE BLOWER SWITCH RED/GRY PRESSURE SWITCH ORANGE BLOWER HEATER FAN, MOTOR YELLOW PRESSURIZER AND A/C FAN BLACK ORANGE BLUE 9/ORA 21R/ORA THERMOSTAT 13EE/BLK 33D/GRN BLACK 35/YEL 18J/ORA 26/PUR 96/ORA...
- Page 99 ELECTRICAL Wire Harnesses Group 800- -810 G/LPG (LSG ENGINE) 13P/BLK 13VV/BLK ENGINE GROUND 26B/PUR 13P/BLK L.H. SIDE BRUSH LIFT SV- -10 13DD/BLK BLACK RED/GRY 96B/ORA A/C HARNESS 96A/ORA WHITE 13SS/BLK BLACK 1G/RED 9/ORA MAIN HARNESS CB- -8 30 AMP CB- -7...
- Page 100 ELECTRICAL Wire Harnesses Group 800- -810 G/LPG (LSG ENGINE) 18/ORA 18P/ORA 18Q/ORA CB- -4 20/BLU 11/PUR 11A/PUR 11B/PUR CB- -2 1C/RED 1D/RED MAIN HARNESS RFS OPTION HARNESS ROUTING 102B/GRY 101B/ORA 102A/GRY 101A/ORA 13AF 13AE 108/GRN 107/BRN 13AL/BLK 13AJ/BLK USED USED...
- Page 101 ELECTRICAL Wire Harnesses Group 800- -810 G/LPG (LSG ENGINE) L.H. HEADLIGHT 104/BLU 103/GRN 62H/YEL L.H. 13AP/BLK VANE MOTOR 13AQ/BLK 11B/PUR 11C/PUR 102/GRY CIRCUITRY L.H. P- -2 J- -2 SHAKER MOTOR P- -1 J- -1 11C/PUR M- -20 11D/PUR 101/ORA M- -19 R.H.
- Page 102 ELECTRICAL Wire Harnesses Group 800- -810 G/LPG (LSG ENGINE) 4-- 30 800/810 MM337 (6- -01)
- Page 103 ELECTRICAL Wire Harnesses Group 800- -810 G/LPG (LSG ENGINE) 4-- 31 800/810 MM337 (6- -01)
-
Page 104: Electrical Schematic 800--810 G/Lpg (Lrg Engine)
ELECTRICAL Electrical Schematic 800- -810 G/LPG (LRG ENGINE) 4-- 32 800/810 MM337 (6- -01) - Page 105 ELECTRICAL Electrical Schematic 800- -810 G/LPG (LRG ENGINE) 4-- 33 800/810 MM337 (6- -01)
- Page 106 ELECTRICAL Electrical Schematic 800- -810 G/LPG (LRG ENGINE) 4-- 34 800/810 MM337 (6- -01)
- Page 107 ELECTRICAL Electrical Schematic 800- -810 G/LPG (LRG ENGINE) 4-- 35 800/810 MM337 (6- -01)
- Page 108 ELECTRICAL Electrical Schematic 800- -810 G/LPG (LRG ENGINE) 4-- 36 800/810 MM337 (6- -01)
- Page 109 ELECTRICAL Electrical Schematic 800- -810 G/LPG (LRG ENGINE) 4-- 37 800/810 MM337 (6- -01)
- Page 110 ELECTRICAL Electrical Schematic 800- -810 G/LPG (LRG ENGINE) 4-- 38 800/810 MM337 (6- -01)
- Page 111 ELECTRICAL Electrical Schematic 800- -810 G/LPG (LRG ENGINE) 10502 4-- 39 800/810 MM337 (6- -01)
-
Page 112: Wire Harnesses Group 800--810 G/Lpg (Lrg Engine)
ELECTRICAL Wire Harnesses Group 800- -810 G/LPG (LRG ENGINE) 86/PUR 115/ORA 43/BLU 84/GRN 15B/BLU 13B/BLK 72/GRY HYD. 73/WHT 16/GRN FILTER INDICATOR WATER SWITCH TEMPERATURE PRESSURE (OPTION) SENDER SWITCH CARBURETOR ACTUATOR REV. BATTERY IGNITION COIL ENGINE 89/BRN 44/GRY SWITCH LOCATION 62D/YEL... - Page 113 ELECTRICAL Wire Harnesses Group 800- -810 G/LPG (LRG ENGINE) 27/YEL 13V/BLK VAC FAN ALTERNATOR SHUT OFF L.H. HEADLIGHT SWITCH 13A/BLK 62G/YEL 5/PUR HORN 13MMM/BLK 62H/YEL 13AAA/BLK SOLENOID 24A/PUR BLOCK THERMO 24/PUR 13BBB/BLK SWITCH ENGINE 13KKK/BLK 23B/GRY 13/BLK 13HHH/BLK 13DDD/BLK 30A/ORA...
- Page 114 ELECTRICAL Wire Harnesses Group 800- -810 G/LPG (LRG ENGINE) RELAYS M3 ELECTRONIC INSTRUMENT PANEL M4 SHAKER MOTOR L.H. M5 VAC FAN SOLENOID SIDE BRUSH M6 HEADLIGHTS HARNESS M7 ROTATING/FLASHING LIGHTS (OPTION) M8 HOPPER LIFT M9 FRONT BRUSH M10 MAIN BRUSH...
- Page 115 ELECTRICAL Wire Harnesses Group 800- -810 G/LPG (LRG ENGINE) CB- -8 CB- -7 (OPTION) (OPTION) 1G/RED DIRECTIONAL HARNESS (OPTION) 20B/BLU 1E/RED 20A/BLU CB- -6 CB- -5 CB- -4 20A/BLU 1F/RED 20/BLU 21D/ORA 74/PUR 18/ORA 74E/PUR 74F/PUR CB- -3 1D/RED 2.5 A...
- Page 116 ELECTRICAL Wire Harnesses Group 800- -810 G/LPG (LRG ENGINE) 10C/GRY 10C/GRY 10/GRY 12B/BRN 12B/BRN 12/BRN FROM MAIN REV/FLSH NEUTRAL LIGHT (ONLY) START HARNESS OHG/CAB HARNESS 76C/ORA 13PPP/BLK HYD. PUMP REV/FLSH LIGHT HARNESS 13PPP/BLK 13NNN/BLK 76A/ORA 76C/ORA 89/BRN REV/FLSH LIGHT FROM TAIL LIGHT...
- Page 117 ELECTRICAL Wire Harnesses Group 800- -810 G/LPG (LRG ENGINE) TURN LIGHTS LEFT HAND 88/GRN S.E. OPTION 88A/GRN 13WWW/BLK 13TTT/BLK TURN LIGHTS LEFT HAND 88A/GRN 13TTT/BLK 13ZZZ/BLK 62G/YEL 62H/YEL 13AAA/BLK 13BBB/BLK FLASHER L.H. HEADLIGHT REF. ONLY 80/BLU 88/GRN 79/YEL FROM HOPPER...
- Page 118 ELECTRICAL Wire Harnesses Group 800- -810 G/LPG (LRG ENGINE) COMPRESSOR CLUTCH BLUE BLOWER SWITCH RED/GRY PRESSURE SWITCH ORANGE BLOWER HEATER FAN, MOTOR YELLOW PRESSURIZER AND A/C FAN BLACK ORANGE BLUE 9/ORA 21R/ORA THERMOSTAT 13EE/BLK 33D/GRN BLACK 18J/ORA 35/YEL 26/PUR 96/ORA...
- Page 119 ELECTRICAL Wire Harnesses Group 800- -810 G/LPG (LRG ENGINE) 13P/BLK 13VV/BLK ENGINE GROUND 26B/PUR 13P/BLK L.H. SIDE BRUSH LIFT SV- -10 13DD/BLK BLACK RED/GRY 96B/ORA WHITE 96A/ORA 13SS/BLK BLACK 1F/RED 1G/RED 9/ORA FROM MAIN CB- -8 HARNESS 30 AMP CB- -7...
- Page 120 ELECTRICAL Wire Harnesses Group 800- -810 G/LPG (LRG ENGINE) 18/ORA 18P/ORA 18Q/ORA CB- -4 20/BLU 20A/BLU 11A/PUR 11/PUR 11B/PUR CB- -2 1C/RED 1D/RED MAIN HARNESS E DB A RFS OPTION HARNESS ROUTING HOPPER DOOR SWITCH (OPTION) 13AF 102B/GRY 101B/ORA 102A/GRY...
- Page 121 ELECTRICAL Wire Harnesses Group 800- -810 G/LPG (LRG ENGINE) L.H. HEADLIGHT 104/BLU 103/GRN 62H/YEL 13AP/BLK L.H. VANE 13AQ/BLK MOTOR 11B/PUR 11C/PUR 102/GRY 13AT/BLK 62F/YEL CIRCUITRY 13DDD/BLK 30A/ORA P- -2 J- -2 L.H. SHAKER MOTOR EDCBA 38A/PUR 39A/GRY VIEW J- -J...
- Page 122 ELECTRICAL Wire Harnesses Group 800- -810 G/LPG (LRG ENGINE) MAIN 1A/RED HARNESS 1B/RED 1B/RED 2/ORA 13A/BLK 13MMM/BLK STANDARD ALTERNATOR VIEW G- -G ELECTRONIC GOVERNOR CONTROL 13U/BLK MAIN HARNESS 4-- 50 800/810 MM337 (6- -01)
- Page 123 ELECTRICAL Wire Harnesses Group 800- -810 G/LPG (LRG ENGINE) GND. REL. IND. (NOT USED) 13A/BLK MAIN 13MMM/BLK HARNESS 1B/RED 1A/RED 1B/RED 2/ORA S.E. ALTERNATOR VIEW G- -G 13E/BLK 72/GRY 18D/ORA 73/WHT 85/BLU 86/PUR 83/BRN 84/GRN VIEW N- -N ELECTRONIC GOVERNOR...
-
Page 124: Electrical Schematic 800--810 D (Perkins 200 Series Engine)
ELECTRICAL Electrical Schematic 800- -810 D (PERKINS 200 SERIES ENGINE) 4-- 52 800/810 MM337 (6- -01) - Page 125 ELECTRICAL Electrical Schematic 800- -810 D (PERKINS 200 SERIES ENGINE) 4-- 53 800/810 MM337 (6- -01)
- Page 126 ELECTRICAL Electrical Schematic 800- -810 D (PERKINS 200 SERIES ENGINE) 4-- 54 800/810 MM337 (6- -01)
- Page 127 ELECTRICAL Electrical Schematic 800- -810 D (PERKINS 200 SERIES ENGINE) 4-- 55 800/810 MM337 (6- -01)
- Page 128 ELECTRICAL Electrical Schematic 800- -810 D (PERKINS 200 SERIES ENGINE) 4-- 56 800/810 MM337 (6- -01)
- Page 129 ELECTRICAL Electrical Schematic 800- -810 D (PERKINS 200 SERIES ENGINE) 4-- 57 800/810 MM337 (6- -01)
-
Page 130: Wire Harnesses Group 800--810 D (Perkins 200 Series Engine)
ELECTRICAL Wire Harnesses Group 800- -810 D (PERKINS 200 SERIES ENGINE) 4-- 58 800/810 MM337 (6- -01) - Page 131 ELECTRICAL Wire Harnesses Group 800- -810 D (PERKINS 200 SERIES ENGINE) 4-- 59 800/810 MM337 (6- -01)
- Page 132 ELECTRICAL Wire Harnesses Group 800- -810 D (PERKINS 200 SERIES ENGINE) 4-- 60 800/810 MM337 (6- -01)
- Page 133 ELECTRICAL Wire Harnesses Group 800- -810 D (PERKINS 200 SERIES ENGINE) 4-- 61 800/810 MM337 (6- -01)
- Page 134 ELECTRICAL Wire Harnesses Group 800- -810 D (PERKINS 200 SERIES ENGINE) 4-- 62 800/810 MM337 (6- -01)
- Page 135 ELECTRICAL Wire Harnesses Group 800- -810 D (PERKINS 200 SERIES ENGINE) 4-- 63 800/810 MM337 (6- -01)
- Page 136 ELECTRICAL Wire Harnesses Group 800- -810 D (PERKINS 200 SERIES ENGINE) 4-- 64 800/810 MM337 (6- -01)
- Page 137 ELECTRICAL Wire Harnesses Group 800- -810 D (PERKINS 200 SERIES ENGINE) 4-- 65 800/810 MM337 (6- -01)
- Page 138 ELECTRICAL Wire Harnesses Group 800- -810 D (PERKINS 200 SERIES ENGINE) 4-- 66 800/810 MM337 (6- -01)
- Page 139 ELECTRICAL Wire Harnesses Group 800- -810 D (PERKINS 200 SERIES ENGINE) 4-- 67 800/810 MM337 (6- -01)
-
Page 140: Electrical Schematic 800--810 D (Perkins 700 Series Engine)
ELECTRICAL Electrical Schematic 800- -810 D (PERKINS 700 SERIES ENGINE) 4-- 68 800/810 MM337 (6- -01) - Page 141 ELECTRICAL Electrical Schematic 800- -810 D (PERKINS 700 SERIES ENGINE) 4-- 69 800/810 MM337 (6- -01)
- Page 142 ELECTRICAL Electrical Schematic 800- -810 D (PERKINS 700 SERIES ENGINE) 4-- 70 800/810 MM337 (6- -01)
- Page 143 ELECTRICAL Electrical Schematic 800- -810 D (PERKINS 700 SERIES ENGINE) 4-- 71 800/810 MM337 (6- -01)
- Page 144 ELECTRICAL Electrical Schematic 800- -810 D (PERKINS 700 SERIES ENGINE) 4-- 72 800/810 MM337 (6- -01)
- Page 145 ELECTRICAL Electrical Schematic 800- -810 D (PERKINS 700 SERIES ENGINE) 4-- 73 800/810 MM337 (6- -01)
-
Page 146: Troubleshooting
ELECTRICAL TROUBLESHOOTING The troubleshooting charts that follow are organized so they lead you through the circuits. They include flow charts and instructions for you as to where to insert your test instruments. 4-- 74 800/810 MM337 (8- -97) -
Page 147: Engine Run
SE- - 1 42/ORA FUEL SENDER FULL=90 13HH/BLK EMPTY=0 COOLANT TEMP SE- - 2 43/BLU SENDER CLOSES AT 225 F 23A/GRY CIRCUIT ELECTRONIC BOARD 15/BLU PRESSURE INSTRUMENT SWITCH N.O. 13B/BLK PANEL N.C. 16/GRN S- - 6 4-- 75 800/810 MM337 (8- -97) -
Page 148: Shaker
30B/ GRY 13EEE/ CB- - 3 22/YEL 1E/RED 2.5A BATT. 23/GRY START 18/ORA CB- - 4 20/BLU 18C/ORA IGNITION SWITCH S- - 10 6/GRN 23A/GRY 13T/BLK SHAKER RELAY 23C/GRY 29/GRN CIRCUIT BOARD ELECTRONIC INSTRUMENT PANEL 4-- 76 800/810 MM337 (8- -97) -
Page 149: Shaker Failure
CIRCUIT BOARD > 8.5 AMPS O AMPS CHECK AMP DRAW CHECK VOLTAGE AT MOTOR REPLACE MOTOR 30A GRY TO 13III BLK 30B GRY TO 13EEE BLK (= BATTERY VOLTAGE) CONT. NEXT PAGE REPLACE MOTOR 4-- 77 800/810 MM337 (8- -97) - Page 150 KEY OFF 23C GRAY REPLACE REPLACE M4 WITH MOTOR KNOWN 11 PURPLE OPERATES OPERATING GOOD RELAY CHECK CONTINUITY REPLACE M4 30 GRY / 30A GRY OR 30B GRY REPAIR CONNECTION REPLACE WIRE CONT. NEXT PAGE 4-- 78 800/810 MM337 (8- -97)
- Page 151 P- -16 / P- -23 REMOVE M4 RELAY LET COOL 3 MIN. CHECK CONTINUITY > 1 MEG THEN SWITCH ON OF 29 GREEN CHECK RESISTANCE PLUG 1 P16 - - P23 REPAIR OR REPLACE REPLACE BOARD 29 GREEN 4-- 79 800/810 MM337 (8- -97)
-
Page 152: Vac Fan
S- - 5 13T/BLK S- - 2 24A/PUR CIRCUIT BOARD ELECTRONIC INSTRUMENT PANEL 21D/ORA S- - 12 HOPPER LIFT CB- - 6 20A/BLU 21/ORA 27/YEL 13V/BLK 15 AMP 28B/BRN SV- - 6 21A/ORA 32/GRN 13W/BLK 28A/BRN 4-- 80 800/810 MM337 (8- -97) -
Page 153: Vacuum Fan Failure
UNPLUG M10 RELAY LED BURNT OUT (REMOVE BRUSHES REPLACE TOUCH PANEL REPLACE FROM CIRCUIT) CIRCUIT BOARD UNPLUG M12 RELAY (REMOVE HOPPER ROLL- -OUT FROM CIRCUIT) CHECK & RESET CB6 IF NECESSARY CONT. NEXT PAGE 4-- 81 800/810 MM337 (8- -97) - Page 154 OR LIFT ARM SWITCH REMOVE M5 RELAY CHECK VOLTAGE CHECK 24 PUR TO BATT. NEG. HYDRAULICS CHECK VOLTAGE 23B GRY TO BATT. NEG. REPAIR OR REPLACE REPAIR OR REPLACE 24 PURPLE 23B GRAY CONT. NEXT PAGE 4-- 82 800/810 MM337 (8- -97)
- Page 155 CONT. NEXT PAGE REPLACE AT M8 21D ORA, 21 ORA 21 ORA TO 27 YEL OR 21A ORA REPAIR OR REPAIR OR REPLACE REPLACE 28B BRN OR 27 YEL OR 13V BLK 28A BRN 4-- 83 800/810 MM337 (8- -97)
- Page 156 (= BATTERY VOLTAGE) (BATTERY VOLTAGE) CHECK VOLTAGE CHECK SV- -6 COIL 7 +/- - 2 OHMS BATT + TO 13W/BLK REPLACE COIL REPLACE 13W/BLK SV- -6 REPAIR OR REPLACE 32 GREEN CONT. NEXT PAGE 4-- 84 800/810 MM337 (8- -97)
- Page 157 LET COOL 3 MIN. < 1 MEG > 1 MEG CONTINUITY OF THEN SWITCH ON 25 BRN CHECK RESISTANCE PLUG 1 P21 - - P23 REPAIR OR CHECK REPLACE REPLACE BOARD 25 BRN HYDRAULICS 4-- 85 800/810 MM337 (8- -97)
-
Page 158: Main Brush
CB- - 6 20A/BLU 21/ORA 27/YEL 13V/BLK 15 AMP 28B/BRN 21A/ORA MAIN/FRONT BRUSH S- - 1 13Y/BLK 37/YEL MAIN BRUSH SV- - 1 21C/ORA 19/GRY 13Z/BLK 19A/GRY 13D/BLK M. BRUSH LIFT SV- - 4 4-- 86 800/810 MM337 (8- -97) -
Page 159: Main Brush Failure
TO BATT. NEG. TO BATT NEG. REPAIR OR REPAIR OR CHECK VOLTAGE REPLACE REPLACE 21C ORA 37 YELLOW 21C ORANGE TO 13Y BLK REPAIR OR REPLACE S- -1 REPLACE BRUSH SWITCH 13Y BLK CONT. NEXT PAGE 4-- 87 800/810 MM337 (8- -97) - Page 160 (= BATTERY VOLTAGE) CHECK SV- -1 COIL CHECK VOLTAGE 7 +/- - 2 OHMS BATT + TO 13Z/BLK REPAIR OR REPAIR OR REPLACE COIL REPLACE REPLACE SV - -1 19 GRAY 13Z BLK CHECK HYDRAULICS 4-- 88 800/810 MM337 (8- -97)
-
Page 161: Side Brush
CB- - 6 20A/BLU 21/ORA 27/YEL 13V/BLK 15 AMP 28B/BRN 21A/ORA MAIN/FRONT BRUSH S- - 1 13Y/BLK 37/YEL 21C/ORA 19/GRY 19A/GRY 19B/GRY S- - 7 R.H. SIDE R.H. SIDE BRUSH BRUSH SV- - 3 13N/BLK 33/GRN 4-- 89 800/810 MM337 (8- -97) -
Page 162: Side Brush Failure
(= BATTERY VOLTAGE) CHECK VOLTAGE CHECK SV- -3 COIL 7 +/- - 2 OHMS BATT + TO 13N BLK REPLACE COIL REPLACE 13N BLK SV - -3 REPAIR OR REPLACE CHECK 33 GREEN HYDRAULICS 4-- 90 800/810 MM337 (8- -97) -
Page 163: Hopper Roll Out
20/BLU IGNITION SWITCH S- - 10 S- - 22 HOPPER ROLL OUT 21J/ORA 13GGG/BLK 21G/ORA 67/PUR 67A/PUR SV- - 7 HOPPER ROLL OUT 21H/ORA 13H/BLK 66/BRN 21D/ORA 20A/BLU CB- - 6 15 AMP 21/ORA 4-- 91 800/810 MM337 (8- -97) -
Page 164: Hopper Rollout Failure
CHECK CONTINUITY SEE HYDRAULICS OF S- -22 HOPPER ROLL OUT SWITCH CHECK VOLTAGE REPLACE AT SV- -7 S- -22 66 BRN TO BATT. NEG. REPLACE OR REPLACE REPLACE SV- -7 OR CHECK VALVE M12 RELAY 4-- 92 800/810 MM337 (8- -97) -
Page 165: Headlight
S- - 10 6/GRN 23A/GRY 13T/BLK CIRCUIT BOARD HEADLIGHT RELAY 23E/GRY 60/GRN ELECTRONIC INSTRUMENT PANEL HEADLIGHT R.H. M6 87 CB- - 5 74B/PUR 62F/YEL 13BBB 1F/RED 62/YEL 62B/YEL 15 AMP 62G/YEL 13BB 13AAA HEADLIGHT L.H. 4-- 93 800/810 MM337 (8- -97) -
Page 166: Headlight Failure
( 10 +/- - 1 AMP ) CHECK CHECK VOLTAGE AND REPAIR AT LIGHTS SHORTED WIRE 62F YEL TO 13BBB BLK (RH) 62G YEL TO 13AAA BLK (LH) (BATTERY VOLTAGE) CONT. NEXT PAGE REPLACE LIGHTS 4-- 94 800/810 MM337 (8- -97) - Page 167 REPAIR OR REPLACE M6 WITH REPLACE LIGHTS KNOWN OPERATE LIGHTS 74B PURPLE GOOD RELAY CHECK CONTINUITY REPLACE M6 62 YEL, 62B YEL, 62F YEL & 62G YEL REPAIR OR REPLACE YELLOW WIRES CONT. NEXT PAGE 4-- 95 800/810 MM337 (8- -97)
- Page 168 P- -20 / P- -23 REMOVE M6 RELAY LET COOL 3 MIN. > 1 MEG CHECK CONTINUITY THEN SWITCH ON OF 60 GREEN CHECK RESISTANCE PLUG 1 P20 - - P23 REPAIR OR REPLACE REPLACE BOARD 60 GREEN 4-- 96 800/810 MM337 (8- -97)
-
Page 169: Warning Light
SWITCH S- - 10 6/GRN 23A/GRY 13T/BLK CIRCUIT BOARD WARNING LIGHT 23D/GRY 75/BRN ELECTRONIC INSTRUMENT PANEL ROTATING LIGHT M7 87 13NNN CB- - 5 76/ORA 1F/RED 74/PUR 76A/ORA FLASHING LIGHT 15 AMP 13TT 76B/ORA 4-- 97 800/810 MM337 (8- -97) -
Page 170: Warning Light Failure
( 10 +/- - 1 AMP ) CHECK VOLTAGE CHECK AT LIGHTS AND REPAIR 76A ORA TO SHORTED WIRE 13NNN BLK (R) 76B ORA TO 13TT BLK (F) (BATTERY VOLTAGE) CONT. NEXT PAGE REPLACE LIGHTS 4-- 98 800/810 MM337 (8- -97) - Page 171 KEY OFF REPAIR OR REPLACE M7 WITH REPLACE LIGHTS KNOWN OPERATE LIGHTS GOOD RELAY 74 PURPLE CHECK CONTINUITY REPLACE M7 76 ORA, 76A ORA OR 76B ORA REPAIR OR REPLACE ORANGE WIRES CONT. NEXT PAGE 4-- 99 800/810 MM337 (8- -97)
- Page 172 P- -19 / P- -23 REMOVE M7 RELAY LET COOL 3 MIN. > 1 MEG CHECK CONTINUITY THEN SWITCH ON OF 75 BROWN CHECK RESISTANCE PLUG 1 P19 - - P23 REPAIR OR REPLACE REPLACE BOARD 75 BROWN 4-- 100 800/810 MM337 (8- -97)
-
Page 173: Clogged Filter Indicator Circuit
18/ORA CB- - 4 20/BLU 18C/ORA IGNITION 6/GRN SWITCH S- - 10 23/GRY 38A/PUR 13FFF/BLK N.C. S- - 4 38/PUR 13X/BLK N.O. 13DDD/BLK HOPPER DIFFERENTIAL 23A/GRY PRESSURE SWITCH 13T/BLK CIRCUIT BOARD ELECTRONIC INSTRUMENT PANEL 4-- 101 800/810 MM337 (8- -97) - Page 174 P.C. BOARD TO SWITCH DIAPHRAGM BATTERY LIGHT VOLTAGE CHECK CONNECTIONS & CONTINUITY OF REPLACE SWITCH 38 PUR, 38A PUR, 13FFF BLK, 13DDD BLK AND 13X BLK REPLACE VACUUM REPLACE BOARD LINES REPAIR OR REPLACE 4-- 102 800/810 MM337 (8- -97)
-
Page 175: Hopper Door Circuit
1H/RED BATT. START 18/ORA CB- - 4 20/BLU 18C/ORA IGNITION SWITCH 6/GRN S- - 10 23/GRY 39A/GRY 13CCC 13AAA 39/GRY 13BB 23A/GRY S- - 13 13BBB HOPPER DOOR 13T/BLK CIRCUIT BOARD ELECTRONIC INSTRUMENT PANEL 4-- 103 800/810 MM337 (8- -97) -
Page 176: Hopper Door Indicator
CHECK VOLTAGE REPLACE BATTERY 0 VOLTS REPLACE SWITCH PLUG 1 P1 - - P4 VOLTAGE P.C. BOARD CHECK CONNECTIONS REPLACE BOARD & CONTINUITY OF 39 GRAY / 13BB BLK REPAIR OR REPLACE WIRES AS NEEDED 4-- 104 800/810 MM337 (8- -97) -
Page 177: Down Force
CB- - 3 22/YEL 1E/RED 2.5A 1H/RED BATT. START 18/ORA CB- - 4 20/BLU 18C/ORA IGNITION SWITCH 6/GRN S- - 10 23/GRY 23A/GRY 40/YEL 13MMM/BLK S- - 14 DN. FORCE 13T/BLK CIRCUIT BOARD ELECTRONIC INSTRUMENT PANEL 4-- 105 800/810 MM337 (8- -97) -
Page 178: Down Force Circuit
REPLACE BATTERY 0 VOLTS PLUG 1 P1 - - P7 VOLTAGE S- -14 SWITCH P.C. BOARD CHECK CONNECTIONS REPLACE BOARD & CONTINUITY OF 40 YEL / 13MMM BLK REPAIR OR REPLACE WIRES AS NEEDED 4-- 106 800/810 MM337 (8- -97) -
Page 179: Fuel Sender Circuit
18C/ORA IGNITION SWITCH 6/GRN S- - 10 23/GRY SE- - 1 13HH/BLK 42/ORA FUEL SENDER FULL=90 EMPTY=0 23A/GRY 13T/BLK 13S/BLK CIRCUIT 13R/BLK BOARD (LP ONLY ON GAS WILL TURN LIGHTS OFF) ELECTRONIC INSTRUMENT PANEL 4-- 107 800/810 MM337 (8- -97) -
Page 180: Fuel Indicator (Gas And Diesel Machines)
INSERT TEST HARNESS CHECK REPLACE SE- -1 CONTINUITY 42 ORA CHECK REPAIR OR CONTINUITY REPLACE REPLACE PANEL P1- -22 42 ORA TO BATT. NEG. REMOVE JUMPER 13R BLK REPLACE PANEL FOR L.P. ONLY SEE SCHEMATIC 4-- 108 800/810 MM337 (8- -97) -
Page 181: Coolant Sender Circuit
1H/RED BATT. START 18/ORA CB- - 4 20/BLU 18C/ORA IGNITION SWITCH 6/GRN S- - 10 23/GRY COOLANT TEMP SE- - 2 SENDER 43/BLU CLOSES AT 225 F 23A/GRY 13T/BLK CIRCUIT BOARD ELECTRONIC INSTRUMENT PANEL 4-- 109 800/810 MM337 (8- -97) -
Page 182: Coolant Temperature
AND RETEST INSERT TEST HARNESS CHECK VOLTAGE REPLACE REPLACE BATTERY 0 VOLTS PLUG 1 P1 - - P5 VOLTAGE SE- -2 SENSOR P.C. BOARD CHECK CONTINUITY REPLACE BOARD 43 BLU REPAIR OR REPLACE 43 BLU 4-- 110 800/810 MM337 (8- -97) -
Page 183: Low Lp Circuit (L.p. Machines Only)
18/ORA CB- - 4 20/BLU 18C/ORA IGNITION SWITCH 6/GRN S- - 10 23/GRY CLOSED=FLASH OPEN=ALL OFF LOW L.P. FUEL 23A/GRY 44/GRY 13M/BLK N.C.H.O. S- - 5 13T/BLK 13S/BLK 13R/BLK CIRCUIT BOARD ELECTRONIC INSTRUMENT PANEL 4-- 111 800/810 MM337 (8- -97) -
Page 184: Low L.p. Circuit (L.p. Machines Only)
13M BLK = OPEN OR 13S BLK 2 FUEL NO FLASHING GROUND 44 GRY LIGHTS FUEL LIGHTS FLASH INSERT TEST HARNESS CHECK CONTINUITY REPLACE S- -5 44 GRY REPAIR OR REPLACE REPLACE PANEL 44 GRY 4-- 112 800/810 MM337 (8- -97) -
Page 185: Alternator Fault
1E/RED 2.5A ALTERNATOR 1A/RED 13A/BLK 55A MAX. 1B/RED SENSE CHARGE 1H/RED BATT. START 18/ORA CB- - 4 20/BLU 18C/ORA IGNITION 6/GRN SWITCH S- - 10 2/ORA 23/GRY 23A/GRY 13T/BLK CIRCUIT BOARD ELECTRONIC INSTRUMENT PANEL 4-- 113 800/810 MM337 (8- -97) -
Page 186: Alternator
ON CONSTANTLY? INSERT TEST HARNESS & START ENGINE CHECK VOLTAGE REPLACE LAMP > 1 VOLT 0 VOLTS ACROSS LIGHT AND RETEST PLUG 1 P1 - - P14 REPLACE REPLACE RETEST BATTERY P.C. BOARD ALTERNATOR 4-- 114 800/810 MM337 (8- -97) -
Page 187: Hourmeter Circuit
2.5A 1H/RED BATT. START 18/ORA CB- - 4 20/BLU 18C/ORA IGNITION SWITCH 6/GRN S- - 10 23/GRY 23A/GRY CIRCUIT BOARD 13T/BLK PRESSURE 15/BLU SWITCH N.O. 13B/BLK N.C. 16/GRN ELECTRONIC S- - 6 INSTRUMENT PANEL 4-- 115 800/810 MM337 (8- -97) -
Page 188: Hourmeter Won't Work
S- -6 AND JUMPER 13B BLK TO GROUND DOES HOURMETER INDICATOR CLICK WITHIN 1 MINUTE INSERT TEST HARNESS CHECK CONTINUITY REPLACE S- -6 15 BLU REPAIR OR REPLACE REPLACE HOURMETER 15 BLU AND RETEST 4-- 116 800/810 MM337 (8- -97) -
Page 189: Power Up Circuit
POWER UP CIRCUIT BATTERY 13/BLK 540 C.C.A. CB- - 3 22/YEL 1E/RED 2.5A 1H/RED BATT. START 18/ORA CB- - 4 20/BLU 18C/ORA IGNITION SWITCH 6/GRN S- - 10 23/GRY 23A/GRY 13T/BLK CIRCUIT BOARD ELECTRONIC INSTRUMENT PANEL 4-- 117 800/810 MM337 (8- -97) -
Page 190: Power Up Testing
AT S- -10 KEY SWITCH REPLACE CB 4 1H RED TO BATT. NEG. REPAIR OR REPAIR OR REPLACE REPLACE 1H RED 18 ORA CONT. NEXT PAGE CHECK AND REPAIR KEY SWITCH OR 20 BLUE 4-- 118 800/810 MM337 (8- -97) - Page 191 1E RED OR 1E RED ONLY 22 YEL TO BATT. NEG. BATTERY VOLTAGE 1E RED & 22 YEL REPAIR OR REPLACE REPLACE CB 3 1E RED CONT. NEXT PAGE REPAIR OR REPLACE 22 YELLOW 4-- 119 800/810 MM337 (8- -97)
- Page 192 0 VOLTS P1- -23 TO BATT. + VOLTAGE CHECK VOLTAGE BATTERY REPAIR OR REPLACE 0 VOLTS 13T BLK OR 13 BLK P1- -1 TO P1- -23 VOLTAGE REPAIR OR REPLACE REPLACE BOARD 23A GRAY 4-- 120 800/810 MM337 (8- -97)
-
Page 193: 800/810 Relay And Circuit Breaker Location
ELECTRICAL 800/810 RELAY AND CIRCUIT BREAKER LOCATION CB 6 CB 4 CB 1 CB 3 M3 - - INSTR. PANEL CB 1 - - HORN M4 - - SHAKER MOTOR CB 2 - - SHAKER MOTOR M5 - - VAC FAN SOL. - Page 194 ELECTRICAL 4-- 122 800/810 MM337 (8- -97)
- Page 195 CYLINDER ....5--18 800 MAIN -- LO SPD AND VAC FAN 5--62 TO REPLACE HOPPER ROLL OUT 810 REAR BROOM AND VAC FAN...
- Page 196 HYDRAULICS 5-- 2 800/810 MM337 (8- -97)
-
Page 197: Hydraulic Fluid Reservoir
HYDRAULIC FLUID RESERVOIR The reservoir is located behind the operator seat. Mounted on top of the reservoir is a filler cap with a built-in breather. Replace the cap every 800 hours of operation. 08452 Check the hydraulic fluid level at operating temperature every 100 hours of operation. -
Page 198: To Drain Hydraulic Fluid Reservoir And Replace Filter Element
5. Put the reservoir breather-filler cap on the reservoir. 6. Start engine and operate all the hydraulic components. 7. Recheck the hydraulic fluid level. 8. Check for any leaks. 08430 5-- 4 800/810 MM337 (8- -97) -
Page 199: Hydraulic Fluid
The quality and condition of the hydraulic fluid play a very important role in how well the machine operates. TENNANT’s hydraulic fluid is specially selected to meet the needs of TENNANT machines. TENNANT’s hydraulic fluids provide a longer life for the hydraulic components. There are two fluids available for different temperature ranges: TENNANT part no. -
Page 200: Directional Control
7. Unscrew the spacer from threaded end of the directional spring assembly and save. 8. Loosen the large jam nuts holding directional spring assembly to the pedal plate. Drop the directional spring assembly down, off the pedal plate. 5-- 6 800/810 MM337 (8- -97) - Page 201 19. Check the adjustment of the new directional spring assembly by starting the machine and checking the rear drive tire for any rotation. If the tire is rotating in either direction see TO ADJUST DIRECTIONAL CONTROL instructions in this section. 5-- 7 800/810 MM337 (8- -97)
-
Page 202: Control Cable
NOTE: The cable may have to be held to keep it from turning. 10. Open the engine cover and side door. Locate the propel pump under the radiator/ fan shroud assembly. 5-- 8 800/810 MM337 (8- -97) - Page 203 20. Use the large jam nut to lock the directional spring assembly in place. 21. Thread the spacer back on the end of the cable. 5-- 9 800/810 MM337 (8- -97)
- Page 204 29. Check the adjustment of the new directional spring assembly by starting the machine and checking the rear drive tire for any rotation. If the tire is rotating in either direction see TO ADJUST DIRECTIONAL CONTROL instructions in this section. 5-- 10 800/810 MM337 (8- -97)
- Page 205 9. The large jam nuts on the control cable can be loosened and repositioned for more adjustment. 10. Remove the jack stands and lower the machine. Operate the machine and check for proper pedal centering. 5-- 11 800/810 MM337 (8- -97)
-
Page 206: Hydraulic Components
8. Remove and plug the hydraulic hoses leading to the propel pump. NOTE: Observe hydraulic cleanliness requirements when opening hydraulic lines. 9. Remove the two M12 hex screws holding the propel pump to the flywheel housing. 5-- 12 800/810 MM337 (8- -97) - Page 207 Close the engine cover and side door. 21. Observe the rear tire for any rotation. If the tire is rotating in either direction see TO ADJUST DIRECTIONAL CONTROL instructions in this section. 5-- 13 800/810 MM337 (8- -97)
-
Page 208: To Replace Accessory Pump
The accessory pump must be dropped down and out of the machine between the engine cradle and rear frame. NOTE: Be careful not to lose or damage the o- -ring on the accessory pump. 5-- 14 800/810 MM337 (8- -97) - Page 209 Close the engine cover and side door. 16. Observe the rear tire for any rotation. If the tire is rotating in either direction see TO ADJUST DIRECTIONAL CONTROL instructions in this section. 5-- 15 800/810 MM337 (8- -97)
-
Page 210: To Replace Hopper Lift Cylinder
7. The cylinder can now be removed out the front of the machine. 8. If a new or rebuilt cylinder is going to be installed, remove the fittings and rod end clevis from the old cylinder. 5-- 16 800/810 MM337 (8- -97) - Page 211 13. Start the machine and lift the hopper. Check for any leaks. 14. Close the engine cover and side door. 15. Disengage the prop arm and lower the hopper. Operate the machine and check for proper operation. 5-- 17 800/810 MM337 (8- -97)
-
Page 212: To Replace Steering Cylinder
5. Remove the two 0.75 in. hex screws and nyloc nuts attaching the steering cylinder to the machine frame and the rear drive casting steering bracket. 6. The steering cylinder can now be removed out the front of the machine. 5-- 18 800/810 MM337 (8- -97) - Page 213 12. Start the machine and turn the steering wheel in both directions. Check for any leaks and proper operation of the steering cylinder. 13. Remove the jack stands and lower the machine. 14. Disengage the prop arm and lower the hopper. 5-- 19 800/810 MM337 (8- -97)
-
Page 214: To Replace Hopper Roll Out Cylinders
8. If a new or rebuilt cylinder is going to be installed, remove the fittings and clevis end from the old cylinder. NOTE: Measure the location of clevis on old cylinder and install in same location on new cylinder. 5-- 20 800/810 MM337 (8- -97) - Page 215 Tighten to 18 -- 24 Nm (13 -- 18 ft lb). 17. Disengage the prop arm and lower the hopper. 18. Start the machine and roll the hopper in and out a few times. Check for any leaks. 5-- 21 800/810 MM337 (8- -97)
-
Page 216: To Replace Hopper Dump Door Cylinders
8. Remove the cotter pin and clevis pin from the rod end of dump door cylinder. Remove the cylinder from the machine. 9. If a new or rebuilt cylinder is going to be installed, remove the fittings from the old cylinder. 5-- 22 800/810 MM337 (8- -97) - Page 217 Tighten to 18 -- 24 Nm (13 -- 18 ft lb). 17. Disengage the prop arm and lower the hopper. 18. Start the machine and open the dump door a few times. Check for any leaks. 5-- 23 800/810 MM337 (8- -97)
-
Page 218: To Replace Main Brush Lift Cylinder
The cylinder can now be removed from the machine. 8. Remove one 0.50 in. hex nut from the threaded rod holding plastic spring tubes to the lift cylinder. 5-- 24 800/810 MM337 (8- -97) - Page 219 14. Reconnect the main brush lift cable to the cylinder bracket. Tighten the M8 hex bolt to 18 -- 24 Nm (13 -- 18 ft lb). 15. Reinstall the muffler and tail pipe. 16. Start engine and check for any leaks. 5-- 25 800/810 MM337 (8- -97)
-
Page 220: To Replace Side Brush Lift Cylinder
8. Remove the cotter pin from the 0.375 clevis pin connecting the rod end of the side brush lift cylinder to the pivot brackets. 5-- 26 800/810 MM337 (8- -97) - Page 221 Tighten the M10 hex screw to 37 -- 48 Nm (26 -- 34 ft lb). 17. Start the machine, lower hopper, and check the side brush lift cylinder for any leaks and proper operation. 5-- 27 800/810 MM337 (8- -97)
-
Page 222: To Replace Power Throwt Brush Lift Cylinder
The cylinder can now be removed from the machine. 8. Remove one 0.50 in. hex nut from the threaded rod holding plastic spring tubes to the lift cylinder. 5-- 28 800/810 MM337 (8- -97) - Page 223 Tighten the M8 hex bolt to 18 -- 24 Nm (13 -- 18 ft lb). 15. Reinstall the muffler and tail pipe. 16. Start engine and check for any leaks. 5-- 29 800/810 MM337 (8- -97)
-
Page 224: To Replace Side Brush Solenoid Valve
10. Reconnect the main harness to the solenoid valve. See schematic in the ELECTRICAL section. 11. Drop rubber dust flap back in place. 12. Start the machine, lower hopper, and check the side brush for proper operation. 5-- 30 800/810 MM337 (8- -97) -
Page 225: To Replace Hydraulic Lift Valve
Remove the valve out the front of of the machine. 11. Remove the two M6 hex screws holding the valve to the mount bracket. Remove the mount bracket. 5-- 31 800/810 MM337 (8- -97) - Page 226 8 -- 10 Nm (5 -- 7 ft lb). 18. Reinstall the three plastic knobs on the valve handles. Lightly hand tighten. 19. Reconnect the battery cables. 20. Start machine and check the new valve for leaks. 5-- 32 800/810 MM337 (8- -97)
-
Page 227: To Replace Hydraulic Steering Valve
8. Remove the four M6 hex screws holding the two steering bracket pivot bearing in place. 9. Slide the steering column, control motor, and pivot bracket assembly down and out of the machine. 5-- 33 800/810 MM337 (8- -97) - Page 228 Tighten the M12 hex nut to 102 -- 132 Nm (75 -- 97 ft lb). 18. Reinstall the rubber cap on the steering wheel. 19. Start the engine and check the steering control motor for leaks. 5-- 34 800/810 MM337 (8- -97)
-
Page 229: To Replace Hydraulic Solenoid Valve
8. Remove the valve by lifting it up and out of the lower bracket. NOTE: Be careful not to lose two rubber isolator strips. 9. Remove the three M8 flat head screws holding the valve mounting plate to the valve. 5-- 35 800/810 MM337 (8- -97) - Page 230 15. Plug the four solenoid valve cartridges back into the main harness. See schematic in the ELECTRICAL section. 16. Reconnect the battery cables. 17. Start the machine and check for leaks and proper operation of the solenoid valve. 5-- 36 800/810 MM337 (8- -97)
-
Page 231: To Replace Solenoid Valve Cartridge
NOTE: Do not over tighten, snug only. 11. Plug the coil back in the main harness. See schematic in the ELECTRICAL section. 12. Reconnect the battery cables. 13. Start the machine and check the cartridge for leaks and proper operation. 5-- 37 800/810 MM337 (8- -97) -
Page 232: To Replace Engine Cooling Fan Hydraulic Motor
7. Remove the hex nut from the fan motor shaft in center of the fan blade. 8. Remove the fan blade from the motor shaft. NOTE: A puller must be used to remove the fan blade from the tapered motor shaft. 5-- 38 800/810 MM337 (8- -97) - Page 233 See schematic in this section. 16. Reinstall the screen guard. Reinstall the springs and hooks. 17. Reconnect the battery cables. 18. Start the machine and check the fan motor for any leaks and proper operation. 5-- 39 800/810 MM337 (8- -97)
-
Page 234: To Replace Rear Drive Motor
9. Position the new or rebuilt motor on the rear casting in the same orientation as it was removed. 10. Install the four socket-head screws and nyloc nuts. Torque nuts to 120 -- 157 Nm (89 -- 116 ft lb). 5-- 40 800/810 MM337 (8- -97) - Page 235 Tighten the six wheel nuts to 122 -- 142 Nm (90 -- 105 ft lb). 14. Start the machine and run the propel circuit in forward and reverse. Check for leaks and proper operation. 15. Remove jack stands and lower machine. 5-- 41 800/810 MM337 (8- -97)
-
Page 236: To Replace Main Brush Motor
37 -- 47 Nm (27 -- 35 ft lb). Make sure corners of brush motor line up with slots in brush arm. 10. Reinstall hydraulic fittings in motor. 11. Reconnect hydraulic hoses to motor. (See schematic in hydraulic section). 5-- 42 800/810 MM337 (8- -97) - Page 237 Install new cotter pin. 14. Reinstall main brush. 15. Lower the hopper, operate the main brush and check for proper rotation and leaks. 5-- 43 800/810 MM337 (8- -97)
-
Page 238: To Replace Side Brush Motor
8. Slide the side brush onto the side brush drive shaft. 9. Insert the side brush clevis pin through the side brush hub and shaft. Reinstall the hair pin and cable back into the hole in the end of the clevis pin. 5-- 44 800/810 MM337 (8- -97) -
Page 239: To Replace Power Throwt Brush Motor
10. Reinstall new motor and drive shaft on brush arm using four 0.375 in. socket head screws. Tighten to 37 -- 40 Nm (27 -- 30 ft lb). Note the orientation of the motor in the brush arm. 5-- 45 800/810 MM337 (8- -97) - Page 240 7 -- 10 Nm (5 -- 8 ft lb). Make sure the square key is in place in the drive shaft. 13. Reinstall the Power Throwt brush and idler plate. See TO REPLACE POWER THROWt BRUSH instructions in the SWEEPING section. 5-- 46 800/810 MM337 (8- -97)
-
Page 241: Vacuum Fan
NOTE: Observe hydraulic cleanliness requirements when opening hydraulic lines. 9. Remove the two M10 hex screws, washers, and rubber isolators holding the vacuum fan housing to the machine frame. 5-- 47 800/810 MM337 (8- -97) - Page 242 Tighten the 0.375 in. nyloc nuts to 16 -- 22 Nm (12 -- 16 ft lb). NOTE: Make sure the motor and fittings are positioned in the same orientation as they were removed. 5-- 48 800/810 MM337 (8- -97)
- Page 243 Reinstall 0.31 in. hex screws and tighten to 22 -- 27 Nm (16 -- 20 ft lb). NOTE: Tennant part no. 57543 plastic shims must be used for proper fan to housing clearance. Remove the shims through the fan intake after tightening screws.
- Page 244 HYDRAULICS Fig. 1 - - Hydraulic Schematic 800 G/LPG/D (for machines below serial number 2300) 3 4 5 6 5-- 50 800 MM337 (6- -01)
- Page 245 HYDRAULICS Fig. 1 -- Hydraulic Schematic 800 G/LPG/D (for machines below serial number 2300) 3 4 5 6 5-- 51 800 MM337 (6- -01)
- Page 246 HYDRAULICS Fig. 2 - - Hydraulic Schematic 800 G/LPG/D (for machines serial number 2300 and above) 3 4 5 6 5-- 52 800 MM337 (6- -01)
- Page 247 HYDRAULICS Fig. 2 - - Hydraulic Schematic 800 G/LPG/D (for machines serial number 2300 and above) 3 4 5 6 09912 - - 800 5-- 53 800 MM337 (6- -01)
- Page 248 HYDRAULICS Fig. 3 - - Hydraulic Schematic 810 G/LPG/D (for machines below serial number 2300) 3 4 5 6 5-- 54 800 MM337 (6- -01)
- Page 249 HYDRAULICS Fig. 3 -- Hydraulic Schematic 810 G/LPG/D (for machines below serial number 2300) 3 4 5 6 5-- 55 800 MM337 (6- -01)
- Page 250 HYDRAULICS Fig. 4 - - Hydraulic Schematic 810 G/LPG/D (for machines serial number 2300 and above) 3 4 5 6 5-- 56 800 MM337 (6- -01)
- Page 251 HYDRAULICS Fig. 4 - - Hydraulic Schematic 810 G/LPG/D (for machines serial number 2300 and above) 3 4 5 6 09911 - - 810 5-- 57 800 MM337 (6- -01)
- Page 252 HYDRAULICS Fig. 5 - - Hydraulic Hose Group 800 G/LPG/D (for machines below serial number 2300) 5-- 58 800 MM337 (6- -01)
- Page 253 HYDRAULICS Fig. 6 - - Hydraulic Hose Group 810 G/LPG/D (for machines below serial number 2300) 5-- 59 800 MM337 (6- -01)
- Page 254 HYDRAULICS 5-- 60 800 MM337 (6- -01)
-
Page 255: Troubleshooting
HYDRAULICS TROUBLESHOOTING The troubleshooting charts that follow are organized so they lead you through the circuits. They include flow charts and instructions for you as to where to insert your test instruments. 5-- 61 800/810 MM337 (8- -97) -
Page 256: 800 Main - - Lo Spd And Vac Fan
HYDRAULICS 800 MAIN - - LO SPD AND VAC FAN 1000 psi 6,900 kPa VAC FAN DOOR PRESSURE ROLL RETURN SUCTION LIFT 2000 psi 13800 kPa S- - 14 1900 psi 13200 kPa 2200 psi 1150 psi 15000 kPa 8000 kPa... -
Page 257: 810 Rear Broom And Vac Fan
500 psi 3400 kPa 500 psi 3400 kPa REAR FRONT FRONT LIFT BROOM BROOM REAR LIFT R SIDE L SIDE BROOM BROOM RV 4 25 psi 170 kPa RV 8 3 psi 20 kPa 5-- 63 800/810 MM337 (8- -97) -
Page 258: 800 Main, S. Br. And Vac Fan
HYDRAULICS 800 MAIN, S. BR. AND VAC FAN 1000 psi 6900 kPa VAC FAN DOOR PRESSURE ROLL RETURN SUCTION LIFT 2000 psi 13800 kPa S- - 14 1900 psi 13200 kPa 1150 psi 7900 kPa 2200 psi 15000 kPa 800 psi... -
Page 259: 810 All Brooms And Vac Fan
8300 KPA 7900 kPa REAR FRONT FRONT LIFT BROOM BROOM REAR LIFT 650 psi 4500 kPa R SIDE L SIDE BROOM BROOM 250 psi 1700 kPa 25 psi 170 kPa 3 psi 20 kPa 5-- 65 800/810 MM337 (8- -97) -
Page 260: 800 / 810 Hopper Lower
HYDRAULICS 800 / 810 HOPPER LOWER DOOR ROLL LIFT LOWER 2000 psi 13800 kPA PRESSURE RETURN SUCTION RV 8 3 psi 20 kPa 25 psi 170 kPa 5-- 66 800/810 MM337 (8- -97) -
Page 261: 800 / 810 Hopper Lift
HYDRAULICS 800 / 810 HOPPER LIFT DOOR ROLL LIFT LIFT 2000 psi 13800 kPa PRESSURE RETURN SUCTION 3 psi 20 kPa 25 psi 170 kPa 5-- 67 800/810 MM337 (8- -97) -
Page 262: 800 / 810 Door Open
HYDRAULICS 800 / 810 DOOR OPEN DOOR OPEN 500 psi 3400 kPa ROLL LIFT PRESSURE RETURN SUCTION 2000 psi 13800 kPa 3 psi 20 kPa 25 psi 170 kPa RES1 5-- 68 800/810 MM337 (8- -97) -
Page 263: 800 / 810 Door Close
HYDRAULICS 800 / 810 DOOR CLOSE DOOR CLOSE ROLL LIFT PRESSURE RETURN SUCTION 2000 psi 13800 kPa 3 psi 20 kPa 25 psi 170 kPa RES1 5-- 69 800/810 MM337 (8- -97) -
Page 264: 800 / 810 Roll In
HYDRAULICS 800 / 810 ROLL IN DOOR ROLL 500 psi ROLL IN 3400 kPa LIFT 2000 psi 13800 kPa PRESSURE RETURN SUCTION 3 psi 20 pKA 25 psi 170 kPa 5-- 70 800/810 MM337 (8- -97) -
Page 265: 800 / 810 Roll Out
HYDRAULICS 800 / 810 ROLL OUT 200 psi DOOR ROLL ROLL OUT 500 psi 3400 kPa LIFT 2000 psi 13800 kPa PRESSURE RETURN SUCTION 3 psi 20 kPa 25 psi 170 kPa RES1 5-- 71 800/810 MM337 (8- -97) -
Page 266: 800 / 810 Right Turn
HYDRAULICS 800 / 810 RIGHT TURN STEERING SYSTEM 400 psi 2700 kPa 1300 psi 8900 kPa 900 psi 6200 kPa PRESSURE RETURN SUCTION STRN1 3 psi 20 pKa 25 psi 170 kPa RES1 5-- 72 800/810 MM337 (8- -97) -
Page 267: 800 / 810 Left Turn
HYDRAULICS 800 / 810 LEFT TURN STEERING SYSTEM 400 psi 2700 kPa 1300 psi 8900 kPa 900 psi 6200 kPa PRESSURE RETURN SUCTION 3 psi 20 kPa 25 psi 170 kPa RES1 5-- 73 800/810 MM337 (8- -97) -
Page 268: 800/810 Coolant Fan
HYDRAULICS 800/810 COOLANT FAN COOLANT FAN 500 psi 3400 kPa 1300 psi 8900 kPa PRESSURE RETURN SUCTION STRN1 25 psi 170 kPa HTX1 3 psi 20 kPa FLTR1 RES1 5-- 74 800/810 MM337 (8- -97) - Page 329 TO REPLACE ENGINE ALTERNATOR ....6--31 TO REPLACE ENGINE ALTERNATOR WITH AIR CONDITIONING ..6--32 6-- 1 800/810 MM337 (6- -01)
- Page 330 ENGINE- -G/LPG 6-- 2 800/810 MM337 (8- -97)
-
Page 331: Ford 2.3 Liter Engine
ENGINE- -G/LPG FORD 2.3 LITER ENGINE The Ford 2.3 liter engine in the early model 800/810 G/LP machines has a LSG--423 designation. Later model 800/810 G/LP machines use a Ford 2.3 liter engine with a LRG--423 designation. The easiest way to distinguish which engine your machine is equipped with is the LSG--423 has a distributor and distributor cap. -
Page 332: To Remove Engine
16. The engine can now be carefully lifted out. NOTE: Be sure to disconnect engine oil drain hose from oil pan before lifting engine completely out of machine. 6-- 4 800/810 MM337 (8- -97) -
Page 333: To Install Engine
Tighten to 52 -- 67 Nm (39 -- 50 ft lb). NOTE: Make sure the steel gasket is in place when installing exhaust pipe. Current Design (LRG) 7. Reconnect the fuel lines. 8. Reconnect the ground cable from the bellhousing to the machine frame. 6-- 5 800/810 MM337 (8- -97) - Page 334 15. Start the engine. Check for leaks on the fuel lines and hydraulic lines. 16. Reinstall the engine cover and side door. Lower the machine and operate, checking for proper operation. 6-- 6 800/810 MM337 (8- -97)
-
Page 335: To Change Engine Timing Belt
Once the tension is released, re--tighten the tensioner adjustment screw. NOTE: A special tension release tool is available from FORD. The part number is T74P- -6254- -A. A small pry bar may be used in place of this tool. 6-- 7 800/810 MM337 (8- -97) - Page 336 22. Reconnect the battery cables. Start the engine and check the timing. The timing should be set at 10 degrees BTDC with the engine at idle speed. 6-- 8 800/810 MM337 (8- -97)
-
Page 337: Lubrication
ATTENTION! Never pour cold water or cold antifreeze into the radiator of an overheated engine. Allow the engine to cool down to avoid cracking the cylinder head or block. Keep the engine running while adding water. 08432 6-- 9 800/810 MM337 (8- -97) -
Page 338: Engine Belt
0.39 in) for a new belt and 10 to 11 mm (0.39 to 0.43 in) for a used belt with a force of 10 kg (22 lb). Check and adjust the belt tension every 100 hours of operation. 08486 6-- 10 800/810 MM337 (8- -97) -
Page 339: Air Intake System
Service the air filter element only when the air filter indicator shows restriction in the air intake system. Do not remove the air filter element from the housing unless it is restricting air flow. 08455 6-- 11 800/810 MM337 (8- -97) -
Page 340: To Replace Air Filter Element
12. Install the dust cap with the arrows pointing up. Tighten the clamp ring to hold it in place. Check all intake hose connections for leaks or abrasions. 13. Reset the air filter restriction indicator. 14. Close the access doors. 02492 6-- 12 800/810 MM337 (8- -97) -
Page 341: Fuel System -- Gasoline
LSG engine linkage. Increase the engine speed by turning the screw clockwise. Decrease the engine speed by turning the screw counter-clockwise. Proper idle speed is 950 + 50 rpm with all accessories off. LRG engine 6-- 13 800/810 MM337 (8- -97) -
Page 342: Fuel System -- Lpg
Check for frosting. If frosting occurs on or near any LPG component, there is a possible LPG fuel leak or malfunctioning component. engine 6-- 14 800/810 MM337 (8- -97) - Page 343 Check routings of all LPG hoses. Keep them away from sharp edges, exhaust manifolds, or other hot surfaces. Check for signs of abrasion or deterioration. Replace worn or damaged hoses. engine 6-- 15 800/810 MM337 (8- -97)
-
Page 344: Lpg Fuel Tank
The valve must be closed except when in service. 03485 Tank Service Valve Coupling -- Check for proper functioning, thread condition, and damaged or missing washers or o-rings. 03485 6-- 16 800/810 MM337 (8- -97) - Page 345 Changing the tank is a chance for the machine operator to carefully check over the tank, fittings, and the fuel lines and fittings. If abnormal wear is detected, report the findings to the appropriate personnel. 6-- 17 800/810 MM337 (8- -97)
-
Page 346: To Change Lpg Fuel Tank
13. Open the tank service valve slowly and check for leaks. Close the service valve immediately if an LPG leak is found, and tell the appropriate personnel. 14. If no leaks are found, the engine is ready to start. 6-- 18 800/810 MM337 (8- -97) -
Page 347: Fuel Filter Lock
If any malfunction is found, completely disassemble the carburetor. Clean all the parts in alcohol. Inspect all the parts and replace where needed. Carefully reassemble the carburetor with the seal repair kit. LSG engine LRG engine 6-- 19 800/810 MM337 (8- -97) -
Page 348: Oil Pressure Switch
Plugged fuel filter Replace filter Kinked or restricted fuel line Straighten or replace fuel line Engine out of tune Tune-up engine Restricted air filter Clean or replace air filter element Vaporizer-regulator out of Adjust vaporizer-regulator adjustment 6-- 20 800/810 MM337 (8- -97) -
Page 349: Governor Actuator (Lsg Engine)
9. Snap the throttle rod onto the ball on the actuator arm. 10. Reconnect the two wires on top of the actuator. Reconnect the battery cables. 11. Start the machine and check the new actuator for proper operation. See TO ADJUST GOVERNOR instructions. 6-- 21 800/810 MM337 (8- -97) -
Page 350: To Adjust Governor (Lsg Engine)
(located on back of governor control box under hole plug) counterclockwise one-eighth of a turn. 6. Repeat this procedure until less than three engine surges occur. 7. Replace the hole plug if removed for adjustment. 6-- 22 800/810 MM337 (8- -97) -
Page 351: Governor Troubleshooting
The fuel system is at fault. The purpose of the governor is to open the carburetor and to bring the engine to set RPM’s depending on where you have the speed control switch set 6-- 23 800/810 MM337 (8- -97) - Page 352 With the engine running, disconnect Wire 86, purple wire, at the actuator. b. Connect a jumper wire from the battery terminal on the starter to the terminal where you removed Wire 86, purple wire, from the actuator. 6-- 24 800/810 MM337 (8- -97)
- Page 353 45_. After the adjustments are made and verified, reassemble the back plate and reseat the plate with a bead of RTV to keep dust and moisture out of the box. 6-- 25 800/810 MM337 (8- -97)
-
Page 354: Governor Actuator (Lrg Engine)
9. Loosely assemble the mount strap using the two cap screws. Use a small amount of loctite on the threads of cap screws. Do not tighten at this time. 6-- 26 800/810 MM337 (8- -97) - Page 355 14. Install the wire clamp to the side of the bracket making approximately a 1 inch loop between the actuator and bracket. Tighten the cap screw. 15. Start the machine and check for proper operation. 6-- 27 800/810 MM337 (8- -97)
-
Page 356: Ignition System
400 hours of operation. See Ford LRG--423, 2.3 Engine Service Manual at the end of this section. Clean the crankcase ventilation hoses, tubes, and fittings and replace the PCV valve every 400 hours of operation. 6-- 28 800/810 MM337 (8- -97) -
Page 357: Engine Electrical System
Tighten the M10 hex screw to 37 -- 48 Nm (26--34 ft lb). 8. Reinstall the air cleaner to the engine. 9. Reconnect the battery and start the machine, checking for proper starter operation. 6-- 29 800/810 MM337 (8- -97) -
Page 358: With Air Conditioning
37 -- 48 Nm (26--34 ft lb). 10. Reinstall the air conditioning condenser assembly and the plastic fan duct assembly to the machine side panel. 11. Reconnect the battery and start the machine, checking for proper starter operation. 6-- 30 800/810 MM337 (8- -97) -
Page 359: Alternator
18 -- 24 Nm (15--20 ft lb). Tighten the M10 hex screw to 37 -- 48 Nm (26--34 ft lb). 8. Reconnect the battery and start the machine, checking for proper alternator operation. LRG engine 6-- 31 800/810 MM337 (8- -97) -
Page 360: With Air Conditioning
18 -- 24 Nm (15--20 ft lb). Tighten the M10 hex screw to 37 -- 48 Nm (26--34 ft lb). 8. Reconnect the battery and start the machine, checking for proper alternator operation. 6-- 32 800/810 MM337 (8- -97) - Page 361 TO REPLACE ENGINE ALTERNATOR WITH AIR CONDITIONING ..7--20 ENGINE FAN BELT ....7--21 7-- 1 800/810 MM337 (6- -01)
- Page 362 ENGINE- -D- -PERKINS 200 SERIES 7-- 2 800/810 MM337 (8- -97)
-
Page 363: Perkins 200 Series Engine
To verify that your machine is equipped with a Perkins 200 Series engine----check the tag on the front right corner of the engine valve cover. The 200 Series engine will have the numbers 204--25. 7-- 3 800/810 MM337 (8- -97) -
Page 364: To Remove Engine
17. The engine can now be carefully lifted out. NOTE: Be sure to disconnect engine oil drain hose from oil pan before lifting engine completely out of machine. 7-- 4 800/810 MM337 (8- -97) -
Page 365: To Install Engine
NOTE: Make sure steel gasket is in place when installing exhaust pipe. 7. Reconnect the fuel lines. 8. Reconnect the throttle cable to the engine. 9. Reconnect the ground cable from the bellhousing to the machine frame. 7-- 5 800/810 MM337 (8- -97) - Page 366 Block machine up with jack stands 16. Start the engine and check for fuel or hydraulic oil leaks. 17. Reinstall the engine cover and side door. Lower the machine and operate, checking for proper operation. 7-- 6 800/810 MM337 (8- -97)
-
Page 367: Lubrication
ATTENTION! Never pour cold water or cold antifreeze into the radiator of an overheated 08432 engine. Allow the engine to cool down to avoid cracking the cylinder head or block. Keep the engine running while adding water. 7-- 7 800/810 MM337 (8- -97) - Page 368 FOR SAFETY: When Servicing Machine, Wear Eye And Ear Protection When Using Pressurized Air Or Water. 08454 Flush the radiator and the cooling system every 400 hours of operation, using a dependable cleaning compound. 7-- 8 800/810 MM337 (8- -97)
-
Page 369: Air Intake System
Service the air filter element only when the air filter indicator shows restriction in the air intake 08455 system. Do not remove the air filter element unless it is restricting air flow. 7-- 9 800/810 MM337 (8- -97) -
Page 370: To Replace Air Filter Element
12. Install the dust cap with the arrows pointing up. Tighten the clamp ring to hold it in place. Check all intake hose connections for leaks or abrasion. 13. Reset the air filter restriction indicator. 02492 14. Close the access doors. 7-- 10 800/810 MM337 (8- -97) -
Page 371: Fuel System (Early Machines)
3. Remove the filter cartridge from the filter head. 4. Lubricate the o-ring of the new filter cartridge and spin it onto the filter head. 5. Bleed the fuel lines of air as described in TO PRIME FUEL SYSTEM. 7-- 11 800/810 MM337 (8- -97) -
Page 372: (Early Machines)
The in--line fuel pump is used to pull fuel from the tank, through the fuel/water separator and into the engine mounted fuel filter. The in--line fuel pump is electric and runs off the 12VDC battery of the machine. 7-- 12 800/810 MM337 (8- -97) -
Page 373: Fuel System (Later Machines)
3. Remove the filter cartridge from the filter head. 4. Lubricate the o-ring of the new filter cartridge and spin it onto the filter head. 5. Bleed the fuel lines of air as described in TO PRIME FUEL SYSTEM. 7-- 13 800/810 MM337 (8- -97) -
Page 374: Fuel Lines (Later Machines)
The in--line fuel pump is used to pull fuel from the tank, through the in--line filter, and into the fuel/water separator. The in--line fuel pump is electric and runs off the 12VDC battery of the machine. 7-- 14 800/810 MM337 (8- -97) -
Page 375: Engine Mounted Fuel Filter
5. Discard the old filter cartridge. 6. Lubricate the o-ring and spin the new filter cartridge onto the filter base. 7. Bleed the fuel lines of air as described in TO PRIME FUEL SYSTEM. 7-- 15 800/810 MM337 (8- -97) -
Page 376: Priming Fuel System
5. Start the engine, operate it for one minute, then stop it; or operate the starter motor in ten-second intervals until a steady stream of fuel flows from the vent. 6. Close the air vent. 7. Close the access doors. 7-- 16 800/810 MM337 (8- -97) -
Page 377: Engine Electrical System
7. Reverse the order of these steps to reinstall a new or rebuilt starter. Tighten the M10 hex screw to 37 -- 48 Nm (26--34 ft lb). 8. Reconnect the battery and start the machine, checking for proper starter operation. 7-- 17 800/810 MM337 (8- -97) -
Page 378: With Air Conditioning
37 -- 48 Nm (26--34 ft lb). 9. Reinstall the air conditioning condenser assembly and the plastic fan duct assembly to the machine side panel. 10. Reconnect the battery and start the machine, checking for proper starter operation. 7-- 18 800/810 MM337 (8- -97) -
Page 379: To Replace Engine Alternator
18 -- 24 Nm (15--20 ft lb). Tighten the M10 hex screw to 37 -- 48 Nm (26--34 ft lb). 8. Reconnect the battery and start the machine, checking for proper alternator operation. 7-- 19 800/810 MM337 (8- -97) -
Page 380: With Air Conditioning
7. Loosen the M10 hex screw and nyloc nut holding the alternator to the bottom mounting bracket. Pivot the alternator in and remove the V--belt. WARNING: Always disconnect battery cables from machine before working on electrical components. 7-- 20 800/810 MM337 (8- -97) -
Page 381: Engine Fan Belt
Proper belt tension is 13 mm (0.50 in) from a force of 4 to 5 kg (8 to 10 lb) applied at the mid-point of the longest span. Check and adjust the belt tension every 100 hours of operation. 08935 7-- 21 800/810 MM337 (8- -97) - Page 382 ENGINE- -D- -PERKINS 200 SERIES 7-- 22 800/810 MM337 (8- -97)
- Page 383 . . . 8--14 TO REPLACE ENGINE ALTERNATOR ....8--15 ENGINE ALTERNATOR BELT ..8--16 8-- 1 800/810 MM337 (6- -01)
- Page 384 ENGINE- -D- -PERKINS 700 SERIES 8-- 2 800/810 MM337 (8- -97)
-
Page 385: Perkins 700 Series Engine
ENGINE- -D- -PERKINS 700 SERIES PERKINS 700 SERIES ENGINE To verify that your machine is equipped with a Perkins 700 Series engine----check the tag on the top of the engine valve cover. 8-- 3 800/810 MM337 (8- -97) -
Page 386: To Remove Engine
16. The engine can now be carefully lifted out. NOTE: Be sure to disconnect engine oil drain hose from oil pan before lifting engine completely out of machine. 8-- 4 800/810 MM337 (8- -97) -
Page 387: To Install Engine
52 -- 67 Nm (39 -- 50 ft lb). NOTE: Make sure steel gasket is in place when installing exhaust pipe. 7. Reconnect the fuel lines. 8. Reconnect the ground cable from the bellhousing to the machine frame. 8-- 5 800/810 MM337 (8- -97) - Page 388 14. Start the engine and check for fuel or hydraulic oil leaks. 15. Reinstall the engine covers and side door. 16. Reinstall the air cleaner assembly. 17. Lower the machine and operate. Check for proper operation. 8-- 6 800/810 MM337 (8- -97)
-
Page 389: Lubrication
ATTENTION! Never pour cold water or cold antifreeze into the radiator of an overheated engine. Allow the engine to cool down to avoid cracking the cylinder head or block. Keep the engine running while adding water. 8-- 7 800/810 MM337 (8- -97) - Page 390 FOR SAFETY: When Servicing Machine, Wear Eye And Ear Protection When Using Pressurized Air Or Water. Flush the radiator and the cooling system every 400 hours of operation, using a dependable cleaning compound. 8-- 8 800/810 MM337 (8- -97)
-
Page 391: Air Intake System
Service the air filter element only when the air filter indicator shows restriction in the air intake system. Do not remove the air filter element unless it is restricting air flow. 8-- 9 800/810 MM337 (8- -97) -
Page 392: To Replace Air Filter Element
12. Install the dust cap with the arrows pointing up. Tighten the clamp ring to hold it in place. Check all intake hose connections for leaks or abrasion. 13. Reset the air filter restriction indicator. 8-- 10 800/810 MM337 (8- -97) -
Page 393: Fuel System -- Diesel
4. Remove the filter cartridge from the filter head. 5. Lubricate the o-ring of the new filter cartridge and spin it onto the filter head. 6. Bleed the fuel lines of air as described in TO PRIME FUEL SYSTEM. 8-- 11 800/810 MM337 (8- -97) -
Page 394: In--Line Filter
ENGINE- -D- -PERKINS 700 SERIES IN- -LINE FILTER The fuel system on the 800/810 diesel includes an in--line fuel filter. This filter is ahead of the fuel pump and is used to filter any impurities before they reach the pump. -
Page 395: Priming Fuel System
5. Start the engine, operate it for one minute, then stop it; or operate the starter motor in ten-second intervals until a steady stream of fuel flows from the vent. 6. Close the air vent. 7. Close the access doors. 8-- 13 800/810 MM337 (8- -97) -
Page 396: Engine Electrical System
Tighten the M10 hex screws to 37 -- 48 Nm (26--34 ft lb). 7. Reconnect the wires to the new starter. See schematic in the ELECTRICAL section. 8. Reconnect the battery and start the machine. Check for proper starter operation. 8-- 14 800/810 MM337 (8- -97) -
Page 397: To Replace Engine Alternator
9. Check the V--belt for proper tension. See ENGINE ALTERNATOR BELT instructions. 10. Reconnect the wires to the new alternator. See schematic in the ELECTRICAL section. 11. Reconnect the battery and start the machine. Check for proper alternator operation. 8-- 15 800/810 MM337 (8- -97) -
Page 398: Engine Alternator Belt
Proper belt tension is 13 mm (0.50 in) from a force of 4 to 5 kg (8 to 10 lb) applied at the mid-point of the longest span. Check and adjust the belt tension every 100 hours of operation. 8-- 16 800/810 MM337 (8- -97) - Page 399 We Need Your Help... As part of Tennant’s Zero Defects Program, we want to know about errors you have found or suggestions you may have regarding our machine manuals. If you find an error or have a suggestion, please complete this postage-paid form and mail it to us.
- Page 401 We Need Your Help... As part of Tennant’s Zero Defects Program, we want to know about errors you have found or suggestions you may have regarding our machine manuals. If you find an error or have a suggestion, please complete this postage-paid form and mail it to us.
Need help?
Do you have a question about the 800 and is the answer not in the manual?
Questions and answers