Table of Contents
Advertisement
Advertisement
Table of Contents

Related Manuals for Ivoclar digital PrograMill Base


Summary of Contents for Ivoclar digital PrograMill Base
- Page 1 PrograMill Base Operating Instructions ivoclardigital.com...
-
Page 3: Table Of Contents
Transportation of the PrograMill Base Unpacking the PrograMill Base Checking delivery contents and condition Initial Operation Setting up the PrograMill Base Placing the PrograMill milling machine onto the PrograMill Base Setting up the PrograMill accessories Cleaning Technical Data Measurements, weight... - Page 4 Table of Contents Appendix Delivery form Ordering spare parts...
-
Page 5: About This Document
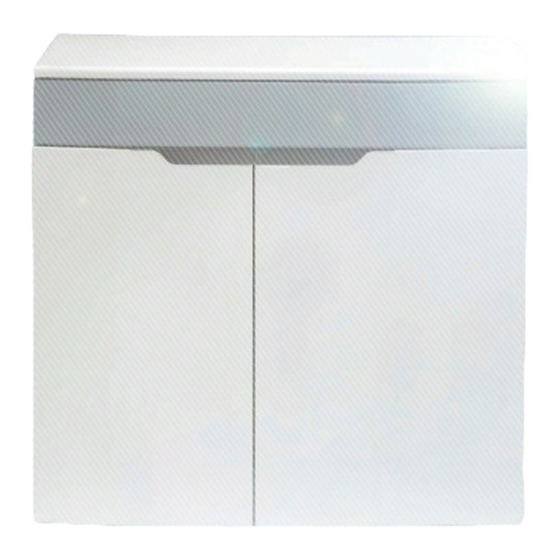
About this Document About this Document These Operating Instructions will familiarize you with the PrograMill Base features. The PrograMill Base will be referred to as “base cabinet” from now on. This product is a cabinet for accessories, tools and discs / blocks from the PrograMill milling systems. -
Page 6: Signs And Symbols
Consequences of non-compliance with instructions. Action in order to avoid danger. Hazard example: WARNING! Risk of injury from the PrograMill Base tipping over or falling down. Crushing extremities. Damage to the PrograMill Base. Only use suitable means of transportation (e.g. fork lift trucks, capacity > 500 kg). -
Page 7: Revision And Validity
About this Document 1.2.2 Signs and symbols Symbol Significance Additional information, e.g. for better understanding, for simplifying workflows or for further information Prerequisite which must be followed before the subsequent actions can be performed Individual steps which you must perform 1., 2. -
Page 8: Safety
Intended use PrograMill Base is designed for use in the dental technical field as a place to stand the PrograMill PM3, PM5 or PM7 milling systems and store accessories, cleaning materials, tools and discs / blocks. -
Page 9: Hazardous Areas On The Programill Base
Safety Hazardous areas on the PrograMill Base Hazardous areas Safety measures Protective effect Pull-out shelf Lock on the handles Secures against unintentional movement when doors are opened or work is carried out on the PrograMill milling machine or PrograMill Base. -
Page 10: Safety Instructions For Individual Operating Phases
Safety Safety instructions for individual operating phases 2.3.1 Transportation Only transport the PrograMill Base according to the description in these Operating Instructions (“Transportation and Assembly”, page 17). 2.3.2 Use Keep unauthorized persons, such as patients, children and animals, away from the product. -
Page 11: Design And Function
Design and Function Design and Function Complete system... - Page 12 Design and Function Description Function PrograMill Base cabinet • Installation site for the milling machine • Storage of accessories, tools and discs / blocks CNC milling machine PrograMill PM7 Milling of discs / blocks (exemplary for PrograMill series including PM3, PM5, PM7)
-
Page 13: Overview Of Programill Base
Design and Function Overview of PrograMill Base The PrograMill Base has been specifically designed to meet the needs of the PrograMill systems. It has sufficient load-bearing strength to support the PrograMill milling machines and their accessories and is designed to store discs / blocks and tools. - Page 14 Storage space Position for the milling machine Indentations for device feet Secure positioning of the milling machine on the PrograMill Base Tube and cable access Cable and tube guides Handle Pulling the shelf out and pushing it back in...
-
Page 15: Suggestion For The Placement Of Items Within The Drawer
Design and Function Suggestion for the placement of items within the drawer You can store the accessories for your PrograMill system in the drawer of the PrograMill Base cabinet as follows: The following picture shows an assembly example for the components supplied with the PrograMill PM7 milling machine. - Page 16 Design and Function Description PrograMill disc holder for PM3, PM5, PM7 Torque wrench • 0.45 Nm for all zirconium oxide and wax materials • 2.8 Nm for all PMMA materials and non-precious metals Disc Tool disc with tools for the milling machine without interchangeable tool magazine (optional, estimated to be available from Q4/2018) PrograMill tool pliers...
-
Page 17: Transportation And Assembly
Instructor as part of your PrograMill System Instruction. Do not perform the tasks described below alone! Choosing the location site Before setting up the PrograMill Base, select a suitable location site for your device. Make sure the following requirements are complied with: ... -
Page 18: Unpacking The Programill Base
Move the product in its original packaging by means of a fork lift to the defined location site. Unpacking the PrograMill Base WARNING! Risk of injury from heavy lifting, falling over or dropping the PrograMill Base. Crushing of extremities. Injuries to the back due to overloading. -
Page 19: Initial Operation
Then screw the standing feet back in so that the weight of the PrograMill Base is no longer supported by the feet, but by the rolling wheels. The PrograMill Base can now be moved using the wheels. -
Page 20: Placing The Programill Milling Machine Onto The Programill Base
1. Set up the PrograMill Base in the chosen location site. 2. Adjust the height of the feet using the Allen key according to the above specifications. 3. Use the spirit level to check whether PrograMill Base is perfectly level. 4. Loosen the Allen screws (1) and remove the crossbeam (2). - Page 21 Pull-out shelf from the PrograMill Base dismantled (“Unpacking the PrograMill Base”, page 18) Cross beam from the PrograMill Base dismantled (“Setting up the PrograMill Base”, page 19) 1. Screw out the feet of the PrograMill milling machine as far as possible with an open-ended spanner.
-
Page 22: Setting Up The Programill Accessories
PrograMill Base cabinet. 6. Lower the PrograMill milling machine onto the PrograMill Base. 7. Adjust the feet of the PrograMill milling machine to the required height using an open- ended spanner and use a spirit level to ensure that the device is completely level. - Page 23 Initial Operation 5.3.1 Placing the pull-out shelf into the PrograMill Base 1. To place the pull-out shelf into the interior of PrograMill Base, tilt the shelf slightly forward and lift the rear rollers over the crossbeam. 2. Pull the shelf out of the PrograMill Base so that there is sufficient space to insert the PrograMill Suction Unit and Tank.
- Page 24 Further information on the PrograMill Suction Unit, the PrograMill milling machine and the PrograMill Tank connections can be found in the PrograMill Suction Unit and the PrograMill milling machine Operating Instructions (“Supporting documents”, page 7). In the following, the PrograMill Base is shown without the PrograMill milling machine.
- Page 25 (4). 5. Connect the cables and tubes to the milling machine. 6. Push the pull-out shelf by the handles into the PrograMill Base and fasten the locks. 7. If necessary, place other PrograMill accessories into the PrograMill Base cabinet...
-
Page 26: Cleaning
Cleaning Cleaning Perform monthly visual inspection. If necessary remove dust, milling residues etc. with the help of the suction system, a commercial vacuum cleaner or a cloth moistened with tap water (see the PrograMill milling machine Operating Instructions, “Supporting documents”, page 7). -
Page 27: Technical Data
Technical Data Technical Data Measurements, weight Characteristics Value Measurements: Depth 750 mm 980 mm Width Height 930 mm Weight: Weight of the base cabinet Max. 120 kg Weight of the base cabinet incl. Max. 185 kg PrograMill Suction Unit and PrograMill Tank Ambient conditions Please observe the environmental conditions of the PrograMill milling machines and the accessories used. - Page 28 Appendix Appendix Delivery form Item description Number Item number PrograMill Base (without device) 689971 PrograMill Base inlay 689972 Foam insert for tool magazine PrograMill PM7 Energy chain Standard rolling wheels, white Allen screws Ordering spare parts 1. When ordering spare parts, keep the following information ready: •...
- Page 32 Ivoclar Vivadent – worldwide Ivoclar Vivadent AG Ivoclar Vivadent AB Ivoclar Vivadent SAS Ivoclar Vivadent S.A. de C.V. Bendererstrasse 2 B.P. 118 Calzada de Tlalpan 564, Dalvägen 14 9494 Schaan 74410 Saint-Jorioz Col Moderna, Del Benito Juárez 169 56 Solna Liechtenstein France 03810 México, D.F.
Need help?
Do you have a question about the PrograMill Base and is the answer not in the manual?
Questions and answers