Advertisement
Table of Contents
- 1 Safety Instruction
- 2 Outside Size Picture
- 3 Main Function
- 4 DMX Control Function
- 5 Dimmer Mode
- 6 DMX Address Setting
- 7 Static Setting
- 8 Color Cast Calibration Setting
- 9 Channel Mode Setting
- 10 Dimming Mode Setting
- 11 Check the Lighting Information
- 12 Lighting Setting Parameter Reset
- Download this manual
Advertisement
Table of Contents

Related Manuals for Expolite Tour-BAR 64


Summary of Contents for Expolite Tour-BAR 64
- Page 1 Tour-BAR 64 led22115 PRE-MANUAL Änderungen sind ohne Ankündigung möglich. RAWMNLeng V201705-001 Changes are possible without prior notice.
-
Page 2: Safety Instruction
Ø Safety instruction ? Make sure the power supply voltage are consistent with this lights,Ensure the use of voltage is in the range of the request technical parameter. ?Before the installation, please check the light’s fasteners and mechanical structure have been received in good condition and appear no damage. -
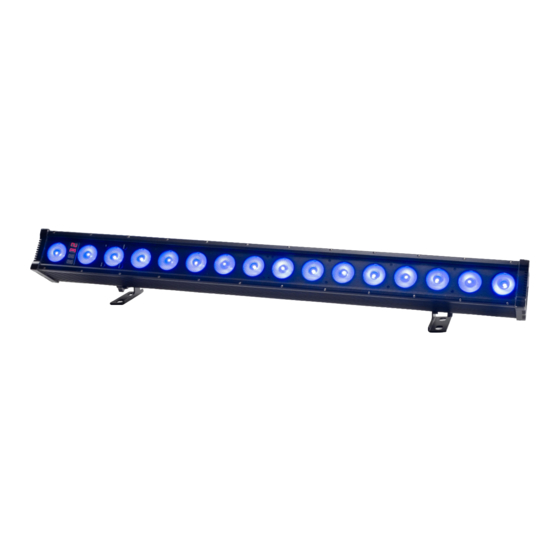
Page 3: Main Function
2 Main Function Ø Input voltage: AC 100V-264V/47-63HZ Ø Consume:200W Ø Lamp Type:15W LED 4-in-1 R、G、B、W(16PCS) Ø Control Signal:DMX512 Ø Control mode:stand alone/ Master/Slaver Ø Channel:72CH,64CH,48CH,40CH,24CH,16CH,10CH,5CH,4CH,3CH Ø Function Effect: dimmer, strobe, gradual change, rainbow, auto run, self-program running Ø Built-in temperature control measurement function, when LED work overheated, intelligent reduce LED output power, current power output and can be viewed. -
Page 4: Dmx Control Function
3 DMX Control Function Ø DMX Channels Illustrations: The same numbers represent the same group. 72CH CHANNEL NAME CHANNEL NAME... - Page 5 STROBE EFFECT AUTO SPEED VIRTUAL COLOR WHEEL DIMMER MODE ID FUNCTION ID ADDRESS 64CH CHANNEL NAME CHANNEL NAME...
- Page 6 48CH CHANNEL NAME CHANNEL...
- Page 7 40CH CHANNEL NAME CHANNEL NAME STROBE EFFECT AUTO SPEED VIRTUAL COLOR WHEEL DIMMER MODE ID FUNCTION ID ADDRESS 24CH 16CH CHANNEL NAME CHANNEL NAME DIM ALL DIM ALL...
- Page 8 STROBE EFFECT AUTO SPEED VIRTUAL COLOR WHEEL DIMMER MODE ID FUNCTION ID ADDRESS STROBE EFFECT AUTO SPEED VIRTUAL COLOR WHEEL DIMMER MODE ID FUNCTION ID ADDRESS 10CH CHANNEL NAME CHANNEL NAME CHANNEL NAME DIM ALL DIM ALL STROBE EFFECT AUTO SPEED VIRTUAL COLOR WHEEL DIMMER MODE...
- Page 9 NAME VALUE FUNCTION DIM ALL 0-255 DARK->LIGHT 0-255 DARK->LIGHT GREEN 0-255 DARK->LIGHT BLUE 0-255 DARK->LIGHT AMBER 0-255 DARK->LIGHT WHITE DARK->LIGHT STROBE No strobe 6-20 Not synchronous strobe(slow to fast) 21-60 Synchronous strobe(slow to fast) 61-100 Electronic Sine wave(slow to fast) 101-140 Random Strobe(slow to fast) 141-180...
- Page 10 101-105 AUTO 10 106-110 AUTO 11 111-115 AUTO 12 116-120 AUTO 13 121-125 AUTO 14 126-130 AUTO 15 131-135 AUTO 16 136-140 AUTO 17 141-145 AUTO 18 146-150 AUTO 19 151-155 AUTO 20 156-160 AUTO 21 161-165 AUTO 22 166-170 AUTO 23 171-175 AUTO 24...
-
Page 11: Dimmer Mode
Green (Red=0, Green=full, Blue =0, White=0)(step) Red->up, Green=full, Blue=0, 92-130 White=0(proportional) Yellow (Red=full, Green=full, Blue=0, White=0)(step) Red=full, Green->down, Blue=0, 132-170 White=0(proportional) Red(Red=full, Green=0, Blue=0, White=0)(step) Red=full, Green=0, Blue->up, 172-210 White=0(proportional) Magenta (Red=full, Green=0, Blue=full, White=0)(step) Red -> down, Green=0, Blue=full, 212-250 White=0(proportional) Blue (Red=0, Green=0, Blue=full,... - Page 12 AUTO Details R,G,B,W,RG,RB,GB,RGBW R?,R?,G?,G?,B?,B?,W?,W? R?G?,R?G?,R?B?,R?B?,B?G?,B?G? R?G?B?W?,R?G?B?W? B,BG?,BG,B?G,G,GR?,GR,G?R,R,RB?,RB,R?B(Rainbow effect) One piece running from 1 to 16 then change color continue RGBY step running 4Y running with fade 4P step running 4R running on G 4G running on B 4Y running on P 4R step running 4C step running 6Y running with fade...
- Page 13 Each piece rainbow effect 4 Display Operation instruction Ø MENU : access the menu or return to a previous menu option Ø ENTER: select the current menu option Ø UP: menu selection or parameter increments Ø DOWN: menu selection or parameters decrease Menu Tree: LEVEL1 LEVEL2...
- Page 14 0-255 0-255 0-255 YES/NO CHMD(Channel 72CH mode) 64CH 48CH 40CH 24CH 16CH 10CH LIN(linear)/SQR(square law)/ISQR(inverse square DIM(Dimming law)/SCUR(S-curve)/LIN.(linear mode) smooth)/SQR.(square law smooth)/ISQR.(inverse square law smooth)/SCUR.(S-curve smooth) DISY(Display set) ON(Permanent on) 2MIN (2 minutes off) LOCK(Key 2 YES/NO minutes lock) CTST(Custom color CT01 0-255 set)
-
Page 15: Dmx Address Setting
0-255 0-255 0-255 0-255 0-255 SHUT 0-255 NONE,AT0 AUTO 1-AT33 ATSP 0-255(S) TIME 0-255(S) WAIT 0-25.5(S) YES/NO SC20(Scene 20) CHS3(Chase 3) SOFT(Software INFO(Information) Vx.x version) TEM(Temperature) xxxC POW(Power xxx% reduction) LOAD(Load) ST L(Setting load) YES/NO PR L(Program load) YES/NO SEND(Send) YES/NO ID(ID Address) 0-255... -
Page 16: Color Cast Calibration Setting
3) Press the【UP/DOWN】button to set up the【0-255】numerical value. 4) Press the【ENTER】button to escape and save. 7 COLOR CAST CALIBRATION SETTING 1) Press the【ENTER】button in 【CAL】menu, then enter to the color cast calibration setting. 2) Press the【UP/DOWN】button to select 【RED】,【GREEN】,【BLUE】,【WHITE】 3) Press the【UP/DOWN】button to set up the【0-255】numerical value. 4) On the【USE】interface, pressing【YES】button means valid,【NO】means invalid. - Page 17 10 DISPLAY SETTING 1) Press the【ENTER】button in【DISY】menu, then enter to the display setting. 2) Press the【UP/DOWN】button to select【ON】,【2 MINITES OFF】 3) Press the【ENTER】button to escape and save. 11 AUTO LOCK KEY SETTING 1) Press the【ENTER】button in【LOCK】menu, then enter auto lock key setting. 2) Press the【UP/DOWN】button to select【YES】,【NO】...
-
Page 18: Check The Lighting Information
2) Press the【UP/DOWN】button to select【CHASE01】…【CHASE03】 3) Press the【ENTER】button for confirmation and enter to the next menu. 4) Press the【UP/DOWN】button to select【SCENE01】…【SCENE20】 5) Press the【ENTER】button for confirmation and enter to the next menu. 6) Then press the【UP/DOWN】button to select【RED1】…【SHUT】,【TIME】,【WAIT】,【USE】 7) Press the【UP/DOWN】button to set up the parameter which are needed. 8) Press the【ENTER】button t o escape and save. - Page 19 CABLE 1) Press the【ENTER】button in【SEND】menu, then enter to sending parameter to other lightings. 2) Press the【UP/DOWN】button to select【YES】. 3) Press the【ENTER】button to confirm sending. Illustrations: 1)Please disconnect the connection of projector and DMX console before sending the parameter. 2)The information of【ADDR】、【CAL】、【ID】can’t be sent, can’t be downloaded each other. 3)There will be an automatic reset of the other projectors after receiving parameter correctly.
Need help?
Do you have a question about the Tour-BAR 64 and is the answer not in the manual?
Questions and answers