Table of Contents
Advertisement
Available languages
Available languages
Quick Links
Bedienungsanleitung
Eigenschaften
Bedienelemente
Steuerung
Bedienungsanleitung bitte aufbewahren
Keep this Manual for later queries
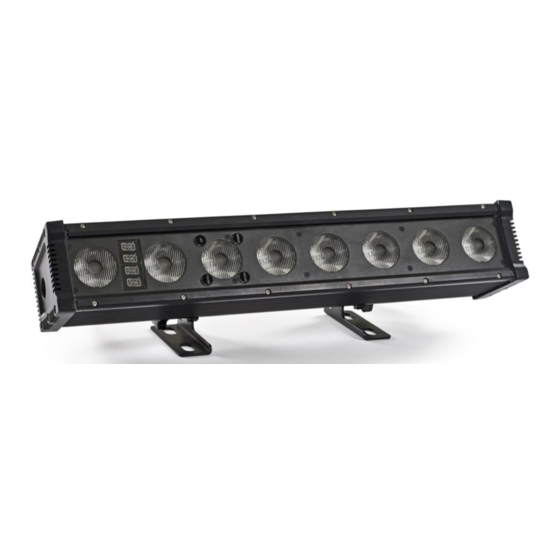
TourBar 32PIX
User Manual
Art.Nr.: led21165
Specifications
Änderungen sind ohne Ankündigung möglich.
Changes are possible without prior notice.
Rev. 2019-34-41
Menu
Control
Advertisement
Table of Contents

Related Manuals for Expolite TourBAR 32PIX


Summary of Contents for Expolite TourBAR 32PIX
- Page 1 TourBar 32PIX Bedienungsanleitung User Manual Art.Nr.: led21165 Specifications Eigenschaften Menu Bedienelemente Control Steuerung Bedienungsanleitung bitte aufbewahren Änderungen sind ohne Ankündigung möglich. Changes are possible without prior notice. Keep this Manual for later queries Rev. 2019-34-41...
- Page 2 Die beiliegenden Bedienhinweise für Expolite Geräte sind Bestandteil dieser Bedienungs- anleitung. Lesen Sie diese sorgfältig, bevor Sie das Gerät in Betrieb nehmen. The enclosed General Information for Expolite Units are part of these user manual. Read them carefully before operating the device. FOCON SHOWTECHNIC...
-
Page 3: Table Of Contents
Inhalt - Content Inhalt - Content Seite / Page Lieferumfang D-04 Technische Daten D-05 Abmessungen D-06 Installation D-07 Bedienung D-08 Steuerung mit DMX512 D-15 Delivery E-28 Product Information E-29 Dimensions E-30 Installation E-31 Operation E-32 Using DMX512 Controller E-39... - Page 4 Lieferumfang - Expolite TourBAR 32PIX - Anschlusskabel für Spannungsversorgung - Bedienhinweise für Expolite Geräte - Bedienungsanleitung Expolite Geräte werden vor dem Versand sorgfältig geprüft. Sollte der Lieferumfang dennoch nicht vollständig sein, wenden Sie sich bitte umgehend an Ihren Vertriebspartner. D-04...
-
Page 5: Technische Daten
8 x 15W 4in1 RGBW** Abstrahlwinkel 10 x 40° Steuerung Stand-Alone / Master-Slave / DMX512 DMX-Kanäle 3 - 40 (3/4/5/10/16/24/24/32/40) * Siehe Allgemeine Bedienhinweise für Expolite Geräte - Hinweise zu Kondenswasserbildung im Geräteinneren ** Toleranzbereich der Farbtemperatur entsprechend Herstellerangabe +/- 10% D-05... -
Page 6: Abmessungen
Abmessungen D-06... -
Page 7: Installation
Installation Montage Hängend Das Gerät kann am Haltebügel hängend montiert werden. Geräte müssen entsprechend der jeweils gültigen Vorschriften sicher montiert und mit einer zweiten Sicherung gegen herabfallen versehen werden. Stehend Das Gerät kann stehend auf den montierten Standfüßen betrieben werden. Eine sichere und ausreichend rutschhemmende Standfläche ist sicherzustellen! HINWEIS Das LED Modul kann in jeder beliebigen Lage betrieben werden. -
Page 8: Bedienung
Bedienung Bedienelemente am Gerät MENU - Taste: Eine Menüebene aufwärts ENTER-Taste: In gewähltes Menü springen; Eingabe bestätigen Aufwärts blättern; Wert erhöhen UP-Taste: DOWN-Taste Abwärts blättern; Wert verringern MENU ENTER DOWN Menüstruktur MENU PERSON ADDR 001 - 512 HSIC STAT 0 - 255 PERSON 0 - 255 HSIC G1... - Page 9 MENU AUTO HSIC AT01 PERSON HSIC AT33 HSIC ATSP 0 - 255 HSIC CHS1 HSIC CHS2 HSIC CHS3 SC01 PERSON PROG HSIC CHS1 0 - 255 0 - 255 0 - 255 HSIC CHS3 SC20 0 - 255 0 - 255 0 - 255 0 - 255 0 - 255...
- Page 10 DMX-Adresse einstellen MENU ADDR 001 - 512 HSIC PERSON Im Menü wird im Punkt ADDR die DMX-Startadresse des Gerätes eingestellt. Diese bleibt auch bei dem Wechsel der Personality erhalten. DMX-Kanalbelegung einstellen MENU 40CH PERSON HSIC CHMD 32CH 24CH-1 24CH-2 16CH 10CH Im Menü...
- Page 11 Kalibrierung MENU HSIC (0 - 255) PERSON GREEN (0 - 255) (0 - 255) BLUE WHITE (0 - 255) Im Menüpunkt SET wird unter CAL eine benutzerdefinierte Farbkalibrierung gespeichert. Diese begrenzt die maximale Helligkeit der Farbkanäle bei dem DMX-Wert „255". Im Untermenü USE können diese Einstellungen aktiviert (YES) oder deaktiviert werden (NO).
- Page 12 Aktivieren des Passwortschutzes MENU PERSON HSIC LOCK Im Menü LOCK wird festgelegt, ob das Display nach jeder Benutzung gesperrt wird, so dass ein Passwort eingegeben werden muss, um es freizuschalten (ON), oder ob der Zugriff gundsätzlich frei ist (OFF). PASSWORD: UP - DOWN - UP - DOWN - ENTER Benutzerdefinierte statische Szenen MENU (0 - 255)
- Page 13 Benutzerprogramme editieren MENU PERSON PROG HSIC CHS1 SC01 0 - 255 0 - 255 0 - 255 HSIC CHS3 SC20 0 - 255 0 - 255 0 - 255 0 - 255 0 - 255 SHUT 0 - 255 AUTO NONE AT01 AT33...
- Page 14 Zurücksetzen auf Werkseinstellungen MENU SETTING LOAD SETTING LOAD SETTING LOAD ST L WAIT WAIT HSIC LOAD SETTING LOAD SETTING LOAD SETTING LOAD PR L WAIT WAIT Im Menü LOAD, Untermenü ST L kann das Gerät auf die Werkeinstellungen zurückgesetzt werden. Davon ausgenommen sind die Werte ADDR, CTST und PROG.
-
Page 15: Steuerung Mit Dmx512
Steuerung mit DMX512 DMX-Kanalbelegung Dieses Gerät verfügt über verschiedene DMX-Personalities. Bei diesen werden unterschiedlich viele DMX-Kanäle belegt und die Reaktion des Gerätes unterscheidet sich entsprechend. Es sind 9 DMX-Personalities (3-/4-/5-/10-/16-/24-/24-/32-/40-Kanäle) wählbar. Durch Änderungen in der Gerätesoftware kann es zu weiteren oder geänderten Funktionen kommen. Auf der Website steht das aktuellste Dokument „DMX-Channels“... - Page 16 10CH 0-255 Dimmer 0-255 0-255 Green 0-255 Blue 0-255 White Strobe No Function 6-20 Asynchronous Strobe (Slow to fast) 21-60 Synchronous Strobe (Slow to fast) 61-100 Eletronic Sine Wave (Slow to fast) 101-140 Random Strobe (Slow to fast) 141-180 Opening Pulse (Slow to fast) 181-220 Closing Pulse (Slow to fast) 221-255...
- Page 17 151-155 AT20 156-160 AT21 161-165 AT22 166-170 AT23 171-175 AT24 176-180 AT25 181-185 AT26 186-190 AT27 191-195 AT28 196-200 AT29 201-205 AT30 206-210 AT31 211-215 AT32 216-220 AT33 221-225 CHS1 226-230 CHS2 231-235 CHS3 236-255 Reserved 0-255 Auto Speed Virtual Colour Wheel 0-10 No Function Blue...
- Page 18 16CH 0-255 Dimmer 0-255 Red1 0-255 Green1 0-255 Blue1 0-255 White1 0-255 Red2 0-255 Green2 0-255 Blue2 0-255 White2 Strobe No Function 6-20 Asynchronous Strobe (Slow to fast) 21-60 Synchronous Strobe (Slow to fast) 61-100 Eletronic Sine Wave (Slow to fast) 101-140 Random Strobe (Slow to fast) 141-180...
- Page 19 131-135 AT16 136-140 AT17 141-145 AT18 146-150 AT19 151-155 AT20 156-160 AT21 161-165 AT22 166-170 AT23 171-175 AT24 176-180 AT25 181-185 AT26 186-190 AT27 191-195 AT28 196-200 AT29 201-205 AT30 206-210 AT31 211-215 AT32 216-220 AT33 221-225 CHS1 226-230 CHS2 231-235 CHS3 236-255...
- Page 20 Dimmer Mode 0-10 Dimmer Mode set in the Fixture menu is used 11-20 Linear Curve without Delay 21-30 Square Law Curve without Delay 31-40 Inverse Square Law Curve without Delay 41-50 S-Curve without Delay 51-60 Linear Curve with Delay 61-70 Square Law Curve with Delay 71-80 Inverse Square Law Curve with Delay...
- Page 21 24CH-1 0-255 Dimmer 0-255 Red1 0-255 Green1 0-255 Blue1 0-255 White1 0-255 Red2 0-255 Green2 0-255 Blue2 0-255 White2 0-255 Red3 0-255 Green3 0-255 Blue3 0-255 White3 0-255 Red4 0-255 Green4 0-255 Blue4 0-255 White4 Strobe No Function 6-20 Asynchronous Strobe (Slow to fast) 21-60 Synchronous Strobe (Slow to fast) 61-100...
- Page 22 91-95 AT08 96-100 AT09 101-105 AT10 106-110 AT11 111-115 AT12 116-120 AT13 121-125 AT14 126-130 AT15 131-135 AT16 136-140 AT17 141-145 AT18 146-150 AT19 151-155 AT20 156-160 AT21 161-165 AT22 166-170 AT23 171-175 AT24 176-180 AT25 181-185 AT26 186-190 AT27 191-195 AT28 196-200...
- Page 23 Dimmer Mode 0-10 Dimmer Mode set in the Fixture menu is used 11-20 Linear Curve without Delay 21-30 Square Law Curve without Delay 31-40 Inverse Square Law Curve without Delay 41-50 S-Curve without Delay 51-60 Linear Curve with Delay 61-70 Square Law Curve with Delay 71-80 Inverse Square Law Curve with Delay...
- Page 24 32CH 0-255 Red1 0-255 Green1 0-255 Blue1 0-255 White1 0-255 Red2 0-255 Green2 0-255 Blue2 0-255 White2 0-255 Red3 0-255 Green3 0-255 Blue3 0-255 White3 0-255 Red4 0-255 Green4 0-255 Blue4 0-255 White4 0-255 Red5 0-255 Green5 0-255 Blue5 0-255 White5 0-255 Red6...
- Page 25 40CH 0-255 Dimmer 0-255 Red1 0-255 Green1 0-255 Blue1 0-255 White1 0-255 Red2 0-255 Green2 0-255 Blue2 0-255 White2 0-255 Red3 0-255 Green3 0-255 Blue3 0-255 White3 0-255 Red4 0-255 Green4 0-255 Blue4 0-255 White4 0-255 Red5 0-255 Green5 0-255 Blue5 0-255 White5...
- Page 26 Effect No Effect 6-10 CT01 11-15 CT02 16-20 CT03 21-25 CT04 26-30 CT05 31-35 CT06 36-40 CT07 41-45 CT08 46-50 CT09 51-55 CT10 56-60 AT01 61-65 AT02 66-70 AT03 71-75 AT04 76-80 AT05 81-85 AT06 86-90 AT07 91-95 AT08 96-100 AT09 101-105 AT10...
- Page 27 231-235 CHS3 236-255 Reserved 0-255 Auto Speed Virtual Colour Wheel 0-10 No Function Blue 12-50 Blue 100% + Green Up Cyan 52-90 Green 100% + Blue Down Green 92-130 Green 100% + Red Up Yellow 132-170 Red 100% + Green Down 172-210 Red 100% + Blue Up Magenta...
- Page 28 Delivery - Expolite TourBAR 32PIX - Power connection cable - General Information for Expolite Units - User Manual Expolite devices are carefully checked before shipment. If the delivery is not complete, please contact your distributor immediately. E-28...
-
Page 29: Product Information
10 x 40° Control Stand-Alone / Master-Slave / DMX512 DMX-Channels 3 - 40 (3/4/5/10/16/24/24/32/40) * Take note to General Informations for Expolite Units - Notes for Condensation inside Housing ** Tolerance in colour temperature according to LED manufacturer +/- 10% E-29... -
Page 30: Dimensions
Dimensions E-30... -
Page 31: Installation
Installation Mounting Hanging The fixture can be mounted in a hanging position using the mounting bracket. Fixture must be safe mounted in accordance with the relevant regulations and provided with a safetycord to prevent falling. Standing The fixture can be used in an upright position, using the mounted stands. A safe and sufficient anti-slip ground must be ensured! NOTE The LED module can be operated in any position. -
Page 32: Operation
Operation Display Operation Return to previous menu MENU: ENTER: Enter currently selected menu Scroll Up, Increase value DOWN: Scroll down: Decrease value MENU ENTER DOWN Menu Map MENU PERSON ADDR 001 - 512 HSIC STAT 0 - 255 PERSON 0 - 255 HSIC G1 HSIC B1 0 - 255... - Page 33 MENU AUTO HSIC AT01 PERSON HSIC AT33 HSIC ATSP 0 - 255 HSIC CHS1 HSIC CHS2 HSIC CHS3 SC01 PERSON PROG HSIC CHS1 0 - 255 0 - 255 0 - 255 HSIC CHS3 SC20 0 - 255 0 - 255 0 - 255 0 - 255 0 - 255...
- Page 34 Setting DMX-Address MENU ADDR 001 - 512 HSIC PERSON The DMX start address of the fixture is set in the menu ADDR. This is retained even when changing the personality. Setting DMX-Personality MENU 40CH PERSON HSIC CHMD 32CH 24CH-1 24CH-2 16CH 10CH The personality is set in the menu SET, submenu CHMD.
- Page 35 Calibration MENU HSIC (0 - 255) PERSON GREEN (0 - 255) (0 - 255) BLUE WHITE (0 - 255) In the menu SET, submenu CAL a custom colour calibration is stored. This calibration limits the maximum brightness of the colour channels at the DMX value "255". This settings can be activated (YES) or deactivated (NO) in the submenu USE.
- Page 36 Activating Device Lock MENU PERSON HSIC LOCK In the menu SET, submenu LOCK you can lock (ON) or unlock (OFF) the display to prevent the fixture from unauthorised access. Enter password to unlock the display. PASSWORD: UP - DOWN - UP - DOWN - ENTER Setting individual static scenes MENU PERSON...
- Page 37 Edit User Programs MENU PERSON PROG HSIC CHS1 SC01 0 - 255 0 - 255 0 - 255 HSIC CHS3 SC20 0 - 255 0 - 255 0 - 255 0 - 255 0 - 255 SHUT 0 - 255 AUTO NONE AT01...
- Page 38 In the submenu LOAD/ST L the changed values of the fixture can be reset to factory defaults. This doesn‘t affect the values of ADDR, CTST und PROG. In the submenu LOAD/PR L the edited parameters (for example CTST) of the user programs can be reset.
-
Page 39: Using Dmx512 Controller
Using DMX512 Control DMX-Channel assignment This device has several DMX personalities. In each personality a different number of DMX channels is used and the reaction of the device differs accordingly. There are nine DMX personalities with 3, 4, 5, 10, 16, 24, 24, 32, and 40 channels selectable. Because of changes in the firmware of the fixture, functions can be added or changed. - Page 40 10CH 0-255 Dimmer 0-255 0-255 Green 0-255 Blue 0-255 White Strobe No Function 6-20 Asynchronous Strobe (Slow to fast) 21-60 Synchronous Strobe (Slow to fast) 61-100 Eletronic Sine Wave (Slow to fast) 101-140 Random Strobe (Slow to fast) 141-180 Opening Pulse (Slow to fast) 181-220 Closing Pulse (Slow to fast) 221-255...
- Page 41 151-155 AT20 156-160 AT21 161-165 AT22 166-170 AT23 171-175 AT24 176-180 AT25 181-185 AT26 186-190 AT27 191-195 AT28 196-200 AT29 201-205 AT30 206-210 AT31 211-215 AT32 216-220 AT33 221-225 CHS1 226-230 CHS2 231-235 CHS3 236-255 Reserved 0-255 Auto Speed Virtual Colour Wheel 0-10 No Function Blue...
- Page 42 16CH 0-255 Dimmer 0-255 Red1 0-255 Green1 0-255 Blue1 0-255 White1 0-255 Red2 0-255 Green2 0-255 Blue2 0-255 White2 Strobe No Function 6-20 Asynchronous Strobe (Slow to fast) 21-60 Synchronous Strobe (Slow to fast) 61-100 Eletronic Sine Wave (Slow to fast) 101-140 Random Strobe (Slow to fast) 141-180...
- Page 43 131-135 AT16 136-140 AT17 141-145 AT18 146-150 AT19 151-155 AT20 156-160 AT21 161-165 AT22 166-170 AT23 171-175 AT24 176-180 AT25 181-185 AT26 186-190 AT27 191-195 AT28 196-200 AT29 201-205 AT30 206-210 AT31 211-215 AT32 216-220 AT33 221-225 CHS1 226-230 CHS2 231-235 CHS3 236-255...
- Page 44 Dimmer Mode 0-10 Dimmer Mode set in the Fixture menu is used 11-20 Linear Curve without Delay 21-30 Square Law Curve without Delay 31-40 Inverse Square Law Curve without Delay 41-50 S-Curve without Delay 51-60 Linear Curve with Delay 61-70 Square Law Curve with Delay 71-80 Inverse Square Law Curve with Delay...
- Page 45 24CH-1 0-255 Dimmer 0-255 Red1 0-255 Green1 0-255 Blue1 0-255 White1 0-255 Red2 0-255 Green2 0-255 Blue2 0-255 White2 0-255 Red3 0-255 Green3 0-255 Blue3 0-255 White3 0-255 Red4 0-255 Green4 0-255 Blue4 0-255 White4 Strobe No Function 6-20 Asynchronous Strobe (Slow to fast) 21-60 Synchronous Strobe (Slow to fast) 61-100...
- Page 46 91-95 AT08 96-100 AT09 101-105 AT10 106-110 AT11 111-115 AT12 116-120 AT13 121-125 AT14 126-130 AT15 131-135 AT16 136-140 AT17 141-145 AT18 146-150 AT19 151-155 AT20 156-160 AT21 161-165 AT22 166-170 AT23 171-175 AT24 176-180 AT25 181-185 AT26 186-190 AT27 191-195 AT28 196-200...
- Page 47 Dimmer Mode 0-10 Dimmer Mode set in the Fixture menu is used 11-20 Linear Curve without Delay 21-30 Square Law Curve without Delay 31-40 Inverse Square Law Curve without Delay 41-50 S-Curve without Delay 51-60 Linear Curve with Delay 61-70 Square Law Curve with Delay 71-80 Inverse Square Law Curve with Delay...
- Page 48 32CH 0-255 Red1 0-255 Green1 0-255 Blue1 0-255 White1 0-255 Red2 0-255 Green2 0-255 Blue2 0-255 White2 0-255 Red3 0-255 Green3 0-255 Blue3 0-255 White3 0-255 Red4 0-255 Green4 0-255 Blue4 0-255 White4 0-255 Red5 0-255 Green5 0-255 Blue5 0-255 White5 0-255 Red6...
- Page 49 40CH 0-255 Dimmer 0-255 Red1 0-255 Green1 0-255 Blue1 0-255 White1 0-255 Red2 0-255 Green2 0-255 Blue2 0-255 White2 0-255 Red3 0-255 Green3 0-255 Blue3 0-255 White3 0-255 Red4 0-255 Green4 0-255 Blue4 0-255 White4 0-255 Red5 0-255 Green5 0-255 Blue5 0-255 White5...
- Page 50 Effect No Effect 6-10 CT01 11-15 CT02 16-20 CT03 21-25 CT04 26-30 CT05 31-35 CT06 36-40 CT07 41-45 CT08 46-50 CT09 51-55 CT10 56-60 AT01 61-65 AT02 66-70 AT03 71-75 AT04 76-80 AT05 81-85 AT06 86-90 AT07 91-95 AT08 96-100 AT09 101-105 AT10...
- Page 51 231-235 CHS3 236-255 Reserved 0-255 Auto Speed Virtual Colour Wheel 0-10 No Function Blue 12-50 Blue 100% + Green Up Cyan 52-90 Green 100% + Blue Down Green 92-130 Green 100% + Red Up Yellow 132-170 Red 100% + Green Down 172-210 Red 100% + Blue Up Magenta...
- Page 52 © 2019 by Focon Showtechnic Vertriebsgesellschaft mbH...
Need help?
Do you have a question about the TourBAR 32PIX and is the answer not in the manual?
Questions and answers