
Subscribe to Our Youtube Channel
Related Manuals for Avalue Technology AID-173S


Summary of Contents for Avalue Technology AID-173S
- Page 1 Avalue Intelligent Display & System AID-173S All-In-One Bedside Terminal Quick Reference Guide Ed- 15 October 2010 Copyright © 2010 Avalue Technology Inc., All Rights Reserved Part No: E2017173SA1R By Jason Lin...
- Page 2 AID-173S Quick Reference Guide Federal Communication Commission Interference Statement THIS DEVICE COMPLIES WITH PART 15 OF THE FCC RULES. OPERATION IS SUBJECT TO THE FOLLOWING TWO CONDITIONS: (1) THIS DEVICE MAY NOT CAUSE HARMFUL INTERFERENCE AND (2) THIS DEVICE MUST ACCEPT ANY INTERFERENCE RECEIVED, INCLUDING INTERFERENCE THAT MAY CAUSE UNDESIRED OPERATION.
- Page 3 AID-173S Quick Reference Guide FCC RF Radiation Exposure Statement This equipment complies with FCC radiation exposure limits set forth for an uncontrolled environment. This equipment should be installed and operated with minimum distance 20cm between the radiator & your body.
-
Page 4: Table Of Contents
1.1 Front view ..................6 1.2 Rear & Bottom view ................7 1.3 Handset ....................8 2. Setting Up AID-173S Bedside Terminals ............9 2.1 Mounting ..................10 2.2 Cabling ..................... 11 Please follow below steps to connect power cable to system..11 2.3 System Activation &... -
Page 5: Aid-173S Bedside Terminal Features
AID-173S Quick Reference Guide 1. AID-173S Bedside Terminal Features ▬▬▬▬▬▬▬▬▬▬▬▬▬▬▬▬▬▬▬▬▬▬▬▬▬▬▬▬▬▬▬▬▬▬ In this chapter, you will get to know all features of our AID-173S bedside terminal. 1.1 Front view 1.2 Rear & Bottom view 1.3 Handset AID-173S Quick Reference Guide... -
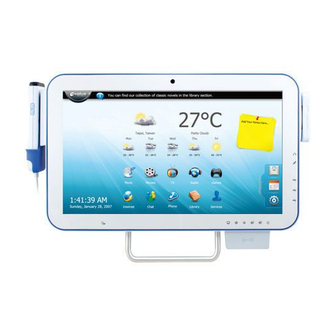
Page 6: Front View
AID-173S Quick Reference Guide 1.1 Front view Magnetic Stripe Reader 17.3” TFT-LCD & Touch Screen Camera Handset 3 x USB RFID Reader/Writer Cord Power on/off Smart Card Reader Reserved Brightness Volume Up/down Up/down AID-173S Quick Reference Guide... -
Page 7: Rear & Bottom View
AID-173S Quick Reference Guide 1.2 Rear & Bottom view HDMI Output (optional) TV Antenna Input (optional) DVI-I Output (Optional, 1024*768) USB Port DC in Service Door Service Door Speaker Speaker Microphone BNC Video Input (Optional) COM1 COM2 Nursing Call Input... -
Page 8: Handset
AID-173S Quick Reference Guide 1.3 Handset Barcode Scanner Scan button Volume Descriptions Activate the phone software (i.e. Skype) Nurse Call Answer Hang Up Contact List (Up) Contact List (Down) Numeric Keys * Key # Key AID-173S Quick Reference Guide... -
Page 9: Setting Up Aid-173S Bedside Terminals
AID-173S Quick Reference Guide 2. Setting Up AID-173S Bedside Terminals ▬▬▬▬▬▬▬▬▬▬▬▬▬▬▬▬▬▬▬▬▬▬▬▬▬▬▬▬▬▬▬▬▬▬ This chapter gives instructions on how to set up AID-173S bedside terminal hardware and how to connect different cables. Furthermore, with provided Internet ISP setting information, you will be able to connect AID-173S bedside terminal to the Internet. -
Page 10: Mounting
AID-173S Quick Reference Guide 2.1 Mounting VESA 75 Mounting Suggested Screw type for mounting Note: 4 pieces of M6x10 screws AID-173S Quick Reference Guide... -
Page 11: Cabling
AID-173S Quick Reference Guide 2.2 Cabling 1. Power Cable 2. Ethernet (RJ-45) Cable (Optional) 3. TV (Coaxial) Cable (Optional) Coaxial connector Ethernet (RJ-45) Power Jack Connector Please follow below steps to connect power cable to system. AID-173S Quick Reference Guide... -
Page 12: System Activation & Registration
AID-173S Quick Reference Guide 2.3 System Activation & Registration 1. Upon receiving your product, a system activation and software registration needs be performed before you start using this system. 2. Please consult your local service providers for more details. AID-173S Quick Reference Guide... -
Page 13: Connecting To The Internet
AID-173S Quick Reference Guide 2.4 Connecting to the Internet 1. Use built-in wireless LAN to connect to the Internet. 2. Use Ethernet (RJ-45) to connect to the Internet. 3. Consult your Internet Service Provider (ISP) for software settings. Note: ISP, IP, (wireless) router, Access Point, DSL modem, Access ID &... -
Page 14: Using Aid-173S Bedside Terminals
AID-173S Quick Reference Guide 3. Using AID-173S Bedside Terminals ▬▬▬▬▬▬▬▬▬▬▬▬▬▬▬▬▬▬▬▬▬▬▬▬▬▬▬▬▬▬▬▬▬▬ This chapter describes in detail all features of AID-173S bedside terminal. Turn ON/OFF the System 3.2 Using LCD Display and Touch Screen 3.3 Using Ear Phone and Microphone 3.4 Using Smart Card Reader 3.5 Using Magnetic Stripe Reader... -
Page 15: Turn On/Off The System
AID-173S Quick Reference Guide 3.1. Turn ON/OFF the System ON/OFF Touch Button 3.1.1 Turn ON the System 1. Check if the Power ON/OFF LED light is red. 2. Move your finger to touch the Power ON/OFF icon. 3. The Power ON/OFF LED turns green. -
Page 16: Using Lcd Display And Touch Screen
AID-173S Quick Reference Guide 3.2 Using LCD Display and Touch Screen Control Buttons 3.2.1 Adjust System Volume 1. Move your finger on the top of the Volume Up or Volume Down icon. 2. The volume will be adjusted accordingly. 3.2.2 Adjust LCD Display Brightness 1. -
Page 17: Using Earphone And Microphone
AID-173S Quick Reference Guide Using Earphone and Microphone 1. Open the rubber cover on the right side of the system. 2. Insert the earphone phone or microphone into the jacks. AID-173S Quick Reference Guide... -
Page 18: Using The Smart Card Reader
AID-173S Quick Reference Guide 3.4 Using the Smart Card Reader 1. Have the IC card face up. 2. Insert the IC card into the Smart Card Reader slot. AID-173S Quick Reference Guide... -
Page 19: Using Magnetic Stripe Reader
AID-173S Quick Reference Guide 3.5 Using Magnetic Stripe Reader 1. Have your card with the magnetic stripe facing outside. 2. Slide the card from top to the bottom. AID-173S Quick Reference Guide... -
Page 20: Using Rfid Reader/Writer
AID-173S Quick Reference Guide 3.6 Using RFID Reader/Writer 1. Place the card onto the RFID Reader/Writer. Keep card close to the reader no greater than 5cm. 2. The RFID will beep if the card is read or written successfully. Note: The RFID Reader/Writer accepts ISO 14443A standard cards ONLY. -
Page 21: Using Handset
AID-173S Quick Reference Guide 3.7 Using Handset Pick up the Handset 1. Lift the handset from the cradle to start usage. Hang up the Handset 2. Return the handset back to the handset cradle with keypad facing inside. AID-173S Quick Reference Guide... - Page 22 AID-173S Quick Reference Guide Start and End a Phone Conversation 1. To make a phone call, enter the numbers by keying the numbers on the keypad and press “Dial” icon. 2. To end a phone conversation, press the “Hang Up” icon.
-
Page 23: Using Barcode Scanner
AID-173S Quick Reference Guide 3.8 Using Barcode Scanner 1. Pick up the handset and directed to the object with the Scan button facing up. 2. Aim to the barcode and maintain an appropriate distance between barcode and scanner. 3. Press SCAN button. -
Page 24: Upgrading Aid-173S Bedside Terminals
AID-173S Quick Reference Guide 4. Upgrading AID-173S Bedside Terminals ▬▬▬▬▬▬▬▬▬▬▬▬▬▬▬▬▬▬▬▬▬▬▬▬▬▬▬▬▬▬▬▬▬▬ In this chapter, you will learn several peripherals upgrade or replacement. Please perform these steps with care. ▲ WARNING: Turn OFF the system and disconnect the power cable before performing the following tasks. -
Page 25: Adding/Removing/Replacing Memory
AID-173S Quick Reference Guide 4.1 Adding/Removing/Replacing Memory 1. Remove the two screws from the service door. 2. Open the service door. 1. Press the two latches of the retaining clips locking the memory module. 2. The memory module will pop up at an angle. -
Page 26: Adding/Removing/Replacing Tv Tuner
AID-173S Quick Reference Guide 4.2 Adding/Removing/Replacing TV Tuner 1. Remove the two screws from the service door. 2. Open the service door. Unplug the TV signal cable. Unlock the mini-PCIe socket. Pull the TV module out of the socket. 1. Place the TV module into the mini-PCIe socket. -
Page 27: Removing And Replacing The Wireless Card
AID-173S Quick Reference Guide 4.3 Removing and Replacing the Wireless Card 1. Remove the two screws from the service door. 2. Open the service door. 1. Unplug the two antennas from the wireless module. 2. Unlock the mini-PCIe socket. 3. Pull the wireless module out of the socket. -
Page 28: Adding 3Rd Party Mini-Pcie Cards
AID-173S Quick Reference Guide 4.4 Adding 3rd Party Mini-PCIe Cards 1. Remove the two screws from the service door. 2. Open the service door. 1. Insert the 3 party mini-PCIe card into the empty mini-PCIe expansion socket. 2. Lock the mini-PCIe socket. -
Page 29: Removing And Replacing The Hard Disk Drive
AID-173S Quick Reference Guide 4.5 Removing and Replacing the Hard Disk Drive 1. Remove the two screws from the service door. 2. Open the service door. 1. Remove two screws from the hard disk slot to release hard disk. 2. Disconnect power and data cables from the hard disk drive. - Page 30 AID-173S Quick Reference Guide 1. Attach hard disk to bracket by means of two screws. 2. Place the hard disk drive into the slot. 3. Attach hard disk bracket to slot by means of two screws. 4. Connect the power and data cable to the hard disk drive.
- Page 31 AID-173S Quick Reference Guide Thank you for purchasing and using AID-173S Bedside Terminals. We hope you have a joyful experience with our products and services. AID-173S Quick Reference Guide...
Need help?
Do you have a question about the AID-173S and is the answer not in the manual?
Questions and answers