RKI Instruments GX-3R Operator's Manual
Gas monitor
Hide thumbs
Also See for GX-3R:
- Operator's manual (122 pages) ,
- Quick reference manual (52 pages) ,
- Operator's manual (12 pages)

Related Manuals for RKI Instruments GX-3R


Summary of Contents for RKI Instruments GX-3R
- Page 1 GX-3R Operator’s Manual Part Number: 71-0477 Revision: P1 Released: 5/15/19 www.rkiinstruments.com...
- Page 2 Typical calibration frequencies for most applications are between 1 and 3 months, but can be required more often or less often based on your usage. GX-3R Operator’s Manual...
-
Page 3: Table Of Contents
Turning On the GX-3R ........ - Page 4 Chapter 7: General Parts List ........80 GX-3R Operator’s Manual...
- Page 5 Understand manual before operating. Substitution of components may impair intrinsic safety. To prevent ignition of a hazardous atmosphere, batteries must only be changed or charged in an area known to be nonhazardous. Not tested in oxygen enriched atmospheres (above 21%). GX-3R Operator’s Manual...
-
Page 6: Chapter 1: Introduction
Chapter 1: Introduction Overview This chapter briefly describes the GX-3R gas monitor. This chapter also describes the GX-3R Operator’s Manual (this document). Table 1 at the end of this chapter lists the specifications for the GX-3R. About the GX-3R Using an advanced detection system consisting of up to three gas sensors, the GX-3R... -
Page 7: Specifications
TWA Alarm 1.0 ppm 25 ppm * The GX-3R is also available set up for general hydrocarbons and calibrated to a combustible gas other than methane, such as isobutane. Consult RKI Instruments, Inc. for further information. Table 2: GX-3R Specifications... -
Page 8: About This Manual
Approximately 65(H) x 58(W) x 26(D) mm (2.6”H x 2.3”W x 1.0”D) Weight Approximately 100 g (3.5 oz.) About this Manual The GX-3R Operator’s Manual uses the following conventions for notes, cautions, and warnings. NOTE: Describes additional or critical information. CAUTION: Describes potential damage to equipment. -
Page 9: Chapter 2: Description
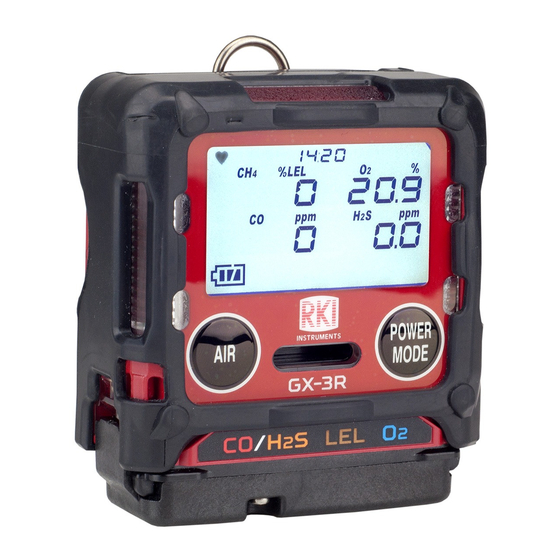
Figure 1: Component Location Case The GX-3R’s sturdy, high-impact plastic case is radio frequency (RF) resistant and is suitable for use in many environmental conditions, indoors and out. The case is dust proof and water resistant. A clear plastic window is located on the front of the case for viewing the LCD. -
Page 10: Control Buttons
), carbon monoxide (CO), and hydrogen sulfide (H S) simultaneously. The sensors are located inside the GX-3R and are held in their sockets by the sensor retainer and bottom cover. The sensors use different detection principles, as described below. Combustible Gas Sensor The combustible gas sensor detects combustible gas in the %LEL range. -
Page 11: Filters
Any unit that has less than 3 sensors will have a dummy sensor installed in one or more unused sensor positions. Dummy sensors are factory installed. The flat side of the dummy sensor should face away from the GX-3R and the hollow side should face toward the GX-3R. -
Page 12: Infrared Communications Port
A charging socket on the back of the instrument allows for charging cable connection. A lithium ion (Li-ion) battery pack powers the GX-3R. At 25°C the battery lasts at least 25 hours. The battery icon in the upper right of the LCD shows remaining battery life. -
Page 13: Included Accessories
Included Accessories Alligator Clip An alligator clip is installed on the back of the GX-3R. The alligator clip can be used to attach the GX-3R to clothing or a belt. Teeth in the alligator clip’s jaws prevent the unit from slipping off. The alligator clip can be rotated to change how the instrument is oriented when worn. -
Page 14: Calibration Cup
“Front” and “rear” imprinting on the bottom of the cup correspond to the front and rear of the GX-3R Pro when the calibration cup is installed. In addition, a “front” label on the front of the calibration cup should be visible when viewing the LCD with the calibration cup installed. -
Page 15: Chapter 3: Measuring Mode
Mode” on page 29. Start Up This section explains how to start up the GX-3R, get it ready for operation, and turn it off. NOTE: The screens illustrated in this section are for a standard 4-gas unit. The screens displayed by your GX-3R may be slightly different. - Page 16 Buzzer sounds double pulsing None tone Action • Option A, Perform calibration: The GX-3R cannot be used until a • Option A, Perform calibration: Press and release POWER If you want to enter User Mode successful calibration has been MODE to enter User Mode to to perform a calibration, press performed.
- Page 17 Buzzer sounds double pulsing tone None tone Action • Option A, Perform bump test: The GX-3R cannot be used until a • Option A, Perform bump test: Press and release POWER If you want to enter User Mode successful bump test has been per-...
- Page 18 7:49 %LEL 18.0 30.0 7:49 %LEL ALARM 7:49 %LEL 23.5 1200 100.0 7:49 %LEL ALARM H 40.0 2000 200.0 7:49 F.S. 7:49 %LEL STEL 19.5 7:49 WARNING 18 • Chapter 3: Measuring Mode GX-3R Operator’s Manual...
- Page 19 U_ID_001 S_ID_001 If the GX-3R experiences a sensor failure during start up, a screen indicating which sensor failed appears and the buzzer sounds a double pulsing tone once per second. In the example below, the combustible gas sensor has failed.
-
Page 20: Performing A Demand Zero
%LEL 20.9 Performing a Demand Zero Before using the GX-3R, it is recommended to set the fresh air readings for the target gases by performing a demand zero. This will set the combustible gas, H S, and CO channels to zero and the OXY channel to 20.9%. -
Page 21: Measuring Mode Operation
See “Updating the Backlight Time (BL TIME)” on page 68 to program backlight duration. If the BEEP menu item in User Mode is set to anything other than OFF, the GX-3R will give periodic indications to confirm that it’s operating or to indicate a non-compliance (see “Setting the Confirmation Beep and Non-Compliance Indicator (BEEP)”... -
Page 22: Combustible Gas Detection
0.13 • The GX-3R provides the combustible gas sensor with some protection against exposure to high levels of combustible gas which can damage the sensor. It does this by turning off the combustible gas sensor power temporarily when it determines that an over scale (more than 100 %LEL) concentration of combustible gas is present that may damage the sensor. -
Page 23: Alarms
Alarm Indications The GX-3R buzzer will sound an alarm, the LEDs will flash, and the vibrator will pulse when any sort of alarm condition or failure is encountered. If the GX-3R is operating in Stealth Mode, the buzzer will not sound and the vibrator’s operation will depend on the VIB setting in Gas Select Mode’s STEALTH menu item. - Page 24 • FAIL appears in the middle of the Double pulsing tone once per screen and CLOCK appears at the second bottom of the screen. • Alarm LEDs flash once per second 24 • Chapter 3: Measuring Mode GX-3R Operator’s Manual...
-
Page 25: Responding To Alarms
Reset the alarm using POWER MODE or AIR once the alarm condition has cleared if LATCHING is set to ON (factory setting) in Maintenance Mode. Calibrate the GX-3R as described in “Chapter 5: User Mode and Calibration” on page 39. - Page 26 “Recharging the Batteries” on page 74. The GX-3R is fully functional during a low battery warning. However, only a limited amount of operating time remains, approximately 1 - 2 hours. The amount of time depends on how often the LCD backlight is used and how often the unit is responding to alarm conditions.
-
Page 27: Data Logging
031 system failure. Contact RKI Instruments, Inc. as soon as possible. Data Logging The GX-3R features the ability to log data to its internal memory and download it to a computer via the infrared communications port on the front of the unit. It logs gas readings in Measuring Mode, alarm data, and calibration data. - Page 28 The data logging capacity depends on how often the GX-3R stores data, how many channels are active, and how often the GX-3R is turned on and off. The table below illustrates how much data logging time is available for the various interval times. It assumes that the unit has the standard four sensors, is only turned on once, and there are no alarm occurrences.
-
Page 29: Chapter 4: Display Mode
Maintenance Mode (factory setting is OFF). Only appears if CAL RMDR is set to ON in User Mode (factory setting). Only appears if BUMP.RMDR is set to ON in User Mode (factory setting is OFF). GX-3R Operator’s Manual Chapter 4: Display Mode • 29... -
Page 30: Tips For Using Display Mode
(lower for oxygen), the peak reading is cleared, or the GX-3R is turned off. The lunch break feature enables the GX-3R to save peak readings when it is turned off so it can continue with the same peaks when it is turned on again. See “Turning On the GX- 3R”... -
Page 31: Stel Screen (Stel)
(factory setting), the TWA is cleared when the GX-3R is turned off. If LUNCH is set to ON, the GX-3R will remember TWA readings when it is turned off so it can continue them when it is turned on again. See “Turning On the GX-3R” on page 15. -
Page 32: Changing The Combustible Gas Sensor's Gas (List)
LIST screen. The gas formula displays at the bottom of the Measuring Mode screen. The gas selection remains selected if you turn the instrument off and on again. 32 • Chapter 4: Display Mode GX-3R Operator’s Manual... -
Page 33: Changing The User Id (User Id)
ID DISP in Maintenance Mode is set to ON (factory setting is OFF). Use this screen to select a user ID from the 128 user IDs that are stored in the GX-3R’s memory. Before a user ID is selected on a brand new instrument, the user ID is “----------”. -
Page 34: Changing The Station Id (Stn Id)
Use this screen to select a station ID from the 128 station IDs that are stored in the GX-3R’s memory. Before a station ID is selected on a brand new instrument, the station ID is “----------”. The factory-installed station IDs have a “S_ID_XXX” format. -
Page 35: Last Successful Calibration Date (Cal Data)
CAL DATA CAL DATA When you are done viewing the last calibration date for the sensors, press and release POWER MODE to return to the CAL DATA screen in Display Mode. GX-3R Operator’s Manual Chapter 4: Display Mode • 35... -
Page 36: Last Successful Bump Test Date (Bump Data)
BUMP DATA BUMP DATA When you are done viewing the last bump test date for the sensors, press and release POWER MODE to return to the BUMP DATA screen in Display Mode. 36 • Chapter 4: Display Mode GX-3R Operator’s Manual... -
Page 37: Date, Time, And Temperature Screen (Temp)
ALARM--PT After entering Display Mode, press and release POWER MODE until ALARM--PT appears. Press and release AIR. The Full Scale Settings screen will appear showing full scale settings for each channel. GX-3R Operator’s Manual Chapter 4: Display Mode • 37... - Page 38 2000 200.0 1200 100.0 F.S. ALARM H 7:49 7:49 %LEL 19.5 WARNING STEL 7:49 7:49 %LEL 18.0 30.0 ALARM Press and release POWER MODE to return to the Alarm Points Screen. 38 • Chapter 4: Display Mode GX-3R Operator’s Manual...
-
Page 39: Chapter 5: User Mode And Calibration
Chapter 5: User Mode and Calibration Overview This section describes the GX-3R in User Mode. See Table 9 below for a list of the items found in User Mode, the page that the menu item’s instructions can be found on, and a short description of the menu item. - Page 40 ON: Lunch break feature is on. Instrument will ask if you want to resume TWA and PEAK readings at startup. OFF (factory setting): Lunch break feature is off. Instrument resets TWA and PEAK readings every time it’s turned on. 40 • Chapter 5: User Mode and Calibration GX-3R Operator’s Manual...
- Page 41 (pg.70) OFF (factory setting): No password is needed to access User Mode. ROM/SUM View the firmware information for the GX-3R’s sensor board and main board. (pg.71) START (pg.72) Press and release POWER MODE to begin the warmup sequence and enter Measuring Mode.
-
Page 42: Entering User Mode
The GX-3R is not in operation as a gas detector while in User Mode. Take the GX-3R to a non-hazardous location and turn it off if it is on. Press and hold AIR, then press and hold POWER MODE. When you hear a beep, release the buttons. -
Page 43: Tips For Using User Mode
19.5% is acceptable. CAUTION: Although the GX-3R can be bump tested with an oxygen concentration of up to 19.5%, RKI Instruments, Inc. recommends that a multi-gas cylinder have an oxygen concentration in the range of 10% - 16% oxygen. - Page 44 Install the calibration cup onto the GX-3R. Use the label and imprinting to make sure that the calibration cup gets installed in the correct orientation relative to the GX-3R. Be sure the calibration cup is pushed on all the way.
- Page 45 POWER MODE to return to the BUMP menu item in User Mode. See “Troubleshooting” on page 73. d. Turn the regulator knob clockwise to close the regulator. e. Continue to Step 15. GX-3R Operator’s Manual Chapter 5: User Mode and Calibration • 45...
- Page 46 GAS TIME and the CAL TIME values defined in the BUMP SET\SETTINGS menu item in User Mode. %LEL 23.3 AUTO CAL 46 • Chapter 5: User Mode and Calibration GX-3R Operator’s Manual...
-
Page 47: Performing A Calibration (Gas Cal)
(AUTO CAL). • The optimum frequency of calibration depends heavily on how the GX-3R is used. Instruments used daily may need to be calibrated weekly or monthly, while instruments that are used only a few times a year may need to be calibrated before each use. - Page 48 MODE to acknowledge the failure. See “Troubleshooting” on page 73. Performing a Span Adjustment in AUTO CAL Preparing for a Span Adjustment To adjust the span on the GX-3R, you will need: • Known concentrations of the gases being detected. The combustible and toxic gas samples should have concentrations between 10 and 50% of the full scale value.
- Page 49 Confirm that the regulator knob is turned all the way clockwise. Screw the 0.25 LPM fixed flow regulator onto the calibration cylinder. Install the calibration cup onto the GX-3R. Use the label and imprinting to make sure that the calibration cup gets installed in the correct orientation relative to the GX-3R.
- Page 50 AIR and POWER MODE together. 7:49 7:49 %LEL %LEL 20.9 20.9 APPLY AUTO CAL Turn the regulator knob counterclockwise to open the regulator. Allow the gas to flow for 2 minutes. 50 • Chapter 5: User Mode and Calibration GX-3R Operator’s Manual...
- Page 51 14 . Unscrew the regulator from the calibration cylinder. 15 . If necessary, repeat Step 1 though Step 14 for additional cylinders. 16 . Remove the calibration cup from the GX-3R. 17 . Store the calibration kit in a safe and convenient place.
- Page 52 Cylinder A will display. Use AIR to scroll to CAL--P. 7:49 CAL--P Press and release POWER MODE. The combustible gas channel will display. 7:49 %LEL - - - CAL--P 52 • Chapter 5: User Mode and Calibration GX-3R Operator’s Manual...
- Page 53 11 . Repeat Step 7 through Step 10 for any other channels that need to be changed. 12 . Use AIR to scroll to ESCAPE. GX-3R Operator’s Manual Chapter 5: User Mode and Calibration • 53...
- Page 54 AUTO CAL Press and release POWER MODE. The Auto Cal screen for gases assigned to Cylinder A will display. Use AIR to scroll to CYL SEL. 7:49 CYL SEL 54 • Chapter 5: User Mode and Calibration GX-3R Operator’s Manual...
- Page 55 Press and release POWER MODE. The current setting will flash. In the example below, the combustible gas channel is selected. 7:49 %LEL CYL SEL Use AIR to change the cylinder assignment. The choices are A, B, C, D, and E. GX-3R Operator’s Manual Chapter 5: User Mode and Calibration • 55...
-
Page 56: Setting Calibration Parameters (Cal Set)
ESCAPE. While in User Mode, press AIR to scroll to CAL SET. 7:49 CAL SET Press and release POWER MODE. The CAL RMDR menu item appears. 7:49 CAL RMDR 56 • Chapter 5: User Mode and Calibration GX-3R Operator’s Manual... - Page 57 POWER MODE to perform a calibration. CANT USE: If the unit is due for calibration, the GX-3R will give an indication at start up that calibration is past due and will prompt you to press and release POWER MODE to enter User Mode and perform a calibration.
-
Page 58: Setting Bump Test Parameters (Bump Set)
NONE: The GX-3R will give an indication at startup that calibration is past due. If desired, POWER MODE can be pressed to perform a calibration but it is not necessary to acknowledge the calibration due indication. The warm-up sequence will continue on its own. - Page 59 After entering the SETTINGS menu, press AIR to scroll to CHECK. 7:49 CHECK Press and release POWER MODE. The current setting flashes. Use AIR to display the desired setting. GX-3R Operator’s Manual Chapter 5: User Mode and Calibration • 59...
- Page 60 For example, if the CAL TIME is set to 90 seconds and the GAS TIME is set to 30 seconds, if the bump test fails, the GX-3R will only be exposed to gas for an additional 60 seconds. The available values are 90 seconds (factory setting), and 120 seconds.
- Page 61 BUMP.RMDR ON: The GX-3R will give an indication at start up if it is due for bump testing. The type of indication will depend on the BUMP.EXPD setting (see “BUMP.EXPD” on page 61). OFF (factory setting): The GX-3R will not give an indication at start up if it is due for bump testing.
-
Page 62: Alarm Settings (Alarm--Pt)
NONE: The GX-3R will give an indication at startup that a bump test is past due. If desired, POWER MODE can be pressed to perform a bump test but it is not necessary to acknowledge the bump test due indication. The warm-up sequence will continue on its own. - Page 63 7:49 %LEL - - - - - - ALARM--PT ALARM--PT 7:49 7:49 - - - ALARM--PT DEF--ALMP 7:49 7:49 - - - ALARM--PT ESCAPE Press and release POWER MODE. GX-3R Operator’s Manual Chapter 5: User Mode and Calibration • 63...
- Page 64 TWA (CO and H S only) settings. The instrument will return to the channel selection screen. Repeat Step 1 - Step 7 to change the alarm points for other channels. 64 • Chapter 5: User Mode and Calibration GX-3R Operator’s Manual...
-
Page 65: Updating The Lunch Break Setting (Lunch)
TWA and PEAK readings and the time in operation from the last time the GX-3R was used or start collecting new readings and reset the time in operation. While in User Mode, press AIR to scroll to LUNCH. -
Page 66: Setting The Confirmation Beep And Non-Compliance Indicator (Beep)
OFF (factory setting): The GX-3R does not provide a confirmation alert or non- compliance indicator. LED: The GX-3R’s LEDs double flash as often as defined by the BEEP INT parameter to verify that the instrument is operating. BUZZER: The GX-3R’s buzzer double beeps as often as defined by the BEEP INT parameter to verify that the instrument is operating. - Page 67 Press and release POWER MODE. The current setting flashes. Use AIR to display the desired setting. Press and release POWER MODE to save the setting. The BEEP INT menu item will be displayed. GX-3R Operator’s Manual Chapter 5: User Mode and Calibration • 67...
-
Page 68: Updating The Backlight Time (Bl Time)
Press and release POWER MODE. The current setting flashes. Use AIR to display the desired setting. Press and release POWER MODE to save the setting. The KEY TONE menu item will be displayed. 68 • Chapter 5: User Mode and Calibration GX-3R Operator’s Manual... -
Page 69: Display Mode Items (Disp Set)
This menu item only appears if ZFLW.DISP is set to ON in Maintenance Mode (factory setting is OFF). The ZERO.FLWR setting is not intended for field adjustment. The default setting is ON. The oxygen channel does not support zero follower functionality. GX-3R Operator’s Manual Chapter 5: User Mode and Calibration • 69... -
Page 70: Setting The Date/Time (Date)
DATE menu item will be displayed. Turning the Password On/Off (PASSWORD) ON: The GX-3R prompts you for a password when you enter User Mode. The factory-set password is 0405 but it can be changed as desired. -
Page 71: Viewing The Rom/Sum (Rom/Sum)
SUM is the bottom value. 7:49 7:49 35709 35707 2E86 C1E3 MAIN ROM SENS. ROM Press and release POWER MODE to return to the ROM/SUM menu item in User Mode. GX-3R Operator’s Manual Chapter 5: User Mode and Calibration • 71... -
Page 72: Entering Measuring Mode (Start)
Entering Measuring Mode (START) While in User Mode, press AIR to scroll to START. 7:49 START Press and release POWER MODE. The instrument will begin its warmup sequence. 72 • Chapter 5: User Mode and Calibration GX-3R Operator’s Manual... -
Page 73: Chapter 6: Maintenance
Chapter 6: Maintenance Overview This chapter describes troubleshooting procedures for the GX-3R. It also includes procedures for replacing and recharging the batteries and replacing various consumable parts. WARNING: RKI Instruments, Inc. recommends that service, calibration, and repair of RKI Instruments be performed by personnel properly trained for this work. -
Page 74: Recharging The Batteries
Plug the AC adapter into an electrical outlet. Connect the charging jack on the charging cable to the charging socket on the GX- 3R. When properly connected, a green LED will turn on at the top of the GX-3R. POW ER... -
Page 75: Replacing The Buzzer Cover
The buzzer cover may need to be replaced if it becomes saturated or clogged with particles. Remove the rubber boot from the GX-3R. Peel off the old buzzer cover located between the AIR and POWER MODE buttons. If necessary, clean any remaining residue from the case. - Page 76 Turn the GX-3R upside down. Use a small Phillips screwdriver to unscrew the two screws holding the bottom cover to the rest of the GX-3R’s case. Only unscrew them until the heads are flush with the edge of the bottom cover.
-
Page 77: Replacing The Hydrophobic Dust Filter
GX-3R. The black side of the hydrophobic dust filter should be facing up. 11 . Reattach the bottom cover to the GX-3R. Push it onto the GX-3R until it snaps into place. -
Page 78: Replacing A Sensor
Turn the GX-3R upside down. Use a small Phillips screwdriver to unscrew the two screws holding the bottom cover to the rest of the GX-3R’s case. Only unscrew them until the heads are flush with the edge of the bottom cover. - Page 79 10 . If the hydrophobic dust filter came out, place the filter on top of the filter gasket with the black side facing up. 11 . Reattach the bottom cover to the GX-3R. Push it onto the GX-3R until it snaps into place.
-
Page 80: Chapter 7: General Parts List
Chapter 7: General Parts List Table 11 lists part numbers for the GX-3R’s replacement parts and accessories. Table 11: General Parts List Part Number Description 06-1248RK-03 Calibration kit tubing, 3 foot length 13-0112RK Wrist strap 13-0124 Alligator clip 13-0125 Belt clip... - Page 81 ESR-A13P Carbon monoxide (CO) sensor ESR-A1CP Hydrogen-compensated carbon monoxide (CO) sensor ESR-A1DP Dual carbon monoxide (CO) and hydrogen sulfide (H S) sensor ESR-X13P Oxygen sensor NCR-6309 Combustible gas sensor, catalytic GX-3R Operator’s Manual Chapter 7: General Parts List • 81...
-
Page 82: Appendix A: Maintenance Mode
OFF: You cannot manually perform a fresh air adjust in Measuring Mode by pressing AIR. AUTOZERO ON: The GX-3R will ask if you want to perform a fresh air adjustment at the end of the (pg.90) startup sequence. OFF (factory setting): The GX-3R does not ask if you want to perform a fresh air adjust- ment at the end of the startup sequence. -
Page 83: Entering Maintenance Mode
The GX-3R is not in operation as a gas detector while in Maintenance Mode. Take the GX-3R to a non-hazardous location and turn it off if it is on. Press and hold AIR, then press and hold POWER MODE. You will hear a beep after one second. -
Page 84: Tips For Using Maintenance Mode
Immediately press POWER/MODE and then release both buttons. c. The scrolling direction returns to the original direction when you exit and reenter a menu. • To skip an item when a question is asked, press and release AIR. 84 • Appendix A: Maintenance Mode GX-3R Operator’s Manual... -
Page 85: Performing A Calibration (Gas Cal)
TEST menu even though the buzzer will sound in the event of a real gas alarm condition while in Measuring Mode. Preparing for a Gas Test To perform a gas test on the GX-3R, you will need: • A calibration cylinder. The concentrations should be above the alarm condition you want to check. - Page 86 Install the calibration cup onto the GX-3R. Use the label and imprinting to make sure that the calibration cup gets installed in the correct orientation relative to the GX-3R. Be sure the calibration cup is pushed on all the way.
-
Page 87: Sensor/Battery Replacement Date (Sen Date)
Turn the regulator knob clockwise to close the regulator. Unscrew the regulator from the calibration cylinder. Remove the calibration cup from the GX-3R. Store the calibration kit in a safe and convenient place. Press and release POWER MODE to return to the GAS TEST menu item in Maintenance Mode. -
Page 88: Performing A Bump Test (Bump)
Press and release POWER MODE to return to the SEN DATE menu item in Maintenance Mode. Performing a Bump Test (BUMP) See “Performing a Bump Test (BUMP)” on page 43 for a description of the BUMP menu item. 88 • Appendix A: Maintenance Mode GX-3R Operator’s Manual... -
Page 89: Setting Alarms To Latching Or Self-Resetting (Latching)
Setting Alarms to Latching or Self-Resetting (LATCHING) ON (factory setting): The GX-3R remains in alarm until the alarm condition passes and POWER MODE is pressed. OFF: The GX-3R automatically resets an alarm when the alarm condition passes. While in Maintenance Mode, press AIR to scroll to LATCHING. -
Page 90: Turning The Auto Zero Function On/Off (Autozero)
Turning the Auto Zero Function On/Off (AUTOZERO) ON: The GX-3R will ask if you want to perform a fresh air adjustment at the end of the startup sequence. OFF (factory setting): The GX-3R does not ask if you want to perform a fresh air adjustment at the end of the startup sequence. -
Page 91: Turning The Zero Suppression On/Off (Zero Sup)
Maintenance Mode. It is not normally necessary to have the zero suppression menu item appear in User Mode. Contact RKI Instruments before turning this setting on. User Mode Zero Follower (ZFLW.DISP) ON: Zero follower menu item appears in User Mode. -
Page 92: Turning The Password On/Off (Password)
DATE menu item will be displayed. Turning the Password On/Off (PASSWORD) ON (factory setting): The GX-3R prompts you for a password when you enter Maintenance Mode. The factory-set password is 8102 but it can be changed as desired. -
Page 93: Viewing The Rom/Sum (Rom/Sum)
SUM is the bottom value. 7:49 7:49 35709 35707 2E86 C1E3 MAIN ROM SENS. ROM Press and release POWER MODE to return to the ROM/SUM menu item in Maintenance Mode. GX-3R Operator’s Manual Appendix A: Maintenance Mode • 93... -
Page 94: Performing A Default (M.default)
Press and release POWER MODE to perform a default operation. The instrument will ask if you are sure you want to perform a default operation. 7:49 7:49 SURE? YES / MODE 7:49 / AIR 94 • Appendix A: Maintenance Mode GX-3R Operator’s Manual... -
Page 95: Entering Measuring Mode (Start)
M.DEFAULT menu item in Maintenance Mode. Entering Measuring Mode (START) While in Maintenance Mode, press AIR to scroll to START. 7:49 START Press and release POWER MODE. The instrument will begin its warmup sequence. GX-3R Operator’s Manual Appendix A: Maintenance Mode • 95... -
Page 96: Appendix B: Gas Select Mode
Appendix B: Gas Select Mode Overview This appendix describes the GX-3R in Gas Select Mode. The GX-3R is factory-set to suit most applications. Update settings in Gas Select Mode only if required for your specific application. A description of the Gas Select Mode items is shown in Table 13 below. -
Page 97: Entering Gas Select Mode
The GX-3R is not in operation as a gas detector while in Gas Select Mode. Take the GX-3R to a non-hazardous location and turn it off if it is on. Press and hold AIR, then press and hold POWER MODE. You will hear a beep after one second. -
Page 98: Changing The Gas Combination (Gas Comb)
While in Gas Select Mode, press AIR to scroll to GAS COMB. 7:49 GAS COMB Press and release POWER MODE. The first channel is displayed. 7:49 %LEL - - - GAS COMB 98 • Appendix B: Gas Select Mode GX-3R Operator’s Manual... - Page 99 Press and release POWER MODE. The target gas for the channel will display and it will be flashing. In the example below, the combustible gas channel is selected. 7:49 SELECT GX-3R Operator’s Manual Appendix B: Gas Select Mode • 99...
-
Page 100: Saving The Alarm Points (Set R Ap)
Performing a SET R AP operation has no effect on an M.DEFAULT in Maintenance Mode. An M.DEFAULT operation will return all instrument settings to the RKI default regardless of if a SET R AP operation was performed. 100 • Appendix B: Gas Select Mode GX-3R Operator’s Manual... - Page 101 7:49 SELECT / AIR Press and release POWER MODE to save the current alarm point settings as the default. The instrument will return to the SET R AP menu item. GX-3R Operator’s Manual Appendix B: Gas Select Mode • 101...
-
Page 102: Turning Calibration Max Span On/Off (Max Span)
Turning Calibration Max Span On/Off (MAX SPAN) ON: After a passed calibration, the GX-3R displays the maximum possible adjustment it could have made to the response reading. So if the combustible gas channel was calibrated with 50% LEL gas and the maximum indicated span is 95% LEL, this means that there was enough adjustment left on that channel to set the reading to 95% LEL when the detector was exposed to 50% LEL gas. -
Page 103: Lel Definition (Chg Lel)
Ethylene (C2H4) 27,000 23,000 24,000 Ethane (C2H6) 30,000 24,000 24,000 Ethanol (C2H5OH) 33,000 31,000 31,000 Propylene (C3H6) 20,000 20,000 18,000 Acetone (C3H6O) 21,500 25,000 25,000 Propane (C3H8) 20,000 17,000 17,000 GX-3R Operator’s Manual Appendix B: Gas Select Mode • 103... - Page 104 Press and release POWER MODE. The current setting flashes. Use AIR to display the desired setting. Press and release POWER MODE to save the setting. The CHG LEL menu item will be displayed. 104 • Appendix B: Gas Select Mode GX-3R Operator’s Manual...
-
Page 105: Exiting Gas Select Mode (Start)
Exiting Gas Select Mode (START) While in Gas Select Mode, press AIR to scroll to START. 7:49 START Press and release POWER MODE. The instrument will begin its warm-up sequence. GX-3R Operator’s Manual Appendix B: Gas Select Mode • 105... - Page 106 Warranty RKI Instruments, Inc. warrants the GX-3R sold by us to be free from defects in materials, workmanship, and performance for a period of three years from the date of shipment from RKI Instruments, Inc. This includes the instrument and the original sensors. Replacement parts are warranted for 1 year from the date of their shipment from RKI Instruments, Inc.
Need help?
Do you have a question about the GX-3R and is the answer not in the manual?
Questions and answers