
Summary of Contents for QBC Diagnostics Star
- Page 1 QBC STAR ™ System Operator’s/Service Manual 2006/02 QBC Diagnostics Inc. Document Number: L–000867 200 Innovation Blvd., Suite 212 Revision: A State College, PA 16803 USA 877.231.3115...
- Page 2 QBC, QBC Star, Adams, and Vacutainer are registered trademarks of QBC Diagnostics Inc. © Copyright QBC Diagnostics Inc, 2006. All rights reserved. No part of this publication may be repro- duced, transmitted, transcribed, stored in retrieval systems, or translated into any language or computer language, in any form or by any means, electronic, mechanical, magnetic, optical, chemical, manual, or L–000867(A)
-
Page 3: Table Of Contents
Preface otherwise, without the prior written permission of QBC Diagnostics Inc, 200 Innovation Blvd., Suite 212 State College, PA, 16803, United States of America. VS–0226 Contents 1 – Introduction ........................1–1 Intended Use ............................1–1 Principles of the Test ........................... 1–1 System Overview .......................... - Page 4 Key ............................ 3–5 4 – Operation .........................4–1 Summary of Operation Steps ....................... 4–1 Turn Instrument Power on ......................4–2 Prepare the QBC STAR tube ....................... 4–2 Mix the tube ..........................4–4 Tilt the tube ..........................4–5 Cap the tube ..........................4–5 Insert the tube into the instrument ....................
- Page 5 Preface External liquid controls ....................... 5–6 Profi ciency Tests ..........................5–6 Contents 6 – Maintenance ........................6–1 Cleaning ............................. 6–1 Disinfection ............................6–1 Replacing Printer Paper ........................6–2 Replacing Fuses ........................... 6–3 7 – Troubleshooting ........................7–1 General Problems ..........................7–1 Error Codes and Messages ........................7–2 G –...
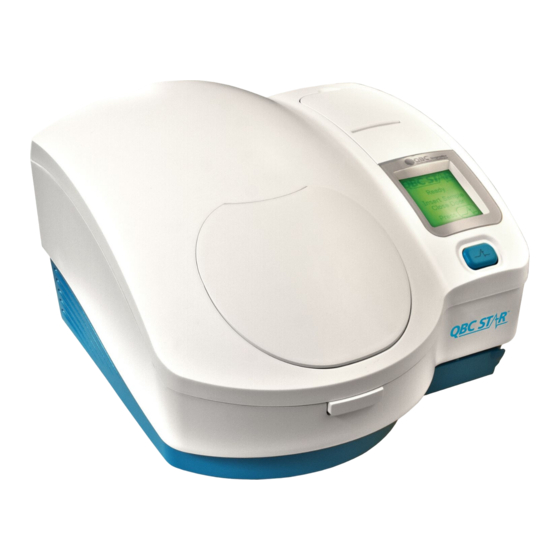
- Page 6 Description Page QBC STAR Blood Collection Tube ..................1–2 QBC STAR Instrument ......................1–3 Symbols Used on the QBC STAR Instrument (rear) ............... 1–6 External Connections ......................2–5 Power Switch ........................3–1 QBC STAR Controls and Indicators ..................3–2 Printer Controls ........................3–3 Floppy Disk Drive Controls and Indicators ................
- Page 7 QBC STAR ™ System User’s Manual QBC Diagnostics Inc.
-
Page 8: Introduction
When the QBC STAR tube is fi lled with blood and placed into the QBC STAR instrument, the tube is spun at a high rate of speed causing the different types of cells in the blood to separate into layers or bands from the heaviest to the lightest. -
Page 9: System Overview
Tubes are fi lled by capillary action with 65 to 75 µL of whole blood. (This is the volume when the tube is fi lled between the 2 fi ll lines marked on the QBC STAR tube.) The blood can come directly from a fi ngerstick or from a Vacutainer™... -
Page 10: Qbc Star Instrument
Analysis of the sample occurs in the centrifuge rotor while the centrifuge is running. See Figure 2. A single fi lled QBC STAR tube is placed into the rotor, the door is closed, and the “Star” button pressed to start the test process. The centrifuge cycle mixes and then separates the blood into distinct cell layers. -
Page 11: Instrument Self-Testing And Calibration
40° C. This threshold insures that the sample temperature does not exceed 45° C during the assay (when temperatures can rise). Although the QBC STAR instrument contains a centrifuge, it is not necessary to periodically test the rotor. Centrifuge speed measurements are verifi ed each time a sample is processed. -
Page 12: Manual Structure
Getting Started The QBC STAR system has been designed and tested for ease of use. However, before you begin to use the instrument, you will fi nd it advantageous to familiarize yourself with the material in this manual, es- pecially: •... -
Page 13: Conventions
A package insert is included with each box of tubes, and is available upon request from QBC Diagnostics Inc. QBC STAR Tube Quick Reference Guide – This document contains a summary of steps for preparing venous and capillary specimens and testing them on the QBC STAR instrument. -
Page 14: Summary Of Warnings And Cautions
Do not handle the QBC STAR tube by the glass collection end of the tube. Do not use any QBC STAR tube if any part of the carrier or tube is chipped or cracked. The user should not perform any servicing except as specifi cally stated in this manual. Refer other problems to trained personnel, or return the instrument to QBC Diagnostics for repair. -
Page 15: Installation And Setup
Electrical Connection Connect the female end of the power cord to the QBC STAR instrument (see Figure 4). Connect the male end of the power cord to the main AC power source. To avoid electrical shock, connect the power cord only to an approved power source such as a 3-wire grounded receptacle. -
Page 16: Qbc Star Specifi Cations
QBC STAR™ System User’s Manual QBC STAR Specifi cations Physical Specifi cations Height (loading door open) 16.3 in (41.4 cm) Width 16 in (40.6 cm) Depth 16.3 in (41.4cm) Weight 30 lb (13.6 kg) Clearance 11.8 in (30 cm) Electrical Specifi cations Voltage 100 –... - Page 17 2 – Installation and Setup Environmental Specifi cations Non-Operating Storage Temperature –20° C – 65° C Humidity 10% – 95% non-condensing Operating 16° C – 32° C unrestricted ( at 32° C – 37° C Temperature use may be limited by instrument temperature shutdown or some results may be suppressed) Humidity 10% –...
-
Page 18: External Connections
You can also leave the internal instrument printer enabled even if you attach an external printer. If you do, results print on the internal printer fi rst. Press the “Star” button to reprint results on the external printer. For information on what makes and models of printers can be used, contact QBC Diagnostics Technical Services. - Page 19 How to attach an external printer: Unpack and set up the printer according to the manufacturer’s operating instructions. Connect the printer to the QBC STAR instrument’s printer (parallel) port (see Figure 4) using the cable specifi ed above. Verify that any printer cartridges are installed and that the correct size paper is present.
-
Page 20: Updating System Software
Updating System Software Updated versions of the QBC STAR Hematology System software may be provided to you from time to time. You should install new software as soon as you receive it. You should also log the update on the form in Appendix C of this manual. -
Page 21: Lcd Contrast
2 – Installation and Setup 1 – LCD Contrast 2 – Date and Time 3 – Disable Auto LCD 4 – Save Data 5 – Print Data 6 – Shipping Prep. 7 – More Options 8 – EXIT The arrow cursor ( ) points to the option that is currently selected. -
Page 22: Disable Auto Lcd (Contrast)
QBC STAR™ System User’s Manual Disable Auto LCD (Contrast) As the QBC STAR instrument is used, it may warm up several degrees. This can cause the LCD screen contrast to change. The instrument monitors operating temperatures and automatically adjusts the contrast. - Page 23 Internal Printer Internal Printer lets you enable or disable the QBC STAR system’s built-in printer. When you select the option, a sub-menu titled “INTERNAL PRINTER” appears. When the printer is ENABLED, the menu lets you disable the printer by selecting option 1. When the built-in printer is ENABLED, option 1 reads “Disable Printer.”...
- Page 24 QBC STAR™ System User’s Manual External Printer External Printer lets you enable or disable a printer that would be attached to the printer port on the back of the instrument. It also lets you enable or disable color printing to the external printer.
-
Page 25: Controls And Indicators
Power Switch The power switch is located on the rear panel of the QBC STAR instrument, on the left side. It is a two- position rocker switch. Place the switch in the “|” position to turn instrument power on. Place the switch in the “O”... -
Page 26: Star" Button
QBC STAR™ System User’s Manual “Star” Button The “Star” Button is located on the top of the QBC STAR instrument, toward the right side. It is teal colored. See Figure 6. This button has several functions: • Start Testing – when an untested tube is in the analyzer •... -
Page 27: Printer
3 – Controls and Indicators Printer Test results print automatically at the end of the testing cycle. The printer is located on the top panel of the instrument, on the right side. Samples of test results printouts are shown in Section 4 – Operation. See Figure 6 for the printer’s location. -
Page 28: Floppy Disk Drive
QBC STAR™ System User’s Manual Floppy Disk Drive The fl oppy disk drive is used primarily for software updates. It is located on the front panel of the instrument, at bottom right. To access the drive, fl ip the top of the access door downward. Disks should be inserted with the shutter fi... -
Page 29: Setup Keypad
3 – Controls and Indicators Setup Keypad The setup keypad is located to the front of the printer beneath the printer access panel. It is used to enter setup information into the computer, such as the date and time, LCD contrast, etc. The setup keypad keys are described below. -
Page 30: Operation
IF A TUBE BREAKS IN THE UNIT, CAREFULLY REMOVE THE TUBE WITH A HE- MOSTAT OR OTHER DEVICE, USING PUNCTURE RESISTANT UTILITY GLOVES. CONTACT TECHNICAL SERVICES FOR ADDITIONAL INFORMATION. Summary of Operation Steps Routine operation of the QBC STAR Hematology System consists of the following steps: • Turn the instrument on •... -
Page 31: Turn Instrument Power On
The blood source can be either a capillary fi ngerstick drop of blood, or a source of anticoagulated ve- nous blood such as a Vacutainer™ tube (lavender top only). The QBC STAR tube fi lls itself by capillary action. That is, when you touch the collection tip of the tube to the blood sample, it is drawn into the tube automatically. - Page 32 Figure 10 – Sample Vial Figure 11 – Inverting the Sample Vial Open the QBC STAR tube package by placing a fi ngernail between the foil seal and the molded plastic packaging, and lifting and peeling the foil layer away.
-
Page 33: Mix The Tube
QBC STAR™ System User’s Manual Figure 13 – Filling a Tube from Capillary Blood Fill the QBC STAR tube to the second black fi ll line. Blood must always be fi lled to at least the fi rst black line. -
Page 34: Tilt The Tube
4 – Operation Tilt the tube Tilt the QBC STAR tube as shown, and allow the blood to move down the tube toward the center of the tube. See Figure 15. Figure 15 – Tilting the Tube Cap the tube Remove the cap from the tube by pulling it straight off. -
Page 35: Insert The Tube Into The Instrument
QBC STAR™ System User’s Manual Insert the tube into the instrument Insert the tube into the QBC STAR instrument oriented as shown in Figure 18. The tube must be inserted into the instrument within 15 minutes of being prepared and capped. -
Page 36: Printing Of Results
Present” appears. To proceed, place the cap on the tube or place the tube in the instrument and press the “Star” button to resume testing. The system can detect if a sample has already been tested. If this occurs, the message “Sample already processed”... - Page 37 A sample results printout is shown in Figure 19. A sample results readout is shown in Figure You can print additional copies of the results report by pressing the “Star” button after the fi rst printout completes. You must reprint the report BEFORE opening the door.
- Page 38 4 – Operation ---------------------------------------------------------- QBC STAR - Hematology Results Patient: ___________________________ Date: DEC 10, 1998 Time: 2:37 pm ---------------------------------------------------------- Software Version: 12/20/38 1.00XX Instrument S/N: XXXXXXX ---------------------------------------------------------- Hematocrit 45.5 Hemoglobin 13.3 g/dL MCHC 29.2 g/dL Total WBC Granulocytes % Granulocytes Lymph+Monos = 3.0...
-
Page 39: Tube Disposal
QC results. Stopping the Centrifuge If for some reason you must stop the test before it is complete, press the “Star” key to stop the instru- ment. Note that you cannot reuse or reanalyze a partially processed tube. - Page 40 4 – Operation Door Unlatch Access Hole (Front of instrument) (Bottom of instrument) Figure 21 – Door Unlatch Access Hole L–000867(A) 4–11...
-
Page 41: Performance And Limitations
Precision Data on typical within-run precision tests on QBC STAR tubes tested in the QBC STAR system are shown in the two tables below. The precision data represents the analysis of ten whole blood specimens, each assayed in replicates of 10. -
Page 42: Accuracy
In a separate precision study, intra- and inter-run precision were assessed using a dual level QBC Control (#424304). The controls were assayed on multiple days at three sites using QBC STAR tubes and the QBC STAR system. The results of this study are presented in the table below. -
Page 43: Interfering Substances
The hematocrit results shown above refl ect the calibration methods of the Coulter or Sysmex analyzers used in the correlation study. The QBC STAR software has been calibrated to match the international reference standard for microhematocrit (MHCT) technology. The data shown in the table below were obtained by comparing the QBC STAR results against the microhematocrit reference method. -
Page 44: Limitations
The QBC STAR reagent tube has been formulated to provide optimum packing and layering of normal cells. In a small number of patients, however, the system cannot read certain parameters and will not report a value. User errors in processing or use of outdated or inappropriately stored tubes can also result in non-reported results. -
Page 45: Controls
Internal Quality Control The QBC STAR Centrifugal Hematology System has multiple built-in-quality control (QC) systems that maintain the overall system integrity and the quality of the test results it produces. The QBC STAR System has fi ve internal quality control elements: Factory calibration. -
Page 46: External Liquid Controls
QBC Controls are available for additional performance monitoring of the QBC STAR system. You must run liquid controls and document the results before you begin testing with a new lot or newly received shipment of QBC STAR tubes. You must run liquid controls and document the results with each instance of instrument relocation or repair. Consult the package insert accompanying the controls for preparation instructions and expected results. -
Page 47: Maintenance
Disinfection If a QBC STAR tube breaks while in the instrument, the spread of blood and glass is substantially contained by the capped tube carrier. This device design provides a high degree of user and instrument protection from exposure to blood and aerosols. -
Page 48: Replacing Printer Paper
QBC STAR™ System User’s Manual Replacing Printer Paper When the printer paper is nearly exhausted, a colored edge appears on the roll of paper. You should replace paper at this time to avoid running out while printing patient test results. See Figure 22. -
Page 49: Replacing Fuses
6 – Maintenance Replacing Fuses WARNING BEFORE BEGINNING TO CHANGE THE FUSES, MAKE SURE THE UNIT’S POWER IS TURNED OFF AND DISCONNECT THE INSTRUMENT POWER CORD FROM THE POWER SOURCE. There are two fuses in the power entry module. The fuses are located in a holder just above the power cord plug. -
Page 50: Troubleshooting
7 – Troubleshooting If the QBC STAR instrument fails to operate properly, consult the guides below. DO NOT ATTEMPT TO PERFORM ANY SERVICE OR REPAIR THAT DOES NOT APPEAR IN THIS MANUAL. Refer service problems to the Technical Service Department of QBC Diagnostics Inc., 1-866-265-1486 (USA). Otherwise, contact your nearest QBC Diagnostics Inc. -
Page 51: Error Codes And Messages
Sample or Cap Not Present POSSIBLE CAUSES: The “Star” key was pressed but there is no tube in the instrument or no cap on the tube. CORRECTIVE ACTIONS: Insert tube in instrument and press “Star” key to begin testing. If tube was present but cap was missing, do the following. - Page 52 CORRECTIVE ACTIONS: Check paper supply to the printer, or paper jam condition.Verify that paper release lever is in “closed” (rear) position. If these are okay, contact QBC Diagnostics Inc for assistance. *For trouble shooting purposes refer to 7-4 to print a diagnostic scan for technical services to interpret.
- Page 53 If using the internal printer, the “Diagnostic Scan” printout will need to be sectioned and placed on a sheet of 8 ½” x 11” paper prior to faxing to QBC Diagnostics. Note: the sheet may need to be photocopied in order to achieve satisfactory transmission results and to prevent jamming the facsimile machine.
-
Page 54: G - Glossary
G – Glossary Complete Blood Count Charge Coupled Device (linear array photo detector) g’s Unit of acceleration, 1g = acceleration of gravity Gran Granulocytes Hemoglobin Hematocrit Lymphocytes and Monocytes Lymph/Monos Lymphocytes and Monocytes MCHC Mean Corpuscular Hemoglobin Concentration Platelets revolutions per minute White blood cell count L–000867(A) G–1... -
Page 55: A - Limited Warranty
QBC STAR System User’s Manual. Any damage to a QBC STAR system resulting from the insertion or removal of cables that connect this instrument to systems other than those approved or supplied by QBC Diagnostics Inc., or the... -
Page 56: B - Parts And Accessories
B – Parts and Accessories Item Catalog Number Paper, Printer (3/pk) 429580 Fuses, 250V 3.15A 5x20 mm (5/pk) 429581 QBC STAR Tubes (box 100) 429625 Power Cord, U.K. 421554 Power Cord, Europe 421551 Power Cord, USA 4326000001 L–000867(A) B–1... -
Page 57: C - Software Update Log
C – Software Update Log Whenever you receive a software update, please take a moment to log it below. This can assist you and QBC Diagnostics Inc., personnel in identifying software revision levels, potential software problems, etc. Date Software Date... - Page 58 C – Software Update Log Whenever you receive a software update, please take a moment to log it below. This can assist you and QBC Diagnostics Inc., personnel in identifying software revision levels, potential software problems, etc. Date Software Date...
-
Page 59: D - Contacts
D – Contact QBC Diagnostics Inc. 200 Innovation Blvd., Suite 212 State College, PA 16803 USA Voice: (814) 231-7660 • Fax: (814) 231-3118 Toll-Free: Technical Services: 1-866-265-1486 Customer Service: 1-877-231-3115 www.qbcdiagnostics.com L–000867(A) D–1... -
Page 60: E - Blood Collection And Handling
E – Blood Collection and Handling General Comments The quality of a test is only as good as the quality of the specimen. The following guidelines help ensure the quality of the blood specimens collected in your offi ce, as well as the safety of the staff performing the tests. -
Page 61: Venous Blood Collection (Venipuncture
QBC STAR™ System User’s Manual Venous Blood Collection (Venipuncture) Supplies • Disposable gloves • Tourniquet • Alcohol pads • Sterile gauze • Bandage • VACUTAINER® Brand (or other) evacuated blood collection system: Tubes containing EDTA anticoagulant (lavender top) Needles Needle holder/adapter •... -
Page 62: Collecting Multiple Specimens From A Single Venipuncture
E – Blood Collection and Handling As the blood begins to fl ow into the tube, release the tourniquet and open the patient’s fi st to avoid bleeding at the puncture site. Keep constant, forward pressure on the tube to prevent the shutoff valve from closing and stopping the fl... -
Page 63: Errors To Avoid In Venous Blood Collection
fl uid. Fill the QBC STAR tube by placing the collection end of the tube directly in contact with the fi nger puncture blood. Fill the QBC STAR tube to a level between the two black fi ll lines. -
Page 64: Avoiding Hemolysis During Capillary Blood Collection
E – Blood Collection and Handling Avoiding Hemolysis during Capillary Blood Collection • Allow the puncture site to dry after cleaning with alcohol. • Do not squeeze the puncture site excessively. • Do not press or scrape the collection device on the skin. •... - Page 65 F – Bibliography WIntrobe, M.M. (1933) “Macroscopic Examination of the Blood,” American Journal of Medicine, SC., 185:58-71. Olef, I. (1937) “The Determination of Platelet Volume,” Journal of Laboratory and Clinical Medicine, 23:166-178. Bessis, M. (1940) “Une méthode permettant L’isolement des différents éléments fi gurés du sang,”...
Need help?
Do you have a question about the Star and is the answer not in the manual?
Questions and answers