Table of Contents
Advertisement
Available languages
Available languages
Einbau- und Betriebsanleitung
Installation and Operating instructions
Instructions de montage et de service
Elektrischer Stellantrieb
Electric Actuator
Servomoteur électrique
Inhaltsverzeichnis
1
2
3
4
5
6
7
8
Content
1
2
3
4
5
6
7
8
Index
1
2
3
4
5
6
7
8
1
Technische Daten / Technical data /
Caractéristique techniques
2
3
4
10/2012
Seite
2
2
2
2
2
3
4
4
page
5
5
5
5
5
6
7
7
page
8
8
8
8
8
9
10
10
11
12
13
14
5112-8010
Baureihe / Series / Séries
ST 5112
Advertisement
Table of Contents

Related Manuals for RTK ST 5112 Series


Summary of Contents for RTK ST 5112 Series
-
Page 1: Table Of Contents
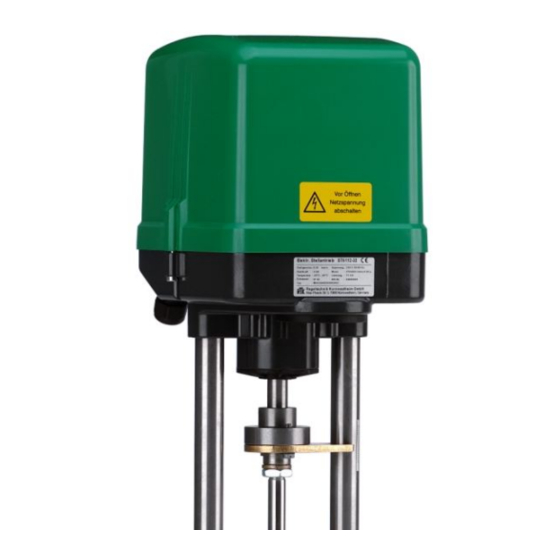
Einbau- und Betriebsanleitung 5112-8010 Installation and Operating instructions Instructions de montage et de service Baureihe / Series / Séries Elektrischer Stellantrieb ST 5112 Electric Actuator Servomoteur électrique Inhaltsverzeichnis Seite Aufbau auf Armaturen Elektrischer Anschluß Handbetätigung Probelauf Einstellung Heizung Austausch von Bauteilen Wartung, Instandhaltung Content page... -
Page 2: Aufbau Auf Armaturen
Einbau- und Betriebsanleitung 5112-8010 Installation and Operating instructions Instructions de montage et de service Aufbau auf Armaturen Der Anbau auf die Armatur kann in beliebiger Lage erfolgen. Die Kupplung ist standardmäßig mit einem Anschlußgewinde M12 ausgeführt. Bei der Bestellung einer Armatur muss die Länge der Abstandsbolzen angegeben werden. •... -
Page 3: Heizung
Einbau- und Betriebsanleitung 5112-8010 Installation and Operating instructions Instructions de montage et de service Einstellung Wegendlagenschalter Die Wegendlagenschalter sind in Reihe mit der Kraftabschaltung für beide Bewegungsrichtungen verkabelt. Zur Begrenzung des Weges in AUF-Richtung (Spindel fährt ein) wird die Einstellspindel E1 benutzt (siehe Bild 2, Pos. 1). Die Begrenzung des Weges in ZU - Richtung (Spindel fährt aus) erfolgt mit der Einstellspindel E2. -
Page 4: Austausch Von Bauteilen
Einbau- und Betriebsanleitung 5112-8010 Installation and Operating instructions Instructions de montage et de service Austausch von Bauteilen Tausch der Motorplatine Achtung: Sicherheitsvorschriften beachten Stellantrieb muss stromlos sein. • Zum Tausch der Motorplatine den Hebel (Bild 6, Pos. 510) entfernen. • Die Endschalterführung (Bild 6, Pos. -
Page 5: Fitting Onto Valves
Einbau- und Betriebsanleitung 5112-8010 Installation and Operating instructions Instructions de montage et de service Fitting onto valves The actuator can be fitted onto the valve in any position. The coupling is designed as standard with a M12 connection thread. When fitting onto a valve, the length of the spacer bolts must be stated. •... -
Page 6: Heating
Einbau- und Betriebsanleitung 5112-8010 Installation and Operating instructions Instructions de montage et de service Setting the limit switches The limit switches are wired in series with the force switch for both directions of movement. The adjusting spindle E1 is used to limit the travel in the OPEN direction (spindle moves in) (cf. Fig. 2, item 1) The adjusting spindle E2 is used to limit the travel in the CLOSED direction (spindle moves out) In this case the cams must not be shifted over the switching point of the microswitch. -
Page 7: Replacement Of Components
Einbau- und Betriebsanleitung 5112-8010 Installation and Operating instructions Instructions de montage et de service Replacement of components Replacement of the motor p.c.b. Caution: Observe the safety regulations The actuator must be deenergized. • To replace the motor p.c.b. remove the switching clutch (Fig. 6, Item 510). •... -
Page 8: Installation Sur Les Vannes
Einbau- und Betriebsanleitung 5112-8010 Installation and Operating instructions Instructions de montage et de service Installation sur les vannes Les servomoteurs peuvent être installés dans une position indifférente: l’accouplement est standardisé (par un filetage M12). Lors de la commande du servomoteur la longueur des colonnettes nécessaire devra être bien déterminée. •... -
Page 9: Chauffage
Einbau- und Betriebsanleitung 5112-8010 Installation and Operating instructions Instructions de montage et de service Réglage des capteurs fin de course Les capteurs de fin de course sont câblés en séries avec les capteurs de force dans les deux directions. La fin de course en position ouverte est attribuée au capteur E1(montée du clapet, Voir fig 2 position 1) La fin de course en position fermé... -
Page 10: Remplacement Des Composants
Einbau- und Betriebsanleitung 5112-8010 Installation and Operating instructions Instructions de montage et de service Remplacement des composants Remplacement du circuit imprimé Attention : Voir les instructions de sécurité Le moteur doit être hors tension • Pour changer le circuit imprimé ôter les leviers de contact (Fig 6 pos 510). •... -
Page 11: Anhang / Appendix/Annexe
Einbau- und Betriebsanleitung 5112-8010 Installation and Operating instructions Instructions de montage et de service Anhang / Appendix/ Annexe Technische Daten / Technical specification / Caractéristiques techniques Type / type / type ST 5112- Regelkraft / operational force / force de poussé 2.8 kN 2.8 kN 2.5 kN... -
Page 12: Elektrischer Anschlußplan / Terminal Connection / Schéma De Cablage
Einbau- und Betriebsanleitung 5112-8010 Installation and Operating instructions Instructions de montage et de service Elektrischer Anschlußplan / Terminal connection / schéma de cablage MU 4524 POT 1 MU 4522 RE 3447 POT 1 POT 2 Bild 1 Kraftschalter Richtung AUF Potentiometer force switch open direction... -
Page 13: Komponenten /Components
Einbau- und Betriebsanleitung 5112-8010 Installation and Operating instructions Instructions de montage et de service Komponenten /components Einstellung Wegabschaltung Kraftabschaltung stroke adjustment force switch contacteur de course contacteuer de force Schalthebel shift lever levier de commande Spindel ausgefahren spindle extended tige sortie F1 F2 F3 E4 E3 Spindel eingefahren... -
Page 14: Ersatzteilliste / Spare Parts List / Liste De Rechange
Einbau- und Betriebsanleitung 5112-8010 Installation and Operating instructions Instructions de montage et de service Ersatzteilliste / spare parts list / liste de rechange Bild 6 10/2012... - Page 15 Einbau- und Betriebsanleitung 5112-8010 Installation and Operating instructions Instructions de montage et de service Order no. CADH51120009 Haube cover capot CSPT12000009 Getriebespindelgruppe spindle nut group ecrou de tige CZRA51120009 Zahnradgruppe 0 gear wheel 0 roue dentée 0 CZRA51122009 Zahnradgruppe 2 gear wheel 2 roue dentée 2 CZRA51121009...
- Page 16 Einbau- und Betriebsanleitung 5112-8010 Installation and Operating instructions Instructions de montage et de service CE-Konformitätserklärung CE-Declaration of conformity CE.Déclaration de conformité gemäß EG-Richtlinie EMV 89/336/EWG und in acc. with the EMC directive 89/336/EEC suivant les directives EMC 89/336/EEC et les Niederspannungsrichtlinie 73/23/EWG and Low-Voltage Equipment Directive directives 73/23/EEc...
Need help?
Do you have a question about the ST 5112 Series and is the answer not in the manual?
Questions and answers