Table of Contents
Advertisement
English Translation by Minok (Rev. Nov 4, 2016) with help of the Märklin user community based on German version of the 60216 Betriebshandbuch downloaded from www.maerklin.de on Oct 29, 2016
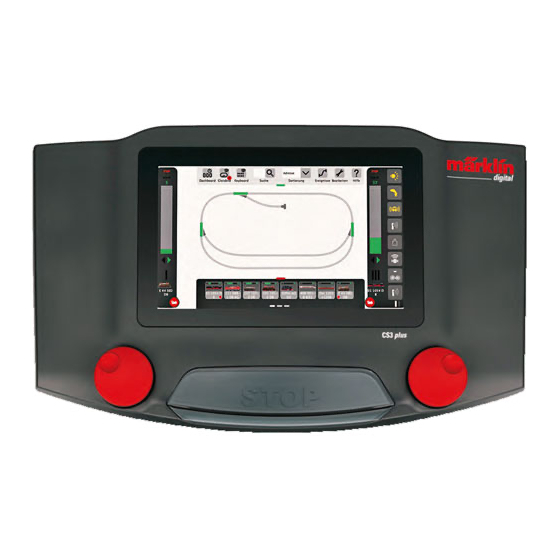
Central Station 3
Note: Contains mostly German Edition Images
Ut porio. Pidel exeriam il inum la aute
omni aut alia que sus, et re quaecta-
quam faccupitiae et volum rem rere,
cone eosant ligendenimus nonsequae
por autem. Itate nulpa conem hilicit
iumque pora asperio blabor a seque
parciis voluptatem am, illaute nobit,
1
Advertisement
Table of Contents

Related Manuals for marklin Central Station 3


Summary of Contents for marklin Central Station 3
- Page 1 English Translation by Minok (Rev. Nov 4, 2016) with help of the Märklin user community based on German version of the 60216 Betriebshandbuch downloaded from www.maerklin.de on Oct 29, 2016 Central Station 3 Note: Contains mostly German Edition Images Ut porio. Pidel exeriam il inum la aute...
-
Page 2: Table Of Contents
Minitrix; or Switching power supply 60101 or 51095 (230 V, 100 VA; for Märklin 1 or Import of CS2 Data | Updating the CS3 LGB), Central Station 3 or 3plus, Track connection cable, Track layout, Rolling stock and/or Introduction | Technical Specifications electromagnetic items (eg switches, signals, etc) One can only use the listed switching power supplies with the CS3/3plus. -
Page 3: Basic Functions And Connections
The central STOP button serves as an is visually indicated by a change in the "emergency off" - the most important vertical, green speed bar in the display. function of the Central Station 3 in critical operations situations. Slot for chip-cards Network/PC Märklin CAN-... - Page 4 Connection to the Layout Language Selection / Setup Assistant Beware of proper polarity: Red = Track Power (B), Brown/Blue = Ground (0) Connection to C-Track Connection to K-Track Connection to Track 1 Connection LGB Connection to Programming Track After being turned on, the CS3 will The programming track is not allowed to have any direct electrical connection to the layout and greet you with the language selection there can be no consumers (e.g.
-
Page 5: Usage | Quickstart
Usage | Quickstart Selection and Swiping: working with the touchscreen Easy access to Locomotive and Items List Pulling up Locomotive List: The locomotive list can be enlarged via the red handle at its top edge. Just touch the red handle and drag up. Dragging down will shrink the locomotive list or hide it entirely. - Page 6 Importing CS2 data Updating the CS3 Importing existing data from the Central Station 2 Staying up to date: Update the CS3 Firmware Have you previously controlled your layout with the Central Station 2? Then you can Märklin is constantly developing the software of the CS3. As soon as a new version is available, import your valuable locomotive, magnetic items, and track data from there in a few steps.
- Page 7 S88 feedback modules 60881 and 60882. Limitations of the Central Station 60226 Central Station 3 (60226): This version is ideal for layouts to be controlled from only one Programming Track connection (max. Because the Central Station 3 60226 does not central controller.
-
Page 8: Driving
Driving Locomotive List . Activating Functions . Editing Locomotives... -
Page 9: Selection And Driving
Selection and Driving Inclusion of Locomotives: Automatic registration of mfx Locomotives Displaying Functions Activating Functions Drag the red By tapping the circle with a function symbols small white you activate the locomotive functions. In the toward the picture to the left screen center: one sees light, The locomotive... - Page 10 Locomotive List: Sorting and Searching Display of the registered locomotives is dependent on the mode of operation. Finding specific locomotives / Live Search In order to provide better Want to find a oversight, the Locomotive List specific locomotive? can be filtered by operations Tap on the "Search"...
- Page 11 Manually Adding Locomotives This is how you add additional locos: Step 2: Add photo from the database Usually the entry receives the photo along with the loco data from the database. If that doesn't happen, use the image database: Open it with a tap on the middle of image region.
-
Page 12: Editing Locomotive Settings | Loco Card
Editing locomotive settings | Loco Card Switch to edit mode Tab "Setup": Changing important settings and functions Enter edit mode by tapping on the wrench/spanner symbol and then on "Edit Locos" (image left). It is To get to loco settings, activate the locomotive list edit mode, and select the seen with the green check-mark at the base of the desired locomotive (see section "Switch to edit mode"... - Page 13 Configuration | Changing CV Values Function Setup Editing individual CV values To assign a function to a After entering edit mode and selecting the locomotive of interest (see section "Setup" on locomotive, tap on the function page 12), tap on the tab "Configuration". If the decoder is an MM- or DCC- protocol decoder, region on the left side, for the following interface will be displayed.
- Page 14 Configuring mfx Locomotives Assembling locomotives around traction All of the detailed settings of a mfx locomotive A double or multi-traction loco is set via decoder are loaded and the menu option "Create traction" (image displayed when you enter left). The pop-up menu opens with a tap on the wrench/spanner symbol in the the select the "Configuration"...
-
Page 15: Editing Accessory List
Editing the Accessory List Accessory setup . sorting . switching... -
Page 16: Adding Accessories
Enter all details about the new turnout in the displayed new data entry form: As initially configured, the Central Station 3 is set up with Märklin Starterpack content - a few solenoid items in the list and a simple layout plan. If you don't need the layout plan or the items, Tap "Ok"... - Page 17 Adding a Signal Adding a Light In order to set up a new signal accessory, tap on the A new light accessory is quickly set up: Open a pop- wrench/spanner symbol in the accessory list and choose up menu via a tap on the wrench/spanner symbol in "Add accessory"...
- Page 18 Adding other Accessories You are now in the settings menu. Here you set the detail attributes of the new S88 contact: Various types of accessories can be added via this option: tap on the wrench/spanner Tap on "Ok" to add symbol and then in the pop-up menu "Add the contact.
- Page 19 Accessory Search / Live Search Button Matrix: You can use the L88 (Link S88) as a button matrix, for example to use as a track switching console. Up to 64 buttons ( 32 accessories or 64 routes) are supported. You enter the corresponding module port in the "Contact nr."...
-
Page 20: Layout Editing
Track Layout Editing Positioning . rotating . connecting layout items... -
Page 21: Creating A Layout
In this section you will learn all necessary steps in order to create a track layout in the Central Station 3. We will use the simple layout of the Märklin Starter Pack (see page 24) as the example to be created, step by step, in the following pages. -
Page 22: Rotation Mode
Rotating Accessories: Rotation Mode Adding Track Accessories We need the turnout in horizontal In order to achieve an optically pleasing track orientation for the planned track layout, we need some track course accessories. layout. We thus rotate it by 90 These are purely design elements without degrees: mark the turnout by tapping function. -
Page 23: Connection Mode
(image left; see rotation mode on page 22). As soon as the two connection points overlap, lift your finger from the display. The Central Station 3 automatically makes a track connection between the connection Now position the track route points (image left). - Page 24 Completing the Track Layout Inserting Signals Now the signals: Drag the signals into position: once they are over the correct track section, lift your finger from the display. The signal will automatically dock to the track. Half of the track layout is complete. Now to the station and the rest of the oval: Drag the Then activate rotation mode and set the rotation angles: set the left signal to 270 degrees turnout "W 3R"...
- Page 25 View Options Selection of Individual and Multiple Accessories Tap on the button "View" in the upper button bar in order to see several filter options. In the default state, the option "Show All" is selected. With a finger tap on each accessory category For some tasks it is necessary to first you can create a...
- Page 26 Define Area from Selections Move and Copy Selection to Track Board One obtains better oversight on complex systems with the function of copying a selection to a new track board (image upper right) or moving Once you have selected multiple accessories (image right) or a region (image right) as selection to a new track board described on the previous page, additional options that were previously greyed out (image right).
- Page 27 Creating and Editing Events Creating segments . Programming and running procedures...
- Page 28 The automation of sequences is the ultimate hobby goal for many model railroaders. With a After opening the menu "Add event" Central Station 3, the processes of creating routes, locomotive sequencing, and the simply drag the appropriate automatic operation of entire layouts is substantially simplified. Thanks to drag-and-drop accessory into the time-line - for one must only drag individual elements into the sequence list.
- Page 29 Editing Settings / Speed Sorting Events How to customize settings: Pull up the point "Edit event" and tap on the Overview: All established corresponding sequence. The event routes and sequences can changes into edit mode, be easily sorted by name recognizable by the small crosses in or feedback sensors (S88).
- Page 30 Creating Turnout Routes Sequence Control via Feedback Contacts With the CS3 it is as easy as never before to create turnout routes: drag the individual turnouts from the accessory list onto the time-line and the turnout route is set. Via the "Edit" menu one can adjust any of the individual turnouts (image far left).
-
Page 31: System Settings
System Settings System Configuration · System Information... -
Page 32: Viewing And Editing System Settings
Viewing and Editing System Settings Accessing the System Menus Access to Basic Functions of the Central Station 3 The system settings entry screen is accessed Tap on the CS3 symbol in the network overview or the left menu to access the CS3 system (image right) by tapping on the "System"... - Page 33 This option is available, for when you connect your Central Station 3 via LAN cable to your router. You have the option of the CS3 obtaing a network IP address automatically via DHCP, or...
- Page 34 Managing Storage and USB Connection Configuring Booster Connections In the booster settings one can change the time between two status queries. Default: every five seconds. Additionally you can configure the designation of the boosters as well as the You see the connected USB devices in this section.
-
Page 35: Update Via Usb-Stick
Update via USB Stick Importing Locomotive Images via Web Browser If you do not have Internet access to update the CS3 to the newest software version, you can The CS3 is delivered with a large variety of locomotive images which should satisfy the needs do so by way of a USB stick. -
Page 36: Available Function Pictograms
Symbols Available Function Pictograms Sound This page shows you all of the pictograms available on the CS3 in one view. They are the same function symbols used when setting up the funtions of a locomotive (see page 13) - divide into sections light, sound, mechanical. This overiew is intended to simplify your Operation Brake Coupling/... -
Page 37: System Architecture: Cs3 And Cs3 Plus
System Architecture: CS3 and CS3 plus Booster 60128 60175/60174 ->6021 MS2 & MS1 Additional CS2 60215 connection Märklin CAN-Bus 60881 60883 Terminal 60125 WLAN router (e.g. TP-Link Nano with USB connection) CS3 plus WLAN connection... - Page 38 System Architecture: CS3 Booster 60128 60175/60174 ->6021 MS2 & MS1 Additional CS2 60215 connection 60883 Terminal 60125 Märklin CAN-Bus WLAN router (e.g. TP-Link Nano with USB connection) WLAN connection...
Need help?
Do you have a question about the Central Station 3 and is the answer not in the manual?
Questions and answers