Table of Contents
Advertisement
PIAGGIO WOULD LIKE TO THANK YOU
for choosing one of its products. We have prepared this manual to help you to get the very best from your vehicle. Please read it carefully before riding
the vehicle for the first time. It contains information, tips and precautions for using your vehicle It also describes features, details and devices to assure
you that you have made the right choice. We believe that if you follow our suggestions, you will soon get to know your new vehicle well and that it will
continue to give you satisfactory service for many years to come. This booklet forms an integral part of the vehicle; should the vehicle be sold, it must
be transferred to the new owner.
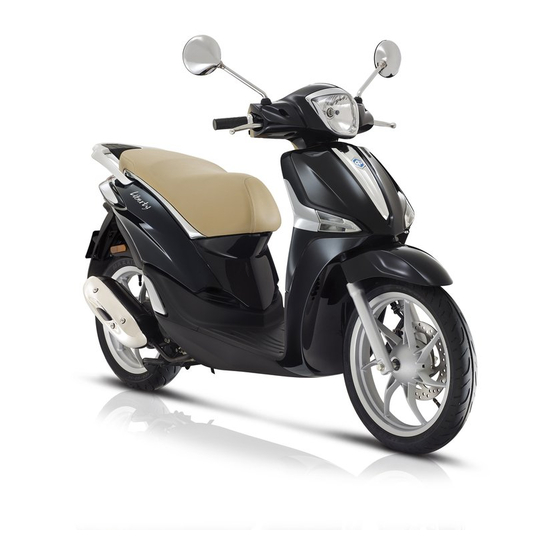
Liberty
Ed. 07_05/2018 Cod. 1Q000427 (IT-FR-DE-ES-NL-EN), 1Q000428 (EN-PT-DE-ES-FR-EL)
Advertisement
Table of Contents

Related Manuals for PIAGGIO Liberty 50IE 2018


Summary of Contents for PIAGGIO Liberty 50IE 2018
- Page 1 PIAGGIO WOULD LIKE TO THANK YOU for choosing one of its products. We have prepared this manual to help you to get the very best from your vehicle. Please read it carefully before riding the vehicle for the first time. It contains information, tips and precautions for using your vehicle It also describes features, details and devices to assure you that you have made the right choice.
- Page 2 The instructions given in this manual are intended to provide a clear, simple guide to using your vehicle; this booklet also details routine maintenance procedures and regular checks that should be carried out on the vehicle at an authorised Dealer or Service Centre. The booklet also contains instructions for simple repairs.
- Page 3 Personal safety Failure to completely observe these instructions will result in serious risk of personal injury. Safeguarding the environment Sections marked with this symbol indicate the correct use of the vehicle to prevent dam- aging the environment. Vehicle intactness The incomplete or non-observance of these regulations leads to the risk of serious damage to the vehicle and sometimes even the invalidity of the guarantee.
-
Page 5: Table Of Contents
INDEX VEHICLE..................Safe driving................32 Dashboard................MAINTENANCE................35 Analogue instrument panel............Engine oil level................36 Clock..................11 Engine oil level check............36 Digital lcd display..............12 Engine oil top-up..............37 Setting the hour/minutes function.......... 13 Engine oil change..............37 *MODE* button..............14 Hub oil level................ - Page 6 SCHEDULED MAINTENANCE............ 83 Scheduled servicing table............84 Recommended products............86...
-
Page 7: Vehicle
Liberty Chap. 01 Vehicle... -
Page 8: Dashboard
Dashboard (01_01) 01_01... -
Page 9: Analogue Instrument Panel
A = Ignition switch B = Bag hook C = Saddle opening button D = Horn button E = Turn indicator switches F = Headlight switch G = Instrument panel H = Throttle grip I = Starter button L = MODE key Analogue instrument panel (01_02) - Page 10 01_02 A = Speedometer B = Engine control warning light...
-
Page 11: Clock
C = Turn indicator warning light D = Low fuel warning light E = Digital display F = High-beam warning light on Clock (01_03) The clock, when the vehicle is on or with the key in «ON», shows the current hour and minutes in the format «hh:mm». -
Page 12: Digital Lcd Display
Digital lcd display (01_04, 01_05, 01_06, 01_07) Turning the ignition switch to «ON», the digital display will show: - the fuel level in the tank. 01_04 - Press the «MODE» key located on the handlebar for a couple of seconds to display the total and trip odometer (TRIP A and TRIP B). -
Page 13: Setting The Hour/Minutes Function
- the current hour and minutes in format «hh:mm». Set the correct time as described in the paragraph «Set functions hours/minutes». 01_07 Setting the hour/minutes function (01_08, 01_09, 01_10) To set or adjust the time, with vehicle running or with ignition switch in «ON» position, proceed as follows: - press the «MODE»... -
Page 14: Mode* Button
WARNING DISCONNECTING THE BATTERY CABLES WILL RESULT IN A RESET OF THE CLOCK 01_10 *MODE* button (01_11, 01_12) The «MODE» key, located on the right side of the handlebar, allows to: - alternate the display of the total or trip odometer with short pressures; - alternate the trip odometer when shown, with a long pressure;... -
Page 15: Keyswitch
Keyswitch (01_13) SWITCH POSITIONS ON «1»: Ready to start position, non-extractable key, mechanical anti-theft device disabled. Saddle opening and case opening possible. OFF «2»: Ignition disabled, non-extractable key, mechanical anti-theft device disa- bled. Saddle opening and case opening possible. CLOSE «3»: Ignition disabled, extractable key, mechanical anti-theft device disabled. Saddle opening and case opening disabled. -
Page 16: Releasing The Steering Wheel
Releasing the steering wheel (01_15) Reinsert the key and turn it to «OFF». CAUTION NEVER TURN THE KEY TO «LOCK» OR «OFF» WHILE RIDING. 01_15 Switch direction indicators (01_16) Move the lever «A» of the turn signals switch to the left, to position «1» to turn the left turn signals on. -
Page 17: Horn Button
Horn button (01_17) Press the button to sound the horn. 01_17 Light switch (01_18) Place the light switch «A» to «0» to turn the high beam lights on. Place the light switch «A» to «1» to turn the low beam lights on. The position «2»... -
Page 18: Start-Up Button
Start-up button (01_19) To start the engine, pull either one of the two brake levers and press the starter button. 01_19 Opening the saddle (01_20, 01_21) To open the saddle, place the ignition switch on «OFF» or «ON». 01_20... -
Page 19: Opening The Saddle To Access The Helmet Compartment In An Emergency
Press the saddle opening button and lift the saddle. 01_21 Opening the saddle to access the helmet compartment in an emergency (01_22, 01_23) If there is no battery power supply, proceed as following: - Put the ignition switch to «OFF» and press it to open the front case hatch. 01_22 - Pull the lever located inside the case to the top to open the saddle. -
Page 20: Keys
Keys (01_24) The vehicle is supplied with two keys (one spare) which serve to start the engine and to open the front case hatch. The keys are accompanied by a tag marked with the identification code to be quoted when ordering duplicates. WARNING WE RECOMMEND KEEPING THE DUPLICATE KEY TOGETHER WITH ITS CODE IN A SAFE PLACE AND NOT ON THE VEHICLE. -
Page 21: Rear Top Box Opening
FRAME IDENTIFICATION NUMBER: The frame identification number is inside the front case under a snap-on cover. 01_25 ENGINE IDENTIFICATION NUMBER: The engine identification number is stamped in the rear part of the engine near the shock absorber lower support. 01_26 Rear top box opening (01_27) Put the ignition switch to «OFF»... -
Page 22: Bag Clip
Bag clip (01_28) To use the bag hook mounted on the leg shield back plate it must be turned towards the saddle. CAUTION Maximum applicable load: 1.5 kg 01_28... -
Page 23: Use
Liberty Chap. 02... -
Page 24: Checks
Checks (02_01) Before using the vehicle, check: 1. That there is enough fuel in the fuel tank. 2. Rear hub oil level. 3. Engine oil level (see the «Engine oil level» section). 4. That the tyres are correctly inflated. 5. The correct functioning of headlights, rear light and turn indicators. 02_01 6. - Page 25 PLASTIC ELEMENTS AND COME INTO CONTACT WITH HOT PARTS ON THE VEHICLE. CAUTION KEEP NAKED FLAMES OR LIT CIGARETTES AWAY FROM THE TANK FILLER NECK: FIRE HAZARD. ALSO AVOID INHALING HARMFUL VAPOURS. CAUTION 02_03 ALWAYS USE PETROL WITH A MAXIMUM OF 10% BIOETHANOL CONTENT (E10).
-
Page 26: Tyre Pressure
FUEL TANK CAPACITY Fuel tank capacity 6 ± 0.5 litres (1 l of which is reserve) Tyre pressure (02_05) CAUTION TYRE PRESSURE SHOULD BE CHECKED WHEN TYRES ARE COLD.INCOR- RECT TYRE PRESSURE CAUSES ABNORMAL TYRE WEAR AND MAKES RID- ING DANGEROUS. TYRES MUST BE REPLACED WHEN THE TREAD REACHES THE WEAR LIMITS 02_05 SET FORTH BY LAW. -
Page 27: Running In
Running in (02_06) WARNING DURING THE FIRST 1,000 KM DO NOT RIDE THE VEHICLE OVER 80% OF ITS MAXIMUM SPEED. AVOID TWISTING THE ACCELERATOR KNOB COMPLETE- LY AND/OR KEEPING A CONSTANT SPEED FOR LONG PERIODS OF TIME. AFTER THE FIRST 1,000 KM, GRADUALLY INCREASE SPEED UNTIL REACH- ING THE MAXIMUM PERFORMANCE. - Page 28 - Insert the key into the ignition key and turn it to «ON». 02_07 - Wait for the engine control warning light to turn off. 02_08 - To start the engine, press the starter button, «A», after pulling either one of the two brake levers.
-
Page 29: Precautions
CAUTION DUE TO THE HIGH TEMPERATURES THE SILENCER CAN REACH, ALWAYS TAKE CARE, WHEN PARKING THE VEHICLE, THAT THE SILENCER DOES NOT COME INTO CONTACT WITH FLAMMABLE MATERIALS, TO AVOID SERIOUS BURNS. Precautions CAUTION NEVER STRESS THE ENGINE AT LOW TEMPERATURES IN ORDER TO AVOID POSSIBLE DAMAGE. -
Page 30: Stopping The Engine
necessary, once the engine is started, to take your vehicle to an Authorised Service Centre to determine the cause of this problem and to re-establish the vehicle proper functioning. Stopping the engine (02_10) Stop acceleration, then turn the key switch to «OFF » to stop the engine (extractable key). -
Page 31: Stand
MUFFLER: TO AVOID SERIOUS BURNS OR FIRE, THE MUFFLER SHOULD NEV- ER COME INTO CONTACT WITH FLAMMABLE MATERIALS. Stand (02_12) CENTRE STAND Push with your foot on the centre stand fork while lifting the vehicle backward, using the handlebar. 02_12 Automatic transmission (02_13) To ensure simple, pleasurable riding, the vehicle is equipped with automatic trans- mission with regulator and centrifugal clutch. -
Page 32: Safe Driving
Safe driving (02_14) WARNING SOME SIMPLE TIPS ARE PROVIDED BELOW WHICH WILL ENABLE YOU TO USE YOUR VEHICLE ON A DAILY BASIS MORE EASILY AND SAFELY. <. Your ability and your knowledge of the vehicle form the basis of safe riding. So try out the vehicle somewhere without traffic until you have gained a good familiarity of the vehicle itself. - Page 33 8. Any modification that changes the vehicle's performance, such as tampering with original structural parts, is strictly forbidden by law, and renders the vehicle non-con- forming to the approved type and dangerous for driving safety. CAUTION RIDING UNDER THE INFLUENCE OF ALCOHOL, DRUGS OR CERTAIN MEDI- CINES CAN BE EXTREMELY DANGEROUS FOR ONESELF AND FOR OTHERS.
-
Page 35: Maintenance
Liberty Chap. 03 Maintenance... -
Page 36: Engine Oil Level
Engine oil level In four-stroke engines, the engine oil is used to lubricate the timing elements, the bench bearings and the head-engine block-piston assembly. An insufficient quantity of oil can cause serious damage to the engine. In all four-stroke engines, a loss of efficiency in oil performance and certain consumption should be considered normal. -
Page 37: Engine Oil Top-Up
03_02 ENGINE OIL CAPACITY Engine oil ~ 850 cm³ Engine oil top-up The oil should be topped up after having checked the level and in any case by adding oil without ever exceeding the MAX. level. Take your vehicle to an Authorised Service Centre to have the engine oil checked and if necessary, topped-up as indi- cated in the scheduled maintenance table. -
Page 38: Hub Oil Level
CAUTION RUNNING THE ENGINE WITH INSUFFICIENT LUBRICATION OR WITH INADE- QUATE LUBRICANTS ACCELERATES THE WEAR AND TEAR OF THE MOVING PARTS AND CAN CAUSE IRREPARABLE DAMAGE. TOPPING UP THE ENGINE WITH AN EXCESSIVE AMOUNT OF OIL MAY CAUSE MALFUNCTION AND/OR A DROP IN PERFORMANCE OF THE VEHICLE. USING OILS OTHER THAN THOSE RECOMMENDED CAN SHORTEN THE LIFE OF THE ENGINE. - Page 39 N.B. THE NOTCHES ON THE HUB OIL LEVEL DIPSTICK, EXCEPT THE ONE INDI- CATING THE MAX LEVEL, REFER TO OTHER MODELS BY THE MANUFACTUR- ER AND HAVE NO SPECIFIC FUNCTION FOR THIS MODEL. CAUTION RIDING THE VEHICLE WITH INSUFFICIENT HUB LUBRICATION OR WITH CON- 03_04 TAMINATED OR IMPROPER LUBRICANTS ACCELERATES THE WEAR AND TEAR OF THE MOVING PARTS AND CAN CAUSE SERIOUS DAMAGE.
-
Page 40: Tyres
Tyres (03_06) Periodically check the inflation pressure of each tyre (when cold). Tyres are fitted with wear indicators; tyres should be replaced as soon as these indi- cators become visible on the tyre tread. Also check that the tyres do not show signs of splitting at the sides or irregular tread wear;... -
Page 41: Spark Plug Dismantlement
Spark plug dismantlement (03_07, 03_08, 03_09, 03_10, 03_11, 03_12, 03_13) To remove the spark plug, proceed as follows: - Lift the saddle and undo the cover upper fixing screw from both sides of the vehicle. 03_07 - Undo the spark plug access cover lower fixing screws from both sides of the vehicle. 03_08 - Remove the spark plug access cover. - Page 42 - Remove the spark plug cap. 03_10 - Undo the spark plug with the specific spark plug spanner. 03_11 - Remove the spark plug from its housing. When refitting the plug, tighten it manually, being sure to insert it at the right angle. Use the wrench only to tighten it. CAUTION THE SPARK PLUG MUST BE REMOVED WHEN THE ENGINE IS COLD.
- Page 43 CAUTION FOLLOW THESE PROCEDURES VERY CAREFULLY TO AVOID ANY SEVERE DAMAGE THAT MAY BE CAUSED BY THE VERY POWERFUL IGNITION SYS- TEM. CAUTION THE USE OF SPARK PLUGS OTHER THAN THOSE RECOMMENDED OR A SHIELDLESS SPARK PLUG CAP COULD CAUSE DISTURBANCES TO THE SYS- TEM.
-
Page 44: Removing The Air Filter
Removing the air filter (03_14) To remove and clean the air filter as instructed in the scheduled maintenance table, contact an Authorised Service Centre. 03_14 Checking the brake oil level (03_15) The brake fluid tank is placed on the right side of the handlebar. To control the brake fluid level, proceed as follows: Rest the vehicle on its centre stand and with the handlebars perfectly horizontal. -
Page 45: Braking System Fluid Top Up
Braking system fluid top up (03_16, 03_17, 03_18) To top-up brake fluid, proceed as follows: Rest the vehicle on its centre stand on a flat ground. Undo the rear screws fixing the handlebar front cover. 03_16 Undo the front screw fixing the handlebar front cover. Remove the front cover of the handlebar. -
Page 46: Battery
CUIT FLUID IS HYGROSCOPIC, THAT IS, IT ABSORBS HUMIDITY FROM THE SURROUNDING AIR. IF MOISTURE CONTAINED IN THE BRAKE FLUID EX- CEEDS A CERTAIN VALUE, THIS WILL RESULT IN INEFFICIENT BRAKING. NEVER USE BRAKE LIQUID FROM OPEN OR PARTIALLY USED CONTAINERS. WARNING ONLY USE DOT 4-CLASSIFIED BRAKE FLUID. - Page 47 - Remove the battery compartment cover. The battery is the electrical device requiring the closest monitoring and most diligent maintenance. WARNING USED BATTERIES ARE HARMFUL FOR THE ENVIRONMENT. COLLECTION AND DISPOSAL SHOULD BE CARRIED OUT IN COMPLIANCE WITH REGULA- 03_20 TIONS IN FORCE.
-
Page 48: Use Of A New Battery
Use of a new battery (03_21, 03_22, 03_23, 03_24) To remove the empty battery, proceed as follows: Place the scooter on its centre stand and lift the saddle. Remove the battery com- partment cover and undo the negative pole screw «-». 03_21 Undo the positive pole screw «+». -
Page 49: Long Periods Of Inactivity
Ensure that the terminals are connected correctly and check voltage. CAUTION DO NOT REVERSE THE POLARITY: RISK OF SHORT CIRCUIT AND DAMAGE TO THE ELECTRICAL SYSTEM. WARNING 03_24 USED BATTERIES ARE HARMFUL FOR THE ENVIRONMENT. COLLECTION AND DISPOSAL SHOULD BE CARRIED OUT IN COMPLIANCE WITH REGULA- TIONS IN FORCE. -
Page 50: Fuses
N.B. THE BATTERY MUST BE CHARGED WITH A CURRENT EQUAL TO 1/10 OF THE RATED CAPACITY OF THE BATTERY AND FOR NOT LONGER THAN 10 HOURS. IN ANY CASE, IT IS PREFERABLE TO PERFORM THIS SERVICE AT AN AU- THORISED SERVICE CENTRE. WHEN REFITTING THE BATTERY MAKE SURE THE LEADS ARE CORRECTLY CONNECTED TO THE TERMINALS. - Page 51 MAIN FUSES TABLE Fuse No. 1 Threshold of operation: 20A Protected circuits: recharge circuit, general vehicle. SECONDARY FUSES The five secondary fuses are located under the front grille. 03_27 SECONDARY FUSES TABLE Fuse no. 2 Threshold of operation: 7.5 A Protected circuits: battery-...
- Page 52 Threshold of operation: 7.5 A Protected circuits: key powered: Instrument panel, hight beam/low beam lights, rear daylight running lights, licence plate light. To access the auxiliary fuses proceed as follows: Remove the Piaggio clip-on badge using a flat screwdriver. 03_28...
- Page 53 Unscrew the screw fixing the grille to the frame. 03_29 Remove the grille by slightly pulling it upwards and releasing the seat tongues. CAUTION BEFORE REPLACING THE FUSE IT IS NECESSARY TO FIND AND SOLVE THE FAILURE THAT CAUSED IT TO BLOW. DO NOT REPLACE THE FUSE WITH ANY ALTERNATIVE FORM OF CONDUC- TOR.
-
Page 54: Lamps
CAUTION MODIFICATIONS OR REPAIRS TO THE ELECTRICAL SYSTEM, PERFORMED INCORRECTLY OR WITHOUT STRICT ATTENTION TO THE TECHNICAL SPEC- IFICATIONS OF THE SYSTEM CAN CAUSE MALFUNCTIONING AND RISK OF FIRE. CAUTION PROCEED WITH CAUTION. DO NOT DAMAGE THE TABS AND/OR THEIR CORRESPONDING SLOTS. HAN- DLE THE PLASTIC AND PAINTED COMPONENTS WITH CARE, DO NOT SCRATCH OR IMPAIR THEM. - Page 55 BULBS High/low beam light bulb Type: Halogen (HS1) Power: 12V - 35/35W Quantity: 1 Front indicator light bulb Type: Amber spherical Power: 12V - 10W Quantity: 1 RH + 1 LH Rear indicator light bulb Type: Spherical Power: 12V - 10W Quantity: 1 RH + 1 LH Rear tail light bulb Type: Capless...
-
Page 56: Front Light Group
Front light group (03_32, 03_33, 03_34, 03_35, 03_36, 03_37) To access the front light assembly, proceed as follows: Rest the vehicle on its centre stand on a flat ground. Undo the rear screws fixing the handlebar front cover. 03_32 Undo the front screw fixing the handlebar front cover. Remove the front cover of the handlebar. - Page 57 Remove the protective cap. 03_35 Turn the fixing ring nut of the low beam/high beam lights bulb anticlockwise and re- move it. 03_36 Remove the low beam/high beam lights bulb and replace it with a new bulb. Follow the process in reverse order to refit. N.B.
-
Page 58: Head Light Adjustment
CAUTION DO NOT REST OR TRANSPORT OBJECTS AND/OR CLOTHING ON TOP OF THE FRONT LIGHT ASSEMBLY WITH THE LIGHT ON OR JUST TURNED OFF. FAIL- URE TO OBSERVE THIS PRECAUTION MAY CAUSE THE GLASS TO OVERHEAT AND CONSEQUENTLY MELT. FRONT LIGHT ASSEMBLY BULB High/low beam light bulb Type: Halogen (HS1) Power: 12V - 35/35W... -
Page 59: Front Direction Indicators
FER TO THE STATUTORY REGULATIONS IN FORCE IN EVERY COUNTRY WHERE THE VEHICLE IS USED. 03_39 Front direction indicators In the event of malfunction, we recommend contacting an Authorised Service Cen- tre for replacement. FRONT TURN INDICATORS BULBS Front indicator light bulb Type: Amber spherical Power: 12V - 10W Quantity: 1 RH + 1 LH... -
Page 60: Rear Optical Unit
Rear optical unit (03_40, 03_41, 03_42, 03_43, 03_44, 03_45, 03_46, 03_47, 03_48, 03_49, 03_50) To replace the rear light assembly bulbs, proceed as follow: Remove the luggage carrier cover. 03_40 Unscrew the upper fixing screw of the rear light assembly. 03_41 Use a screwdriver, remove the chromed covers from both sides of the vehicle. - Page 61 Unscrew the rear light assembly side fastening screw from both sides of the vehicle. 03_43 Remove the rear light assembly from its seat. 03_44 Turn the turn indicator lights bulb holder anticlockwise and remove it from its seat. 03_45...
- Page 62 Lightly press the bulb, turn it anticlockwise and remove it from the bulb holder. To refit, proceed in reverse order. 03_46 REAR TURN INDICATOR BULBS Rear indicator light bulb Type: Spherical Power: 12V - 10W Quantity: 1 RH + 1 LH Remove the bulb holder from its seats.
- Page 63 Remove the daylight running lights bulb and replace it. 03_48 REAR DAYLIGHT BULBS Rear tail light bulb Type: Capless Power: 12V - 5W Quantity: 2 Turn the stop light bulb holder anticlockwise and remove it from its seat. 03_49...
-
Page 64: Number Plate Light
Slightly press the stop light bulb, turn it anticlockwise and remove it from the bulb holder. To refit, proceed in reverse order. N.B. IF MISTING IS NOTICED ON THE INSIDE OF THE HEADLAMP GLASS, THIS DOES NOT INDICATE AN ABNORMALITY AND IS RELATED TO HUMIDITY AND/ OR LOW TEMPERATURES. -
Page 65: Rear-View Mirrors
Remove the bulb of the licence plate light and replace it. 03_52 LICENCE PLATE LIGHT BULB Licence plate light Type: Capless Power: 12V - 5W Quantity: 1 Rear-view mirrors (03_53, 03_54) The mirrors can be set to the desired position by adjusting the mirror frame. 03_53... -
Page 66: Front Disc Brake
To remove the rear view mirror, lift the rubber protection «A», unscrew the nut «B» slightly to unlock the stem. Slide off the complete mirror. CAUTION DO NOT ADJUST THE MIRRORS WHILE DRIVING. THIS COULD CAUSE YOU TO LOOSE CONTROL OF THE VEHICLE. 03_54 Front disc brake (03_55) The brake disc and pad wear is automatically compensated, therefore it has no effect... -
Page 67: Rear Drum Brake
CAUTION BRAKING SHOULD BEGIN AFTER ABOUT 1/3 OF THE BRAKE LEVER STROKE. Rear drum brake (03_56) Operate adjusting nut «B» and loosen lock nut «A» shown in the figure. Note that when the throttle is in idle the wheel should rotate free. After the adjustment, screw lock nut «A». -
Page 68: Inactivity Of The Vehicle
Inactivity of the vehicle (03_58) The following operations are recommended: 1. Clean the vehicle thoroughly and then cover it with a canvas; 2. With the engine off, remove the spark plug and pour 1 to 2 of oil through the spark plug hole (larger quantities will cause engine damage). - Page 69 · Salinity and humidity of the atmosphere: marine areas, hot and wet weather. WARNING . Prevent deposits from remaining on the bodywork, industrial and pollutant residual dust, tar spots, dead insects, bird droppings, etc. · Do not park the vehicle under the trees. During some seasons, resins, fruits or leaves containing aggressive chemical substances that may damage the paint- work may fall from trees.
-
Page 70: Troubleshooting
WARNING WHEN WASHING THE ENGINE WITH A HIGH-PRESSURE WATER JET: • ONLY USE FAN SPRAY JETS. • DO NOT PLACE THE WATER JET NOZZLE CLOSER THAN 60 CM. • DO NOT USE WATER AT TEMPERATURES OVER 40ºC. • DO NOT DIRECT THE JET AT THE THROTTLE BODY, THE ELECTRIC CABLES, THE COOLING SLITS IN THE TRANSMISSION COVER AND THE SPIRAL COVER, THE FUEL TANK CAP. - Page 71 Injection system fault Contact an Authorised Service Centre. Insufficient battery charge Recharge the battery Fuel pump fault Contact an Authorised Service Centre. IGNITION PROBLEMS No spark from spark plug. Due to Check that the electrodes are the presence of high voltage, this properly adjusted (0.7÷...
- Page 72 HIGH FUEL CONSUMPTION AND BAD PERFORMANCE Air filter blocked or dirty Contact an Authorised Service Centre. INEFFICIENT BRAKING Oil on drum or disc. Worn Pads/ Contact an Authorised Service Shoes Centre. incorrect rear brake adjustment Adjust INEFFICIENT SUSPENSION Inefficient shock absorbers, oil Contact an Authorised Service leakage, deteriorated end of stroke Centre.
- Page 73 STAND DOES NOT RETURN TO POSITION Presence of dirt Clean and grease...
-
Page 75: Technical Data
Liberty Chap. 04 Technical data... -
Page 76: Data
Data (04_01) 04_01... - Page 77 VEHICLE TECHNICAL DATA Frame Tubular steel frame Front suspension Straight hydraulic telescopic fork. Stroke: 76 mm Rear suspension Single-chamber shock absorber. Front brake Ø 240 mm disc brake with dual piston floating calliper. Rear brake Ø 140 mm mechanically operated drum brake controlled from LH handlebar lever.
- Page 78 ENGINE TECHNICAL DATA Engine Single-cylinder, 4-stroke Piaggio i- Bore 39 mm Stroke 41.8 mm Engine capacity 50 cm³ Max. power 2.4 kW at 7,500 rpm MAX torque 3.1 Nm at 7,250 rpm Max Power (version with limited 1.7 kW at 6500 rpm...
- Page 79 Gearbox Continuously variable transmission with torque server Clutch Automatic centrifugal dry with pad support stopper. Fuel Unleaded petrol max E10 (95 RON) Spark plug NGK CR8EB Exhaust silencer Absorption-type exhaust muffler with catalytic converter. Emissions compliance EURO 3 CAPACITY Engine oil ~ 850 cm³...
-
Page 81: Spare Parts And Accessories
Liberty Chap. 05 Spare parts and accessories... -
Page 82: Warnings
Warnings (05_01) WARNING IT IS RECOMMENDED THAT "ORIGINAL PIAGGIO SPARE PARTS" BE USED, AS THESE ARE THE ONLY ONES OFFERING YOU THE SAME QUALITY AS- SURANCE AS THOSE INITIALLY FITTED ON THE VEHICLE. IT SHOULD BE REMEMBERED THAT USING NON-ORIGINAL SPARE PARTS 05_01 CAUSES YOUR WARRANTY RIGHTS TO EXPIRE. - Page 83 Liberty Chap. 06 Scheduled maintenance...
- Page 84 Scheduled servicing table (06_01) Adequate maintenance is fundamental to ensure long-lasting, optimum operation and performance of your vehicle. For this reason a series of checks and maintenance services has been prepared, available for purchase separately, listed together in the chart on the following page. It is a good idea to report small performance anomalies right away to an Authorised Service Centre, without waiting for the next scheduled service, so they can be re- paired immediately.
- Page 85 EVERY EVERY Km x 1,000 MONTH MONTH Air filter Oil filter (mesh) Valve clearance Clutch assembly Electrical system and battery Braking system Cylinder cooling system Brake fluid Engine oil * Hub oil Headlight direction adjustment Brake pads Sliding shoes / CVT rollers Tyre pressure and wear Vehicle road test Driven pulley - roller casings...
- Page 86 * Check level every 2,500 km Recommended products (06_02) Piaggio Group recommends the products of its "Castrol Official Partner" for the scheduled maintenance of its vehicles.Use lubricants and liquids having specifi- cations that are equivalent, or superior, to the recommended products. These indica- tions also apply when topping up fluid levels.
- Page 87 Product Description Specifications Lithium-based grease Lithium-based grease, suitable for various Yellow grease ISO L-X-BCHA 3 - DIN 51 825 uses. K3K -20 Water repellent spray grease Water repellent pouring calcium spray grease. R.I.D./A.D.R. 2 10°b) 2 R.I.Na. 2.42 - I.A.T.A. 2 - I.M.D.G.
- Page 89 TABLE OF CONTENTS Air filter: 44 Fuses: 50 Maintenance: 35, 83 Technical Data: 75 Mirrors: 65 Top box: 21 Transmission: 31 Tyre pressure: 26 Tyres: 40 Battery: 46, 48 Horn: 17 Brake: 44, 66, 67 Hub oil: 38 Puncture: 67 Vehicle: 7, 68 Checks: 24 Identification: 20...
- Page 90 The descriptions and images in this publication are given for illustrative purposes only. While the basic features as described and illustrated in this manual remain unchanged, Piaggio & C. S.p.A. reserves the right, at any time and without being required to update this publication beforehand, to make any changes to components, parts or accessory supplies which it deems necessary to improve the product, or which are required for manufacturing or commercial reasons.
Need help?
Do you have a question about the Liberty 50IE 2018 and is the answer not in the manual?
Questions and answers