Table of Contents
Advertisement
Quick Links
Piaggio would like to thank you
for choosing one of its products. We have drawn up this booklet to show you all features of our product. Please read the booklet carefully before using
your vehicle. It includes information, suggestions and warnings regarding your vehicle. You will also be informed of features, details and devices that
will prove the excellence of your choice. We believe that if you follow our suggestions you will soon tune in with your vehicle and use it for a long time
at full satisfaction.
This booklet is an integral part of the vehicle, and upon sale, it should be transferred to the new owner.
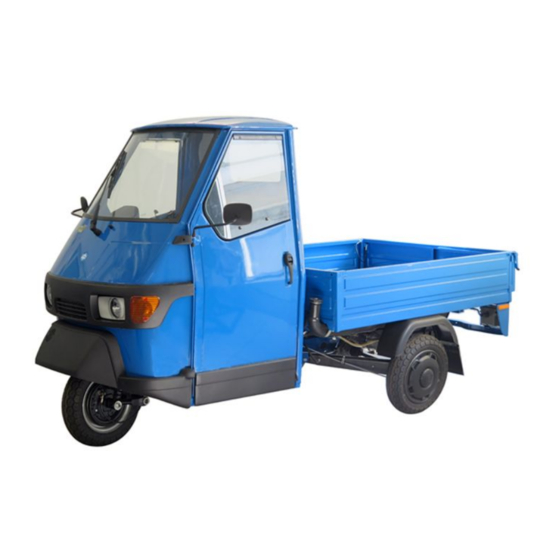
APE 50 E4
Ed. 03_07/2018 - Cod. 1Q000649 (IT-ES) 1Q000650 (FR-EN) 1Q000651 (DE-PT) 1Q000652 (EL-NL) 1Q000653 (DA-PL)
Advertisement
Table of Contents

Related Manuals for PIAGGIO APE 50 E4


Summary of Contents for PIAGGIO APE 50 E4
- Page 1 Piaggio would like to thank you for choosing one of its products. We have drawn up this booklet to show you all features of our product. Please read the booklet carefully before using your vehicle. It includes information, suggestions and warnings regarding your vehicle. You will also be informed of features, details and devices that will prove the excellence of your choice.
- Page 2 The instructions given in this booklet are intended to provide a clear, simple guide to using your scooter; details are also given of routine maintenance procedures and regular checks that should be carried out on the vehicle at an Authorised PIAGGIO Dealer or Service Centre. The booklet also contains instructions for simple repairs.
- Page 3 Personal safety Failure to completely observe these instructions will result in serious risk of personal injury. Safeguarding the environment Sections marked with this symbol indicate the correct use of the vehicle to prevent dam- aging the environment. Vehicle intactness The incomplete or non-observance of these regulations leads to the risk of serious damage to the vehicle and sometimes even the invalidity of the guarantee.
-
Page 5: Table Of Contents
INDEX IDENTIFICATION................. Instrument unit and indicators........... 46 Manufacturer plate..............Indicator lights................47 Vehicle identification number............ Brake fluid level warning light..........48 Engine identifications numbers..........10 Turn signal indicator light............48 Inside view................11 Indicators.................. 48 Outside view................12 Speedometer................. 49 SAFE RIDING................ - Page 6 Brakes..................88 Brake adjustment..............89 Troubleshooting / What to do if..........89 TECHNICAL DATA..............95 Vehicle..................96 Engine..................99 SCHEDULED MAINTENANCE - CHECKS......... 103 Checks..................104 Scheduled maintenance service..........104 Recommended products............106...
-
Page 7: Identification
APE 50 E4 Chap. 01 Identification... -
Page 8: Manufacturer Plate
Manufacturer plate (01_01, 01_02, 01_03, 01_04) Located under the right side seat. MANUFACTURER'S PLATE KEY: 1. Manufacturer of the vehicle. 2. Type-approval number. 3. Vehicle Identification Number V.I.N. 4. Noise level (dB) under prescribed engine (Rpm) 01_01 5. Type of engine. 6. -
Page 9: Vehicle Identification Number
TYRE LABEL. To know the front and rear tyre pressure, read the values specified on the tyre label, situated inside the driving cabin. 01_03 01_04 Vehicle identification number (01_05, 01_06) The identification registration numbers are made up of a prefix that identifies the ve- hicle type and a progressive number punched on the chassis and engine. -
Page 10: Engine Identifications Numbers
Check that the prefix and number punched on the chassis correspond to that shown on the vehicle documents. The chassis identification number is located on the right side of the cross member under the seat. CAUTION BE REMINDED THAT ALTERING IDENTIFICATION REGISTRATION NUMBERS 01_06 MAY LEAD TO SERIOUS PENAL SANCTIONS (IMPOUNDING OF THE VEHICLE. -
Page 11: Inside View
CAUTION BE REMINDED THAT ALTERING IDENTIFICATION REGISTRATION NUMBERS MAY LEAD TO SERIOUS PENAL SANCTIONS (IMPOUNDING OF THE VEHICLE. ETC.) ENGINE IDENTIFICATION NUMBER ENGINE PREFIX C804M *01001* ENGINE IDENTIFICATION NUMBER (VERSION WITH SPEED LIMITED TO 25 K ENGINE PREFIX C805M *01001* Inside view (01_08) -
Page 12: Outside View
01_08 Outside view (01_09, 01_10) - Page 13 01_09...
- Page 14 01_10...
-
Page 15: Safe Riding
APE 50 E4 Chap. 02 Safe riding... -
Page 16: Safety Rules
Safety rules (02_01) The catalytic converter is an emission control device, mounted in the exhaust system, whose function is to reduce the polluting agents from the exhaust gases. CAUTION DURING OPERATION, THE CATALYTIC SILENCER DEVELOPS HIGH TEMPER- ATURES; THEREFORE, DO NOT STOP OR PARK THE VEHICLE ON: GRASS, 02_01 DRY LEAVES OR OTHER INFLAMMABLE MATERIALS, TO AVOID THE RISK OF FIRE. -
Page 17: Engine Exhaust Gas
prevent brake overheating, which could reduce their efficiency. Shift down gears to increase the engine braking effect. 10. For rapid «pick up», e.g. for overtaking, shift down a gear to get the required torque. 11. When driving up demanding slopes, shift down to employ the maximum pow- 12. -
Page 18: Maintenance
Ensure there are no loose connections or holes in the exhaust system. It is advisable to have the exhaust system and the bodywork checked by an Author- ised Piaggio Service Centre in the following cases: • whenever there is a change in the sound of the exhaust. -
Page 19: Ventilation System
Ventilation system (02_05) To allow the ventilation system to work properly, ensure the air intake grille, adjacent to the headlight covers, is always clear of snow, leaves and any other obstructions. 02_05 Running-in period (02_06) It is advisable to observe the following precautions during the first 1,000 km so as not to compromise the vehicle performance. -
Page 21: Vehicle Use
APE 50 E4 Chap. 03 Vehicle use... -
Page 22: Checks
Checks (03_01) Before using the vehicle, check: 1. that the petrol and oil tanks are refilled. 2. The brake fluid level. 3. That the tyre inflation pressure is correct. 4. Correct operation of side/taillights, headlights and turn indicators. 5. Front and rear brake operation. 6. - Page 23 Fuel type plate - E10 gasoline The plate illustrated in the image indicates the fuel type to be used for refilling. 03_03 To open the refilling plug, insert the supplied key and turn it anti-clockwise, then re- move the plug. 03_04 To close, refit the plug in its seat, then turn the key clockwise and remove it.
- Page 24 CAUTION STOP THE ENGINE BEFORE REFILLING WITH GASOLINE. NEVER EXCEED THE TANK'S MAXIMUM CAPACITY, AS THE EXCESS FUEL WILL END UP FILL- ING THE DELIVERY HOSE AS WELL, THUS RESULTING IN POSSIBLE FUEL SPILLAGE AND THE CONSEQUENT RISK OF FIRE AND/OR DAMAGE TO THE VEHICLE'S BODYWORK.
- Page 25 OIL TANK: The oil tank is located on the right side of the vehicle. 03_06 To open the refilling plug, turn it anti-clockwise. 03_07 To close it, refit the plug in its seat and turn it clockwise. CAUTION USE OF OILS DIFFERENT THAN THOSE RECOMMENDED MAY COMPROMISE THE SERVICE LIFE OF THE ENGINE.
-
Page 26: Before Starting The Engine
The minimum oil level is indicated by the specific warning light on the instrument panel. 03_09 Before starting the engine (03_10) Before starting the vehicle, check: • that the hand brake is not engaged. • that the reverse gear control lever is forward or backward according to wheth- er you want to move forward or in reverse. -
Page 27: Engine Start Up
Engine start up (03_11, 03_12, 03_13, 03_14, 03_15, 03_16, 03_17, 03_18) Make sure the fuel cock is open, making sure to unscrew it completely. 03_11 Make sure that the hand brake is engaged. 03_12 Make sure that the gear is in neutral position, identified by the "N" position on the gear indicator. - Page 28 Turn the key supplied by setting the switch to the "ON" position. 03_14 With the starter key on «ON» , the warning lights on the instrument panel, the low beam and the parking lights are always lit. 03_15 Keep the throttle hand grip at idle. 03_16...
-
Page 29: Stopping The Engine
When starting the engine cold, pull the starter knob. Release it a few seconds after the ignition of the engine. 03_17 Press the start-up button for a few seconds until the engine starts. Do not try the switch in the event of ignition failure, refer to the procedure described in paragraph"Difficult starting". -
Page 30: Vehicle Start-Up
Turn the switch key to «OFF». 03_20 Vehicle Start-up (03_21, 03_22) With the engine at idle, pull the clutch lever and turn the gearshift lever to 1st speed position, identified by the "1" position on the gear indicator. 03_21 Slowly release the clutch lever and at the same time increase the number of revolu- tions of the engine with the throttle hand grip. -
Page 31: Starting Difficulties
Before performing this operation, check the reverse lever position. If you cannot start the engine even with the procedure described above, contact an Authorised PIAGGIO Service Centre. CAUTION NEVER STRESS THE ENGINE AT LOW TEMPERATURES IN ORDER TO AVOID POSSIBLE DAMAGE. -
Page 32: Gear Position
CAUTION AFTER A LONG JOURNEY ALLOW THE ENGINE TO RUN AT IDLE SPEED FOR A FEW SECONDS BEFORE SWITCHING IT OFF Gear position (03_24, 03_25, 03_26, 03_27, 03_28) To reverse the vehicle, proceed as follows: in a stationary position put the gear in neutral position identified by the "N" position of the gear indicator, keeping the engine at idle. - Page 33 Engage the 1st gear identified by the "1" position of the gear indicator, release the clutch lever slowly, and at the same time operate the throttle hand grip to start the vehicle in reverse gear. WARNING PAY PARTICULAR ATTENTION WHILE GUIDING IN REVERSE GEAR TO AVOID THE LOSS OF CONTROL OF THE VEHICLE.
- Page 34 Once reverse gear is engaged, there are 4 separate ratios available for reversing (for the version with speed limited to 25 km/h there are 3 ratios). For safety reasons, it is nonetheless recommended to always keep the same ratio until the end of the ma- noeuvre.
-
Page 35: Seats And Safety Belts
APE 50 E4 Chap. 04 Seats and safety belts... -
Page 36: Using The Safety Belts
(on the hips) and not at your waist. Ask your doctor for advice. 05_01 Injured people: PIAGGIO recommends using the seat belt. Ask your doctor for ad- vice. WARNING THE SAFETY BELTS ARE DESIGNED TO EXERT THEIR ACTION ON THE BONE STRUCTURE OF YOUR BODY. -
Page 37: Fasting The Safety Belt
BLY. AFTER AN ACCIDENT OF A CERTAIN SEVERITY, WE RECOMMEND THAT YOU HAVE THE SEAT BELT WHICH WAS BEING WORN REPLACED AT AN AU- THORISED PIAGGIO SERVICE CENTRE, EVEN IF IT DOES NOT APPEAR DAM- AGED. Fasting the safety belt (05_02) Take the metal tongue from its housing. -
Page 38: Adjusting The Safety Belt
Adjusting the safety belt (05_03) Place the seatbelt as low as possible on the hips, not on the waist. Adjust the seatbelt so that there is space for a fist between the seatbelt and the chest. Keep the anchorage at a right angle with the seatbelt and pull the latter in order to extend or shorten it. -
Page 39: Instrument Panel And Controls
APE 50 E4 Chap. 05 Instrument panel and controls... -
Page 40: Dashboard
Dashboard (06_01) 06_01... -
Page 41: Controls
Instrument panel key: A = Reverse gear lever B = Horn button C = Turn indicator switch D = Gear shift knob E = Clutch lever F = 12V power socket G = Instrument panel H = Throttle grip I = Windscreen wiper control switch L = Ignition switch M = Ignition switch N = Hand brake lever... - Page 42 RIGHT BUTTONS UNIT: WINDSCREEN WIPER SWITCH The switch has three positions: 1. Windscreen wiper turned off. 2. Windscreen wiper turned on. 3. Windscreen washer enabling. 06_03 START-UP BUTTON 06_04 LEFT BUTTONS UNIT:...
-
Page 43: Ignition Switch
TURN INDICATOR SWITCH The turn indicator switch has three positions: 1. Left side turn indicator turned on. 2. Turn indicator turned off. 3. Right side turn indicator turned on. 06_05 AUDIBLE WARNING DEVICE 06_06 Ignition switch (06_07) Key switch "A" LOCK = Ignition grounded, extractable key, anti-theft engaged. -
Page 44: Accessories Socket
ON THE APE CROSS VERSION P = Parking position ignition grounded, front and rear daylight running light turned on, clock lighted and extractable key. Locking the steering (antitheft):turn the handlebar to the left (end of the stroke), turn the key to the «LOCK» position and remove it. Unlocking the steering:Re-insert the key and turn it to the «OFF»... -
Page 45: Gauges And Warning Lights
APE 50 E4 Chap. 06 Gauges and Warning Lights... -
Page 46: Instrument Unit And Indicators
Instrument unit and indicators (07_01) 07_01... -
Page 47: Indicator Lights
Instrument group key: A = Speedometer B = Odometer C = Fuel gauge D = Turn indicator warning light E = "Lights on" warning light F = Brake fluid level warning light G = MìLow mixer oil warning light H = Low fuel warning light Indicator lights The warning lights indicate faults in the systems or their activation. -
Page 48: Brake Fluid Level Warning Light
CAUTION 07_02 DO NOT DRIVE WITH THE WARNING LIGHT ON, TO AVOID ACCIDENTS. HAVE THE BRAKE CIRCUIT CHECKED IMMEDIATELY BY AN AUTHORISED PIAGGIO SERVICE CENTRE. Turn signal indicator light (07_03) Warning light for right and left indicators on. -
Page 49: Speedometer
Speedometer (07_04) The instrument needle indicates vehicle speed, the speedometer has two scales, one from 0 - 80 km/h and an internal one from 0 - 50 mph. CAUTION ADJUST SPEED TO COMPLY WITH ROAD TRAFFIC REGULATIONS. 07_04 Odometer (07_05) The odometer «A»... - Page 50 CAUTION WARNING DO NOT DRIVE WITH THE FUEL GAUGE BELOW THE "E" MARK (TANK EMPTY). UNDER SUCH CONDITIONS THE VEHICLE COULD STOP SUDDENLY CAUSING POSSIBLE SITUATIONS OF DANGER FOR PEOPLE. RESTORING FUNCTIONALITY OF THE ENGINE THAT HAS BEEN WITHOUT FUEL MEANS THE INJECTION SYSTEM HAS TO BE BLED; THIS PARTICULAR OPERATION REQUIRES SPECIFIC TECHNICAL EXPERTISE SO PLEASE CON- TACT AN AUTHORISED SERVICE CENTRE.
-
Page 51: Mirrors And Window Glasses
APE 50 E4 Chap. 07 Mirrors and Window Glasses... -
Page 52: Adjusting The Mirror
Adjusting the mirror (08_01) Rear-view mirrors are adjusted by moving the mirror body manually until the ideal angle is obtained to guarantee full visibility. CAUTION NEVER ADJUST MIRRORS WHILE DRIVING AS YOU MAY LOSE CONTROL OF THE VEHICLE. 08_01 Wipers and Brushes (08_02, 08_03, 08_04) Blade •... - Page 53 Replace the windscreen wiper blade as follows: 1. Lift the windscreen wiper arm "A" and position the blade so that it forms a right angle with the arm; 2. Press retainer tab "B" of the latching spring and extract the blade for arm "A";...
-
Page 55: Electrical System
APE 50 E4 Chap. 08 Electrical system... - Page 56 Electrical system (10_01, 10_02, 10_03) The circuits of the electrical system are protected by fuses placed under the panel on the vehicle's left side and under the driver's seat. CAUTION IN THE EVENT OF ANY ELECTRICAL SYSTEM INTERVENTION, MAKE SURE THAT THE WIRES OF THE CONTROL UNIT ARE CONNECTED CORRECTLY BY 10_01 FOLLOWING THE COLOURS REPORTED ON THE CONTROL UNIT.
- Page 57 WARNING USED BATTERIES ARE HARMFUL TO THE ENVIRONMENT. COLLECTION AND DISPOSAL MUST BE CARRIED OUT IN COMPLIANCE WITH THE CURRENT REGULATIONS.
-
Page 59: Emergency
APE 50 E4 Chap. 09 Emergency... -
Page 60: Wheel Replacement
Wheel replacement Spare wheel removal (11_01, 11_02) Spare wheel and jack The spare wheel is located under the deck on the right side; to release it, loosen the nut on the support bracket of the same wheel after having removed the cotter pin. The jack and its rod are placed inside cab under the driver seat. - Page 61 11_03 JACK POSITIONING 1. Front lifting point.
- Page 62 2. Rear lifting point. REMOVING THE REAR WHEEL Remove the rear wheel by following this procedure: Turn off the vehicle so that it is not dangerous for the traffic in order to remove the wheel safely. Put on the hand brake. 11_04 Place the jack under the suspension's triangle by matching the triangle's ribs and the jack's grooves.
- Page 63 Temporary remove the wheel cup. Keep the wheel on the ground and loosen the nuts connecting the wheel to the hub. 11_06 Turn the jack rod clockwise until the wheel to be replaced is lifted a few centimetres from the ground and can easily spin by hand. 11_07 Completely unscrew the fixing nuts, then remove the wheel.
- Page 64 Unscrew the fastening nuts and remove the internal rim. Reinstall the internal rim on the spare wheel by thoroughly tightening the fastening nuts. 11_09 Make sure that, where the spare wheel touches the hub, everything is clean and that there are no impurities that might lead to a wrong fastening of the nuts. Gradually lock the fastening nuts after lowering the vehicle.
- Page 65 FRONT WHEEL REMOVAL Remove the front wheel by following this procedure: Turn off the vehicle so that it is not dangerous for the traffic in order to remove the wheel safely. Put on the hand brake. 11_12 Temporary remove the wheel cup. Keep the wheel on the ground and loosen the nuts connecting the wheel to the hub.
- Page 66 Turn the jack rod clockwise until the wheel to be replaced is lifted a few centimetres from the ground and can easily spin by hand. 11_15 Completely unscrew the fixing nuts, then remove the wheel. 11_16 Unscrew the fastening nuts and remove the internal rim. Reinstall the internal rim on the spare wheel by thoroughly tightening the fastening nuts.
- Page 67 Make sure that, where the spare wheel touches the hub, everything is clean and that there are no impurities that might lead to a wrong fastening of the nuts. Gradually lock the fastening nuts after lowering the vehicle. 11_18 Install the wheel cup by making it click into the corresponding grooves. CAUTION A WRONG INSTALLATION OF THE WHEEL CUP MAY CAUSE ITS DETACHMENT WHILE THE VEHICLE IS RUNNING.
-
Page 69: Maintenance
APE 50 E4 Chap. 10 Maintenance... -
Page 70: Checking The Brake Fluid Level
2. Check the oil level is between 1 cm under the surface of cap «A» (MAX level) and 1 cm over the bottom of the reservoir (MIN level). If the oil is under the minimum level contact a PIAGGIO Dealer or Authorised Service Centre to have the brake system checked. -
Page 71: Gear Box Oil Level
CAUTION BRAKING CIRCUIT FLUID IS VERY CORROSIVE;. AVOID CONTACT WITH PAIN- TED PARTS. CAUTION BRAKING SYSTEM LIQUID IS HYGROSCOPIC, I.E., IT ABSORBS HUMIDITY FROM THE SURROUNDING AIR. IF THE HUMIDITY IN THE BRAKE FLUID EX- CEEDS A CERTAIN VALUE, IT WILL LEAD TO INEFFICIENT BRAKING. NEVER USE BRAKE FLUID FROM PREVIOUSLY OPENED OR PARTLY-EMPTY CON- TAINERS. - Page 72 AN EXCESSIVE AMOUNT OF OIL CAN SPILL OUT AND DIRTY THE ENGINE. WARNING USED OIL IS HARMFUL TO THE ENVIRONMENT. WHEN REPLACING THE OIL, WE SUGGEST TO CONTACT A PIAGGIO AUTHORISED SERVICE CENTRE EQUIPPED FOR DISPOSING SPENT OILS IN THE RESPECT OF NATURE AND IN COMPLIANCE WITH THE LAWS IN FORCE.
-
Page 73: Differential-Gear Oil Level
Differential-gear oil level (12_04, 12_05, 12_06) To check the differential oil level, proceed as follows: Unscrew the inspection cap and clean the dipstick with a cloth. Screw it again until it reaches the closing point. 12_04 Unscrew the cap again and make sure the oil level is between the «MIN» and «MAX»... -
Page 74: Window Washer Fluid Level
Window washer fluid level (12_07) The windscreen washer fluid reservoir is located inside the cab, under the right side seat of the vehicle. To fill the reservoir, unscrew the cap and top-up. Use a specific detergent. 12_07 Body maintenance Outside cleaning (12_08) You must first soak the dirt and mud left on painted surfaces, using a jet of water at a low pressure. -
Page 75: Checking And Replacing The Air Cleaner Element
CAUTION NEVER WASH IN THE SUN, ESPECIALLY IN SUMMER. SHAMPOO IF LEFT TO DRY ON HOT BODYWORK BEFORE RINSING MAY DAMAGE THE PAINT. NEV- ER USE RAGS SOAKED IN PETROL OR NAPHTHA TO WASH PAINTED OR PLASTIC SURFACES, SO AS TO PREVENT THEM FROM LOSING THEIR SHINE. Checking and replacing the air cleaner element (12_09) To remove and clean the air filter, observe the indications from the scheduled main- tenance table, contact an Authorised Service Centre. - Page 76 Unscrew the spark plug by using the supplied wrench. 12_11 Check the spark plug's wear status and cleanliness, and, if necessary, clean it with pure petrol and a metallic brush. Check the status of the spark plug's insulation, and replace the spark plug if any cracks or breaks are encountered. Reinsert the spark plug manually at the appropriate angle, and only use the wrench to tighten it.
-
Page 77: Checking The Battery Status
Checking the battery status (12_13, 12_14) The electrical system has a battery placed under the seat on the vehicle's right side. Should the battery be removed from its location in order to be replaced or recharged, disconnect the negative terminal first and, then, the positive one. Disconnect the elas- tic belt from the fastening hooks and remove the battery. -
Page 78: Bulbs
SET-UP OF A NEW BATTERY Make sure the terminals are properly connected. CAUTION DO NOT INVERT THE POLES: SHORT-CIRCUIT AND FAILURE RISK ON ELEC- TRICAL DEVICES. 12_14 PROLONGED INACTIVITY If the vehicle remains inactive for a long time the battery needs to be periodically recharged: please notice that the battery usually gets completely empty after approx- imately three months . - Page 79 BULBS Low beam light bulb Type: With leds Power: 7W Quantity: 1 RH + 1 LH Front turn indicator bulb Type: Spherical (amber colour) Power: 12V / 10W Quantity: 1 RH + 1 LH Cab internal light bulb Type: With leds Quantity: 1 Indicators unit bulb Type: Capless...
-
Page 80: Replacing The Lights
Quantity: 1 RH + 1 LH Rear daylight running light bulb Type: Spherical Power: 12V / 5W Quantity: 1 RH + 1 LH Licence plate light bulb Type: Spherical Power: 12V / 5W Quantity: 1 Replacing the lights Headlight (12_16) The front headlights are of the «LED»... - Page 81 Front direction indicator (12_17, 12_18) In order to replace the bulbs of the front turn indicators, proceed as follows: Loosen the fixing screws of the transparent plastic. 12_17 Press lighty and turn the bulb anticlockwise to take it out; 12_18 Plate lights (12_19) In order to remove the number plate light bulb, proceed as follows: - Undo the two fixing screws of the transparent cover;...
- Page 82 Front inside light (12_20) The cab has a courtesy light placed above the left door, the switch is on the same light fitting. As it is an LED light, it requires no maintenance. 12_20 Tail lights (12_21, 12_22) To replace the bulbs of turn indicator lights, stop lights, and daylight running light, proceed as follows: Remove the transparent plastic by unscrewing the four fixing screws.
-
Page 83: Fuses
Fuses (12_23, 12_24) The circuits of the electric system are protected by two main fuses located under the driver's seat and by four fuses located under the instrument panel, on the left side of the vehicle. 12_23 12_24 FUSES Fuse No. 1 Capacity: 20 A Power supply input: directly from the battery. - Page 84 Fuse No. 2 Capacity: 15 A Power supply input: switched live. Protected circuits: windscreen wiper motor. Fuse No. 3 Capacity: 10 A Power supply input: battery protected by fuse No. 1. Protected circuits: internal lighting, cigarette lighter. Fuse No. 4 Capacity: 7.5 A Power supply input: switched live.
- Page 85 OR A FUSE WITH A GREATER AMP RATING THAN THAT WHICH IS INDICATED. CAUTION IF YOU WANT TO INSTALL ADDITIONAL SYSTEMS (E.G. ADDITIONAL LIGHTS), PLEASE NOTICE THAT INAPPROPRIATE BRANCHING ON THE WIRING'S CON- NECTIONS MAY DAMAGE THE SYSTEM: CONTACT A PIAGGIO OFFICIAL AS- SISTANCE POINT.
-
Page 86: Brake Pedal
Air bleeding from the braking system In case of anomalies of the brake performance, accompanied by idle pumping, have the system drained by the Concessionaires or Authorised PIAGGIO Service Cen- tres. IN FACT, THE BRAKE FLUID IS HIGHLY CORROSIVE AND IT MUST BE DIS- POSED ACCORDING TO PRECISE REGULATIONS. -
Page 87: Tyres
Tyres feature wear indicators; replace tyres as soon as these indicators be- come visible on the tyre tread. • Also check that the tyres do not show signs of splitting at the sidewalls or irregular tread wear; In this case, consult a Dealer or an Authorised Piaggio Service Centre. CAUTION 12_28 ACCORDING TO THE PROVISIONS OF THE REGULATIONS IN FORCE, THE TYRE TREADS MUST BE OVER 1 MM THICK. -
Page 88: Periods Of Inactivity
TYRES Wheel rim 2.5" x 10 Tyres 100/90 - 10 56J Front tyre pressure without load 1.8 bar Rear tyre pressure without load 2.2 bar Periods of inactivity (12_29) Perform the following operations: 1. general vehicle cleaning; 2. With the engine off and the piston at bottom dead center, remove the spark plug, enter 10 to 15 cc of oil from the corresponding hole. -
Page 89: Brake Adjustment
Brake adjustment (12_30) CAUTION TO ADJUST THE BRAKES RELATED TO THE BRAKING SYSTEM, IT IS REC- OMMENDED TO CONTACT AN AUTHORISED PIAGGIO SERVICE CENTRE. HAND BRAKE During vehicle use, a slight elongation of the hand brake stroke may be noted, due to normal wear. - Page 90 Spark plug connectors Reconnect. disconnected IGNITION DIFFICULTIES No fuel in the tank. Refill Filters, jets, carburettor body Contact a PIAGGIO Official obstructed or dirty Assistance Point IGNITION IRREGULARITIES No spark from spark plug Make sure the electrodes are properly adjusted (0.5 mm)
- Page 91 DUE TO THE PRESENCE OF HIGH VOLTAGE, THIS CHECK MUST BE PERFORMED BY QUALIFIED PERSONS. INSUFFICIENT COMPRESSION Spark plug housing thread Contact a PIAGGIO Official damaged; head tightening loose; Assistance Point worn-out piston circlips HIGH CONSUMPTIONS AND LOW PERFORMANCE Air filter blocked or dirty Wash with water and shampoo.
- Page 92 Air in the brake circuit Let the air out; Contact a PIAGGIO Official Assistance Point. SUSPENSIONS INEFFICIENCY Oil leaks; spring load leaks; worn- Contact a PIAGGIO Official out stop buffers. Assistance Point GEARBOX IRREGULARITIES Malfunctions of gearbox or Contact a PIAGGIO Official differential gear.
-
Page 95: Technical Data
APE 50 E4 Chap. 11 Technical data... -
Page 96: Vehicle
Vehicle (14_01) 14_01... - Page 97 SIZES millimetres (mm) CROSS LONG Deck SHORT deck Length 2660 2540 2660 2500 2500 Width 1,260 1,260 1,260 1,260 1,260 Height 1550 1620 1550 1550 1590 Wheelbase 1590 1590 1590 1590 1590 Deck length (INTERNAL) 1,350 1,190 1,350 1,190 1,190 Deck length (EXTERNAL) 1410 1250...
- Page 98 REFILLING Fuel tank (reserve) 10 litres (2 litres) Mixer oil tank (reserve) 2.0 litres (0.6 litres) Gearbox oil 750 cm³ Differential Oil 420 cm³ Windscreen washer fluid tank 1.5 litres BRAKES Braking system Hydraulic dual circuit and foot pedal operation. Front brakes Ø...
-
Page 99: Engine
TYRES Wheel rim 2.5" x 10 Tyres 100/90 - 10 56J Front tyre pressure without load 1.8 bar Rear tyre pressure without load 2.2 bar ELECTRICAL SYSTEM Battery 12V 32Ah 150A Voltage regulator 14.5 V at 5,000 rpm (regulated voltage), 20 A (maximum current on the battery) ≥0.06 kgm at 4,200 rpm;... - Page 100 Stroke 43 mm Engine capacity 49,8 cm3 Compression ratio 10÷10,5:1 Maximum declared torque ±5% (*) 3,3 Nm at 5.200 rpm Maximum declared power ±5% (*) 1,9 kW at 6.000 rpm Engine idle speed approx. 1500 ± 100 g/min Ignition Capacitor discharge. Fuel supply Petrol-oil mix by means of automatic carburettor/mixer...
- Page 101 conveying motion to the wheels. The differential is equipped with a gear reversing device. Exhaust silencer Combined type, expansion and absorption with double catalytic converter and secondary air system (SAS box). Spark plug NGK GR8DI-8 Homologation L5e Euro 4 Tricycle (*) = the tolerance of ±5% applies to both the speed and the value measured.
- Page 102 From Imperial System to International System of Units (S.I.)
-
Page 103: Scheduled Maintenance - Checks
APE 50 E4 Chap. 12 Scheduled maintenance - Checks... -
Page 104: Checks
Scheduled Main- tenance table. It is a good rule to point out any small function anomalies to an Authorised PIAGGIO Dealer or Service Centre at once, without waiting until the next time your vehicle is serviced, in order to remedy them as soon as possible. - Page 105 SCHEDULED MAINTENANCE TABLE EVERY EVERY km x 1,000 MONT MONT Safety blocks Spark plug Carburettor Hinges - Door locks - Transmissions Accelerator - mixer control Air filter SAS (secondary air) filter Filter of the CO control system Steering play Electrical system and battery Braking system Brake and clutch levers...
-
Page 106: Recommended Products
C : CLEAN, R : REPLACE, A : ADJUST, L : LUBRICATE Recommended products (15_03) Piaggio Group recommends the products of its "Castrol Official Partner" for the scheduled maintenance of its vehicles. Use lubricants and liquids having specifications that are equivalent, or superior, to the recommended products. - Page 107 RECOMMENDED PRODUCTS TABLE Product Description Specifications Two stroke oil for mixer Low smokiness lubricant for 2 stroke engines, API TC; JASO FC; ISO-L-EGD with synthetic base plus additives. 80W-90 transmission oil Lubricant for gearboxes and transmissions SAE 80W-90; API GL-4 Brake fluid DOT 4 Synthetic brake fluid.
- Page 109 TABLE OF CONTENTS Battery: 77 Identification: 7, 9 Refuelling: 22 Warning: 45, 48 Belt: 37, 38 Instrument panel: 39 Warning light: 48 Brakes: 88 Wheel: 60 Bulbs: 78 Safe riding: 15 Level: 48, 49, 70, 71, 73, 74 Safety: 16, 35–38 Lights: 45, 47, 80–82 Safety belts: 35, 36 Checks: 22, 103, 104...
- Page 110 © Copyright 2018 - PIAGGIO & C. S.p.A. Pontedera. All rights reserved. No part of this publication may be reproduced. This publication has been edited by: After sales - PIAGGIO & C. S.p.A. V.le Rinaldo Piaggio, 25 - 56025 PONTEDERA (Pi) ITALY www.piaggio.com...
Need help?
Do you have a question about the APE 50 E4 and is the answer not in the manual?
Questions and answers
Dear Sir/Madam on my Ape Piaggio at the moment I can put only the second gear what I need to do and how please?
The context does not provide specific instructions for a situation where only the second gear can be engaged on a Piaggio Ape 50 E4. However, if there is a gear engagement issue, it is recommended to contact an Authorised PIAGGIO Service Centre.
This answer is automatically generated