Table of Contents
Advertisement
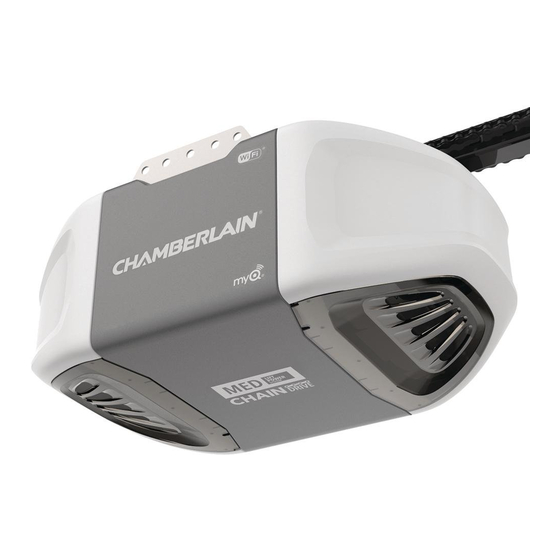
Garage Opener
Garage Opener
• Please read this manual and the enclosed safety materials carefully!
• Fasten the manual near the garage door after installation.
• The door WILL NOT CLOSE unless the Protector System
and properly aligned.
• Periodic checks of the garage door opener are required to ensure
safe operation.
• The model number label is located on the front panel of your garage
door opener.
• This garage door opener is compatible with myQ® and
is connected
®
Security+ 2.0® accessories.
• DO NOT install on a one-piece door if using devices or features
providing unattended close. Unattended devices and features are
to be used ONLY with sectional doors.
Owner's Manual
C203 • C400 • C410
Chain Drive Garage Door
Opener
FOR RESIDENTIAL USE ONLY
PRE-PROGRAMMED REMOTE CONTROL
INCLUDED
TO WATCH VIDEOS GO TO:
tinyurl.com/lgh5x3h
Contents
Preparation ..................................... 2–5
Assembly ...................................... 6–10
Installation ..................................11–28
Install The Door Control ............21–22
Install The Protector System® ....23–26
Power ......................................27–28
Adjustments .................................29–31
Operation .....................................32–37
Features .......................................33
Using Your Garage Door Opener .....34
Using the Multi-Function
Control Panel ...........................34–35
Remote Control .............................36
Homelink® ...................................36
To Erase The Memory .....................37
To Open The Door Manually ...........37
Maintenance .....................................38
Troubleshooting ...........................39–40
Accessories ........................................41
Warranty ...........................................42
Repair Parts .................................43–44
www.chamberlain.com
www.mychamberlain.com
Advertisement
Table of Contents

Subscribe to Our Youtube Channel
Related Manuals for Chamberlain C203


Summary of Contents for Chamberlain C203
- Page 1 Owner’s Manual Contents C203 • C400 • C410 Preparation ........2–5 Assembly ........6–10 Chain Drive Garage Door Installation ........11–28 Opener Install the Door Control ....21–22 Install the Protector System® ..23–26 FOR RESIDENTIAL USE ONLY Power ........27–28 Adjustments .........29–31 PRE-PROGRAMMED REMOTE CONTROL Operation ........32–37...
- Page 2 Torsion Extension Spring Spring...
- Page 3 5/32 3/16 5/16 9/16 7/16 7/16...
-
Page 5: Assembly
DOOR CONTROL ASSEMBLY INSTALLATION Bolt Bolt Wing Nut Lag Screw 5/16"-9x1-5/8" (4) 1/4"-20x1-3/4" 1/4"-20 (2) Drywall Anchors (2) Self-Threading Screw Threaded Clevis Pin 5/16"x1-1/2" 1/4"-14x5/8" (2) Shaft Screw 6-32x1" (2) Clevis Pin 5/16"x1" Clevis Pin 5/16"x1-1/4" Screw 6ABx1" (2) Master Link (2) Lock Nut 1/4"-20 Carriage Bolt... - Page 6 Slide to stops on top and sides of “U” bracket Screwdriver “U” Bracket (TO MOTOR UNIT) Rail Tab On Top Trolley Wear Pads Front Rail Section (TO DOOR)
- Page 7 HARDWARE Lock Nut Bolt 1/4"-20 1/4"-20x1-3/4" Hex Screws Bolts (Mounted in the 8-32x7/16 garage door opener) Chain Spreader “U” Bracket Bolt Cover Protection Bolt Hole Lock Nut...
- Page 8 HARDWARE Nut 3/8" Lock Washer 3/8" Bolt Rail Tab Chain/cable Rail Bolt Grease Inside Pulley Idler Pulley Lock Washer...
- Page 9 HARDWARE Master Link Threaded Shaft Figure 2 Sprocket Figure 1 Figure 3 Master Link Inner Nut Lock Washer Threaded Master Shaft Link Outer Nut...
- Page 10 Trolley To Tighten Outer Lock Threaded Outer Nut Washer Shaft To Tighten Inner Nut Inner Nut Chain 1/4" (6 mm) Base of Rail Mid length of Rail...
-
Page 11: Installation
Installation IMPORTANT INSTALLATION INSTRUCTIONS To reduce the risk of SEVERE INJURY or DEATH: 1. READ AND FOLLOW ALL INSTALLATION WARNINGS AND INSTRUCTIONS. 9. Install wall-mounted garage door control: 2. Install garage door opener ONLY on properly balanced and lubricated garage door. An within sight of the garage door. - Page 12 OPTIONAL CEILING MOUNT Header Wall FOR HEADER BRACKET Vertical Centerline of Garage Door Structural Supports Unfinished Ceiling Level (Optional) Sectional door with curved track One-piece door with horizontal track Header Wall Header Wall 2" (5 cm) 2" (5 cm) Track Door Track Highest...
- Page 13 WALL INSTALLATION Header Wall Vertical Centerline of Wall Mounting Structural Garage Door Support Holes HARDWARE Header Bracket Lag Screw 5/16"-9x1-5/8" Horizontal Screw Line Door Spring Highest Point of Garage Optional Mounting Holes Door Travel Garage Door CEILING INSTALLATION Header Bracket Finished Ceiling 6"...
- Page 14 HARDWARE Clevis Pin Ring Fastener 5/16"x1-1/2" Ring Fastener Clevis Pin Connected Disconnected One-piece door All other without tracks door types...
- Page 15 HARDWARE Lag Screw 5/16"-18 5/16"-9x1-5/8" Lock Washer Hex Bolt 5/16"-18 5/16"- 18x7/8" EXAMPLES Finished Ceiling Unfinished Ceiling Finished Ceiling Not Provided Not Provided Lag Screw Lag Screw Hex Bolt Lock Washer Provided...
- Page 17 HARDWARE Self-Threading Screw 1/4"-14x5/8" Horizontal Reinforcement Vertical Reinforcement FIGURE 1 FIGURE 2 Vertical Reinforcement Vertical Reinforcement Vertical Centerline Vertical of Garage Door Centerline Door Bracket of Garage Door Hardware Door Bracket (not provided) Self-Threading Screw FIGURE 3 FIGURE 4 Inside Edge of Door or Reinforcement Board Vertical Hardware...
- Page 18 Header Wall 2x4 Support (Finished Ceiling) Header Bracket Door Bracket Optional For a door with no exposed Placement framing, or for the optional of Door installation, use lag screws Bracket 5/16"x1-1/2" (not provided) to fasten the door bracket. Vertical Centerline of Garage Door Metal Door...
- Page 19 HARDWARE Clevis Pin 5/16"x1-1/4" Clevis Pin 5/16"x1" Hex Bolt 5/16"-18x7/8" Lock Washer Ring Fastener 5/16" -18 Nut 5/16"-18 Ring Fastener Clevis Pin 5/16"x1" Lock Washer Hex Bolt Straight Door Arm (Groove Clevis Pin facing out) 5/16"x1-1/4" Curved Door Arm...
- Page 20 Straight Door Arm (Groove facing out) Curved Door Arm One-Piece Door without Track Ring Fastener HARDWARE Ring Fastener Lock Washer Clevis Pin 5/16"x1" Clevis Pin 5/16"x1-1/4" Clevis Pin 5/16"x1" Hex Bolt 5/16"-18x7/8" Clevis Pin 5/16"x1-1/4" Lock Washer Hex Bolts Ring Fastener 5/16"...
- Page 21 1/4" (6 mm) 7/16" (11 mm) Wall HARDWARE DRYWALL GANG BOX Screw Screw 6-32x1" (2) 6-32x1" 6ABx1" (2) Drywall Anchor 6ABx1" Drywall Screw DRYWALL GANG BOX Anchors (2) 6ABx1-1/2" (2) Drywall Anchor 6-32x1" 6ABx1"...
- Page 22 HARDWARE Insulated Staple (Not Shown) 7/16" (11 mm) Staple...
- Page 23 HARDWARE Wing Nut Carriage Bolt 1/4"-20 1/4"-20 x 1/2" No more than 6 inches (15 cm) Carriage Bolt Safety Reversing Sensor Invisible Light Beam 6" (15 cm) max. above floor Protection Area Wing Nut Facing the door from inside the garage...
- Page 24 Inside Garage Wall (Not provided) Inside Garage Wall (Not provided) (Not provided) No more than 6 inches (15 cm) Wing Nut Carriage Bolt Wing Nut Lens Carriage Bolt...
- Page 25 HARDWARE Insulated Staple (Not Shown) Staple 7/16" (11 mm)
- Page 26 Pre-installed 7/16" (11 mm) wires Safety reversing sensor wires Wire nuts (not provided) Safety reversing Pre-installed wires sensor wires Yellow (for example) White White/Black Purple (for example) Yellow Purple Yellow Purple 7/16" (11 mm) To insert or remove the wires from the terminal, push in the tab with a screwdriver tip.
- Page 27 Ground Tab Black Wire Green Ground Screw Ground Wire White Wire...
- Page 28 Wing Nut (invisible light beam) Amber LED Green LED SENDING SENSOR RECEIVING SENSOR If the receiving sensor is in direct sunlight, switch it with sending sensor so it is on the opposite side of the door.
-
Page 29: Adjustments
Correct Incorrect UP Button Adjustment Button DOWN Button PROGRAMMING BUTTONS DOWN (Close) UP (Open) - Page 30 UP Button Adjustment Button DOWN Button PROGRAMMING BUTTONS...
- Page 34 Command LED Push Bar LEARN Button LOCK Button LIGHT Button...
- Page 35 Push Button Command LED Push Bar LEARN Button LOCK Button LIGHT Button...
- Page 36 LEARN Button The command LED The command LED will LEARN LED will flash once. flash once again.
- Page 41 953EV Remote Control: Extension Brackets: 8 Foot (2.4 m) Rail Extension: Monitor open/closed status Works with ALL Chamberlain (Optional) For safety for up to 4 myQ compatible openers from 1993–present. reversing sensor installation To allow an 8 foot (2.4 m) garage door openers or gate myQ compatible.
-
Page 42: Operation
Warranty CHAMBERLAIN LIMITED WARRANTY ® The Chamberlain Group, Inc. ® (“Seller”) warrants to the fi rst retail purchaser of this product, for the residence in which this product is originally installed, that it is free from defects in materials and/or STOP! workmanship for a specifi... -
Page 43: Accessories
3V CR2032 Lithium Battery K010A0020 Description Part Number Hanging Brackets 012B0776 Not Shown Push Button Door Control 041A7367-3 Model C203 Owner’s Manual 114A5230 Multi-Function Door Control 041A7185-1 Models C400 and C410 1-Button Remote Control 950ESTD Model C203 3-Button Remote Control... -
Page 44: Repair Parts
Model C410 041D8128 Motor with Travel Module 041D7440 Line Cord 041B4245-1 Terminal Block 041A3150 Not Shown Wire Harness 041A7945 The Chamberlain Group, Inc. © 2018, The Chamberlain Group, Inc. 300 Windsor Drive 114A5230 All Rights Reserved Oak Brook, IL 60523...
Need help?
Do you have a question about the C203 and is the answer not in the manual?
Questions and answers
why is the chain too long