Billion BiPAC 7800 User Manual
Dual wan adsl2+ firewall router
Hide thumbs
Also See for BiPAC 7800:
- User manual (149 pages) ,
- Specifications (2 pages) ,
- Product manual (20 pages)
Table of Contents
Advertisement
Quick Links
Download this manual
See also:
User Manual
Advertisement
Table of Contents

Related Manuals for Billion BiPAC 7800


Summary of Contents for Billion BiPAC 7800
-
Page 1: User Manual
BiPAC 7800 Dual WAN ADSL2+ Firewall Router User Manual Version released 1.01 Last revised date 11-11-2008... -
Page 2: Table Of Contents
Chapter 1: Introduction ... 1 Introduction to your Router Features ...2 Chapter 2: Installing the Router ... 4 Important note for using this router Package Contents The Front LEDs..6 Cabling ...8 Chapter 3: Basic Installation ... 9 Connecting Your Router Network Configuration Factory Default Settings Information from your ISP... - Page 3 WAN ...41 WAN Profile (ADSL) WAN Profile – Main Port (EWAN) ADSL Mode System ...50 Time Zone Firmware Upgrade Backup / Restore ...52 Restart User Management Firewall ...53 Packet Filter MAC Filter Block WAN Ping Virtual Server ...55 Port Mapping ...57 Advanced ...58 Static Route...
-
Page 4: Chapter 1: Introduction
Chapter 1: Introduction Introduction to your Router Thank you for purchasing BiPAC 7800 Router. Your new router is an all-in-one unit that combines an ADSL modem, ADSL2/2+ router and Ethernet network switch to provide everything you need to get the machines on your network connected to the Internet over an ADSL broadband connection. -
Page 5: Features
(ITU G.992.5)). EWAN Besides using ADSL to get connected to the Internet, BiPAC 7800 offers its Ethernet port 5 as a WAN port to be used to connect to Cable Modems, VDSL, fiber optic lines and PON. This alternative, yet faster method to connect to the internet will provide users more flexibility to get online. - Page 6 Domain Name System (DNS) Relay It provides an easy way to map the domain name (a friendly name for users such as www.yahoo. com) and IP address. When a local machine sets its DNS server with this router’s IP address, every DNS conversion request packet from the PC to this router will be forwarded to the real DNS in the outside network.
-
Page 7: Chapter 2: Installing The Router
Chapter 2: Installing the Router Important note for using this router... -
Page 8: Package Contents
Package Contents BiPAC 7800 Dual WAN ADSL2+ Firewall Router CD containing the online manual RJ-11 ADSL/Telephone cable Ethernet (RJ-45) cable Power adapter Quick Start Guide Splitter / Microfilter (Optional) -
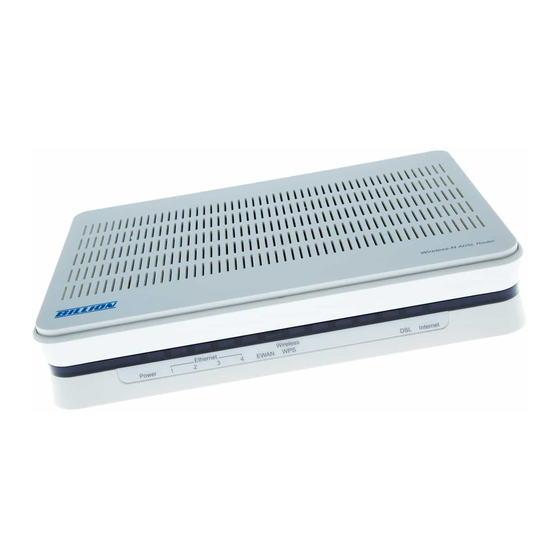
Page 9: The Front Leds
The Front LEDs. Internet EWAN Ethernet port — (RJ-45 connector) Power Lit red when WAN port fails to get IP address. Flash green when WAN port gets IP address successfully and when data is transmitted. Lit Green when the device is successfully connected to an ADSL DSLAM. -
Page 10: The Rear Ports
The Rear Ports Port Power Switch Power RESET Giga Ethernet EWAN Meaning Power ON/OFF switch. Connect it with the supplied power adapter. Press more than 1 second to restore the device to its default mode. Connect to a PC or an office/home network of 10Mbps, 100Mbps or 1000Mbps using the provided RJ-45 Ethernet cables. -
Page 11: Cabling
Cabling One of the most common causes of problem is bad cabling or ADSL line(s). Make sure that all connected devices are turned on. On the front panel of your router is a bank of LEDs. Verify that the LAN Link and ADSL line LEDs are lit. If they are not, verify if you are using the proper cables. Make sure that all devices (e.g. -
Page 12: Chapter 3: Basic Installation
Chapter 3: Basic Installation The router can be configured through your web browser. A web browser is included as a standard application in the following operating systems: Linux, Mac OS, Windows 98/NT/2000/XP/Me/Vista, etc. The product provides an easy and user-friendly interface for configuration. Please check your PC network components. -
Page 13: Connecting Your Router
Connecting Your Router Users will not be able to connect to the internet through EWAN if DSL is already connected to the internet. Only one connection type (EWAN or DSL) is allowed to connect to the internet at one time. ADSL Router Mode Broadband Router Mode... -
Page 14: Network Configuration
Network Configuration Configuring PC in Windows Vista Go to Start. Click on Network. Then click on Network and Sharing Center at the top bar. When the Network and Sharing Center window pops up, select and click on Manage network connec- tions on the left window column. - Page 15 Select Internet Protocol Version 4 (TCP/IPv4) then click Properties. In the TCP/IPv4 properties window, select the Obtain an IP address au- tomatically and Obtain DNS Server address automatically radio but- tons. Then click OK to exit the set- ting. Click OK again in the Local Area Connection Properties window to apply the new configuration.
-
Page 16: Configuring Pc In Windows Xp
Configuring PC in Windows XP Go to Start > Control Panel (in Classic View). In the Control Panel, double-click on Network Connections Double-click Local Area Connection. In the Local Area Connection Status window, click Properties. Select Internet Protocol (TCP/IP) and click Properties. -
Page 17: Configuring Pc In Windows 2000
Configuring PC in Windows 2000 Go to Start > Settings > Control Panel. In the Control Panel, double-click on Network and Dial-up Connections. Double-click Local Area Connection. In the Local Area Connection Status window click Properties. Select Internet Protocol (TCP/IP) and click Properties. -
Page 18: Configuring Pc In Windows 95/98/Me
Configuring PC in Windows 95/98/Me Go to Start > Settings > Control Panel. In the Control Panel, double-click on Network and choose the Configuration tab. Select TCP/IP > NE2000 Compatible, or the name of your Network Interface Card (NIC) in your PC. Select the Obtain an IP address auto- matically radio button. - Page 19 Configuring PC in Windows NT4.0 Go to Start > Settings > Control Panel. In the Control Panel, double-click on Network and choose the Protocols tab. Select TCP/IP Protocol and click Prop- erties. Select the Obtain an IP address from a DHCP server radio button and click...
-
Page 20: Factory Default Settings
Factory Default Settings Before configuring your router, you need to know the following default settings. Web Interface (Username and Password) Username: admin Password: admin The default username and password are “admin” and “admin” respectively. Device LAN IP settings IP Address: 192.168.1.254 Subnet Mask: 255.255.255.0 ISP setting in WAN site PPPoE... -
Page 21: Information From Your Isp
Information from your ISP Before configuring this device, you have to check with your ISP (Internet Service Provider) to find out what kind of service is provided such as DHCP (Obtain an IP Address Automatically, Static IP (Fixed IP Address) or PPPoE. Gather the information as illustrated in the following table and keep it for reference. -
Page 22: Chapter 4: Configuration
“Go”, a login window prompt will appear. The default username and password are “admin” and “admin” respectively. Congratulations! You are now successfully logon to the BiPAC 7800 Firewall Router! If the authentication succeeds, the homepage “Device Info - Summary” will appear on the screen. -
Page 23: Quick Start
Quick Start Step 1: Select WAN port connect mode from the connect mode drop down menu. There are two types of connect mode to choose from: ADSL or EWAN Step 2: After selecting the connect mode, press Continue to move on to the next configuring page. There are 5 types of connection protocols available under ADSL connect mode while there are 2 types of connection protocols available for EWAN connect mode. - Page 24 ADSL Connect Mode For ADSL connect mode there are 5 types of connection protocols: PPPoE, PPPoA, IPoA, MPoA Pure Bridge. PPPoE VPI/VCI: Enter the information provided by your ISP. Username: Enter the username provided by your ISP. You can input up to 256 alphanumeric characters (case sensitive).
- Page 25 PPPoA VPI/VCI: Enter the information provided by your ISP. Username: Enter the username provided by your ISP. You can input up to 256 alphanumeric characters (case sensitive). This is in the format of “username@ispname” instead of simply “username”. Password: Enter the password provided by your ISP. You can input up to 32 alphanumeric characters (case sensitive).
- Page 26 IPoA Connection VPI/VCI: Enter the VPI and VCI information provided by your ISP. Encapsulation mode: Select the encapsulation format. Select the one provided by your ISP. IP Address: IPOA WAN IP address can only set fix IP address. Subnet mask: User can change it to others such as 255.255.255.128. Type the netmask assigned to you by your ISP (if given).
- Page 27 MPoA Connection VPI/VCI: Enter the VPI and VCI information provided by your ISP. Encapsulation mode: Select the encapsulation format. Select the one provided by your ISP. IP Address: Your WAN IP address. Leave the IP address as 0.0.0.0 to enable the device to automatically obtain an IP address from your ISP.
- Page 28 EWAN Connect Mode For EWAN connect mode there are 2 types of connection protocols: PPPoE and IPoW. PPPoE connection Username: Enter the username provided by your ISP. You can input up to 256 alphanumeric characters (case sensitive). This is in the format of “username@ispname” instead of simply “username”.
- Page 29 IPoW connection IP Address: Your WAN IP address. Leave the IP address as 0.0.0.0 to enable the device to automatically obtain an IP address from your ISP. Subnet Mask: User can change it to others such as 255.255.255.128. Type the netmask assigned to you by your ISP (if given) Default Gateway: Enter the IP address of the default gateway.
-
Page 30: Status (Basic Mode)
Status (Basic Mode) -
Page 31: Cofiguration (Basic Mode)
Cofiguration (Basic Mode) A WAN (Wide Area Network) is an outside connection to another network or the Internet. There are two items within the WAN section: WAN Profile ADSL Mode. WAN – Main Port (ADSL) PPPoE Connection (ADSL) PPPoE (PPP over Ethernet) provides access control in a manner similar to dial-up services using PPP. - Page 32 PPPoA Connection (ADSL) PPPoA stands for Point to Point Protocol over ATM Adaptation Layer 5 (AAL5). It provides access control and billing functionality in a manner similar to dial-up services using PPP. VPI/VCI: Enter the information provided by your ISP. Username: Enter the username provided by your ISP.
- Page 33 MPoA Connection (ADSL) VPI/VCI: Enter the VPI and VCI information provided by your ISP. Encap. mode: Select the encapsulation format. Select the one provided by your ISP. IP Address: Your WAN IP address. Leave the IP address as 0.0.0.0 to enable the device to automatically obtain an IP address from your ISP.
- Page 34 IPoA Connections (ADSL) VPI/VCI: Enter the VPI and VCI information provided by your ISP. Encap. mode: Select the encapsulation format. Select the one provided by your ISP. IP Address: Your WAN IP address. Leave the IP address as 0.0.0.0 to enable the device to automatically obtain an IP address from your ISP.
- Page 35 Pure Bridge Connections (ADSL) VPI/VCI: Enter the VPI and VCI information provided by your ISP. Encap. mode: Select the encapsulation format. Select the one provided by your ISP.
-
Page 36: Wan Profile - Main Port (Ewan)
WAN Profile – Main Port (EWAN) Besides using ADSL to get connected to the Internet, Ethernet port 1 of BiPAC 7800 can be used as an althernative to connect to Cable Modems, VDSL and fiber optic lines. This alternative not only provides faster connection to the Internet, it also provides users with more flexibility to get online. - Page 37 IPoW (IP over Ethernet) IP Address: Your WAN IP address. Leave the IP address as 0.0.0.0 to enable the device to automatically obtain an IP address from your ISP. Subnet Mask: User can change it to others such as 255.255.255.128. Type the netmask assigned to you by your ISP (if given).
-
Page 38: Status (Advanced Mode)
Status (Advanced Mode) -
Page 39: Adsl
ADSL DSP Firmware Version: DSP code version. DMT Status: Current DMT Status. Operational Mode: Display the ADSL state when the connect mode is set to AUTO. Upstream: Upstream rate. Downstream: Downstream rate. Noise Margin (Upstream): This shows the noise margin for upstream rate. Noise Margin (Downstream): This shows the noise margin for downstream rate. -
Page 40: Arp
This table shows the mapping of Internet (IP) addresses to Ethernet (MAC) addresses. This is useful in determining the MAC address of the network interface of your PCs that use the router’s Firewall – MAC Address Filter function. See the Firewall section of this manual for more information on this feature. -
Page 41: System Log
System Log Display all the system logs that have been recorded up to the present time. -
Page 42: Configuration (Advanced Mode)
Configuration (Advanced Mode) A Local Area Network (LAN) is a shared communication system network where many computers are connected. This type of network is area defined and is usually limited to a confined region within a building or just within the same storey of a building. There are 3 items within the LAN section: Ethernet, IP Alias DHCP... -
Page 43: Dhcp Server
DHCP Server DHCP allows networked devices to obtain information on the parameter of IP, Netmask, Gateway as well as DNS through the Ethernet Address of the device. If you check the DHCP Relay you must enter the IP address of the DHCP server that assigns an IP address to the DHCP client in the LAN. -
Page 44: Wan
A WAN (Wide Area Network) is a computer network that covers a broad geographical area (eg. Internet) that is used to connect LAN and other types of network systems. There are two items within the WAN section: WAN Profile ADSL Mode. - Page 45 Connection: Always on: If you want the router to establish a PPPoE session during start up and to auto- matically re-establish the PPPoE session when disconnected by the ISP. Idle Timeout: Auto-disconnect the broadband firewall gateway when there is no activity on the line for a predetermined period of time.
- Page 46 PPPoA Connection (ADSL) PPPoA stands for Point to Point Protocol over ATM Adaptation Layer 5 (AAL5). It provides access control and billing functions in a manner similar to dial-up services using PPP. Description: A given name for the connection. VPI/VCI: Enter the information provided by your ISP. Encapsulation mode: Select the encapsulation format.
- Page 47 MPoA Connection (ADSL) Description: A user-definable name for this connection. VPI/VCI: Enter the VPI and VCI information provided by your ISP. Encap. mode: Select the encapsulation format. Select the one provided by your ISP. NAT: The NAT (Network Address Translation) feature allows multiple users to access the Internet through a single ISP account by sharing a single IP address.
- Page 48 IPoA Connections (ADSL) Description: A user-definable name for this connection. VPI/VCI: Enter the VPI and VCI information provided by your ISP. Encap. mode: Select the encapsulation format. Select the one provided by your ISP. NAT: The NAT (Network Address Translation) feature allows multiple users to access the Internet through a single ISP account by sharing a single IP address.
- Page 49 Pure Bridge Connections (ADSL) Description: A user-definable name for this connection. VPI/VCI: Enter the VPI and VCI information provided by your ISP. Encap. mode: Select the encapsulation format. Select the one provided by your ISP.
-
Page 50: Wan Profile - Main Port (Ewan)
WAN Profile – Main Port (EWAN) Besides using ADSL to connect to the Internet, BiPAC 7800 Ethernet port 1 is also an alternative to connect to Cable Modems, VDSL and fiber optic lines. This alternative provides users with faster connection & flexibility to connect to the Internet. - Page 51 MTU: Control the maximum Ethernet packet size your PC will send. IPoW (IP over Ethernet) NAT: The NAT (Network Address Translation) feature allows multiple users to access the Internet through a single ISP account by sharing a single IP address. If users on your LAN have their own public IP addresses to access the Internet, NAT function can be disabled.
-
Page 52: Adsl Mode
ADSL Mode ADSL Mode: There are 2 modes “Annex L” and ”Annex M” that user can select for this connection. Modulator: There are 5 modes “ADSL2”, ”ADSL2+”, “G.Lite:”, “T1.413” and “G.DMT” that user can select for this connection. -
Page 53: System
System There are five items within the System section: Time Zone, Firmware Upgrade, Backup/ Restore, Restart and User Management. Time Zone The router does not have a real time clock on board; instead, it uses the Simple Network Time Protocol (SNTP) to get the most current time from an SNTP server outside your network. Choose your local time zone from the drop down menu. -
Page 54: Backup / Restore
Backup / Restore These functions allow you to save a backup of the current configuration of your router to a defined location on your PC, or to restore a previously saved configuration. This is useful if you wish to experiment with different settings, knowing that you have a backup in hand in case any mistakes occur. -
Page 55: Restart
Restart There are 2 options for you to choose from before restarting the your 7800 device. You can either choose to restart your device to restore it to the Factory Default Settings or to restart the device with your current settings applied. Restarting your device to Factory Default Setting will be useful especially after you have accidentally changed your settings that may result in undesirable outcome. -
Page 56: Firewall
Firewall Packet Filter Packet filtering enables you to configure your router to block specified internal/external users (IP address) from Internet access, or you can disable specific service requests (Port number) to / from the Internet. This configuration program allows you to set up different filter rules for different users based on their IP addresses or their network Port number. -
Page 57: Mac Filter
MAC Filter A MAC (Media Access Control) address is the unique network hardware identifier for each PC on your network’s interface (i.e. its Network Interface Card or Ethernet card). Using your router’s MAC Address Filter function, you can configure the network to block specific machines from accessing your LAN. -
Page 58: Virtual Server
Virtual Server Virtual Server allows you to direct incoming traffic from WAN side (identified by Protocol and External port) to the Internal server with private IP address on the LAN side. The Internal port is required only if the external port needs to be converted to a different port number used by the server on the LAN side. -
Page 59: Port Mapping
Port Mapping Application: Select the service you wish to configure. Protocol: A protocol is automatically applied when an Application is selected from the listbox or you may select a protocol type which you want. External Port & Internal Port: Enter the public port number & range you wish to configure. Internal IP Address: Enter the IP address of a specific internal server to which requests from the specified port is forwarded. -
Page 60: Dmz
The DMZ Host is a local computer exposed to the Internet. When setting a particular internal IP address as the DMZ Host, all incoming packets that do not use a port number which is already used by any other Virtual Server entries will fi rst be checked by the Firewall and NAT algorithms before it is passed to the DMZ host. -
Page 61: Advanced
Advanced Static Route Enter the destination network address, subnet mask, gateway AND/OR the available WAN interface, then click “Add” to add a new entry to the routing table. Dynamic DNS The Dynamic DNS function lets you alias a dynamic IP address to a static hostname, so if your ISP does not assign you a static IP address you can still use a domain name. -
Page 62: Vlan
VLAN VLAN (Virtual Local Area Network) is a group of devices on different physical LAN segments that can communicate with each other as if they were all on the same physical LAN segment. -
Page 63: Device Management
Device Management The Device Management advanced configuration settings allow you to control your router’s security options and device monitoring features. UPnP offers peer-to-peer network connectivity for PCs and other network devices, along with the feature to control data transfer between devices. UPnP offers many advantages for users running NAT routers through UPnP NAT Traversal, and on supported systems. - Page 64 Installing UPnP in Windows Example Follow the steps below to install the UPnP in Windows Me. Step 1: Click Start and Control Panel. Double-click Add/Remove Programs. Step 2: Click on the Windows Setup tab and select Communication in the Components selection box.
- Page 65 Step 4: Click OK to go back to the Add/Remove Programs Properties window. Click Next. Step 5: Restart the computer when prompted. Follow the steps below to install the UPnP in Windows XP. Step 1: Click Start and Control Panel. Step 2: Double-click Network Connections.
- Page 66 Auto-discover Your UPnP-enabled Network Device Step 1: Click start and Control Panel. Double-click Network Connections. An icon displays under Internet Gateway. Step 2: Right-click the icon and select Properties. Step 3: In the Internet Connection Properties window, click Settings to see the port mappings that were automatically created.
- Page 67 Step 4: You may edit or delete the port mappings or click Add to manually add port mappings. Step 5: Select Show icon in notification area when connected option and click OK. An icon displays in the system tray. Step 6: Double-click on the icon to display your current Internet connection status.
- Page 68 Step 3: Select My Network Places under Other Places. Step 4: An icon describing each UPnP-enabled device shows under Local Network. Step 5: Right-click on the icon of your BiPAC 7800 and select Invoke. The web configuration login screen displays.
-
Page 69: Igmp
IGMP IGMP, known as Internet Group Management Protocol, is used to manage hosts from multicast group. IGMP Proxy: Accepting multicast packet. Default is set to Disable. IGMP Snooping: Allowing switched Ethernet / Wireless to check and make correct forwarding decisions. Default is set to Disable. TR-069 Client Please contact you ISP for the information of TR069. -
Page 70: Remote Access
Remote Access Remote Access Control: Select Enable to allow management access from remote side (mostly from internet). -
Page 71: Appendix: Product Support & Contact
Appendix: Product Support & Contact If you come across any problems please contact the dealer from where you purchased your prod- uct. Contact Billion Worldwide: http://www.billion.com MAC OS is a registered Trademark of Apple Computer, Inc. Windows 98, Windows NT, Windows 2000, Windows Me, Windows XP and Windows Vista are registered Trademarks of Microsoft Corporation.
Need help?
Do you have a question about the BiPAC 7800 and is the answer not in the manual?
Questions and answers