
Subscribe to Our Youtube Channel
Related Manuals for Fronius IG 2000


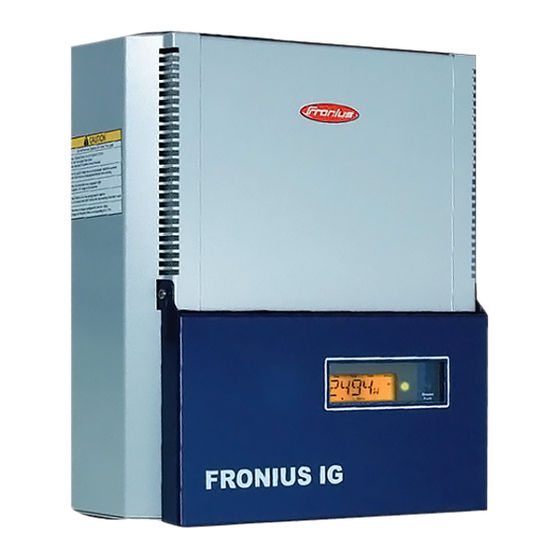
Summary of Contents for Fronius IG 2000
- Page 1 / Perfect Charging / Perfect Welding / Solar Energy Operating Instructions Fronius IG 2000 / 3000 / 2500-LV Fronius IG 4000 / 5100 / 4500-LV Inverter for grid-connected photo- voltaic systems 42,0410,1089 005-10082015...
- Page 3 Thank you for the trust you have placed in our company and congratulations on buying this high-quality Fronius product. These instructions will help you familiarize yourself with the product. Reading the instructions carefully will enable you to learn about the many different features it has to offer.
- Page 5 IMPORTANT SAFETY INSTRUCTIONS SAVE THESE INSTRUCTIONS General These operating instructions contain important instructions that must be followed during in- stallation and maintenance of the inverter. The inverter is designed and tested according to international safety requirements, but as with all electrical and electronic equipment, certain precautions must be observed when in- stalling and/or operating the inverter.
-
Page 7: Table Of Contents
Recommended screws for mounting plate assembly ................Attaching the mounting plate - mounting height..................Inverter Installation..........................Connecting the Fronius IG to the Public Grid (AC) ..................General ..............................Inverter configuration for connection to grids without neutral ............... Overview of available grids ........................ - Page 8 Connecting solar module strings......................Commissioning ............................Factory pre-set configuration ........................ Commissioning ............................. Inserting Option Cards ..........................Suitable option cards ..........................Safety..............................Inserting and connecting option cards ....................Data Communication and Solar Net ......................Solar Net and data interface ......................... Example ..............................Operation Product description ............................
- Page 9 Normal Operation Status Codes ......................Total Failure ............................Ground fault indication .......................... Status Codes on Fronius IG with Several Power Stage Sets ............... Class 1 Status Codes ........................... Class 2 Status Codes ........................... Class 3 status codes..........................Class 4 status codes..........................
-
Page 11: Safety Rules
Safety rules Explanation of DANGER! Indicates an immediate danger. Death or serious injury may result if Safety Instruc- appropriate precautions are not taken. tions WARNING! Indicates a possibly dangerous situation. Death or serious injury may result if appropriate precautions are not taken. CAUTION! Indicates a situation where damage or injury could occur. - Page 12 Utilization in Ac- The device is to be used exclusively for its intended purpose. cordance with Utilization for any other purpose, or in any other manner, shall be deemed to "Intended Pur- be "not in accordance with the intended purpose." The manufacturer shall not pose"...
- Page 13 Data Regarding The inverter generates a maximum sound power level of < 80 dB(A) (ref. 1 Noise Emission pW) when operating under full load in accordance with IEC 62109-1:2010. Values The device is cooled as quietly as possible with the aid of an electronic tem- perature control system, and depends on the amount of converted power, the ambient temperature, the level of soiling of the device, etc.
- Page 14 Protective Mea- Danger of damage to electrical components from electrical discharge. Suitable sures against measures should be taken to protect against ESD when replacing and install- ing components. Safety measures Only operate the device when all safety devices are fully functional. If the safe- in normal opera- ty devices are not fully functional, there is a risk of tion...
-
Page 15: General Information
General Information... -
Page 17: Protection Of Persons And Equipment
The separate power stage set area should only be disconnected from the connection area after first being disconnected from the grid power. The separate power stage set area should only be opened by Fronius-trained service personnel. Never work with live wires! Prior to all connection work, make sure that the AC and DC wires are not charged. -
Page 18: Ground Fault Detector / Interrupter
Ground fault de- The inverter is equipped with a ground fault detection and interruption (GFDI) circuit as re- tector / interrupt- quired by UL 1741 and the National Electrical code. Depending on the system configuration either the PV array’s negative or positive conductor is connected to the grounding system in the inverter. -
Page 19: The Fronius Ig Unit In The Pv System
The Fronius IG Unit in the PV System General The solar inverter is the highly complex link between the solar modules and the public grid. Inverter Main AC Energy- Load PV array meter Center Tasks The main tasks of the inverter include:... -
Page 20: Display Function And Data Communication
Datalogger and modem interface as well as an Ethernet/Internet connection (for using a PC to record and manage data from your photovoltaic system) Various large-format displays Fronius Personal Display Actuators (e.g.: relays, alarms) Interface cards Data communications components are available as plug-in cards. -
Page 21: Installation And Startup
Installation and Startup... -
Page 23: Fronius Ig Installation And Connection
The separate power stage set area should only be disconnected from the connection area after first being disconnected from the grid power. The separate power stage set area should only be opened by Fronius-trained service personnel. Never work with live wires! Prior to all connection work, make sure that the AC and DC wires are not charged. -
Page 24: Overview
Overview ‘Fronius IG installation and connection’ contains the following sections: Connection options and Knockouts Choosing the location Inverter installation Connecting the inverter to the public grid (AC) Connecting solar module strings... -
Page 25: Connection Options And Knockouts
Connection Options and Knockouts Connection Op- tions and Knock- outs (13) (6) (7) (8) (9) (10) (11) (12) Item Description Knockout for 1/2 in. / 3/4 in. conduit fitting (DC-cables) Knockout for 1/2 in. / 3/4 in. conduit fitting (DC-cables) Knockout for 1/2 in. - Page 26 Connection area opened: (14) (15) (16) (17) (18) (19) (20) Item Description (14) Connection area (to be opened only by qualified electrical professionals) (15) AC-disconnect (16) DC-disconnect (17) GFDI fuse (18) Menu keysn (19) LED for operating status (20) LED for GFDI status...
-
Page 27: Choosing The Location
Choosing the Location Choosing the lo- Please note the following criteria when choosing a location for the inverter: cation in general Installation only on a solid vertical wall: min. 3 ft. (0.9 m) above the ground max. 6.5 ft. (2 m) above the ground Max. -
Page 28: Choosing A Location For Outdoor Installation
Choosing a loca- NEMA 3R protection means that the inverter is not susceptible to water spray from any tion for outdoor direction. installation However, the manufacturer recommends, if possible, that the inverter not be exposed to direct moisture or to a direct water jet (e.g., from sprinklers). In order to protect the display, the inverter should not be exposed to direct sunlight. -
Page 29: Fronius Ig Installation
In most cases, you should use 1/4 in. or 5/16 in. stainless steel or aluminum screws capa- screws for ble of supporting: mounting plate 26 lbs. for Fronius IG 2000 / 3000 / 2500-LV assembly 42 lbs. for Fronius IG 4000 / 5000 / 4500-LV Attaching the IMPORTANT! Keep a minimum distance under the inverter corresponding to the ‘NEC... -
Page 30: Inverter Installation
Inverter Installa- As your inverter is delivered, the mounting plate is fixed to the inverter by two screws on tion the bottom of the inverter. CAUTION! Danger of injury by falling equipment. The inverter may become dis- lodged and fall from the mounting plate if the unit is not fixed to the mounting plate. -
Page 31: Connecting The Fronius Ig To The Public Grid (Ac)
Connecting the Fronius IG to the Public Grid (AC) General Your inverter needs to be connected to the AC disconnect, to the DC disconnect and to the equipment grounding according to the following steps. AC and DC are switched separately. -
Page 32: Overview Of Available Grids
Jumper positions for neutral conductor in the grid: public grid with neutral conductor - factory setting (Enable) public grid without neutral conductor (Disable) Set the jumper to the refered position Overview of avail- Inverters can be connected to the following grids: able grids 208 V Delta : 120 V WYE 240 V : 120 V Split Phase... -
Page 33: Monitoring The Grid
The connection to the grid should be done in the following way: Connect Fronius IG No. 1, No. 4, No. 7, ... to L1 and L2 Connect Fronius IG No. 2, No. 5, No. 8, ... to L2 and L3... -
Page 34: Ac-Side Terminals And Grounding Terminals
AC-side terminals and grounding (1)(2) (4)(5) terminals The white plastic divider that separates the AC from the DC connection area is not shown in the figure. Grid grounding / Grounding conductor The inverter must be connected via the grounding terminal to the AC grid ground- ing. -
Page 35: Cross Section Of Ac Wires
Canadian standards. Use minimum AWG 12, min. 167 °F (75 °C), copper wire for the AC connec- tion of the FRONIUS IG 2000, 3000 and 2500-LV. Use minimum AWG 10, min. 167 °F (75 °C), copper wire for the AC connec- tion of the FRONIUS IG 4000, 5100 and 4500-LV. -
Page 36: Removing Knockouts And Mounting Conduits
Removing knock- Available knockouts: outs and mount- ing conduits Connecting plate Knockout 1/2 in. / 3/4 in. for DC cables Knockout 1/2 in. / 3/4 in. for AC cables Knockouts on inverter side 1/2 in. / 3/4 in. for AC or DC cables CAUTION! Danger of short circuit by loose metal parts from knockouts. -
Page 37: Connecting The Inverter To The Public Grid (Ac)
National Electrical Code, side overcurrent ANSI / NFPA 70, at a MAXIMUM of: protection 20A ... IG 2000 / 3000 / 2500-LV (15 A is permissible) 30A ... IG 4000 / 5100 / 4500-LV (25 A is permissible with the IG 4000) -
Page 38: Additional External Ac And/Or Dc Disconnect
Additional exter- Depending on the installation, an additional external AC and/or DC disconnect may be re- nal AC and/or DC quired if the inverter is installed in a location not easily accessible to utility or fire personnel. disconnect Contact your local authorities for additional information. -
Page 39: Connecting Solar Module Strings To The Fronius Ig (Dc)
More exact data for sizing the solar array for the particular location can be obtained using calculation tools such as the Fronius Configuration Tool (available at http:// www.fronius-usa.com). See NEC table 690.7 for the appropriate code-related voltage adjustment factor for crystalline silicon modules, or use the manufacturer’s specified voltage coefficient. -
Page 40: Dc Terminals
DC terminals The white plastic divider that separates the AC from the DC connection area is not shown in the figure. DC disconnect DC terminal block GFDI fuse Solar module The inverter is equipped with a ground-fault detection and interruption (GFDI) circuit as re- ground quired by UL 1741 and the National Electrical code. -
Page 41: Wire Cross Section Of Solar Module Strings
(see NEC table 250.122). Use minimum AWG 14, min. 167 °F (75 °C), copper wire for the DC connec- tion of the FRONIUS IG 2000, 3000 and 2500-LV. Use minimum AWG 14, min. 167 °F (75 °C), copper wire for the DC connec- tion of the FRONIUS IG 4000, 5100 and 4500-LV Voltage drop and other considerations may dictate larger size wires be used. - Page 42 To access the DC terminals, bend upward the white plastic divider. It is possible to connect up to 3 PV-strings in parallel within the Fronius IG inverter. Insert the DC cables and the grounding cables through the DC conduit into the inverter Connect the DC cables to the DC terminal block: connect the positive (+) cables to the "DC+"...
-
Page 43: Commissioning
Commissioning Factory pre-set The inverter has been pre-configured in the factory and is ready for operation. configuration To change your inverter settings, please see section ‘The setup menu’ in the chapter ‘Op- eration.’ Commissioning Close the connection area If available, turn on an external AC disconnect Switch AC disconnect on the inverter to the "ON"... - Page 44 The Operating Status LED lights up green, and the inverter starts opera- ting. IMPORTANT! For more information about the startup phase, please see the chapter 'Op- eration', section 'Product description Fronius IG' (Startup Phase, Test Procedure).
-
Page 45: Inserting Option Cards
Datalogger and modem interface, Ethernet/Internet connection (for using a PC to re- cord and manage data from your photovoltaic system) Fronius Interface Card Easy (sends all relevant working parameters in a well defined RS-232 protocol) Fronius Personal Display Various large displays (Fronius Public Display) Sensors (temperature sensors / irradiation sensors / ...) -
Page 46: Inserting And Connecting Option Cards
Inserting and When adding option cards to the inverter, please follow all inverter safety instructions and connecting op- information before opening the inverter. tion cards Switch the AC and DC disconnect on the inverter to the OFF position Open connection area Insert the Com Card in the left-most slot named "ENS"... - Page 47 Insert data communication cables through the DatCom conduit and connect them to the sockets "IN" and "OUT" IMPORTANT! When networking several DATCOM components, a termination plug must be placed on each free IN and/or OUT connection of a DATCOM component. Close the connection area Switch the AC and DC disconnects on the inverter to the "ON"...
-
Page 48: Data Communication And Solar Net
Important Every inverter that is to be monitored using a Datalogger requires a ‘Fronius Com Card.’ In this case, the ‘Fronius Com Card’ serves as a link between the internal net- work of the inverter and the Solar Net interface of the Datalogger. - Page 49 Option cards communicate within the Fronius IG via its internal network. External commu- nication (Solar Net) takes place via the 'Fronius Com Cards.' Each 'Fronius Com Card' is equipped with two RS485 interfaces - an input and an output. RJ45 plug connectors are...
-
Page 51: Operation
Operation... -
Page 53: Product Description
Product description Controls and Indi- cators Item Function Display for displaying values, settings and menus Operating Status LED for displaying the operating status LED GFDI-Status for displaying the GFDI status "Enter" key for confirming a selection "Menu / Esc" key for scrolling through menu options for exiting the Setup menu "Down/Right"... -
Page 54: Display
Display The display unit's power is supplied via the safety-low voltage of the solar modules, which means that the display unit can be used only in the daytime. IMPORTANT! The inverter display is not a calibrated measuring instrument. A slight inac- curacy of a few percent is intrinsic to the system. -
Page 55: Operating Status Led And Gfdi Status Led
Item Function ... appears with data readings that are transmitted by the consumption sensor (optional) Range for display unit for displaying the applicable measuring unit Icon for the "Enter" key Icons for the "Menu/Esc" key (10) Icons for the "Down/Right" key (11) Icons for the "Left/Up"... - Page 56 Operating Status LED Explanation Flashes orange A warning is shown on the display the inverter has been set to standby operation in the Setup menu (= manual shutoff of operation). The next day, operation will resume automatically. During the time the LED flashes orange, operation can be re- sumed manually at any time (see section "The Setup Menu") Steady red General status: the respective status code is shown on the...
-
Page 57: Startup Phase And Grid Feed-In Mode
Startup Phase and Grid Feed-in Mode Startup phase The inverter carries out a self test after being turned on automatically. Then a test of the public grid is carried out. This test takes five minutes. During the startup sequence the illu- mination of the Operating Status LED is yellow. -
Page 58: Operation Of Feeding Energy Into The Grid
The startup test takes five minutes. The time elapsed is indicated by a bar shrinking from the top down. Whenever two scale divisions stop flashing and disappear, 1/10 of the total duration of the test is over. Operation of Once the tests have been completed, the inverter starts feeding power into the grid. Feeding Energy The display shows the present power feeding into the grid. -
Page 59: Navigation In The Menu Level
Navigation in the Menu Level Activating display Press any key illumination The display illumination is activated. If no key is pressed for 30 seconds, the display backlight goes out (provided that the display illumination is set to automatic in the Setup menu). The Setup menu also offers a choice between a permanently lit or permanently dark display. -
Page 60: The Display Modes
..Displays values for power fed into the grid during that day "Year" display mode ..Displays values for the present calendar year - only avail- able in combination with optional Fronius Datalogger "Total" display mode ..Displays values for power fed into the grid since the in-... -
Page 61: Overview Of Display Values
Overview of Dis- Display Symbol Unit Optional Display value play Values mode "Now" Output power Grid voltage Output current Grid frequency Solar module voltage Solar module current °F solar module temperature GFDI status energy as read by consumption me- °F ambient temperature W/m²... -
Page 62: Display Values In "Now" Display Mode
Display Values in "Now" Display Mode Selecting the Select the "Now" display mode "Now" Display Mode The first display value in the "Now" display mode appears Use the "Down" (2) key to scroll to the next display value Scroll back using the "Up" key (1) Display values in Output power the ‘Now’... -
Page 63: Options
Solar module current current supplied by solar array at the par- ticular moment (Amperes) Solar modul temperatur (optional Sen- sor Card/Box) temperature at solar modules, tempera- ture sensor No.1 (°F) GFDI status if there is no ground fault in the system "GFDI OK"... -
Page 64: Display Values In "Day / Year / Total" Display Modes
General For the inverter the day begins when it switches on. If the DC supply line is disconnected and no Fronius Datalogger is connected, the following parameters within the display mode ‘Day’ will be reset after repeating the start-up: yield (currency can be selected) reduction (lbs.) -
Page 65: Display Values In The 'Day / Year / Total' Display Modes
Display values in Output energy the ‘Day / Year / Energy supplied during the monitored pe- Total’ display riod (kWh / MWh) modes Due to the variety of different monitoring systems, there can be deviations between the readings of other metering instruments as compared to the readings from the inverter. For determining the energy supplied to the grid, only the readings of the calibrated meter sup- plied by the electric utility company are relevant. -
Page 66: Options
Maximum solar module voltage Highest reading of solar module voltage (V) during the observation period Energy consumption meter reading (optional Sensor Card/Box and con- sumption sensor ) energy consumed during observation pe- riod (kWh / MWh) Maximum solar module temperature (optional Sensor Card/Box) highest temperature reading at solar mod- ules during observation period (°F) -
Page 67: The Setup Menu
The Setup Menu Presetting The inverter is pre-configured and ready to use. No manual control is necessary for feeding the power it generates into the grid. The setup menu allows easy readjustment of the inverter's preset parameters to your needs. Accessing the Switch to the menu level (press the Setup Menu... -
Page 68: Scrolling Through Menu Items
Scrolling through Example: "STANDBY" menu item Example: "CONTRAST" menu item Menu Items Access the Setup menu Scroll through the available menu items using the "Up" (1) and "Down" (2) keys... -
Page 69: Menu Items In The Setup Menu
Menu Items in the Setup Menu STANDBY Manual activation / deactivation of Standby operation using the "Enter" key Unit Setting range Enter Factory setting Automatic operation of feeding energy into the grid (Standby deactivated) The power electronics are switched off in standby mode. No power is fed into the grid. The Operating Status LED flashes orange. -
Page 70: Menu Mode
MENU MODE ‘MENU MODE‘ cannot be selected. LIGHT MODE Initial setting for display illumination. Unit Setting range AUTO / ON / OFF Factory setting AUTO AUTO: The display illumination will stop 30 seconds after the last time a key has been pressed. The display will remain illuminated whenever power is supplied to the grid. -
Page 71: Dat Com
DDMMYYYY, HH:MM Setting range Date / Time Factory setting IMPORTANT! The "TIME" menu item is only supported when the Fronius Datalogger op- tion is installed. STATE PS Status display of power stage sets; the last error that has occurred can be displayed... -
Page 72: Version
VERSION displays the version number and serial number of the electronic components (e.g. IG control unit and the power stage sets) Unit Display area MAIN CTRL / PS (PS00, PS01) Factory setting MAINCTRL Version information of the IG control unit (inverter controller) Version information of the power stage sets (PS00 - PS01) -
Page 73: Setting And Displaying Menu Items
Setting and Displaying Menu Items Setting Menu Access the Setup menu Items - General Use the "Up" or "Down" keys to select the desired menu item Press the "Enter" key The first digit of a value to be set flash- The available settings are displayed: Use the "Up"... -
Page 74: Setting The Currency And Rate
Setting the cur- Select the ‘CASH’ menu item rency and rate Press the ‘Enter’ key The currency is display, factory setting = ‘USD’; The first character flashes. Use the ‘Up’ and ‘Down’ keys to select a letter for the first character Press the ‘Enter’... - Page 75 The rate for energy supplied is now display- ed in kWh / currency, factory setting = 0.14 USD / kWh; The first digit flashes. Use the ‘Up’ and ‘Down’ keys to select a value for the first digit (e.g., 0) Press the ‘Enter’...
-
Page 76: Displaying And Setting Parameters In The "Datcom" Menu Item
Displaying and Select menu item ‘DATCOM’ Setting Parame- Press the ‘Enter’ key ters in the "DAT- COM" Menu Item The following displays depend on whether a data connection is available a data connection is faulty or an option is not installed Available data connection If there is a data connection available, ‘OK- COM’... -
Page 77: Setting Time And Date
Data connection faulty or an option is not installed If there is a faulty data connection or op- tions are not installed ‘ERRORCOM’ is shown. Press the ‘Esc’ key to exit menu item ‘DATCOM’ Setting Time and Select the "TIME" menu item Date Press the "Enter"... - Page 78 The second digit for the month flashes. Use the "Up" and "Down" keys to select a value for the second month di- Press the "Enter" key The first digit for the year flashes. Use the "Up" and "Down" keys to select a value for the first year digit Press the "Enter"...
- Page 79 The time is displayed (HH:MM), the first di- git for the hour flashes. Use the "Up" and "Down" keys to select a value for the first hour digit Press the "Enter" key The second digit for the hour flashes. Use the "Up" and "Down" keys to select a value for the second hour digit Press the "Enter"...
-
Page 81: Troubleshooting And Maintenance
Troubleshooting and Maintenance... -
Page 83: Status Diagnosis And Troubleshooting
Check the open circuit voltage of the solar modules at the connections of the inverter: Open circuit voltage < 170 V ... error in the photovoltaic system Open circuit voltage > 170 V ... may indicate a basic fault in the inverter. In this case, notify a Fronius-trained service engineer. -
Page 84: Ground Fault Indication
1 AMP 600V" fuse. Switch the AC and DC disconnect to position “ON“ (closed circuit) Status Codes on A special status diagnostic is run if an error occurs in an inverter with several power stage Fronius IG with sets. Several Power Stage Sets It is also possible to call up status codes even if there is no actual error in existence. -
Page 85: Class 1 Status Codes
The status display of the power stage sets "STATE PS" appears Press the "Enter" key Class 1 Status Class 1 status codes are typically tempo- Codes rary. Their cause lies in the public grid. The initial response of the inverter is to disconnect itself from the grid. The grid is subse- quently checked for the stipulated monitoring period. -
Page 86: Class 2 Status Codes
Islanding detected Behavior Grid conditions are thoroughly tested and as soon as they are again within the permissible range, the inverter will resume feeding power into the grid. Remedy Should the status code persist, you should contact your system installer Class 2 Status Status codes of class 2 are typically tempo- Codes... -
Page 87: Class 3 Status Codes
Grid voltage (L2/N) below admissible limits Behavior As soon as the grid voltage has returned to admissible range, the inverter resumes feeding power into the grid. Remedy Check grid voltage; if the status code persists you should con- tact your electrical contractor No grid voltage detected Behavior As soon as the grid conditions have returned to admissible... - Page 88 303 * Over-temperature AC side Description Short interruption of power feeding into the grid due to over- temperature. The inverter returns to the startup phase. Remedy Fault is rectified automatically If this status code keeps recurring, contact your system installer 304 * Over-temperature DC side Description...
-
Page 89: Class 4 Status Codes
The inverter will automatically attempt to connect again and, if possible, resume feeding power into the grid Remedy Check grid connections and fuses If status code persists: Contact a Fronius-trained service tech- nician Communication with EEPROM not possible Description The inverter will automatically attempt to connect again and, if possible, resume feeding power into the grid. - Page 90 Description Fixed voltage lower than the current MPP voltage. Remedy If the status code persists, you should contact a Fronius-trained service technician, or remove excess solar modules so DC volt- age fits within inverter limits. If status code persists: Contact a Fronius-trained service tech-...
- Page 91 Description The Operating Status LED lights up orange, then the inverter at- tempts a restart. Remedy If status code persists: Contact a Fronius-trained service tech- nician Two power stage sets have the same PCB number Description The inverter stops feeding power into the grid, the display...
-
Page 92: Class 5 Status Codes
The inverter will automatically attempt to connect again and, if possible, resume feeding power into the grid Remedy Check grid connections and fuses; If status code persists: Contact a Fronius-trained service tech- nician GFDI stopped grid monitoring Description If it is possible, your inverter will resume the power feeding op-... - Page 93 Description The Solar Net components required are in the inverter: Howev- er, communication is still not currently possible. Remedy Status code will disappear after changing the inverter address EEPROM faulty Description Data from the Setup menu are lost. Remedy Remedied automatically EEPROM faulty Description Data from the ‘Total’...
-
Page 94: Customer Service
Contact a Fronius-trained service technician Customer Service IMPORTANT! Please contact your Fronius dealer or a Fronius-trained service technician if an error appears frequently or for a long period of time an error appears that is not listed in the tables... -
Page 95: Appendix
Appendix... -
Page 97: Technical Data
Technical Data Fronius IG 2000 Input data Recommended PV power 1500 -2500 Wp MPP voltage range 150 - 400 V DC Max. input voltage 500 V DC (at 1000 W/m² / 14 °C in an open circuit) Nominal input voltage... - Page 98 General data Maximum efficiency 95.2 % Night consumption < 0.15 W Consumption during operation Cooling Controlled forced ventilation Degree of protection NEMA 3R Unit dimensions w x h x d 18.5 x 16.33 x 8.71 in. 470 x 418 x 223 mm Weight 26 lbs.
-
Page 99: Fronius Ig 3000
Fronius IG 3000 Input data Recommended PV power 2000 -3300 Wp MPP voltage range 150 - 400 V DC Max. input voltage 500 V DC (at 1000 W/m² / 14 °C in an open circuit) Nominal input voltage 280 V Nominal input current 10.0 A... - Page 100 General data Maximum efficiency 95.2 % Night consumption < 0.15 W Consumption during operation Cooling Controlled forced ventilation Degree of protection NEMA 3R Unit dimensions w x h x d 18.5 x 16.33 x 8.71 in. 470 x 418 x 223 mm Weight 26 lbs.
-
Page 101: Fronius Ig 2500-Lv
Fronius IG 2500- Input data Recommended PV power 1800 -3000 Wp MPP voltage range 150 - 400 V DC Max. input voltage 500 V DC (at 1000 W/m² / 14 °C in an open circuit) Nominal input voltage 280 V Nominal input current 8.6 A... - Page 102 General data Maximum efficiency 94.4 % Night consumption < 0.15 W Consumption during operation Cooling Controlled forced ventilation Degree of protection NEMA 3R Unit dimensions w x h x d 18.5 x 16.33 x 8.71 in. 470 x 418 x 223 mm Weight 26 lbs.
-
Page 103: Fronius Ig 4000
Fronius IG 4000 Input data Recommended PV power 3000 -5400 Wp MPP voltage range 150 - 400 V DC Max. input voltage 500 V DC (at 1000 W/m² / 14 °C in an open circuit) Nominal input voltage 280 V Nominal input current 16.3 A... - Page 104 General data Maximum efficiency 95.2 % Night consumption < 0.15 W Consumption during operation 15 W Cooling Zwangsbelüftung Degree of protection NEMA 3R Unit dimensions w x h x d 28.34 x 16.46 x 8.78 in. 720 x 418 x 223 mm Weight 41.8 lbs.
-
Page 105: Fronius Ig 5100
Fronius IG 5100 Input data Recommended PV power 4000 -6300 Wp MPP voltage range 150 - 400 V DC Max. input voltage 500 V DC (at 1000 W/m² / 14 °C in an open circuit) Nominal input voltage 280 V Nominal input current 20.8 A... - Page 106 General data Maximum efficiency 95.2 % Night consumption < 0.15 W Consumption during operation 15 W Cooling Controlled forced ventilation Degree of protection NEMA 3R Unit dimensions w x h x d 28.34 x 16.46 x 8.78 in. 720 x 418 x 223 mm Weight 41.8 lbs.
-
Page 107: Fronius Ig 4500-Lv
Fronius IG 4500- Input data Recommended PV power 3600 -5500 Wp MPP voltage range 150 - 400 V DC Max. input voltage 500 V DC (at 1000 W/m² / 14 °C in an open circuit) Nominal input voltage 280 V Nominal input current 18.3 A... - Page 108 General data Maximum efficiency 94.4 % Night consumption < 0.15 W Consumption during operation 15 W Cooling Controlled forced ventilation Degree of protection NEMA 3R Unit dimensions w x h x d 28.34 x 16.46 x 8.78 in. 720 x 418 x 223 mm Weight 41.8 lbs.
-
Page 109: Field Adjustable Trip Points
Field adjustable Field adjustable trip points 208 V 240 V trip points Nominal AC output voltage, Line-to-Line, [V] Operating AC voltage range default, 183-229 212-264 Line-to-Line, [V] Adjustment range for voltage, 180-240 180-270 Line-to-Line, [V] Voltage trip limit accuracy ± 1,5 ±... -
Page 110: Warranty And Disposal
Detailed warranty terms and conditions specific to your country can be found online: turer's Warranty www.fronius.com/solar/warranty To take advantage of the full warranty duration for your newly installed Fronius inverter or accumulator, register your product at: www.solarweb.com. Disposal Should your inverter be replaced at some future date, Fronius will accept the obsolete... - Page 111 - Certified to U.S. Standards Utility Interactive Inverter, Models IG 2000 NEG, IG 2000 POS, IG 3000 NEG, IG 3000 POS, IG 2500-LV NEG, IG 2500-LV POS, IG 4000 NEG, IG 4000 POS, IG 5100 NEG, IG 5100 POS, IG 4500-LV NEG, and IG 4500-LV POS, permanently connected.
- Page 112 Certificate: 1878274 Master Contract: 203213 2365464 December 23, 2010 Project: Date Issued: CSA-C22.2 No. 107.1-01 - General Use Power Supplies *UL Std No. 1741-Second Edition - Inverters, Converters, Controllers and Interconnection System Equipment for Use With Distributed Energy Resources *Note: Conformity to UL 1741-Second Edition (January 28, 2010) includes compliance with applicable requirements of IEEE 1547 and IEEE 1547.1 DQD 507 Rev.
- Page 116 Fronius International GmbH Fronius USA LLC Solar Electronics Division 4600 Wels, Froniusplatz 1, Austria 6797 Fronius Drive, Portage, IN 46368 E-Mail: pv-sales@fronius.com E-Mail: pv-us@fronius.com http://www.fronius.com http://www.fronius-usa.com Under http://www.fronius.com/addresses you will find all addresses of our sales branches and partner firms!
Need help?
Do you have a question about the IG 2000 and is the answer not in the manual?
Questions and answers