SpectraLink 84 Series User Manual
Hide thumbs
Also See for 84 Series:
- Administration manual (329 pages) ,
- Deployment manual (150 pages) ,
- User manual (122 pages)

Subscribe to Our Youtube Channel
Related Manuals for SpectraLink 84 Series


Summary of Contents for SpectraLink 84 Series
- Page 1 U S E R G U I D E | C L O U D C O M M U N I C A T I O N S Spectralink 84-Series Wireless Telephone User Guide Document Version 1.0 April 2018...
-
Page 2: Table Of Contents
S P E C T R A L I N K 8 4 - S E R I E S U S E R G U I D E Contents Chapter 1: Understanding Your Handset Understanding Session Types Understanding the Session Manager Understanding the Handset Features Chapter 2: Before Using Your Handset Charging the Battery Pack for the First Use... - Page 3 S P E C T R A L I N K 8 4 - S E R I E S U S E R G U I D E Using the Dialer Managing Calls Managing Active Calls Transferring Calls Setting up Conference Calls Managing Conference Calls Forwarding Calls Enabling and Disabling Do Not Disturb (DND)
- Page 4 Appendix A: Cleaning and Drying the Handset Appendix B: Settings Menu Basic Settings and Preferences Advanced Settings Feature Settings Appendix C: Safety Information Industry Canada Notice Chargers and Battery Packs Wireless Telephones Electromagnetic Interference and Compatibility Specific Absorption Rate (SAR) Information: Spectralink 84-Series Wireless Telephones...
-
Page 5: Chapter 1: Understanding Your Handset
Chapter 1: Understanding Your Handset This user guide shows you how to operate your Spectralink 84-Series Wireless Telephone. In this chapter, you will learn about the four types of communication sessions your handset supports and how their alerting methods differ. -
Page 6: Understanding The Session Manager
S P E C T R A L I N K 8 4 - S E R I E S U S E R G U I D E Understanding the Session Manager The Session Manager Screen displays each type of communication session — calls and Push To Talk (PTT) broadcasts —... - Page 7 S P E C T R A L I N K 8 4 - S E R I E S U S E R G U I D E In another example, suppose you have a conference call with two other people, an incoming PTT broadcast, an application on hold, and an instant messaging chat.
-
Page 8: Understanding The Handset Features
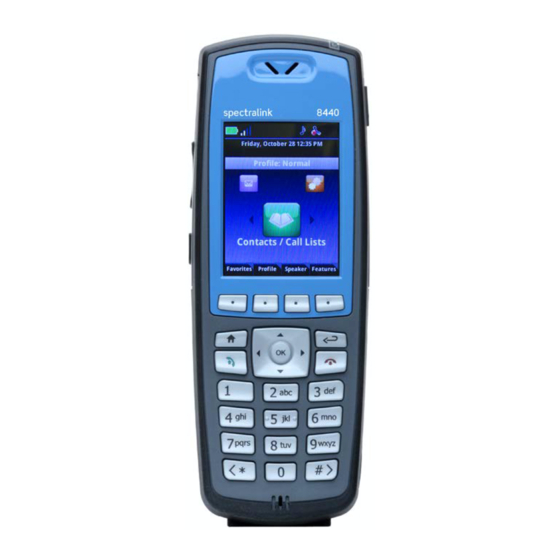
S P E C T R A L I N K 8 4 - S E R I E S U S E R G U I D E Understanding the Handset Features The front, back, and side views of your handset will orient you to the location of the keys, buttons, and other physical features documented in this guide. - Page 9 S P E C T R A L I N K 8 4 - S E R I E S U S E R G U I D E LED Indicator...
-
Page 10: Chapter 2: Before Using Your Handset
S P E C T R A L I N K 8 4 - S E R I E S U S E R G U I D E The LED indicator, located at the top right of the handset, indicates the following conditions: •... -
Page 11: Initializing The Handset
S P E C T R A L I N K 8 4 - S E R I E S U S E R G U I D E Initializing the Handset When you turn on the handset, it will cycle through an initializing sequence. Allow this sequence to continue until you see the Home screen and the registration icon ( ) in the Status Bar. -
Page 12: Understanding The Four Home Screen Icons
S P E C T R A L I N K 8 4 - S E R I E S U S E R G U I D E Settings, Contacts/Call Lists, and Applications. Only three icons are visible at once. This section explains the features associated with each icon. -
Page 13: Shortcut Menus
S P E C T R A L I N K 8 4 - S E R I E S U S E R G U I D E Messages If your facility activates voicemail, you can access call information and message history. Rotate the Messages icon to the front and press the OK button to access your voicemail messages and display information on specific calls. -
Page 14: Understanding The Status Bar Icons
S P E C T R A L I N K 8 4 - S E R I E S U S E R G U I D E When a softkey menu displays, there are two ways to choose a menu item. Use the ▲ and ▲ navigation keys to scroll through the shortcut menu and press the OK key. -
Page 15: Navigating Screens, Menus, And Sessions
S P E C T R A L I N K 8 4 - S E R I E S U S E R G U I D E Position Icon(s) Description The Battery life indicator is in the first, left-most icon position. In this example, the green battery icon shows that the handset is fully charged. -
Page 16: Navigating In And Out Of The Session Manager
S P E C T R A L I N K 8 4 - S E R I E S U S E R G U I D E Navigating and using specific keys Function Applicable Keys To scroll up and down through menu Press the ▲... -
Page 17: Entering Text, Numbers, And Special Characters
S P E C T R A L I N K 8 4 - S E R I E S U S E R G U I D E Press the Back key to return to the Session Manager. Press the left or right Nav keys to scroll to the next Home screen icon choice. - Page 18 S P E C T R A L I N K 8 4 - S E R I E S U S E R G U I D E To enter letters and numbers: Press the Encoding softkey to display a shortcut menu with the following data entry options: •...
- Page 19 S P E C T R A L I N K 8 4 - S E R I E S U S E R G U I D E Special characters Number of presses ‘ & > < “ User Tip: Special characters in passwords Some passwords may contain special characters that the handset cannot produce.
-
Page 20: Locking And Unlocking The Keypad
S P E C T R A L I N K 8 4 - S E R I E S U S E R G U I D E Locking and Unlocking the Keypad To avoid making inadvertent calls, you can lock your keypad so that key presses are not recognized. You must unlock the keypad before you can make calls. -
Page 21: Using The Headsets And Speakerphone
S P E C T R A L I N K 8 4 - S E R I E S U S E R G U I D E Any incoming call, chat or broadcast will automatically unlock a locked keypad and restore normal keypad operation as long as a call cell remains open. -
Page 22: Chapter 4: Using Telephony Applications
S P E C T R A L I N K 8 4 - S E R I E S U S E R G U I D E Chapter 4: Using Telephony Applications The handset enables multiple ways of making calls and several options for handling incoming calls. Making Calls There are several ways to make a call. - Page 23 S P E C T R A L I N K 8 4 - S E R I E S U S E R G U I D E Use the PTT Talk button: The PTT Talk button may be reprogrammed to Emergency Dial. Note locking the keypad does not disable this functionality.
-
Page 24: Using The Dialer
S P E C T R A L I N K 8 4 - S E R I E S U S E R G U I D E You can select a name from the speed dial menu or use the keypad to press a speed-dial index number. The call is placed immediately. -
Page 25: Managing Calls
S P E C T R A L I N K 8 4 - S E R I E S U S E R G U I D E Dialing Contact Names The Dial Mode softkey allows you to enter letters, special characters, and supported language characters that may be required for entering a name. - Page 26 S P E C T R A L I N K 8 4 - S E R I E S U S E R G U I D E User Tip: Adjusting the ringer volume While the handset is alerting you of an incoming call, you can increase or decrease the ringer volume using the volume buttons.
- Page 27 S P E C T R A L I N K 8 4 - S E R I E S U S E R G U I D E Answering Incoming Calls You can answer an incoming call in several ways. You can press the Start key to answer an incoming call with the handset.
-
Page 28: Managing Active Calls
S P E C T R A L I N K 8 4 - S E R I E S U S E R G U I D E To answer an incoming call when in an active call: While in an active call, press the Ignore softkey to open the Session Manager. Press the Hold softkey to place the current call on hold and highlight the incoming call cell. - Page 29 S P E C T R A L I N K 8 4 - S E R I E S U S E R G U I D E An active call has a light blue field when it is highlighted. An active call has a green field when another session cell is highlighted.
-
Page 30: Transferring Calls
S P E C T R A L I N K 8 4 - S E R I E S U S E R G U I D E To mute a call: • To mute yourself in the call, press the Mute softkey. A Mute icon displays in the status bar. Now you can still hear the other party, but that person can’t hear you. -
Page 31: Setting Up Conference Calls
After exiting, you are returned to the Home screen or, if other calls are active, to the Session Manager. User Tip: How many conference call participants can you have? The Spectralink 84-Series handsets support a maximum number of three participants in a conference call. -
Page 32: Managing Conference Calls
S P E C T R A L I N K 8 4 - S E R I E S U S E R G U I D E Managing Conference Calls Once you have set up a conference call, you can manage the conference call in several ways. To mute your microphone during a conference call: During a conference call, in the Session Manager, highlight the Active: Conference call cell. -
Page 33: Forwarding Calls
S P E C T R A L I N K 8 4 - S E R I E S U S E R G U I D E To exit a conference call: • To exit a conference call, in the Session Manager, highlight the Active: Conference call cell and press End. The other parties remain connected. - Page 34 S P E C T R A L I N K 8 4 - S E R I E S U S E R G U I D E User Tip: Call forwarding Automatic call forwarding works only as long as your handset is registered and turned on. If you turn off your handset or move out of range for an extended period of time, calls to your handset are neither received nor forwarded.
-
Page 35: Enabling And Disabling Do Not Disturb (Dnd)
S P E C T R A L I N K 8 4 - S E R I E S U S E R G U I D E Open SIP Server Forwarding is handled locally by the handset. Options allow you to set when the forwarding occurs and what number is called. -
Page 36: Using The Speed Dial List
S P E C T R A L I N K 8 4 - S E R I E S U S E R G U I D E By default, the DND feature, when enabled, applies to all lines on your handset. The system administrator can enable your handset to apply DND on a line-by-line basis. - Page 37 S P E C T R A L I N K 8 4 - S E R I E S U S E R G U I D E Each time you add a contact to your Contact Directory, that contact is automatically assigned the next available speed dial index number and added to your speed dial list.
-
Page 38: Accessing Voicemail
S P E C T R A L I N K 8 4 - S E R I E S U S E R G U I D E Scroll to a contact and press Start or press the index number, for example ‘1’ on the keypad would place a call to Don Blue. -
Page 39: Chapter 5: Push-To-Talk (Ptt) And Paging
Note: When to use Paging The Paging feature is normally used only in environments where Polycom desk sets are deployed and broadcasts need to reach both Spectralink wireless telephones and Polycom wired desk sets. Paging is not normally otherwise deployed. -
Page 40: Using The Push-To-Talk Feature
S P E C T R A L I N K 8 4 - S E R I E S U S E R G U I D E Using the Push-to-Talk Feature Spectralink 84-Series handsets can operate in a group broadcast mode called Push-to-Talk (PTT). With PTT, the administrator enables channels and users are subscribed to some or all of these channels to receive and send PTT broadcasts. - Page 41 S P E C T R A L I N K 8 4 - S E R I E S U S E R G U I D E To send a PTT broadcast: • To broadcast on the default channel from standby mode, press and hold the Talk button. Hold the handset microphone approximately two inches from your mouth and speak.
- Page 42 S P E C T R A L I N K 8 4 - S E R I E S U S E R G U I D E The wait period keeps the channel open and gives any handset subscribed to that channel time to join the conversation.
- Page 43 S P E C T R A L I N K 8 4 - S E R I E S U S E R G U I D E To answer a PTT broadcast: • Press and hold the Talk button during the ten-second wait period. To end a wait period: Press End.
- Page 44 S P E C T R A L I N K 8 4 - S E R I E S U S E R G U I D E • Press the End key to exit the PTT broadcast. To change the PTT volume: •...
- Page 45 S P E C T R A L I N K 8 4 - S E R I E S U S E R G U I D E Configuring PTT There are several ways to configure PTT. You can change the PTT default channel, subscribe or unsubscribe to channels that the system administrator has enabled, and customize incoming PTT alerts.
- Page 46 S P E C T R A L I N K 8 4 - S E R I E S U S E R G U I D E Customizing PTT Alerts When you press the Talk button to send or receive a PTT transmission, your handset emits a PTT alert sound. You can customize this PTT alerting sound in any notification profile.
-
Page 47: Using The Paging Feature
Using the Paging Feature Spectralink 84-Series handsets can operate in a group broadcast mode called Paging. You can use the Paging feature to make a page to a page group. A page is a one-way transmission played over the handset’s speakerphone. - Page 48 S P E C T R A L I N K 8 4 - S E R I E S U S E R G U I D E Highlight the Paging Group you wish to page. Press OK or press the Page softkey to start the page. The page displays as a call cell, shown next: When the preamble period ends and the page starts, start speaking your message.
- Page 49 S P E C T R A L I N K 8 4 - S E R I E S U S E R G U I D E Change the audio option while sending a page: • Change the audio option while you are sending a page by pressing the Speaker softkey and selecting a different option.
- Page 50 S P E C T R A L I N K 8 4 - S E R I E S U S E R G U I D E Highlight and select Accept While Busy. Enable or disable the Accept While Busy feature. •...
-
Page 51: Chapter 6: Using The Contact Directory
S P E C T R A L I N K 8 4 - S E R I E S U S E R G U I D E Highlight and select Group Subscriptions. The Group Subscriptions screen displays. Select a group. Enable your subscription to that channel by choosing Yes or disable your subscription to that channel by choosing No. -
Page 52: Managing Your Contacts
S P E C T R A L I N K 8 4 - S E R I E S U S E R G U I D E Contact Directory Fields Field Name Description Enter the first and last name of the contact. Each field supports a maximum of 32 First Name characters. - Page 53 S P E C T R A L I N K 8 4 - S E R I E S U S E R G U I D E To add contacts manually: Navigate to the Contacts/Call Lists icon on the Home screen and press OK. Highlight Contact Directory and press OK.
- Page 54 S P E C T R A L I N K 8 4 - S E R I E S U S E R G U I D E Highlight Call Lists and press OK. A list of missed, received, and placed calls displays. Highlight the contact and press OK.
-
Page 55: Using Call Lists
S P E C T R A L I N K 8 4 - S E R I E S U S E R G U I D E Using Call Lists The handset captures information about calls you have missed, received, and placed. You can set your call list to display all types of calls or one type of call. -
Page 56: Searching And Saving With The Corporate Directory
S P E C T R A L I N K 8 4 - S E R I E S U S E R G U I D E To save contact information to the Contact Directory: • Select the call and press the Save softkey. To delete calls from the Call List: Select an individual call and press the Delete softkey. -
Page 57: Chapter 7: Pairing And Connecting A Bluetooth Headset
This section shows you how to pair and connect your Bluetooth headset. Note: Bluetooth compatibility Your 84-Series handset has been tested for compatibility with Bluetooth v2.1 headsets. However, Spectralink does not recommend using your headset while the 2.4 GHz band is enabled. In this case, the Bluetooth and WLAN network with both use the same 2.4GHz frequency range. - Page 58 S P E C T R A L I N K 8 4 - S E R I E S U S E R G U I D E Pairing Versus Connecting You can have up to four Bluetooth headset paired with the handset at any one time. Pairing establishes a relationship between a headset and the handset.
- Page 59 S P E C T R A L I N K 8 4 - S E R I E S U S E R G U I D E • Red icon Indicates the listed headset is identified but not paired. Indicates that the headset is paired.
- Page 60 S P E C T R A L I N K 8 4 - S E R I E S U S E R G U I D E Locate your headset in the list and press the Add softkey to begin the acquire procedure. Once the handset has acquired the headset, the Manage BT Headsets screen appears with the headset displayed.
-
Page 61: Chapter 8: Customizing Your Handset
S P E C T R A L I N K 8 4 - S E R I E S U S E R G U I D E Setting Bluetooth volume: • Use the volume adjustment buttons on the headset to increase or decrease call volume. Receiving Push-To-Talk Calls When you receive a Push-to-talk (PTT) call, the audio is automatically routed through the handset speaker and not through the headset you are currently using. - Page 62 S P E C T R A L I N K 8 4 - S E R I E S U S E R G U I D E Select the Notification Profile you wish to edit and press OK. You can edit the label, the tone volume, the ringing characteristics and alerts for each profile.
- Page 63 S P E C T R A L I N K 8 4 - S E R I E S U S E R G U I D E Change the ring pattern or the vibration mode. Experiment with the options until you find a combination that suits you.
-
Page 64: Customizing The Handset Display And Other Preferences
S P E C T R A L I N K 8 4 - S E R I E S U S E R G U I D E Customizing the Handset Display and Other Preferences You can adjust the text that displays on the screen in the Preferences menu. Each of the options listed next is available in the Preferences menu. - Page 65 S P E C T R A L I N K 8 4 - S E R I E S U S E R G U I D E Background The Background option enables you to change the background characteristics of the display. Options are customized by facility.
-
Page 66: Chapter 9: Chargers And Battery Packs
Caution: Battery compatibility Only use Spectralink 84-Series Battery Packs with Spectralink 84-Series handsets. Check the label on the Battery Pack and ensure the model number is RS657 for the Standard Capacity Battery Pack or RS658 for the Extended Capacity Battery Pack. -
Page 67: Charger Options
Battery Pack for the Spectralink 84-Series handset can be charged in any Spectralink 84-Series Charger. Caution: Battery compatibility Only use Spectralink 84-Series Chargers with Spectralink 84-Series handsets. Check the label on the Charger and ensure the model number shown on the label is the same number this document gives for the Charger models. - Page 68 S P E C T R A L I N K 8 4 - S E R I E S U S E R G U I D E The Dual charger has two LEDs. The top LED indicates the charging status of the Battery Pack in the rear bay. The bottom LED indicates whether or not the handset is properly seated in the front charging bay.
-
Page 69: About Battery Packs
S P E C T R A L I N K 8 4 - S E R I E S U S E R G U I D E The Battery Pack snaps into the charging slot. The LED just above the charging slot indicates the charging status of the Battery Pack. - Page 70 WARNING: THERE IS A RISK OF EXPLOSION IF YOU REPLACE THE BATTERY PACK WITH AN INCORRECT TYPE. ONLY USE POLYCOM MODEL RS657 OR RS658 BATTERY PACKS WITH SPECTRALINK 84-SERIES HANDSETS. DISPOSE OF USED BATTERIES BY RETURNING THEM TO THE DISTRIBUTOR OR PRODUCER WHO SUPPLIED THEM.
-
Page 71: Battery Safety Notices
• If multiple Battery Packs are supplied with your handset, Spectralink recommends that each be fully charged upon receipt to prolong battery life. Battery Packs will slowly lose charge if unused. To maintain battery potential, charge unused Battery Packs occasionally or alternate Battery Pack use. -
Page 72: Appendix A: Cleaning And Drying The Handset
Take care not to exert undue pressure on charger electrical contacts while wiping. • Spectralink recommends the use of a silicone cover to prolong the life of your handset, especially when it is dropped regularly or cleaned frequently with the disinfectants prescribed below. - Page 73 S P E C T R A L I N K 8 4 - S E R I E S U S E R G U I D E • If your wireless handset interior gets wet, do not try to accelerate drying with the use of an oven or a dryer as this will damage the wireless handset and void the warranty.
-
Page 74: Appendix B: Settings Menu
S P E C T R A L I N K 8 4 - S E R I E S U S E R G U I D E Appendix B: Settings Menu The User Settings menu contains all the options you need to customize your handset settings for optimum use. Navigate to this menu from the Home screen Settings icon. -
Page 75: Advanced Settings
S P E C T R A L I N K 8 4 - S E R I E S U S E R G U I D E Advanced Settings The Advanced Settings menu is used by the system administrator to set system parameters. It is accessible only by a password. -
Page 76: Appendix C: Safety Information
S P E C T R A L I N K 8 4 - S E R I E S U S E R G U I D E Appendix C: Safety Information Caution: Product compatibility Each Spectralink family of products only works with other members of the same family. If you have any questions about product compatibility, contact your system administrator. Spectralink 84-Series Use only 84-Series products with other 84-Series products as identified by the model number located on the label of the product. -
Page 77: Industry Canada Notice
Bent contacts can keep the Battery Pack from charging. • Only use Spectralink 84-Series Battery Packs with Spectralink 84-Series Chargers. • Never use a non-Spectralink charging unit as it could damage the Battery Pack. • Use only the original plug-in power adapter for the chargers. •... -
Page 78: Wireless Telephones
Caution: Authority to operate this equipment Changes or modifications to this equipment that are not approved by Spectralink may cause this equipment to fail to comply with part 15 of the FCC rules, voiding the user’s authority to operate this equipment. -
Page 79: Electromagnetic Interference And Compatibility
S P E C T R A L I N K 8 4 - S E R I E S U S E R G U I D E Electromagnetic Interference and Compatibility Nearly every electronic device is susceptible to electromagnetic interference (EMI) if inadequately shielded, designed, or otherwise configured for electromagnetic compatibility. -
Page 80: Specific Absorption Rate (Sar) Information: Spectralink 84-Series Wireless Telephones
Specific Absorption Rate (SAR) Information: Spectralink 84-Series Wireless Telephones Your wireless handset is a low power radio transmitter and receiver. When it is on, it receives and sends out 802.11a/b/g/n radio frequency (RF) signals. In August 1996, the Federal Communications Commission (FCC) adopted radio frequency (RF) exposure guidelines with safety levels for hand-held wireless handsets. - Page 81 S P E C T R A L I N K 8 4 - S E R I E S U S E R G U I D E SAR information on this model handset is on file with the FCC. You can find it under the Display Grant section at http://www.fcc.gov/oet/ea after searching on the FCC ID number found on the handset label inside the battery compartment.
Need help?
Do you have a question about the 84 Series and is the answer not in the manual?
Questions and answers