Table of Contents
Advertisement
Available languages
Available languages
ZoneAire
Portable Air Conditioner with Heat
OWNER'S MANUAL
P08SA / P10SA / P12SA
98081002_02
ZoneAire Compact I & O_98081002_02.indd 1
Compact
®
TABLE OF CONTENTS
Important Safety Guidelines ______________ 2
Introduction ___________________________ 3
Unpacking Instructions & Contents ________ 4
Parts ________________________________ 5
Display Functions ______________________ 6
Remote Control Functions _______________ 9
Drain Pipe ___________________________ 12
Maintenance & Cleaning _______________ 13
Installation __________________________ 14
Troubleshooting ______________________ 16
3/16/2018 11:13:24 AM
Advertisement
Chapters
Table of Contents

Related Manuals for Friedrich ZoneAire Compact P08SA


Summary of Contents for Friedrich ZoneAire Compact P08SA
-
Page 1: Table Of Contents
ZoneAire Compact ® Portable Air Conditioner with Heat OWNER’S MANUAL P08SA / P10SA / P12SA TABLE OF CONTENTS Important Safety Guidelines ______________ 2 Introduction ___________________________ 3 Unpacking Instructions & Contents ________ 4 Parts ________________________________ 5 Display Functions ______________________ 6 Remote Control Functions _______________ 9 Drain Pipe ___________________________ 12 Maintenance &... -
Page 2: Important Safety Guidelines
IMPORTANT SAFETY GUIDELINES IMPORTANT Do not install and use your portable air conditioner unit before carefully reading this instruction guide. Please retain this manual brochure for product warranty and future reference CAUTION Operate this unit in an ambient of 89°F or less. The heating function of the unit should be operated in an indoor ambient temperature between 44°F and 73°F. -
Page 3: Introduction
INTRODUCTION Congratulations on your purchase and welcome to Friedrich! ZoneAire Compact: PORTABLE AIR CONDITIONER ® The Air Conditioner has been designed and manufactured to the highest standards of modern engineering. Our product not only provides you a remote control to operate all of the functions easily and conveniently but also includes the following benefits: •... -
Page 4: Grip The Carry Handles Located On Either Sides Of The Unit And Carefully Lift Until It Slides Out Of The Foam
UNPACKING INSTRUCTIONS UNPACKING INSTRUCTIONS 1. Place the unit in the correct upright position before unpacking. 2. Cut the two packing straps. 3. Slide the carton in an upward motion and it will release from the base. 4. Grip the carry handles located on either sides of the unit and carefully lift until it slides out of the foam base. -
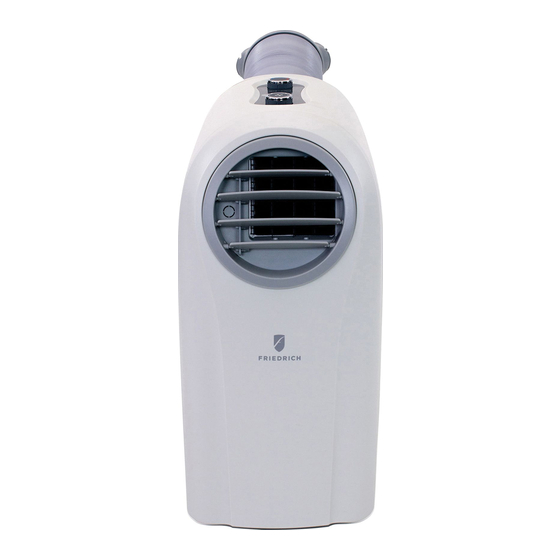
Page 5: Parts
PARTS 1. Control panel 2. Remote control receiver 3. Adjusting Dials 4. Adjustable air vent 5. Joint tube 6. Exhaust hose 7. Upside drain hole 8. Cool air inlet 9. Cool air filter 10. Hot air inlet 11. Hot air filter 12. -
Page 6: Display Functions
DISPLAY FUNCTIONS : LED DISPLAY : POWER : MODE : TIMER : SLEEP mode 1. FUNCTIONS Key Description: POWER (On/ Off Key) - Standby mode (Default) - Turn On/ Off the unit - Turn on the unit, the indicator lights on. - Turn of the unit to standby mode, the indicator lights off. - Page 7 DISPLAY FUNCTIONS 5. L.E.D. DISPLAY The display indicates the current setting temperature or the timer setting. When the set temperature or the timer is adjusted, the new setting is shown then the display returns the current set temperature. The display is also used to show error codes should a fault occur, see TROUBLE SHOOTING. 6.
- Page 8 DISPLAY FUNCTIONS 8. SLEEP CONTROL FUNCTION In “Sleep” mode, your unit will automatically go into low fan speed allowing the temperature to slowly drift up (in cooling) or down (in heating). See below: - While in cooling mode, press the SLEEP key to set the temperature. It increases 2°F after an hour and at most increases 4°F after 2 hours.
-
Page 9: Remote Control Functions
REMOTE CONTROL FUNCTIONS Instruction for the operating keys: When a remote control signal is transmitted, a transmission icon on the display flashes once, indicating the signal has been transmitted. ZoneAire Compact I & O_98081002_02.indd 9 3/16/2018 11:13:25 AM... - Page 10 REMOTE CONTROL FUNCTIONS 1. Transmission window 2. Liquid crystal display 3. Mode select key: Select from among the three functions: cooling, heating and dehumidifying. The fast key function indicates the above operating modes in a cycle when the key is pressed without being released. However, the transmission icon will not appear until the key is released and the confirmed mode is transmitted.
- Page 11 REMOTE CONTROL FUNCTIONS 7. Timer key: TIMER-ON: The timer-on is used to turn on the unit automatically after the setting time is over . 1. Press the “TIMER” key at stand-by status to set the time desired. 2. Once the set time has come to an end. The unit will turn on automatically. 3.
-
Page 12: Drain Pipe
DRAIN PIPE NOTICE This unit can evaporate the condensation and distribute through the exhaust hose automatically. 1. The drain pipe doesn’t have to be installed, when the unit is in cool mode. Please make sure that the rubber cap is locked on drain hole, when the unit is running. 2. -
Page 13: Maintenance & Cleaning
MAINTENANCE AND CLEANING ELECTRICAL SHOCK HAZARD Disconnect all power before servicing or cleaning. Failure to follow these instructions can result in death, electrical shock or fire. MAINTENANCE PLEASE DISCONNECT THE POWER CORD BEFORE CLEANING. AIR FILTER The air filter located on the left hand side of the unit and can be removed simply by pulling the frame up. Clean the air filter with a vacuum cleaner ensuring all dust is removed. -
Page 14: Installation
INSTALLATION PLACE FOR USE 1. Because the machine distributes hot air, please don’t place or operate in a narrow place. 2. Do not work the machine in a humid place. 3. Don’ t place the machine in a sunlit corner otherwise the unit might shut down due to the overheat and the color of the machine may soon fade out. - Page 15 INSTALLATION WINDOW KIT INSTALL 1. Install the Flexible Exhaust Hose and the Adjustable Window Slider Kit vertically or horizontally. 2. Slide the window kit to adjust the length of the window. How to enjoy heating function 1. Remove and reverse the hot and cold air outlet, and re-install the air outlets as seen in picture 03. 2.
-
Page 16: Troubleshooting
Please ask return and collection systems or contact the retailer where the product was purchased to return your used device, they can recycle products safely. Friedrich Air Conditioning Co. 10001 Reunion Place, Suite 500 San Antonio, TX 78216 1-800-541-6645 www.friedrich.com... - Page 17 Climatiseur portatif avec système thermique ZoneAire Compact MANUEL D’UTILISATION P08SA / P10SA / P12SA TABLE DES MATIÈRES Consignes de sécurité importantes ________ 2 Introduction___________________________ 3 Instructions de déballage et contenu ______ 4 Pièces _______________________________5 Fonctions d’affichage ___________________ 6 Fonctions de télécommande _____________ 9 Conduit d’évacuation __________________ 12 Entretien et nettoyage _________________ 13 Installation __________________________ 14 Dépannage __________________________ 16...
-
Page 18: Consignes De Sécurité Importantes
CONSIGNES DE SÉCURITÉ IMPORTANTES IMPORTANT AVERTISSEMENT N’installez pas et n’utilisez pas votre unité Risque de chocs électriques de climatisation portative avant d’avoir lu S’assurer que la prise électrique possède la même attentivement ce guide d’instructions. configuration que la fiche du climatiseur. Consulter un électricien professionnel si elles Conservez cette brochure du manuel pour faire sont différentes. -
Page 19: Introduction
INTRODUCTION Félicitations pour votre achat et bienvenue chez Friedrich! ZoneAire Compact : CLIMATISEUR PORTATIF Le climatiseur a été fabriqué avec les normes les plus élevées de l’ingénierie moderne. Notre produit ne fournit pas uniquement une télécommande pour utiliser toutes les fonctions de manière simple et pratique, mais comprend également les avantages suivants :... - Page 20 INSTRUCTIONS DE DÉBALLAGE INSTRUCTIONS DE DÉBALLAGE 1. Placez l’appareil correctement en position verticale avant de le déballer. 2. Coupez les deux sangles d’emballage. 3. Tournez le carton vers le haut pour le retirer de la base. 4. Saisissez les poignées de transport situées de part et d’autre de l’appareil et soulevez avec précaution jusqu’à...
- Page 21 È PI CES 1. Panneau de commande 2. Récepteur de télécommande 3. Cadrans de réglage 4. Orifice d’aération réglable 5. Tuyau de jonction 6. Tuyau d’évacuation 7. Orifice d’évacuation côté supérieur 8. Orifice d’admission d’air froid 9. Filtre d’air froid 10.
-
Page 22: Fonctions D'affichage
FONCTIONS D’AFFICHAGE : AFFICHAGE DEL : POWER (ALIMENTATION) : MODE : TIMER (MINUTEUR) : Mode SLEEP (Veille) 1. Description des touches fonctionnelles : POWER (Alimentation) (Touche de marche/arrêt) : - Mode repos (par défaut) - Allume/éteint l’appareil - Allume l’appareil, le voyant s’allume. - Page 23 FONCTIONS D’AFFICHAGE 5. AFFICHAGE DEL L’affichage indique la température de consigne ou le paramètre du minuteur actuels. Lorsque la température de consigne ou le minuteur est modifié, le nouveau réglage est affiché, et l’affichage présente la température de consigne actuelle. L’affichage sert également à...
- Page 24 FONCTIONS D’AFFICHAGE 8. FONCTION DE COMMANDE DE VEILLE En mode « veille », votre appareil réduit automati quement la vitesse du venti lateur, ce qui permet à la température d’augmenter (en mode refroidissement) ou de baisser (en mode chauff age) doucement. Voir ci-dessous : - En mode refroidissement, appuyez sur la touche SLEEP (Veille) pour régler la température.
-
Page 25: Fonctions De Télécommande
FONCTIONS DE TÉLÉCOMMANDE Vue du dessus Icône Fonction Refroidissement Vue de face Chauffage Déshumidification En veille MARCHE/ARRÊT du minuteur Température Vitesse automa- tique du flux d’air Vitesse élevée Vitesse moyenne Vitesse faible Mode d’emploi des touches : Lorsqu’un signal de télécommande est émis, une icône de transmission sur l’affichage clignote une fois, indiquant que le signal a été... - Page 26 FONCTIONS DE TÉLÉCOMMANDE 1. Fenêtre de transmission 2. Affichage à cristaux liquides 3. Touche de sélection de mode : Choisissez parmi trois fonctions : refroidissement, chauffage et déshumidification. La fonction de touche rapide indique les modes de fonctionnement ci-dessus au cours d’un cycle, lorsque vous maintenez enfoncée la touche.
- Page 27 FONCTIONS DE TÉLÉCOMMANDE 7. Touche Timer (Minuteur) TIMER-ON (Mise en marche du minuteur) : La fonction de mise en marche du minuteur sert à allumer automatiquement l’appareil après la fin du délai programmé. 1. Appuyez sur la touche « TIMER » (Minuteur) lorsque l’appareil est en état de repos pour régler l’heure souhaitée.
-
Page 28: Conduit D'évacuation
CONDUIT D’ÉVACUATION AVIS Cet appareil peut provoquer l’évaporation de la condensation et peut la répartir automatiquement dans le tuyau d’évacuation. 1. Vous ne devez pas installer le conduit d’évacuation lorsque l’appareil est en mode refroidissement. Vérifiez que le bouchon en caoutchouc est bien verrouillé sur l’orifice d’évacuation pendant le fonctionnement de l’appareil. -
Page 29: Entretien Et Nettoyage
ENTRETIEN ET NETTOYAGE RISQUE DE CHOC ÉLECTRIQUE AVERTISSEMENT Débranchez toute source d’alimentation avant l’entretien ou le nettoyage. Le non-respect de ces instructions peut entraîner un décès, un choc électrique ou un incendie. ENTRETIEN VEUILLEZ DÉBRANCHER LE CORDON D’ALIMENTATION AVANT LE NETTOYAGE. FILTRE À... -
Page 30: Installation
INSTALLATION EMPLACEMENT POUR L’UTILISATION 1. Étant donné que l’appareil diffuse de l’air chaud, ne le placez pas et ne l’utilisez pas dans un endroit confiné. 2. N’utilisez pas la machine dans un endroit humide. 3. Ne placez pas la machine dans un endroit ensoleillé, autrement l’appareil risquerait de s’arrêter à cause d’une surchauffe et la couleur de la machine peut très vite pâlir. - Page 31 INSTALLATION INSTALLATION DE LA TROUSSE D’ÉTANCHÉITÉ DE FENÊTRE 1. Installez le tuyau d’évacuation flexible et la trousse d’étanchéité de fenêtre coulissante verticalement ou horizontalement. 2. Faites glisser la trousse d’étanchéité de fenêtre pour régler la longueur de la fenêtre. Trousse Trousse d’étanchéité...
-
Page 32: Dépannage
Friedrich Air Conditioning Co. 10001 Reunion Place, Suite 500 San Antonio, TX 78216 1-800-541-6645 www.friedrich.com...
Need help?
Do you have a question about the ZoneAire Compact P08SA and is the answer not in the manual?
Questions and answers
Why would water droplets come out of the air vent when the cool portion is being used???
Water droplets may come out of the air vent when using the Friedrich Compact P08SA air conditioner if the drain hole is blocked by the rubber cap and no proper drain hose is installed. This can prevent proper drainage during heating or dehumidifying modes, causing water buildup that may escape through the air vent. To prevent this, remove the rubber cap and attach a proper drain hose to allow water to drain out correctly.
This answer is automatically generated