Table of Contents
Advertisement
P08S/P10S Owner's Manual
Table of Contents
Important Safety Guidelines....................... 2
Introduction.................................................... 3
Unpacking Instructions & Contents ........... 4
Parts ........................................................... 5
Display Functions .......................................... 6
Remote Control Functions .......................... 9
Drain Pipe ...................................................... 12
Maintenance & Cleaning.............................. 13
Installation ..................................................... 14
Troubleshooting............................................ 16
98081002_02
Advertisement
Table of Contents
Troubleshooting

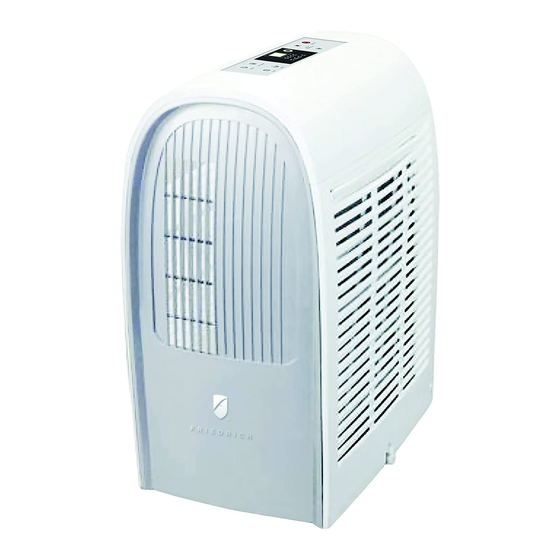
Summary of Contents for Friedrich ZoneAire Compact P08S
-
Page 1: Table Of Contents
P08S/P10S Owner’s Manual Table of Contents Important Safety Guidelines………….………. 2 Introduction……………………………………………. 3 Unpacking Instructions & Contents .………. 4 Parts ……………..........5 Display Functions …………………………………… 6 Remote Control Functions ………..…..………. 9 Drain Pipe ………………………….……..…..………. 12 Maintenance & Cleaning………………………... 13 Installation …………………………………………….. 14 Troubleshooting…………………………………….. -
Page 2: Important Safety Guidelines
IMPORTANT SAFETY GUIDELINES IMPORTANT Do not install and use your portable air conditioner unit before carefully reading this instruction guide. Please retain this manual brochure for product warranty and future reference CAUTION Operate this unit in an ambient of 89°F or less. The heating function of the unit should be operated in an indoor ambient temperature between 44°F and 73°F. -
Page 3: Introduction
INTRODUCTION Congratulations on your purchase and welcome to Friedrich! ZoneAire Compact: PORTABLE AIR CONDITIONER The Air Conditioner has been designed and manufactured to the highest standards of modern engineering. Our product not only provides you a remote control to help user operate all the functions easily and... -
Page 4: Unpacking Instructions & Contents
UNPACKING INSTRUCTIONS & CONTENTS UNPACKING INSTRUCTIONS 1. Place the unit in the correct upright position before unpacking. 2. Cut the two packing straps. 3. Slide the carton in an upward motion and it will release from the base. 4. Grip the carry handles located on either sides of the unit and carefully lift until it slides out of the foam base. -
Page 5: Parts
PARTS 1. Control panel 2. Remote control receiver 3. Hot air-outlet 4. Evaporator’s filter 5. Cool air-inlet 6. Air-outlet’s joint part 7. Cool air-outlet 8. Condenser’ s filter 9. Hot air-inlet 10. Drain hole... -
Page 6: Display Functions
DISPLAY FUNCTIONS 1. ON/OFF Press to turn unit "ON" or "OFF". 2. MODE Press this key to select cooling, heating, or dehumidifying. when the unit is not working, hold the function button for 10 seconds to change the temperature scale °C /°F. - Page 7 DISPLAY FUNCTIONS 6. FAN SPEED Press to select either LOW, MEDIUM, HIGH or AUTO fan speed. If "AUTO" is selected (During cooling function),”HIGH” or "MEDIUM" or “LOW" will be selected automatically according to the difference between setting temperature and ambient temperature. Note: In heating function and dehumidifying function, this key is invalid because the unit is defined to be high speed in heating mode and low speed in dehumidifying mode.
-
Page 8: Maintenance And Cleaning
MAINTENANCE AND CLEANING DISPLAY FUNCTIONS 8. SLEEP CONTROL FUNCTION In “Sleep” mode, your unit will automatically go into low fan speed allowing the temperature to slowly drift up (in cooling) or down (in heating). See below: 1. While in cooling mode, press the SLEEP key to set the temperature. It increases 2°F after an hour and at most increases 4°F after 2 hours. -
Page 9: Remote Control Functions
REMOTE CONTROL FUNCTIONS Instruction for the operating keys: When a remote control signal is transmitted, a transmission icon on the display flashes once, indicating the signal has been transmitted. - Page 10 REMOTE CONTROL FUNCTIONS Transmission window Liquid crystal display Mode select key: Select from among the three functions: cooling, heating and dehumidifying. The fast key function indicates the above operating modes in a cycle when the key is pressed without being released. However, the transmission icon will not appear until the key is released and the confirmed mode is transmitted.
-
Page 11: Troubleshooting
TROUBLESHOOTING REMOTE CONTROL FUNCTIONS 7. Timer key: TIMER-ON: The timer-on is used to turn on the unit automatically after the setting time is over. 1. Press the "TIMER" key at stand-by status to set the time desired. 2. Once the set time has come to an end. The unit will turn on automatically. 3. -
Page 12: Drain Pipe
DRAIN PIPE NOTICE This unit can evaporate the condensation and distribute through the exhaust hose automatically. 1. The drain pipe doesn’t have to be installed, when the unit is in cool mode. Please make sure that the rubber cap is locked on drain hole, when the unit is running. 2. -
Page 13: Maintenance & Cleaning
MAINTENANCE AND CLEANING ELECTRICAL SHOCK HAZARD Disconnect all power before servicing or cleaning. Failure to follow these instructions can result in death, electrical shock or fire. MAINTENANCE PLEASE DISCONNECT THE POWER CORD BEFORE CLEANING. AIR FILTER The air filter located on the left hand side of the unit can be removed simply by pulling the frame up. -
Page 14: Installation
INSTALLATION PLACE FOR USE 1. Because the machine distributes hot air, please don’t place or operate in a narrow place. 2. Do not work the machine in a humid place. 3. Don’ t place the machine in a sunlit corner otherwise the unit might shut down due to the overheat and the color of the machine may soon fade out. -
Page 15: Window Kit
INSTALLATION WINDOW KIT INSTALL 1. Install the Flexible Exhaust Hose and the Adjustable Window Slider Kit as depicted in Fig.1 & Fig.1a. How to enjoy heating function? Fig.01 Fig.02 Fig.03 Fig.04 1. For heating function: remove the exhaust hose from the unit, as shown in "Fig.01“. 2. -
Page 16: Troubleshooting
TROUBLESHOOTING TROUBLE SHOOTING Error Code Cause Troubleshooting Electrical short on both temperature Contact an electrician for repair sensor and PCB Electrical short of temperature Contact an electrician for repair sensor copper tube and PCB wiring User needs to pull out the rubber stopper Indicates water tank full or poor which is located at the bottom of the unit, contact of signal plug.


Need help?
Do you have a question about the ZoneAire Compact P08S and is the answer not in the manual?
Questions and answers