
Related Manuals for Graco FASTACTION JOGGER LX


Summary of Contents for Graco FASTACTION JOGGER LX
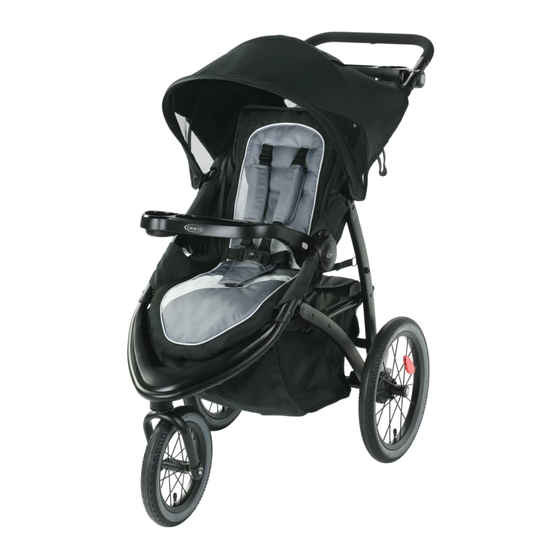
- Page 1 FASTACTION JOGGER LX ™ Stroller Cochecito • Owner’s Manual Manual del propietario • www.gracobaby.com ©2018 Graco NWL0000871146D 09/18 ® NWL0000871146D Fast Action Jogger LX USA R02.indd 1 10/1/18 10:01 AM...
- Page 2 1 WARNING • ADVERTENCIA Pages • Páginas 2 Features • Características Pages • Páginas 2-A FASTACTION™ JOGGER LX Use Positions • Posiciones del uso FASTACTION™ JOGGER LX 2-B Parts List • Lista de piezas 3 Assembly • Ensamblaje 10-20 Pages • Páginas 3-A To Open Stroller •...
- Page 3 4-H Removing Wheels • Cómo sacar las ruedas 4-I To Attach Graco Infant Car Seat to Toddler Seat ® • Para sujetar el asiento de automóvil para bebé Graco al asiento para niño ® pequeño 4-J To Attach Graco Infant Car Seat to Stroller Frame ®...
- Page 4 UNATTENDED. Always keep child parcels or accessory items (other in view while in stroller. than approved Graco stroller bags) AVOID SERIOUS INJURY from on the handle. Never place falling or sliding out. Always use anything on the canopy.
- Page 5 ALWAYS ATTACH the tether strap READ THE MANUAL provided with to your wrist while jogging with your Graco car seat before using it this stroller. with your stroller. BE AWARE of traffic and other ALWAYS INSTALL the infant car...
- Page 6 (si no son EVITE SERIAS LESIONES de caídas las bolsas para cochecito aprobadas o resbalones. Use siempre el por Graco). No ponga nunca nada cinturón de seguridad. Después de sobre la capota. ajustar las hebillas, ajuste los cinturones para obtener un calce PARA PREVENIR UNA SITUACIÓN...
- Page 7 LEA EL MANUAL incluido con su TENGA EN CUENTA la mayor asiento de automóvil Graco antes de velocidad y mayor posibilidad de usarlo con su cochecito. perder el control del cochecito. SIEMPRE INSTALE el asiento de USE SIEMPRE y ajuste automóvil para bebé...
- Page 8 2-A • FASTACTION™ JOGGER LX Use Positions • Posiciones del uso FASTACTION™ JOGGER LX NWL0000871146D Fast Action Jogger LX USA R02.indd 8 10/1/18 10:01 AM...
- Page 9 2-B • Parts List • Lista de piezas Check that you have all the parts for this model BEFORE assembling your product. If any parts are missing, call Customer Service. 1-800-345-4109. NO TOOLS REQUIRED. Verifique que tenga todas las piezas de este modelo ANTES de armar su producto.
- Page 10 3-A • To Open Stroller • Abrir el cochecito Before assembly, be sure to place stroller on top of a piece of cardboard or other protective cover to prevent damage to floor surface. Antes de armarlo, asegúrese de poner el cochecito sobre un pedazo de cartón u otro tipo de protección para prevenir el daño a la superficie del piso.
- Page 11 3. CHECK that the stroller is completely latched open every time you open the stroller and before continuing with the rest of CLICK! ¡CLIC! the assembly steps. 3. VERIFIQUE que el cochecito esté completamente abierto y trabado cada vez que lo abre y antes de continuar los pasos de ensamblaje restantes.
- Page 12 3-B • Front Wheel • Rueda delantera CHECK the tire pressure before using the stroller. DO NOT INFLATE above the maximum recommended inflation pressure that is written on the side of the tire. Over-inflation may cause wheel and/or tire to blowout and could result in serious injury.
- Page 13 1. Attach front wheel to stroller as shown. 1. Sujete la rueda delantera al SNAP! cochecito como se indica. ¡RUIDO! 2. CHECK that wheel is securely attached by pulling on wheel assembly. 2. VERIFIQUE que la rueda esté apretadamente sujetada tirando del ensamblaje de la rueda.
- Page 14 3-C • Rear Wheels • Ruedas traseras WARNING Choking Hazard: Remove and immediately discard protective end cap from each wheel. DO NOT remove rear wheels unless replacing them. Child could fall on exposed rear axle and be injured. ADVERTENCIA Peligro de estrangulamiento: Saque y deseche inmediatamente la tapa de protección de cada rueda.
- Page 15 3. CHECK that wheels are securely attached by pulling on wheel assemblies. 3. VERIFIQUE que las ruedas estén debidamente sujetadas tirando del ensamblaje de la rueda. 3-D • Basket • Canasta 1. Insert the 2 seat back straps through the metal rings and snap together.
- Page 16 3-E • Parent’s tray • Bandeja para padres 1. Attach parent tray as shown. 1. Sujete la bandeja para padres como se indica. CLICK! ¡CLIC! CLICK! ¡CLIC! 2. To remove, press plastic locks on both sides of the parent tray as shown and remove.
- Page 17 3-F • Canopy • Capota To install the canopy: 1. Push the canopy mounts onto the frame mounts until the canopy is locked in position. Para instalar la capota: 1. Empuje los montantes de la capota hacia los montantes del armazón hasta que se traben en posición.
- Page 18 2. Slide rear snaps through the plastic rings on the parent’s tray and fasten snaps to the back of the seat as shown. 2. Deslice los broches traseros por los anillos de plástico de la bandeja para padres y abroche los broches a la parte trasera del asiento como se indica.
- Page 19 5. Pull forward to open canopy. 5. Tire hacia adelante para abrir la capota. 6. Push backwards to close canopy. 6. Empuje hacia atrás para cerrar la capota. 7. Pull flap forward to open and backward to close canopy window. 7.
- Page 20 3-G • Child’s Tray • Bandeja para niños WARNING Always secure your child with the seat belt. The child’s tray is not a restraint device. DO NOT lift the stroller by the child’s tray. Use care when installing the child’s tray on the stroller with a child in the stroller. ADVERTENCIA Asegure siempre a su niño con el cinturón de seguridad.
- Page 21 4-A • Attach/Remove Seat • Cómo sujetar/sacar el asiento • To Remove Toddler Seat • Cómo sacar el asiento para niño pequeño 1. Remove the canopy. 1. Saque la capota. 2. From the right side of the stroller, separate the fold strap as shown (A).
- Page 22 3. Lift up the front of the seat pad, and locate the seat strap. From the bottom of the seat, unfasten the seat strap, and remove it from the frame. 3. Levante el frente de la almohadilla del asiento, y busque la correa del asiento.
- Page 23 6. Unfasten the 12 snaps and remove the seat from the frame. 6. Destrabe los 12 broches y saque el asiento del armazón. 7. Reconnect the fold strap as shown. 7. Vuelva a conectar la correa de pliegue como se indica. NWL0000871146D Fast Action Jogger LX USA R02.indd 23 10/1/18 10:01 AM...
- Page 24 8. Install the canopy. (optional) 8. Instale la capota. (opcional) NWL0000871146D Fast Action Jogger LX USA R02.indd 24 10/1/18 10:01 AM...
- Page 25 • To Attach Toddler Seat • Cómo sujetar el asiento para niño pequeño 1. Remove the canopy. 1. Saque la capota. 2. Seperate the fold strap as shown. 2. Separe la correa de pliegue como se indica. NWL0000871146D Fast Action Jogger LX USA R02.indd 25 10/1/18 10:01 AM...
- Page 26 3. Lay the seat in the frame, then fasten the two rear snaps. 3. Ponga el asiento en el armazón y luego abroche los dos broches traseros. 4. Insert the fold strap into the slot on one side of the seat pad (A) and pull across and out the other slot on the opposite side (B).
- Page 27 5. From under the seat pad, thread the ends of front seat straps through the loops, then pull tight, and fasten the hook and loop connector. 5. Desde abajo de la almohadilla del asiento, pase los extremos de las correas delanteras del asiento por los bucles y luego tire para tensionarlas, y sujete el conector de gancho y bucle.
- Page 28 7. Insert and fasten the rear seat straps through the loops on each side as shown. 7. Inserte y sujete las correas traseras del asiento a través de los bucles en cada costado como se indica. SNAP! ¡RUIDO! 8. Insert the 2 seat back straps through the metal rings and snap together.
- Page 29 4-B • To Secure Child • Cómo sujetar al niño WARNING Falling Hazard: Always use the seat belt. ADVERTENCIA Peligro de caídas: Use siempre el cinturón de seguridad. • 5 Point Harness • Arnés de 5 puntos 1. To open, press button on buckle to release the waist straps.
- Page 30 3. Use slide adjuster at shoulder and waist for tighter adjustment. To Use slide adjuster at shoulder and waist for further adjustment. change shoulder harness slots, Repeat on other side. see page 33. Utilisez le régulateur coulissant 3. Use el ajustador deslizable en el à...
- Page 31 • 3 Point Buckle • Hebilla de 3 puntos 1. To open, press button on buckle to release the waist straps. 1. Para abrirlo, oprima el botón de la hebilla para liberar las correas de la cintura. 2. Slide shoulder strap connectors off of waist straps.
- Page 32 4. Attach waist straps to harness buckle as shown. 4. Sujete las correas para la cintura a la hebilla del arnés como se indica. 5. Use slide adjuster at waist for tighter adjustment. 5. Use el ajustador deslizable de la cintura para ajustarlo más apretadamente.
- Page 33 • Adjusting Shoulder Harness position • Ajustar la posición del arnés para los hombros Shoulder harness anchor— larger child Anclaje del arnés del hombro - niño grande Shoulder harness anchor—smaller child Anclaje del arnés del hombro - niño pequeño Slide adjuster Ajustador deslizable Push harness anchor through the front of the seat then re-insert...
- Page 34 4-C • To Recline Seat • Cómo reclinar el asiento WARNING When making adjustments to the stroller seat, make sure child’s head, arms, and legs are clear of moving seat parts and stroller frame. ADVERTENCIA Cuando realiza ajustes al asiento del cochecito, asegúrese de que la cabeza, brazos y piernas del niño estén alejados de las piezas móviles del asiento y el armazón del cochecito.
- Page 35 4-D • Brakes • Frenos WARNING CHECK that brakes are on by trying to push stroller. ADVERTENCIA VERIFIQUE que los frenos estén activados tratando de empujar el cochecito. 1. Push down both brakes to lock brakes. 1. Empuje los frenos hacia abajo para trabarlos.
- Page 36 4-E • Swivel Wheel • Rueda giratoria WARNING FALL HAZARD from tip over. Before running, jogging or walking fast, LOCK the front wheel from swiveling. ADVERTENCIA PELIGRO DE CAÍDA si se tumba. Antes de correr, trotar o caminar con rapidez, TRABE la rueda delantera para que no gire. 1.
- Page 37 4-F • Handle Adjustment • Para ajustar la manija 1. To adjust handle, press buttons on both sides of handle, and rotate. 1. Para ajustar la manija, oprima los botones en ambos costados de la manija, y girela. NWL0000871146D Fast Action Jogger LX USA R02.indd 37 10/1/18 10:01 AM...
- Page 38 4-G • To Use Tether • Cómo usar la correa de sujeción The tether strap is intended to maintain control of the stroller in the case of a fall while running. DO NOT allow tether strap to lie over top of the handle. DO NOT hang items on the tether strap.
- Page 39 4-H • Removing Wheels • Cómo sacar las ruedas • Front Wheel • Rueda delantera 1. For easy transport or storage, remove front wheel by pushing button as shown. 1. Para facilitar el transporte o almacenamiento, saque la rueda delantera empujando el botón como se indica.
- Page 40 This stroller is only compatible with Graco® SnugRide® infant car seats with Click Connect™. Only use with Graco® infant car seats that have the Click Connect™ logo. If unsure of the model or for more information please call Graco’s customer service number: 1-800-345-4109. Improper use of this product with a car seat may result in serious injury or death.
- Page 41 1. Recline the stroller seat back to its lowest position. Install the child’s tray. CLICK! ¡CLIC! 1. Recline el respaldo del asiento del cochecito hasta la posición más baja. Instale la bandeja para niños. CLICK! ¡CLIC! 2. CHECK that child’s tray is securely attached by pulling on child’s tray.
- Page 42 3. Insert car seat into stroller, and push down on car seat until the latches snap into the Click Connect™ mounts. 3. Inserte el asiento de automóvil en el cochecito, y empuje el asiento Mounts de automóvil hacia abajo hasta Montantes que las trabas se encajen en los montantes Click Connect™.
- Page 43 4-J • To Attach Graco Infant Car Seat to Stroller Frame ® • Para sujetar el asiento de automóvil para bebé Graco al armazón del cochecito ® 1. Install the child’s tray. 1. Instale la bandeja para niños. CLICK! ¡CLIC! CLICK! ¡CLIC!
- Page 44 3. Insert car seat into stroller, and push down on car seat until the latches snap into the Click Connect™ mounts. 3. Inserte el asiento de automóvil en Mounts el cochecito, y empuje el asiento Montantes de automóvil hacia abajo hasta que las trabas se encajen en los montantes Click Connect™.
- Page 45 4-K • To Fold Stroller with Toddler Seat • Para plegar el cochecito con el asiento para niño pequeño WARNING DO NOT allow child to play with the fold handle. ADVERTENCIA NO deje que el niño juegue con la manija de plegarlo. 1.
- Page 46 4. Storage latch will engage, and stroller will rest on the rear wheels and handle. 4. La traba de almacenamiento se activará y el cochecito se apoyará en las ruedas traseras y la manija. NWL0000871146D Fast Action Jogger LX USA R02.indd 46 10/1/18 10:02 AM...
- Page 47 4-L • To Fold Stroller without Toddler Seat • Para plegar el cochecito sin el asiento para niño pequeño WARNING DO NOT allow child to play with the fold handle. ADVERTENCIA NO deje que el niño juegue con la manija de plegarlo. 1.
- Page 48 • FROM TIME TO TIME, CHECK YOUR STROLLER for loose screws, worn parts, torn material or stitching. Replace or repair the parts as needed. Use only Graco replacement parts. • EXCESSIVE EXPOSURE TO SUN OR HEAT could cause fading or warping of parts.
- Page 49 • Notes • Notas NWL0000871146D Fast Action Jogger LX USA R02.indd 49 10/1/18 10:02 AM...
- Page 50 • Notes • Notas NWL0000871146D Fast Action Jogger LX USA R02.indd 50 10/1/18 10:02 AM...
- Page 51 • Notes • Notas NWL0000871146D Fast Action Jogger LX USA R02.indd 51 10/1/18 10:02 AM...
- Page 52 We currently do not accept product registrations from those living outside the United States of America. Para registrar su producto Graco desde dentro de los EE.UU., visítenos en línea en www.gracobaby.com/productregistration o envíe la tarjeta de registro provista con su producto.
Need help?
Do you have a question about the FASTACTION JOGGER LX and is the answer not in the manual?
Questions and answers
how to adjust harness jogging stroller lx. manual nit clear