
Subscribe to Our Youtube Channel
Related Manuals for Fakir RCT109 Cyclonic


Summary of Contents for Fakir RCT109 Cyclonic
- Page 1 RCT 109 Cyclonic fiarjl› El Süpürgesi - Kullanma K›lavuzu Rechargeable Cleaner - Instruction Manual...
- Page 3 • fiarj adaptörünü açmay›n›z, açmaya hasarl› ya da hatal› ise cihaz› çal›flmay›n›z. kullanmay›n›z. • fiarj adaptörünü fiflten çekmek için • Hasarl› ya da hatal› parçalar Fakir Yetkili adaptörün kablosunu kullanmay›n›z. Servis’i taraf›ndan tamir edilir ya da • fiarj adaptörünü ›s›, ya¤ ve keskin de¤ifltirilir.
- Page 4 • E¤er flarj adaptörü fifliniz ile uyumlu de¤il, fiarj adaptörü hatal›, hasarl› ya da bataryay› flarj edemez Dönen f›rça kafas› durumda ise de¤ifltirilmeli ve uygun bir Kenar-köfle aparat› yol ile imha edilmelidir. Bu ifllem için Fakir Yetkili Servisi’ne baflvurunuz. Mobilya f›rças›...
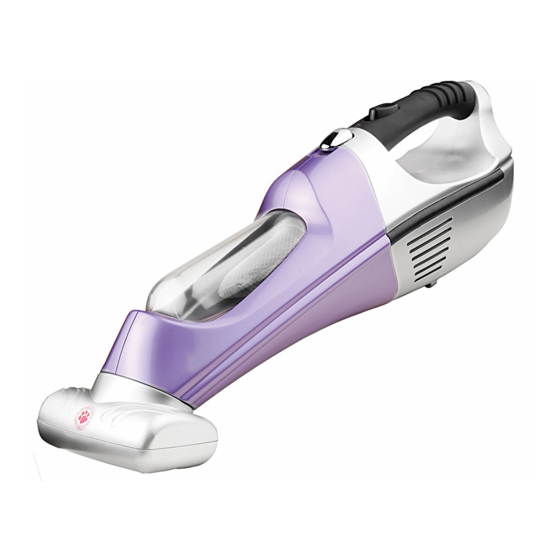
- Page 5 Parça Bilgileri f. Motor/pil yuvas› g. Duvara monte flarj ünitesi a. Toz haznesi h. Kenar-köfle aparat› b. Filtre (Toz haznesinin içinde) i. Mobilya f›rças› c. Toz haznesi açma dü¤mesi j. Motorlu dönen f›rça kafas› d. Açma/Kapama dü¤mesi k. fiarj lambas› e.
- Page 6 Bu cihaz direk olarak cihaz›n ucuna Kenar- Köfle ba¤lanabilen 3 aksesuar ile birlikte Aparat› gelmektedir. Kenar-Köfle Aparat› Aparat Kenar- Köfle aparat› ulaflmas› zor yerlerde kullan›l›r. Aparat› direk olarak cihaz›n Motorlu Dönen F›rça ucuna takabilirsiniz Kafas› Mobilya F›rças› Mobilya Mobilya f›rças›n› direk olarak cihaz›n F›rças›...
-
Page 7: Açma - Kapama
SAKLAMA ünitesi üzerindeki pimler ile temas etti¤inizden emin olunuz.fiarj lambas› Aksesuarlar›n ve turbo f›rçan›n flekilde gösterildi¤i gibi yerlefltirilmesini öneririz, (LED) yanarak flarj iflleminin bafllad›¤›n› bu sayede kaybolmalar› ve bozulmalar› gösterecektir. engellenir. NOT: fiarj esnas›nda ürün kapal› olmal›d›r. 3. E¤er iki haftadan fazla kullan›lmaya- caksa adaptör prizden ç›kart›lmal›d›r. - Page 8 temizli¤inde kullan›l›r. Uzun tüylü Açma hal›lar›n temizli¤inde kullan›lmamal›d›r. Dü¤mesi NOT: Pamuk, saç vb. maddelerin süpürül- mesinde, dönme miline tak›lmalar› f›rça kafas›n›n t›kanmas›na neden olur. Bu durum oluflursa, f›rça kafas›n› ç›kart›n›z ve tak›lan parçalar› dönme milinden sökünüz. Toz Haznesinin Temizlenmesi ve Filtre Süpürgenin çal›flma performans›...
-
Page 9: Safety Instructions
Thank you for purchasing this product • Does not use the vacuum cleaner to pick- which has been designed and up burning objects as this is a fire risk! manufactured to give you many years of • Do not pick up hot objects such as coal trouble free service. -
Page 10: Electrical Safety
DO NOT LEAVE YOUR CHARGING ADAPTOR CONNECTED TO THE MAINS SUPPLY WHEN NOT IN USE. Model Number • RCT109 Cyclonic • This vacuum cleaner is supplied with a charging adaptor which has been Charger Input Voltage designed for indoor use only. - Page 11 Specification f- Motor/Battery Housing g- Charging Stand a- Dust Container h- Crevice Tool b- Filter (Inside dust container) ›- Small Brush c- Release Button j- Motorized Brush d- On / Off Switch k- Led e- Handle...
- Page 12 ACCESSORIES Crevice tool This unit comes with 3 accessories which are fitted by directly inserting them into the nozzle. Nozzle Motorised brush Crevice Tool The Crevice tool can be used to clean hard to reach places. Fit the crevice tool directly into the nozzle.
- Page 13 STORAGE We recommend that the accessories are stored as shown to prevent them getting lost or damaged. The turbo brush attached to the vacuum cleaner and the accessories place onto the charger as shown. • You may leave this unit on charge permanently thereby ensuring that the unit is always ready to use.
- Page 14 • To connect the rotating turbo brush, which has accumulated. If it is very dirty, remove the cleaner from the wall carefully brush the filters with a small mounting charging base. brush. • Ensure that the cleaner is switched Off. 8.
Need help?
Do you have a question about the RCT109 Cyclonic and is the answer not in the manual?
Questions and answers