Advertisement
Quick Links
lntroduction
• Application Details
• Glossary
Installation Procedures
• Tools Needed
• Kit Includes
• Installation Overview
• Configuration and Mounting
• Actuator and Linkage
• Travel Limits
Checkout Procedure
Replacement Parts
© 1993 Johnson Controls, Inc.
Part No. 34-420-6, Rev. A
Code No. LIT-121775
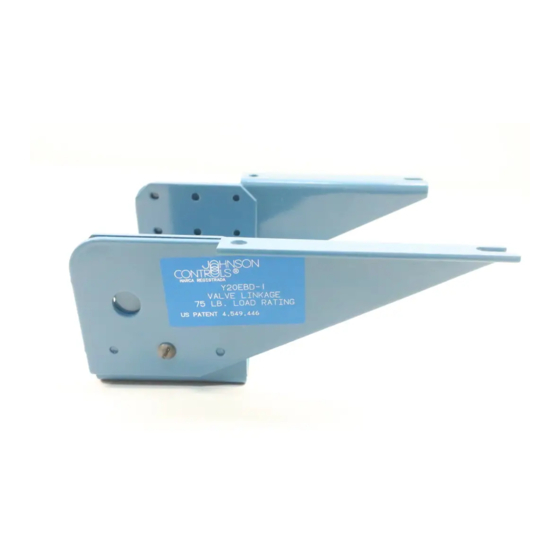
Y20EBD Valve Linkage
for M100 Motor Actuators
FANs 121, 125
Technical Bulletin
Issue Date 0493
3
3
4
5
5
5
6
7
13
16
22
23
1
Advertisement

Related Manuals for Johnson Controls Y20EBD Series


Summary of Contents for Johnson Controls Y20EBD Series
- Page 1 • Glossary Installation Procedures • Tools Needed • Kit Includes • Installation Overview • Configuration and Mounting • Actuator and Linkage • Travel Limits Checkout Procedure Replacement Parts © 1993 Johnson Controls, Inc. Part No. 34-420-6, Rev. A Code No. LIT-121775...
- Page 2 2 M Motor Actuators Y20EBD Valve Linkage for M100 Motor Actuators —...
- Page 3 lntroduction The Y20EBD Valve Linkage converts the rotary motion of an M100 Application Series Motor Actuator to a linear movement in order to operate several Details types of valves. A rack and pinion drive mechanism provides the linear movement. The rack assembly contains a spring that, when compressed by over travel, will maintain valve close off to rated values.
- Page 4 The following terminology is used in these instructions: Glossary CW--Clockwise refers to the direction of rotation of the actuator shaft as seen from the load end. Zero Position--The fully counterclockwise position of the actuator shaft--the de-energized position of a spring return actuator. Stem Up--The initial position of the stem is up before operating the valve.
-
Page 5: Table Of Contents
Installation Procedures • screwdriver, small blade Tools Needed • screwdriver, medium blade • pliers • wrench, adjustable, medium • socket wrench, 3/8 inch drive Kit Includes Y20D1-01 Item Description Quantity Item Description Quantity Mounting Bracket Assembly Washer (High Temp) Valve Bushing, 3/4 in. Not Hex Nut, 1/4-20 Grooved Valve Bushing, 1 in. - Page 6 Upright mounting of the motor actuator is recommended. Installation Overview When valve mounting, do not mount below the horizontal plane of the valve piping to prevent damage to the motor actuator if the valve leaks or develops condensation. Do not install the motor actuator in atmospheres with explosive vapors or escaping gases, or where vapors having deteriorating properties might attack the actuator’s metal parts.
- Page 7 Configuration and Mounting Valve Lift The information obtained in the following steps will be used for the travel adjustments later. The reason that these measurements are here is that it is easier to take the measurements prior to installing the linkage and actuator than after.
- Page 8 Configuring Yoke When configuring the yoke, two areas have to be considered: • the distance the actuator will be from the valve (height) • the direction of drive the actuator is going to provide to the valve Height To determine the height: Valve Stem Full Up Yoke...
- Page 9 • High position for stem lengths from 4 inches to 5-7/8 inches (101.6 to 147.2 mm) in full up position. V90CA valves from 4 inch through 6 inch (101.6 through 152.4 mm) pipe sizes. LOAD END LOAD END Y20A 1-05 Figure 5: Long and Short Stem Valve Bodies The left side of Figure 5 shows a Y20EBD Valve Linkage in the high position connecting a 3-way valve body with a long stem to a M100 Motor...
- Page 10 1. With the motor actuator next to the valve, view the motor actuator from the load end. 2. Determine the type of valve being used and the direction that will be required to drive the stem from its initial position. •...
-
Page 11: Yoke Nut
1. Remove the screw, washer, and nut securing the left and right side brackets to the base bracket. 2. Position the yoke, left side, and right side brackets as determined previously. The pins on the side brackets will fit into the holes in the yoke until the screw is inserted. - Page 12 Jam Nut Packing Nut Yoke Nut Bushing Valve Y20D1-10 Figure 10: Mounting Yoke 2. Place the yoke on the valve over the stem and bonnet. 3. Select the proper bushing and slide it over the bonnet and into the yoke hole. 1.078 1.015 27.38...
- Page 13 6. Install the proper size jam nut onto the valve stem as far as it will go. Do not tighten. M Motor Actuators Y20EBD Valve Linkage for M100 Motor Actuators —...
-
Page 14: Hex Capscrew
Actuator and Linkage Mounting M100 Actuator Motor Actuator Hex Capscrew High Temperature Washer Y20D1-12 Figure 12: Mounting Motor Actuator 1. Locate the load end over the yoke. 2. Mount the actuator onto the brackets using the four bolts and nuts, but do not tighten. -
Page 15: Valve Stem Connector
Valve Stem As received, the valve stem connector (mounted in the spring housing of Connector the rack subassembly) accommodates a 1/4 inch stem valve. If the valve has a 3/8 inch stem, replace the connector with the 3/8 inch connector furnished separately. - Page 16 2. Determine the required position of the gear housing on the load end of the actuator so that the opening for the rack assembly is located as follows: • stem up position, drive down operation--rack to the right • stem down position, drive up operation--rack to the left Housing Locking Screw Rack...
- Page 17 5. Position the gear housing and rack subassembly over the valve stem and align the gear housing with the M100 drive shaft. Attach the gear housing to the motor actuator with the washers and gear housing screws. Do not tighten the screws at this time. Loosen the locking screw and lower the rack subassembly to the valve stem.
- Page 18 Direction of Drive Rotation COM to CW Shorted 10° (AX) Keyway Zero Reference Position Drive Shaft Direction of Drive Rotation COM to CCW Shorted LOAD END Y20A1-15 Figure 17: Actuator Zero Position The actuators are factory set at zero position which is 10° clockwise from square and for 90°...
- Page 19 4. Refer to the technical bulletin provided with the motor actuator and adjust the actuator travel to drive the stem down and compress the spring in the housing (turn power off when adjusting M100A slide stops). Actuator Drive Upper Visual Guide Flat Washers...
- Page 20 Figure 20: Lower Visual Guide Indicating Full Up Travel 6. As shown in Figure 20, the edge of the lower flat washer should appear opposite the notch in the lower visual indicator to indicate compression of the spring with the valve seated. 7.
- Page 21 Three Way Valves Three way valves, mixing or diverting, can be assembled so that the upper seat is initially closed (stem up) or so that the lower seat is initially closed (stem down). Stem up or stem down operation is determined by the yoke configuration and position of the rack and gear housing.
- Page 22 Manual Operation CAUTION: Do not perform this operation if the valve is under pressure. Shut off pump power, including standby power, before attempting manual operation. The valve can be manually operated without electrical power when necessary for maintenance or emergency operation. To operate the valve manually: 1.
- Page 23 Checkout Procedure After Installation and adjustment, run the system through several complete open/close cycles to be sure that all components are functioning correctly. Check to be sure that the actuator responds to the controller and operates the valve properly. Check for proper voltage. Check for operation of the linkage without binding.
- Page 24 Replacement Parts Table 3 shows replacement parts that may be ordered from your nearest Johnson Controls branch or distributor. Table 3: Y20 Linkage Repair Parts Description Code Number Remarks Gear Assembly GER18A-600 Includes CVR115-1 and GER28-1 Gear Only GER28-1 Gear Cover...
- Page 25 Notes Controls Group 507 E. Michigan Street P.O. Box 423 Printed in U.S.A. Milwaukee, WI 53201 M Motor Actuators Y20EBD Valve Linkage for M100 Motor Actuators —...
Need help?
Do you have a question about the Y20EBD Series and is the answer not in the manual?
Questions and answers