
Related Manuals for soundsation VoxTaker 192 PRO


Summary of Contents for soundsation VoxTaker 192 PRO
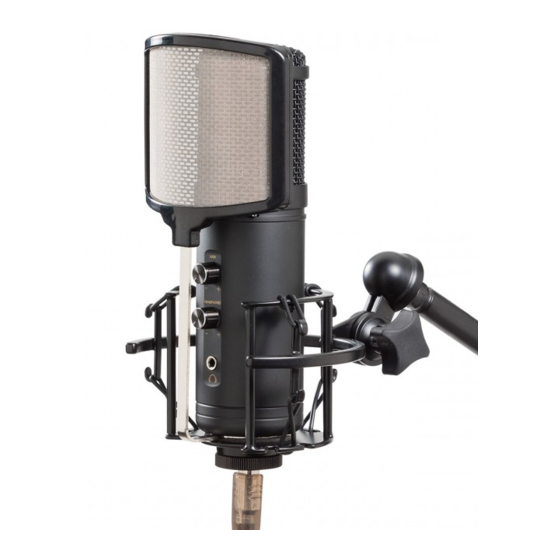
- Page 1 ANUAL / ANUAL tENtE Premium Quality 192kHz/24bit USB Studio Microphone www.soundsationmusic.com...
- Page 2 Dear customer, First of all thanks far purchasing a SOUNDSATION® product. Our mis- sion is to satisfy all possible needs of musical instrument and profes- sional audio and lighting users offering a wide range of products using the latest technologies.
-
Page 3: Table Of Contents
TABLE OF CONTENTS 1. INTRODUCTION ..................page 4 2. FEATURES ....................... page 4 3. WHAT’S IN THE BOX .................. page 5 4. POWER REQUIREMENTS ................page 5 5. HOW TO USE THIS MICROPHONE ............page 6 5.1. Pop-Filter Assembly ................... page 7 6. -
Page 4: Introduction
The transducer element is a dual-condenser golden-plated large dia- phragm capsule with selection of Uni/Bi/Omni-directional polar pattern. All these features make the VoxTaker 192 PRO the perfect tool for any capturing need: from human voice to acoustic instrument miking, to background music, to choral and orchestral recording. -
Page 5: What's In The Box
Pop-Filter 4. POWER REQUIREMENTS VoxTaker 192 PRO is powered by the USB port of your device, meaning that normally you can just plug the microphone in and get started right away. For non-standard USB ports, a powered USB hub may be required. -
Page 6: How To Use This Microphone
If the light does not turn on after plugging the microphone in, the computer or device you are using may not provide enough power for the VoxTaker 192 PRO. If this is the case, we recommend connecting the VoxTaker 192 PRO via a powered USB hub. -
Page 7: Pop-Filter Assembly
Gain - This knob adjusts gain level to adjust preamp circuitry to the incoming sound. Headphones - It adjusts monitor sound level to the mini-jack output (6). Headphones Out - It is the 1/8" stereo jack output where you can connect your headphones and monitor your sound during recording. -
Page 8: Set Up
LED inside the microphone grill is on. If it doesn't turn on after plugging the microphone in, the computer may not provide enough power for the VoxTaker 192 Pro. If this is the case, we recom- mend connecting the VoxTaker 192 Pro via a powered USB hub. - Page 9 Click on “Sound” to open the sound options. Open the “Input” tab.
- Page 10 LED inside the microphone grill is on. If it doesn't turn on after plugging the microphone in, the computer may not provide enough power for the VoxTaker 192 Pro. If this is the case, we recom- mend connecting the VoxTaker 192 Pro via a powered USB hub.
- Page 11 You will see the VoxTaker 192 Pro listed among the various connected devices. Double click on it to access device properties, and open "Recording" tab.
-
Page 12: Adjusting The Sample Frequency
6.2. Adjusting the sample frequency Adjusting the sample frequency affects sound quality and the size of audio files you're going to record. The VoxTaker 192 Pro allows you to adjust this parameter from 44.1kHz to 192kHz (192kHz can only be used under USB2.0 fast mode). -
Page 13: Microphone Storage
7. MICROPHONE STORAGE After use, remove the Voxtaker 192 Pro from its pop filter and shock mount, wipe it with a clean cloth and place in the supplied aluminum case. In any case, please be noticed that a condenser microphone is extremely sensitive to moisture. -
Page 14: Frequency Response Graph
8. FREQUENCY RESPONSE GRAPH Cardioid (dB) -2 0 -3 0 -4 0 -5 0 -6 0 (Hz) Bi-Directional (dB) -2 0 -3 0 -4 0 -5 0 -6 0 20 K (Hz) Omni-Directional... - Page 15 (dB) -2 0 -3 0 -4 0 -5 0 -6 0 10 0 (Hz)
-
Page 16: Polar Pattern Graph
9. POLAR PATTERN GRAPH Cardioid 125Hz 500Hz 1000Hz 2000Hz 4000Hz 8000Hz Bi-Directional 125Hz 500Hz 1000Hz 2000Hz 4000Hz 8000Hz Omni-Directional 125Hz 500Hz 1000Hz 2000Hz 4000Hz 8000Hz... -
Page 17: Technical Specifications
10. TECHNICAL SPECIFICATIONS Condenser Microphone Specifications Dual 34mm Golden Plated Pressure Element Gradient Condenser Transducer Polar Pattern Uni/Dual/Omni Directional, selectable Frequency Response 20Hz~20KHz Sensitivity -34dB±2dB (0dB=1V/Pa @ 1kHz) Max. Input SPL 132dB (@ 1kHz ≤1% T.H.D) Output Impedance 150Ω ±30% (@ 1kHz) Load Impedance ≥1000Ω... -
Page 18: Warranty And Service
To avoid any damages in transit, please use the original packaging if available. Alternatively you can send the product to SOUNDSATION SERVICE CENTER – Via Enzo Ferrari , 10 – 62017 Porto Recanati - Italy . In order to send a product to service center you need an RMA number. -
Page 19: Warning
12. W ARNING PLEASE READ CAREFULLY – EU and EEA (Norway, Iceland and Liechten- stein) only This symbol indicates that this product is not to be disposed of with your household waste, according to the WEEE Directive (2202/96/EC) and your national law. This product should be handed over to a designated collection point, e.g., on an authorized one-for-one basis when you buy a new similar product or to an authorized collection site for recycling waste electrical... - Page 20 Gentile cliente, Grazie per aver scelto un prodotto SOUNDSATION®. La nostra missione è quella di offrire ai nostri utenti una vasta gamma di strumenti musicali ed apparecchiature audio con tecnologie di ultima generazione. Speriamo di aver soddisfatto le vostre aspettative e, se voleste collab- orare, saremmo lieti di ricevere un vostro feedback sulla qualità...
- Page 21 SOMMARIO 13. INTRODUZIONE .................. pagina 22 14. CARATTERISTICHE ................pagina 22 15. CONTENUTO DELLA CONFEZIONE ..........pagina 23 16. REQUISITI DI ALIMENTAZIONE ............. pagina 23 17. UTILIZZO DEL MICROFONO ............pagina 24 17.1. Montaggio del Filtro Anti-Pop ..........pagina 25 18.
-
Page 22: Introduzione
13. INTRODUZIONE VoxTaker 192 Pro è un microfono per registrazione da studio con tecnologia all'avanguardia. Esso combina una capsula a condensatore con diaframma largo di altissima precisione, una sezione di pream- plificazione con circuitazione a JFET, una funzione di conversione a 24Bit/192kHz (max.) reali, e una interfaccia USB 2.0 ad alta-velocità. -
Page 23: Contenuto Della Confezione
16. REQUISITI DI ALIMENTAZIONE VoxTaker 192 Pro è alimentato dalla porta USB del dispositivo. Ciò significa che è sufficiente collegare il microfono e iniziare subito con l'utilizzo. Per le porte USB non standard, potrebbe essere richiesto un... -
Page 24: Utilizzo Del Microfono
VoxTaker 192 Pro. In tal caso, si consiglia di collegare VoxTaker 192 Pro tramite un hub USB alimentato. 17. UTILIZZO DEL MICROFONO... -
Page 25: Montaggio Del Filtro Anti-Pop
direzioni). Attenuatore a -10dB - Ha due posizioni. Quando il selettore è su "0", non influisce sul suono; quando è su "-10dB", abbassa il segnale di 10dB. E' molto utile per adattare il microfono a differenti interfacce audio o dispositivi audio USB. Filtro Low-Cut - Ha due posizioni. -
Page 26: Settaggio
Se il LED non si accende dopo aver collegato il microfono, il computer potrebbe non fornire abbastanza energia per VoxTaker 192 Pro. In tal caso, si consiglia di collegare VoxTaker 192 Pro tramite un Hub USB alimentato. Cliccare sul simbolo Apple in alto a sinistra sullo schermo e seleziona... - Page 27 Cliccare su "Sound" per aprire le opzioni audio...
- Page 28 Se il LED non si accende dopo aver collegato il microfono, il computer potrebbe non fornire abbastanza energia per il VoxTaker 192 Pro. In tal caso, si consiglia di collegare VoxTaker 192 Pro tramite un Hub USB alimentato. Una volta collegato il microfono e acceso il LED interno, Windows cercherà...
- Page 29 VoxTaker 192 Pro verrà elencato tra i vari dispositivi collegati...
- Page 30 Fare doppio clic su di esso per accedere alle proprietà del dispositivo e aprire la scheda "Recording". A questo punto fare doppio clic su "Soundsation VoxTaker192" per regolare il livello di input usando il cursore...
-
Page 31: Regolazione Della Frequenza Di Campionamento
Computer Mac OS Cliccare su Launchpad e selezionare "Other". Quindi avviare l'applicazi- one "Audio MIDI Setup". Nella finestra "Audio Devices", selezionare sul lato sinistro il dispositivo "Soundsation VoxTaker192". Quindi aprire il menu a discesa "Format" per scegliere il valore appro- priato... -
Page 32: Conservazione
19. CONSERV AZIONE Dopo l'uso, rimuovere VoxTaker 192 Pro dal filtro anti-pop e dal suppor- to antivibrazioni, rimuovere polvere, grassi, etc. usando un panno pulito e inserirlo nella custodia di plastica in dotazione. In ogni caso, si noti che un microfono a condensatore è... -
Page 33: Risposta In Frequenza
RISPOSTA IN FREQUENZA Cardioide (dB) -2 0 -3 0 -4 0 -5 0 -6 0 (Hz) Bi-Direzionale (anche nota come a "8") (dB) -2 0 -3 0 -4 0 -5 0 -6 0 20 K (Hz) - Page 34 Omni-Direazionale (dB) -2 0 -3 0 -4 0 -5 0 -6 0 10 0 (Hz)
-
Page 35: Diagramma Polare
21. DIAGRAMMA POLARE Cardioide 125Hz 500Hz 1000Hz 2000Hz 4000Hz 8000Hz Bi-Direzionale (a "8") 125Hz 500Hz 1000Hz 2000Hz 4000Hz 8000Hz Omni-Direazionale 125Hz 500Hz 1000Hz 2000Hz 4000Hz 8000Hz... -
Page 36: Specifiche Tecniche
SPECIFICHE TECNICHE Capsula Capsula Doppia a gradiente di pressione da 34 mm placcata in oro Diagramma polare Uni/Dual/Omni Direzionale, selezionabili Risposta in frequenza 20Hz~20KHz Sensibilità -34dB±2dB (0dB=1V/Pa @ 1kHz) Impedenza di uscita 150Ω (@ 1kHz) Impedenza di carico ≥1000Ω Rumore 16dB A-ponderato Ingresso Max SPL 132dB (@ 1kHz ≤1% T.H.D) -
Page 37: Garanzia E Assistenza
GARANZIA E ASSISTENZA Tutti i prodotti SOUNDSATION dispongono di una garanzia di due anni. Questa garanzia di due anni è valida dalla data di acquisto, come indica- to dal documento di acquisto. I seguenti casi / componenti non sono coperti dalla garanzia di cui sopra: •... -
Page 38: Avviso
A VVISO LEGGETE ATTENTAMENTE - solo per UE e SEE (Norvegia, Islanda e Liech- tenstein). Questo simbolo indica che il prodotto non deve essere smaltito con i rifiuti domestici, in base alla direttiva RAEE (2202/96/CE) e legislazione nazionale. Il prodotto deve essere consegnato a un centro di raccolta differenzia- ta o, in caso di ritiro dell’usato quando si acquista un nuovo prodotto simile, ad un rivenditore autorizzato per il riciclaggio di apparecchiature elettriche ed elettroniche (WEEE). - Page 39 Questo prodotto viene importato nella UE da FRENEXPORT SPA – Via Enzo Ferrari, 10 - 62017 Porto Recanati - Italy www.soundsa tionmusic.com Soundsation® is a registered trademark of FRENEXPORT SPA - Italy Soundsation® è un marchio di fabbrica registrato della FRENEXPORT SPA - Italy...
- Page 40 www.soundsa tionmusic.com Ver 1.0 - Jun. 2018...
Need help?
Do you have a question about the VoxTaker 192 PRO and is the answer not in the manual?
Questions and answers