Table of Contents
Advertisement
Quick Links
SJCAM SJ8 PLUS
ONLINE MANUAL
This is the translator's file.
All texts can be edited.
Please include your name and email address when sending the
translated PPT file back, language, and date of translation.
For questions or clarifications, please send me an email via
troy@sjcamhd.com
with the subject line
"SJ8+ MANUAL TRANSLATOR QUESTION" (in ALL CAPS).
DELETE THIS PAGE BEFORE SAVING IN PDF FORMAT.
Advertisement
Table of Contents

Related Manuals for SJCAM SJ8 PLUS


Summary of Contents for SJCAM SJ8 PLUS
- Page 1 SJCAM SJ8 PLUS ONLINE MANUAL This is the translator’s file. All texts can be edited. Please include your name and email address when sending the translated PPT file back, language, and date of translation. For questions or clarifications, please send me an email via troy@sjcamhd.com...
- Page 2 USER MANUAL...
- Page 3 Having our own factory, controlling the whole production process, and a facility with more than 500 employees, makes us more versatile and able to reach the market fast, ensuring that the highest quality standards are met. It is all about dreams. Dare to join the SJCAM Revolution. -SJCAM CEO...
- Page 4 Congratulations on your new SJCAM Action Camera! We know you’re excited to use your SJ8 PLUS, please take time to read this manual before doing anything with it. There’s plenty you can do, so you need to familiarize yourself with the features now to get the most out of it.
- Page 5 SJ8 PLUS SPECIFICATIONS CHIPSET: Novatek NT96683 SENSOR: SONY IMX117 SENSOR RESOLUTION: 12 MegaPixels FRONT SCREEN: 0.96ʺ OLED MAIN SCREEN: 2.33ʺ IPS Touch Screen LENS: 7G ( 2 Aspheric Lens included) ANGLE: 170° APERTURE: F 2.8 FOCAL LENGTH: 2.8 MM VIDEO RESOLUTION: 4K :(3840×2160) 30fps, 2.7K:(2720X1520) 60fps, 1080P:(1920×1080) 120fps, 720P:(1280×720) 240fps...
-
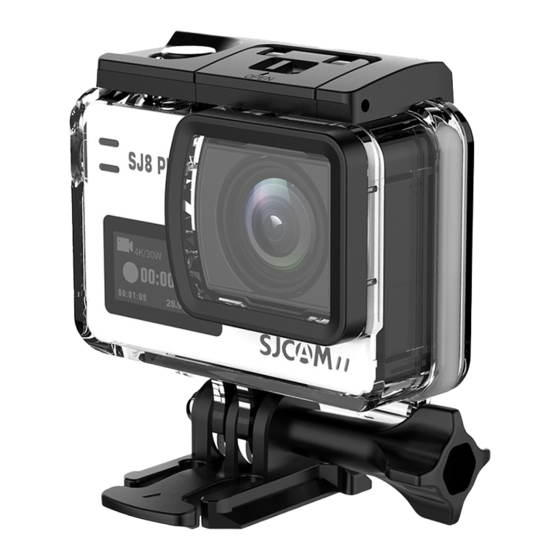
Page 6: Parts Of Your Camera
PARTS OF YOUR CAMERA Shutter/OK Button Speaker 2.33” Touchscreen Shutter/OK Button Speaker Lens Power Button Microphone (Side) Power Indicator WiFi Indicator Front LCD Display Battery/Memory Card Microphone (Front) USB-C Port Compartment... - Page 7 To pair your remote to your SJ8 PLUS: Swipe down from the top > Select Remote Control Tap the “YES” to start pairing. A picture instruction will appear. Press the Video and the Photo buttons on the Remote simultaneously. “Pairing Completion ID” will show.
-
Page 8: Powering The Camera On
POWERING THE CAMERA ON On the right side of your camera The Power Button backlight will The SJCAM splash-screen will briefly is the Power Button. Press and hold come on once the camera is active. show while the camera initializes, it down to start your camera. - Page 9 REPLACING THE SJ8 PLUS BATTERY PULL TAB. Open the battery cover by sliding it Grab the pull-tab with your fingers. Pull the battery out. to the side. Insert a fully-charged battery in. The battery cover will spring outward. NOTE: Always check the orientation of the battery before inserting it into the camera.
- Page 10 INSERTING A USB-C CABLE PULL FLAP OUT Locate the covered USB-C port on the Gently insert the USB-C cable left side of the camera. Pull the flap out. included in the package all the way in. The USB-C port can be used for a variety of purposes. It may be used to transfer files, charge the battery, connect a microphone, and using a special adaptor: output digital or analog video.
-
Page 11: Inserting A Microsd Card
INSERTING A MICROSD CARD Open the battery cover by sliding it Insert the card into the slot as shown. Gently push the card in until to the side. it clicks into place. The battery cover will spring outward. HINT: The arrow on the battery also To remove the card, just reverse points to where the card slot is, aside illustrations 2 &... - Page 12 REMOVING THE CAMERA FROM THE WATERPROOF CASE Release clasp by sliding Unhinge the clasp from the Lift the front side of the Swing the backdoor Pull the camera out from the and holding the lock. backdoor. clasp as shown. downwards towards you. waterproof housing.
-
Page 13: The Main Screen
The Main Screen Elapsed Time | Time left on card Current Mode Icon Battery Indicator Icon will show what mode you are currently in. Displays approximate power left on the The options will vary depending on the mode. battery. Battery blinks when almost empty. Microphone Active Icon Gyro ON/OFF Indicates when the microphone is active. - Page 14 Toggles Screen These are all the screens nested in the Main Screen. You can tap or swipe to access them. Main Screen Settings Screen Playback Options Resolution Video Coding Video Photo Loop Recording Video VideoLapse SlowRec Still PhotoLapse Burst Mode Videod+Ph Car Mode Underwater...
- Page 15 THE TOGGLES SCREEN WIFI Enable or disable the WiFi by tapping this and setting it. REMOTE CONTROL Enable the remote by tapping this and setting it to ON TV OUT Enables analog video output via a special cable. Cable sold separately. LCD OFF Turns off the display and disables the touchscreen to avoid accidental taps.
-
Page 16: The Playback Screen
THE PLAYBACK SCREEN Elapsed Time File Count Shows the file number and number of files Shows how much of the time is played. Go to Previous File Go to Next File Tap or swipe right to get to the previous file Tap or swipe left to get to the next file. - Page 17 THE MODES SCREEN Swipe UP to access Video+Photo, Mode for recording videos. Car, and Underwater Modes. Video Timelapse photographs stitched on-cam To produce a video file. VideoLapse Video VideoLapse SlowRec For recording video in slow motion. SlowRec Still PhotoLapse Burst Mode Still photograph mode.
-
Page 18: The Settings Screen
The Settings Screen Current Mode Icon Icon shows what mode you are currently in. Resolution Current Menu Options Options will vary depending on the mode. Depending on what mode you are in, the menu options will vary. All the options General Settings Button for the particular mode will show on this Video Coding... - Page 19 The Front Screen Current Mode Icon Current Resolution / Frame Rate Icon shows what mode you are currently in. Displays the set resolution size and the Options will vary depending on the mode. accompanying number of frames per second. Camera Activity Ball Elapsed Time / Shots Taken The ball will appear steady when in standby mode.
-
Page 20: Video Settings
Resolution VIDEO SETTINGS VideoCoding Video Loop Recording RESOLUTION › Higher resolutions saves more detail in your video at the expense of file size, but great for large screens. Lower resolutions make smaller filesizes, with lesser details yet good for small size screens. Note: FPS (or Frames Per Second) as part of the options in video resolution: Higher FPS saves more images per second and makes motion look smoother, at the expense of filesize. - Page 21 Resolution VIDEO SETTINGS – Page2 VideoCoding Video Loop Recording ISO › Adjusts the image sensor’s sensitivity to light. A higher ISO will collect more light at the expense of adding noise (grain) into the image when set too high. SHARPNESS › Changing the sharpness setting will make your images either crisper or smoother, adjust according to your preference.
- Page 22 VideoLapse VIDEOLAPSE SETTINGS Resolution VideoLapse VideoCoding VIDEO LAPSE › Sets the time interval between shots. Loop Recording RESOLUTION › Higher resolutions saves more detail in your video at the expense of file size, but great for large screens. Lower resolutions make smaller filesizes, with lesser details yet good for small size screens.
- Page 23 VideoLapse VIDEOLAPSE SETTINGS – Page2 Resolution VideoLapse VideoCoding SHARPNESS › Changing the sharpness setting will make your images either crisper or smoother, adjust according to your preference. Loop Recording SATURATION › Adjusts how vivid colors look like when recorded into the file. CONTRAST ›...
- Page 24 Slow Motion SLOW REC OPTIONS VideoCoding SlowRec Loop Recording SLOW MOTION › Sets the speed of the video recording. VIDEO CODING › Sets how the video file is encoded, the standard H.264 is common. H.265 makes much smaller file sizes with the same image quality, may require a video player upgrade to read this newer type of video encoding.
- Page 25 Slow Motion SLOW REC - Page2 VideoCoding SlowRec Loop Recording SATURATION › Adjusts how vivid colors look like when recorded into the file. CONTRAST › Adjusts how more or less-pronounced the darks and brights are. WHITE BALANCE › Adjusts the color temperature of the recording to compensate for Time Stamp ambient lighting.
- Page 26 Image Size STILL MODE OPTIONS Exposure Time Selfie Timer IMAGE SIZE › Changes the size of still photos that will be recorded. Of course, the bigger Still the size the more detailed your pictures are, at the expense of filesize. Quality Sharpness EXPOSURE TIME ›...
- Page 27 Image Size STILL MODE OPTIONS – Page2 Exposure Time Selfie Timer ISO › Sets the image sensor's sensitivity to light. Choose “Auto” on your camera if you are Still not familiar with this setting. Depending on the lighting conditions, use the lowest ISO Quality whenever possible, as higher settings will introduce more noise (grain).
- Page 28 Resolution PHOTOLAPSE OPTIONS VideoCoding PHOTOLAPSE TIME › Sets the interval between shots. Photolapse EXPOSURE TIME › Sets how long the sensor collects light through the lens. GyroSensor IMAGE SIZE › Changes the size of still photos that will be recorded. Of course, the bigger Audio the size the more detailed your pictures are, at the expense of filesize.
- Page 29 Resolution PHOTOLAPSE OPTIONS – Page2 VideoCoding ISO › Sets he image sensor's sensitivity to light. Choose “Auto” on your camera if you are Photolapse not familiar with this setting. Depending on the lighting conditions, use the lowest ISO whenever possible, as higher settings will introduce more noise while pixel sensitivity GyroSensor also goes up.
- Page 30 Burst Mode BURST MODE OPTIONS Image Size Quality BURST MODE: Fast multiple succession of snapshots, choose the number of photos desired BurstMode (Max: 10 consecutive shots). Sharpness Saturation IMAGE SIZE › Changes the size of still photos that will be recorded. Of course, the bigger the size the more detailed your pictures are, at the expense of filesize.
- Page 31 Burst Mode BURST MODE OPTIONS – Page2 Image Size Quality METERING › Prioritizes the brightness level of specific parts of the scene depending BurstMode on the Metering Mode that is used: Average, Center Weighted, or Spot. Sharpness Saturation GYRO SENSOR › Enables active image-stabilization to eliminate camera shake. Contrast WDR ›...
- Page 32 PhotoLapse Time VIDEO+PHOTO OPTIONS Resolution VideoCoding PHOTOLAPSE TIME › Sets the interval between shots. Loop Recording RESOLUTION › Changing to a higher resolution will have more detail in your video at the Video+ expense of file size. A lower resolution has a smaller filesize but will have less details in Photo your video.
- Page 33 PhotoLapse Time VIDEO+PHOTO OPTIONS – Page2 Resolution VideoCoding ISO › Sets he image sensor's sensitivity to light. Choose “Auto” on your camera if you are not familiar with this setting. Depending on the lighting conditions, use the lowest ISO Loop Recording whenever possible, as higher settings will introduce more noise (grain).
- Page 34 Resolution CAR MODE OPTIONS VideoCoding Loop Recording RESOLUTION › Changing to a higher resolution will have more detail in your video at the expense of file size. A lower resolution has a smaller filesize but will have less details in your video.
- Page 35 Resolution CAR MODE OPTIONS – Page2 VideoCoding Loop Recording BITRATE › Changes how much information is included in each frame of video. Higher bitrates give more definition to your video at the expense of filesize. CarMode ISO › Sets he image sensor's sensitivity to light. Choose “Auto” on your camera if you are not familiar with this setting.
- Page 36 Resolution UNDERWATER MODE OPTIONS VideoCoding Loop Recording RESOLUTION › Changing to a higher resolution will have more detail in your video at the expense of file size. A lower resolution has a smaller filesize but will have less details in your video.
- Page 37 Resolution UNDERWATER MODE OPTIONS – Page2 VideoCoding SHARPNESS › Changing the sharpness setting will make your images either crisper or smoother, adjust according to your preference. Underwater GyroSensor SATURATION › For adjusting how vivid colors look like when recorded into the file. Audio CONTRAST ›...
-
Page 38: File Management
Connect the USB cable, choose “Mass Storage Device” on your camera. b› Your device will show as a drive on your File Manager (Explorer on Windows; Finder in OSX) 2. Via WIFI through the SJCAM Zone App: a› Connect your camera to your phone: Device Settings>Wifi>Choose your camera b›... - Page 39 Get the app. Follow Us Visit us at www.sjcam.com For technical assistance, go to support.sjcam.com...
Need help?
Do you have a question about the SJ8 PLUS and is the answer not in the manual?
Questions and answers