Table of Contents
Advertisement
Quick Links
See also:
User Manual
User Manual
WCDMA / 3G Fixed FLLA Phone
Table of Contents
Preface & Trademarks . ............................................... 3
1. Basic Overview ...................................................... 4
1.1 Package Contents . ................................................ 4
1.2 System Requirements .......................................... 4
1.3 Safety and Maintenance . ..................................... 4
1.3.1 Using the Phone ................................................. 4
1.3.2 Using the Battery .............................................. 5
1.3.3 Using the Battery Charger ................................. 5
2.1 Instructions before use . ....................................... 6
2.1.1 Power on . .......................................................... 7
2.1.2 Power off . ......................................................... 8
2.1.3 Phone Security .................................................. 8
2.1.4 PIN code ............................................................ 8
2.1.5 PUK code ........................................................... 9
2.1.6 Screen Background Light .................................. 9
2.1.7 Adjust the Volume . ............................................ 9
2.2 Hardware Overview ........................................... 1 0
2.2.1 Front . .............................................................. 1 0
2.2.2 Back . ................................................................ 1 0
2.2.3 Key Descriptions . ............................................. 1 1
2.2.4 Status Icons ..................................................... 1 2
2.3.1 Direct dial ........................................................ 1 2
2.3.2 Quick dial from dialled list ............................... 1 3
2.3.3 Receive a call . .................................................. 1 3
2.3.4 Terminate call .................................................. 1 3
2.3.5 Make Emergency call ....................................... 1 3
2.3.6 Make International long-distance call ............. 1 3
2.4.1 Hold / Release talk state . ................................ 1 4
2.4.2 Dial second number ........................................ 1 4
2.4.3 Answer second incoming call .......................... 1 4
2.4.4 Selecting current phone number . ................... 14
3.1 Write Message .................................................. 15
3.2 Inbox .................................................................. 1 6
3.3 Outbox ............................................................... 16
1
3.4 Drafts ................................................................. 1 6
3.5 Sent Box ............................................................. 1 6
3.6 Templates . ......................................................... 1 6
3.7 SMS settings . ..................................................... 17
3.8 Message capacity .............................................. 1 7
3.9 Voice mail server ............................................... 1 7
4. Contacts .............................................................. 17
5. Call logs ............................................................... 18
6. Settings ................................................................ 1 8
6.1 Phone Settings .................................................. 18
6.1.2 Language setting ............................................ 1 9
6.1.3 Shortcut settings ............................................ 1 9
6.1.4 Shortcut dial settings . ..................................... 1 9
6.1.5 Auto power on/off .......................................... 1 9
6.1.6 Power management ....................................... 1 9
6.1.7 Restore factory settings .................................. 2 0
6.2 Display . ............................................................... 2 0
6.3 Call settings ....................................................... 2 0
6.3.1 Network selection ........................................... 2 0
6.3.2 Network type ................................................. 2 0
6.3.3 Call divert ....................................................... 2 0
6.3.4 Call waiting . .................................................... 2 1
6.3.5 Call barring ..................................................... 2 2
6.3.6 Hide ID . ........................................................... 2 2
6.3.7 Call time minute reminder ............................. 2 2
6.3.8 Auto redial . ..................................................... 2 2
6.3.9 Answer/Reject mode . ...................................... 2 2
6.3.10 Post-dialling delay ........................................ 23
6.4 Security ............................................................... 2 3
6.5 Profiles .............................................................. 23
6.6 Phone Info . ......................................................... 2 4
6.7 Calculator ........................................................... 2 4
6.8 Alarm ................................................................. 2 4
6.9 Operator Menu (STK) ......................................... 2 4
7. Frequently Asked Questions ................................ 25
8. Technical Specifications ........................................ 2 6
2
Advertisement
Table of Contents

Related Manuals for D-Link DWR-720P


Summary of Contents for D-Link DWR-720P
-
Page 1: Table Of Contents
Table of Contents Preface & Trademarks .......... 3 3.4 Drafts .............. 1 6 1. Basic Overview ............ 4 3.5 Sent Box ............. 1 6 1.1 Package Contents .......... 4 3.6 Templates ............ 1 6 1.2 System Requirements .......... 4 3.7 SMS settings ............ 17 1.3 Safety and Maintenance ........ 4 3.8 Message capacity .......... ... -
Page 2: Basic Overview
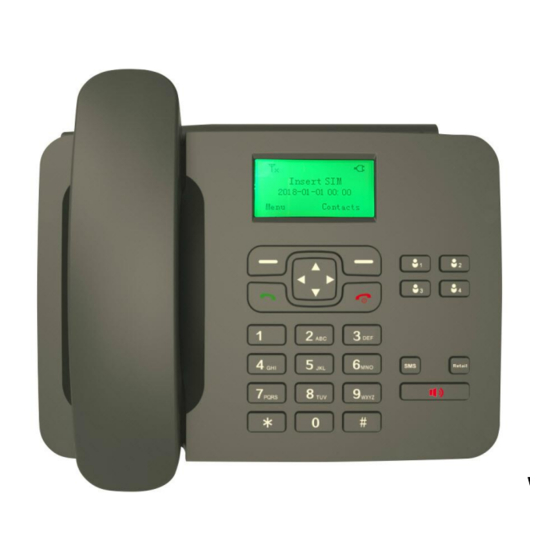
1. Basic Overview 1.1 Package Contents Preface D‐Link DWR‐720P WCDMA / 3G Fixed FLLA Phone Battery D‐Link reserves the right to revise this publication and to make changes in the content Handset Cord hereof without obligation to notify any person or organization of such revisions or changes. Handset Receiver Antenna Power Supply Trademarks Note: Using a power supply with a different voltage rating than the one included with the DWR‐720P will cause damage and void the warranty for this product. D‐Link and the D‐Link logo are trademarks or registered trademarks of D‐Link Corporation or its subsidiaries in the United States or other countries. All other company or product names mentioned herein are trademarks or registered trademarks of their respective 1.2 System Requirements companies. 1 A compatible (U)SIM card with service Copyright ⓒ 2018 by D‐Link Systems, Inc. ... -
Page 3: Using The Battery
Do not touch the charger with wet hands. If the charger connects with water or other liquid, immediately cut off 1.3.2 Using the Battery the power supply. Do not short connect the charger and keep it away from mechanical vibration or shaking and direct sun shine. Please observe the following points: Do not use it in damp environments, such as a bathroom. Before use, please read instructions for use as well as label on the surface of the battery. The battery charger is not waterproof; keep it away from rain and moisture. Please charge the battery in a cool and well‐ventilated room as high temperatures may lead to overheating. Keep the charger out of reach of children to avoid danger. Do not attempt open the battery as it may lead to short circuit or electrolyte leakage. If electrolytes get in contact with your eyes, there is danger of blindness. In such case, immediately wash your eyes with clean water and seek medical attention immediately (Do not rub 2. Basic Overview your eyes) Keep the battery away from mechanical vibration and shaking. Do not short connect the battery as this may 2.1 Instructions before use damage the battery and components connected to it. Keep the metal contact points and battery clean. Before using the phone, make sure the plug or battery is correctly connected and the SIM card has been inserted correctly. Follow the instructions below on how to install the phone: ... -
Page 4: Power On
2.1.2 Power off To power off, press and hold the [Red Power Key] until power off screen appears. A power down music will play if default settings are unchanged. Note: In this state, all reminders and alarms will still sound if set. Power off the phone and disconnect the external power whenever inserting the battery or SIM card. 2.1.3 Phone Security You can set an access password to avoid unauthorized use of your phone. The default phone password is 1234. To activate or deactivate this feature, please follow these steps: In the idle screen ‐> [Menu] ‐> [Settings] ‐> [4.Security] ‐> [Power‐on password]. You now have the option to [Activate], [Modify] or switch [Off] the Phone Lock feature. In order to Activate, or switch Off the power‐on password, you will be required to enter the default password [1234] before entering a new password. Once a Power‐on password is set, when powering on the phone, it will prompt on screen for a password Note: It is highly recommended to change the default password to a 4‐8 digit code only you will know and remember. Warning: Before pulling out the SIM card, the phone should be powered off. Inserting or pulling out SIM cards is not permitted when the external power is connected as it can damage the SIM card. To change the phone password, please follow these steps: In the idle screen ‐> [Menu] ‐> [Settings] ‐> [4.Security] ‐> [Power‐on password] ‐> [2.Modify]. ... -
Page 5: Puk Code
2.1.5 PUK code 2.2.1 Front PUK code, referring to Personal Unlock Code, is used to unlock a SIM card that is locked because of wrong input of PIN code. If the PUK code entry attempts exceed ten times, the SIM card will be hard locked and a SIM replacement will be required. PUK codes or Replacement SIM cards are provided by your Network Service Provider. 2.1.6 Screen Background Light Background light illuminates the screen. When you power on your phone, the background light will turn on for a predefined period. If no key is pressed within the period, the background light will turn off automatically to save battery life. To adjust background light brightness and period: For Time (sec): [Menu] ‐> [Settings] ‐> [2.Display] ‐> [2.Backlight]. You can now select between: Always on, 30, 20, 15, 10, 5 secs: For Brightness: [Menu] ‐> [Settings] ‐> [2.Display] ‐> [3.Contrast]. You can now press the left or right arrow keys to adjust the brightness down or up. ... -
Page 6: Key Descriptions
2.2.3 Key Descriptions 2.2.4 Status Icons Icons on the screen: Signal strength indicator 3G Network Service available 2G Network Service available No Network Service available Network Roaming AC adapter Plugged in and Powered Battery Life Indicator Phone set to Silent Mode Missed Call New Message Received Alarm has been set 1 Press to go into the main menu in idle screen, Select/Ok in submenu Left Soft Key 2 Direction Key Up Key Scroll through the menu; Default shortcut to Contact List in idle scree 2.3 Basic Functions Scroll through the menu; Default shortcut to Call Logs in idle scree Down Key 2.3.1 Direct dial Left Key Default shortcut to Messaging in idle screen Making a phone call: Right Key Default shortcut to Profiles in idle screen 3 In any menu you can go back to the last menu; Default shortcut is Contact ... -
Page 7: Quick Dial From Dialled List
Press the [Green Dial Key] to initiate the call. Note: Some networks do not allow “+” for dialling international numbers. 2.3.2 Quick dial from dialled list 2.4 Talk Options In standby state, press [Green Dial Key] to enter [Dialled calls] list. The phone provides some talk control functions during an active call. Scroll down to the desired contact or the number you want to dial. During the call, press [Left soft key] to enter [Menu] to access the talk control functions. Press [Green Dial Key] again to initiate the call. 2.4.1 Hold / Release talk state If your mobile network supports this function, you can hold a current call. 2.3.3 Receive a call Please ensure the network supports call waiting function & the status has been set to Enabled under Settings. When there is an incoming call, call animation will be displayed together with a ringtone (unless the phone To Enable Call Waiting, in idle screen, [Menu] ‐> [Settings] ‐> [3.Call settings] ‐> [4.Call waiting] ‐> [Activate]. is set to silent mode). During the call, press [Left soft key ‐ Menu] and select [Hold]. Press the [Green Dial Key] or pick up the handset or Press the [Hands Free] to answer calls. To reactivate the held call, Press [Left soft key ‐ Menu] and select [Unhold]. Press the [Red Power Key] to reject the incoming call. ... -
Page 8: Messaging
3. Mute: You can now hear your caller but your caller cannot hear you. 6. Exit: Quit and discard current message. 4. Adjust volume: Adjust the volume of the handset, press right for louder and left for softer. Note: You must have a positive airtime balance and an active service to use this feature. 5. Contacts: Access the phonebook. 3.2 Inbox 6. Call logs: Access the call logs menu. 7. Messaging: Access the messaging menu. The SMS and MMS you received are all stored in the [Inbox]. To open and view SMS or MMS and press [Options] ‐> [View]. When the second call is answered, press [Left soft key] to enter [Menu]: 1. Merge calls: Merge first and second call into one call. Other Available Options are: 2. Swap: Hold current call and activate the held call Reply, Delete, Delete all, Voice call, Mark. 3. Mute: You can now hear your caller but your caller cannot hear you. You can delete multiple marked messages by selecting the message then [Mark] ‐> [Mark] ‐> [Options] ‐> 4. Adjust volume: Adjust the volume of the handset, press right for louder and left for softer. [Delete] 5. Contacts: Access the phonebook. 6. Call logs: Access the call logs menu. Inside a viewed message, you can press [Options] for: 7. Messaging: Access the messaging menu. 1. Delete: Delete current message. 8. End all calls: Terminate both calls 2. Reply: Reply to the sender of the message 3. Forward: Enter into write message mode, you can edit the message per 3.1 Write Message ... -
Page 9: Templates
4. Speed dial settings: You can set Contacts to have speed dial functions here. This allows you to dial a contact by 3.6 Templates pressing and holding down the corresponding numeric key in idle screen. To set this, select the number position of where you wish to set speed dial and press [Options] ‐> [Edit]. Input the number then ‐> [OK] or [Contacts] ‐> Under this option, you will be able to select from pre‐loaded message templates, edit them or remove and select contact ‐> [OK] ‐> [OK]. create your own. 5. Own number: Save your personal number on the device. 3.7 SMS settings 6. Memory status: View memory status. Settings for Message centre, Message validity period, Status report, Preferred storage To Edit a saved contact, you [View contact] ‐> [Options] ‐> [Details] ‐> [Options] ‐> [Edit] ‐> [Modify] ‐> [OK] ‐> [Options] ‐> [Save]. 1. Text centre: By default, this should be set to +2781191 To Delete a saved contact: [View contact] ‐> [Options] ‐> [Details] ‐> [Options] ‐> [Delete] ‐> [OK]. 2. Message validity period: Set how long your message is stored temporarily in the SMS centre if the recipient mobile phone is offline. Validity period can be saved for 1, 6, 24, 72 hours, 1 week, Maximum. To copy a saved contact: [View contact] ‐> [Options] ‐> [Details] ‐> [Options] ‐> [Copy] ‐> Select desired location. 3. Status report: Check/uncheck for a report on whether an SMS message has reached the recipient mobile phone. 4. Preferred storage: Select where you would like to store your messages. SIM or Phone. 5. Call logs 3.8 Message capacity In idle screen, select [Menu] ‐> [Call logs]: 1. Missed Calls: Press [OK] to view history of calls missed. ... -
Page 10: Date & Time
6.1.1 Date & time 6.1.6 Power management 1. Set time: Set the time of your phone. Displays the current method of which the phone is powered. 2. Set date: Set the date of your phone. If the phone is powered with the battery, it will display the percentage of power left. 3. Time format: Select from 12 hours or 24 hours format. 4. Date format: Select from [Year‐Mon‐Day] or [Mon‐Day‐Year] or [Day‐Mon‐Year] 6.1.7 Restore factory settings 5. Update time settings: Set your time to [Auto update time] or [Manual update time] Enter the password then the phone will restore back to factory settings. The default password is [1234]. 6.1.2 Language setting The phone will then power off and reboot. All data will be cleared off the phone. Set the preferred display language. 6.2 Display 6.1.3 Shortcut settings Under display setting, you have the following options to select from: You can set the shortcut key for [Up key], [Down key], [Left key], [Right key], [Right soft key] ... -
Page 11: Call Waiting
To activate call waiting, Press ✲43# on standby mode to activate the service on Telkom. 1. Call forwarding unconditional: This setting redirects all incoming calls to another phone number. Thereafter, you can [Activate], [Cancel], [Check status] on the call waiting interface. To Enable this function, press [Select] ‐> [Activate]. Choose between [Divert to voicemail] or [Divert to number]. If [Divert to voicemail] is selected, make sure the correct settings are configured per the SIM card’s service provider under [Line number]. If [Divert to number] is selected, enter the number which you wish to divert the call to, or press [Contacts] to select from an existing number. 6.3.5 Call barring To Disable this function, press [Select] ‐> [Off]. To check if this function has been activated, by press [Select] ‐> [Check Status]. Call barring lets you stop certain types of calls being made from your phone. This feature is Call forwarding on busy: 2. This setting redirects all incoming calls to another phone number if the phone line network independent. Please contact your network operator for setup of this feature. Available is busy. Phone line can be busy if the number is calling out, you’re not in a service area or you’re using Call Waiting options are: and already have two callers on the line. 1. All Outgoing Calls: This will block your phone from making all calls (except emergency & toll‐free calls). To Enable this function, press [Select] ‐> [Activate]. You can choose between [Divert to voicemail] or [Divert to 2. All Received Calls: This will block your phone from receiving any calls. number]. If [Divert to voicemail] is selected, make sure the correct settings are configured per the SIM card’s service 3. Receive Calls in Roaming: This will block your phone from receiving any calls while in roaming status. provider under [Line number]. 4. International Calls: This will block your phone from making all international calls. If [Divert to number] is selected, enter the number which you wish to divert the call to, or press [Contacts] to select 5. Make Calls in Roaming: This will block your phone from making any calls while in roaming status. from an existing number. ... -
Page 12: Post-Dialling Delay
1. Ring settings: Here you can set the caller ringtone and message ringtone. 2. Adjust volume: Here you can adjust the volume level for the caller ringtone, message ringtone, call volume (handset or hands free volume), alarm & calendar ringtone and power on/off ringtone. 3. Other alert ringtone: Here you can enable/disable the ringtone for Key Tone (keypad sound), Battery low alert, Power ringtone (ringtone when the phone is powered on/off). 6.3.10 Post‐dialling delay 6.6 Phone Info Post dialling delay is the time between the start of the call and the moment the phone of the Here you will find the version info of the phone. called party starts ringing. Available options are: Off, 1~8 seconds. 6.7 Calculator 6.4 Security In this menu, you can do basic calculations of addition, subtraction, multiplication and division. SIM security: You can complete the following functions here: Key functions in Calculator Mode: 1. PIN: Set PIN lock to on or off, or modify PIN. Note that the SIM PIN number is issued by your network provider and is shown on your Complete SIM card. [Up Key]: Press once for Addition ‟ + ” ... -
Page 13: Frequently Asked Questions
SIM Application Toolkit (STK) is a standard of the GSM system which enables the Subscriber • Charger of your phone does not work properly. You can contact nearest service provider or dealer; • Ambient temperature is not appropriate. Please change charging environment; Identity Module (SIM) to initiate actions which can be used for various value‐added services. This • Poor contact. Please check plug of your charger. function is Network Operator specific and can vary. Please contact your Network Operator for further assistance. Q. Cannot select some functions 7. Frequently Asked Questions A. The service is not available or the location network does not support this service. Please contact your operator for details. If any problems are encountered while using the phone, please refer to below FAQs. If the Q. Who can I contact for technical support? problems still exit, please contact the Network Operator. A. You can call Telkom Customer Care on 081 180. Q. “Enter PIN code" appears on the screen. A. Enter the PIN code of your SIM card. Please contact your Network Provider immediately if you do not know the code. 8. Technical Specifications Q. “Enter PUK code" appears on the screen. A. Your SIM card will be locked if you enter wrong PIN code for three times. To unlock your SIM card, you UMTS/HSPA+(WCDMA) Band Support Structure have to enter PUK code. Enter the PUK code of your SIM card. Please contact your Network Provider • Bands 850/1900MHz • Size: 227 x 157 x 70mm / 0.4 kg immediately if you do not know the code. GSM Quad‐band Power adapter ...
Need help?
Do you have a question about the DWR-720P and is the answer not in the manual?
Questions and answers