
Related Manuals for Vogelsang VX186Q


Summary of Contents for Vogelsang VX186Q
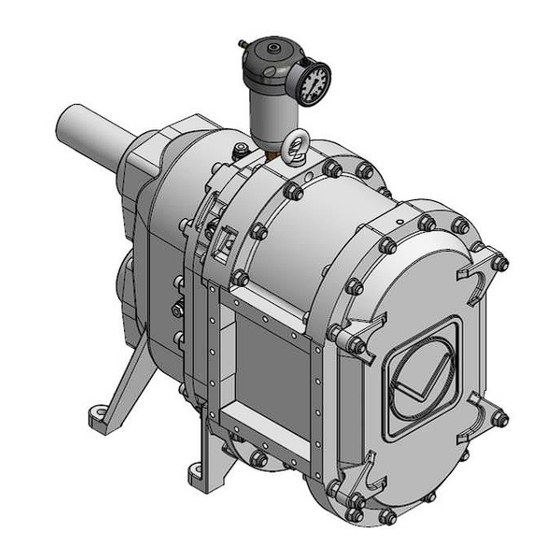
- Page 1 2018-01-25 *WBV.PU.002.EN VX186Q* WBV.PU.002.EN VX186Q V2.0 Operating Instructions Rotary Lobe Pump VX186Q WBV.PU.002.EN VX186Q *WBV.PU.002.EN VX186Q* 2018-01-25 V2.0 1/77...
-
Page 2: Issuer
We reserve the right to make technical modifications to the diagrams and information presented in this document in the event that such modifications become necessary for the enhancement of the machine. © 2018 Vogelsang GmbH & Co. KG Registered trademarks of Vogelsang ®... -
Page 3: Table Of Contents
Each product is developed and built so that you can work more successfully. We call it quite simply: ENGINEERED TO WORK If you want to know more about our company or put forward requests or suggestions, a wealth of information can be found at www.vogelsang.info Table of contents Issuer ................................. 2 Table of contents .............................. - Page 4 Help .............................. 70 Putting out of operation and disposal....................72 Maintenance plan ..........................74 12.1 Maintenance instructions ......................74 12.2 Maintenance intervals ........................74 12.3 Additional maintenance intervals for pumps with belt drive ............75 Service plan ............................76 WBV.PU.002.EN VX186Q V2.0...
- Page 5 Dimension sheet / drawing • Characteristic line • EC declaration of conformity Optional: • Technical information on drive system • Technical information on safety devices Please read and adhere to the information and instructions in the relevant documents. WBV.PU.002.EN VX186Q V2.0...
-
Page 6: User Information
Read the operating instructions thoroughly. All of the points presented in these instructions must be understood and observed by those persons responsible for the installation, operation, maintenance and repair of the machine. Vogelsang does not accept any liability for damage resulting from failure to comply with these operating instructions. KEEP FOR FUTURE REFERENCE Please keep the manual ready at hand to ensure easy access to the necessary information at all times. -
Page 7: Explanation Of Symbols
If personal protective equipment is needed to work with and on the machine, that is indicated by the following symbols: Indicates that protective gloves must be worn for subsequent tasks. Indicates that protective goggles must be worn for subsequent tasks. Indicates that safety shoes must be worn for subsequent tasks. WBV.PU.002.EN VX186Q V2.0... - Page 8 RISK OF ELECTRIC SHOCK Touching live parts leads to dangerous electrocution. This can result in electric shock, burns or death. ATTENTION Refers to possible damage to machinery or property as a result of failure to comply with this note. WBV.PU.002.EN VX186Q V2.0...
-
Page 9: Machine Versions Described Here
PTO drive Combustion engine drive • Chapter "System control" With or without system control The machines listed in these operating instructions are subject to the Machinery Directive (2006/42/EC), see sample printout in Chapter "EC declaration". WBV.PU.002.EN VX186Q V2.0... -
Page 10: Ec Declaration
Applied harmonised standards: DIN EN ISO 12100:2010 DIN EN 809:2012 The person or entity authorised to compile the technical documentation is: Vogelsang GmbH & Co. KG; Holthöge 10-14; 49632 Essen/Oldb., GERMANY 49632 Essen, 2017-07-03 Harald Vogelsang (Managing Director) WBV.PU.002.EN VX186Q V2.0... -
Page 11: Specifications
FPM lobes: max. 6 bar Please consult our service department Steel or stainless steel lobes: Maximum free passage: Ø 61 mm Weights and dimensions For the machine's weight and dimension specifications, see "Dimension sheet" WBV.PU.002.EN VX186Q V2.0... -
Page 12: Material Description For Rotary Lobes
(pure material) Table: Material description consult Vogelsang in the event of the combination of "high differential pressure and high temperatures" ** drinking water approvals: KTW, DVGW-Arbeitsblatt, W 270, WRAS, BELAQUA Please consult us • If you require combinations with high differential pressure and high temperatures – (see * in Table "Material description"). -
Page 13: Injectionsystem
The filling optimisation structure is located at the pump inlet only. Therefore, the direction of flow is set in advance. A brief reverse operation is possible. Injection A provides improved foreign matter protection with low-viscosity fluids and a high proportion of foreign matter. Injection S Injection A Fig. 1: Flow direction with InjectionSystem WBV.PU.002.EN VX186Q V2.0... -
Page 14: Name Plate
Specifications Name plate Fig. 2: Name plate The name plate (1) contains the following details: QR-Code Product Design (series) Year of Serial number manufacture Weight Part number Address of Vogelsang, GERMANY WBV.PU.002.EN VX186Q V2.0... -
Page 15: Safety
Failure to comply with the instructions and safety information specified in this manual may result in serious hazards. In the event of any abnormalities and/or signs relating to the safety of the product supplied by Vogelsang, please contact us without delay via: produktsicherheit@vogelsang.info... -
Page 16: Personnel Qualification
Safety devices may only be connected and checked by qualified technical personnel. • Electrical work and work on the electrical system may only be performed by qualified electricians. Vogelsang must always be consulted prior to any system-specific activities that are not described in this manual. -
Page 17: Intended Use
In some cases the pump or the pump connectors must be reconfigured. In addition to these specifications, the specifications in Chap. "Specifications" must be complied with as well. Any other use is contrary to the intended purpose. Vogelsang is not liable for any damage resulting from incorrect use. Foreseeable misuse: The machine is NOT intended for the following uses: •... -
Page 18: Main Switch, Maintenance And Repair Switch
The maintenance and repair switch must be secured in its OFF position to prevent it being switched back on again, using a padlock for example. WARNING Qualified technical personnel must connect and check the safety devices on a regular basis for proper function, especially after performing maintenance and repair work and before start-up. WBV.PU.002.EN VX186Q V2.0... -
Page 19: Warning And Safety Stickers On The Machine
Only used for pumps with a mechanical seal consisting of the material combination SiSiC-SiSiC) VAU.115 (To avoid adhesion of the mechanical seal faces this pump needs to be rotated (at least one revolution) every two months when not in service!) WBV.PU.002.EN VX186Q V2.0... -
Page 20: Transport, Storage
Use the lifting eye bolts and/or lifting lugs fitted for hoisting gear and securely fasten the lifting tackle. Use the lifting eye bolts on the machine only for lifting and transporting the machine without attachments or system components (e.g. motor, connectors or base). WBV.PU.002.EN VX186Q V2.0... -
Page 21: Storage
For pumps with a mechanical seal that has the mating materials SiC-SiC, the shaft must be turned (at least one revolution) every two months so that the sealing surfaces of the mechanical seal rings do not stick together. WBV.PU.002.EN VX186Q V2.0... -
Page 22: Assembly
Ensure that the pump is installed tension-free and that no tension can develop during operation either. Fig. 5: Installation variants upright horizontal vertical (fix the buffer fluid tank in place pointing suspended upwards and above the buffer chamber) WBV.PU.002.EN VX186Q V2.0... -
Page 23: Pipes
Therefore, ensure that no medium is left in the pump. • Attention – if a connector with a sight glass is installed on the suction side: The pressure must not exceed max. 2 bar during reverse pumping Fig. "Flow direction with pump units". WBV.PU.002.EN VX186Q V2.0... -
Page 24: Fig. 6: Long Suction Lines
Suction lines over 30 m must be laid with a slope of at least 2 x pipe diameter in the direction of flow, ensuring that the pipeline can never run dry Fig. "Long suction lines". Fig. 6: Long suction lines WBV.PU.002.EN VX186Q V2.0... -
Page 25: Direction Of Flow
Fig. 7: Flow direction with motor drive 6.3.2 Pump with PTO drive If you are using tractor driven pumps with two drive shafts, connect either the upper or lower cardan shafts thus determining the flow direction. Fig. 8: Flow direction with PTO drive WBV.PU.002.EN VX186Q V2.0... -
Page 26: Pump Systems
Chapter "Specifications" – "InjectionSystem" Injection S (Symmetrical InjectionSystem) With the symmetrical InjectionSystem, the flow can be in either direction. Injection A (Asymmetrical InjectionSystem) With the asymmetrical InjectionSystem, the flow direction is set in advance. A brief reverse operation is possible. WBV.PU.002.EN VX186Q V2.0... -
Page 27: Pump Connection
Clean threads and contact surfaces. Apply anti-seize paste (part no. BKL.014/BAS.001) evenly and in sufficient quantity to the screw head face and bearing face and to the thread using a brush or filling knife etc. to avoid seizing of stainless steel. WBV.PU.002.EN VX186Q V2.0... -
Page 28: Base, Support Surface For Machine
Before performing adjustments or repair work on the coupling, switch the machine off and secure it against being switched on again. WBV.PU.002.EN VX186Q V2.0... -
Page 29: Coupling Orientation
ATTENTION Vibration and wear due to incorrectly oriented coupling! If completely assembled at the Vogelsang plant, the alignment between the machine and the motor has been optimally adjusted. In the case of a drive provided by the operator, the tolerance specifications of the manufacturer of the coupling must be complied with. -
Page 30: Coupling Guard
NSI.086 M 6 x 25 cylinder head bolt 2 Nm NMK.003 M 6 hexagon nut NSK.027 M 10 x 25 hexagon head bolt 50 Nm * With length (L) of coupling guard < 383 mm: 4 pcs. WBV.PU.002.EN VX186Q V2.0... -
Page 31: Machine And Motor On Base B (Belt Drive)
Secure the hand cart against toppling or rolling during standstill and when the pump is in operation. 6.5.7 Machine on three-point base WARNING Risk of crushing or concussion due to falling machine caused by insufficient stability! Before operating the pump, ensure that the three-point base is properly attached and secured to the tractor. WBV.PU.002.EN VX186Q V2.0... -
Page 32: Drive
Note that the PTC resistor of the geared motor must be connected to the terminals provided on the pump control, to a PTC control unit or to a variable frequency drive with a PTC input (each available as an option). • Install a maintenance switch in close proximity to the machine (recommendation). WBV.PU.002.EN VX186Q V2.0... -
Page 33: Fig. 13: Vent Screw On The Gearbox (Removing The Seal)
Before start-up or long-term storage The seal on the vent screw (if present) must be removed in order to prevent overpressure build-up in the gearbox and thus leakage. Fig. 13: Vent screw on the gearbox (removing the seal) WBV.PU.002.EN VX186Q V2.0... -
Page 34: Hydraulic Drive
• Connect the overflow oil line in accordance with the manufacturer's instructions. • Replace hydraulic hose lines that show signs of damage or ageing. Only use genuine Vogelsang hydraulic hose lines. • The date of manufacture of the hydraulic hose line is displayed on the pressing component of the connector. - Page 35 The machine may only be started up if the cam wheel is protected from contact by a fixed cover. Standard DIN EN ISO 13857 defines safety distances that should be observed when designing the contact protection. Fig. 1: Place the cam wheel on the shaft end Fig. 2: Press the speed measurement into the hollow shaft WBV.PU.002.EN VX186Q V2.0...
-
Page 36: Combustion Engine Drive
Risk of burning due to exposed host surfaces! Parts of the exhaust system and the surface of the engine become hot during operation and must not be touched until they cool down again once the engine has been switched off. WBV.PU.002.EN VX186Q V2.0... -
Page 37: Pto Drive
Pos : 103 /WBV/Pumpen/Warnhinweis e/Gefahr/Keine Ü berdruc ksic her ung durc h Betriebs momentbegrenz ung @ 59 \mod_1313415621053_6.doc x @ 310268 @ @ 1 This operating torque limitation is not an overpressure safety control device for the pump (see 'Theoretical operating torque’ in Chapter "Specifications".) WBV.PU.002.EN VX186Q V2.0... -
Page 38: System Control
Increasing acceleration and deceleration times Reduces pressure peaks Reduces the risk of pipe vibrations A variable frequency drive with a linear torque characteristic line is to be used. The starting torque / nominal torque ratio must be > 1.3. WBV.PU.002.EN VX186Q V2.0... -
Page 39: Start-Up
WARNING Risk of injury, catching by rotating rotary lobes! The pump may only start-up if the inlet and outlet pipes are connected so that access to the rotating rotary lobes in the pumping chamber is not possible. WBV.PU.002.EN VX186Q V2.0... - Page 40 Have all safety devices been installed and is their proper functioning ensured? Are safety devices or maintenance switches easy to reach? Put the pump into operation and check inlet and outlet pressure, speed and capacity. WBV.PU.002.EN VX186Q V2.0...
-
Page 41: Maintenance
Electronic buffer chamber monitoring is also possible. Ask us for more information. If your pump is equipped with a dry buffer chamber or a circulation system, please read the corresponding Chapter ""Dry buffer chamber" sealing system" or "Circulation system on the cartridge mechanical seal". WBV.PU.002.EN VX186Q V2.0... -
Page 42: Pressurisable Buffer Fluid Tank
Close the tank and use a manual air pump or a compressed-air supply outlet to set the required tank pressure. Buffer fluid tank with pressure gauge, valve and manual air pump Opening the buffer fluid tank Fig. 14: Buffer fluid tank WBV.PU.002.EN VX186Q V2.0... -
Page 43: Fig. 15: Filling/Draining The Buffer Chamber
Maintenance Upright installation Horizontal installation Vertical installation Suspended installation Fig. 15: Filling/draining the buffer chamber Screw plug Filling Buffer fluid tank Draining WBV.PU.002.EN VX186Q V2.0... - Page 44 Slight contamination of the buffer fluid A slight increase or reduction in the buffer fluid level • A slight increase in the buffer fluid level is also possible due to thermal expansion during pump operation. WBV.PU.002.EN VX186Q V2.0...
-
Page 45: Depressurised Quenching Fluid Tank
"depressurised quenching fluid tank". Please also observe the "Trouble indication" and "Buffer fluid properties" in Chapter "Pressurisable buffer fluid tank". Screw plug (installation tightening torque: 60 Nm) Quenching fluid tank Fill Drain Fig. 16: Pump with quenching fluid tank WBV.PU.002.EN VX186Q V2.0... -
Page 46: Pressure Valve
When adding buffer fluid, leave a buffer of air above it (about 1 cm distance between the oil level and the bearing seal housing), see C Fig. "Pump with pressure valve". The air buffer prevents the buffer chamber fluid from building up an unacceptably high pressure due to thermal expansion. WBV.PU.002.EN VX186Q V2.0... -
Page 47: Buffer Or Quenching Fluid - Type
A slight increase in the buffer or quenching fluid level is also possible due to thermal expansion during pump operation. Environmentally friendly disposal Treat buffer fluid or quenching fluid, for example, oils and hydraulic fluids, like hazardous waste and dispose of them properly. WBV.PU.002.EN VX186Q V2.0... -
Page 48: Draining And Cleaning The Buffer Chamber
Screw the lower screw plug back in (tightening torque: 60 Nm) and install the various buffer chamber assemblies in reverse sequence. If the lower screw plug is not accessible due to the installation position, a drain pipe can be installed at the side on request. WBV.PU.002.EN VX186Q V2.0... -
Page 49: Dry Buffer Chamber" Sealing System
If the tank (3) is filled with leaked fluid (e.g. pump medium, gear oil or condensed water), undo the wing nuts (1), unscrew the tank cover (union nut (2)) and drain the tank. If the tank is filled by more than half within a month, please contact our service department. WBV.PU.002.EN VX186Q V2.0... -
Page 50: Circulation System On The Cartridge Mechanical Seal
If there is an increased risk that medium will get between the sliding surfaces, the pressure should be increased by 1 bar (in the example: 1.3 bar + 1 bar). Independently of this, the flushing pressure should be no more than 10 bar with a double mechanical seal. WBV.PU.002.EN VX186Q V2.0... -
Page 51: Gearbox
Every 2000 operating hours The buffer or quenching fluid should be changed at the same time as the gear oil change Chapter "Buffer chamber assembly". Environmentally friendly disposal Treat gearbox oils like hazardous wastes and dispose of properly. WBV.PU.002.EN VX186Q V2.0... -
Page 52: Fig. 20: Gear Oil Change
The screw plug 1 must be at the top, and the magnetic screw plug 2 must be at the bottom. Tightening torque ut @ 39\mod_1259315210400_6.doc @ 141472 @ Tightening torque for mounting the screw plugs 60 Nm WBV.PU.002.EN VX186Q V2.0... -
Page 53: Greasing Of Sealing Prechamber
We recommend the lubricating grease listed in Chapter "Oils and lubricants". Lubricating grease - quantity 5 shots per grease nipple (4 x) with a lube gun Lubrication interval • Before and after long shutdowns (2-3 weeks) Chap. "Maintenance plan" WBV.PU.002.EN VX186Q V2.0... -
Page 54: Oils And Lubricants
Maintenance Oils and lubricants Standard Vogelsang oil for pump gearboxes and buffer chamber Part number BSS.006 Description EP (Extreme Pressure) gear oil Trade name (Fuchs) Titan Gear MP 90 Characteristics Test acc. to SAE class 90 (85W-90) DIN 51512 or SAE J306c... - Page 55 DIN ISO 2909 Kinematic viscosity DIN 51562-1 at 40 °C 42 mm²/s at 100 °C 9.6 mm²/s Flash point 300 °C DIN ISO 2592 Pour point -36 °C DIN ISO 3016 Water hazard class Slightly hazardous to waters WBV.PU.002.EN VX186Q V2.0...
- Page 56 ISO 6743-9 Intrinsic viscosity DIN 51562-1 at 40 °C 110 mm²/s at 100 °C 9.5 mm²/s Dropping point > 180 °C IP 396 Service temperature -30 to +120 °C DIN 51825 Water hazard class Slightly hazardous to waters WBV.PU.002.EN VX186Q V2.0...
-
Page 57: Repair
Conversion and spare parts Modifications or changes to the machine are only permissible after consultation with Vogelsang. Only accessory parts approved by Vogelsang or genuine spare parts may be used. The use of other parts invalidates the guarantee for any resulting damage. -
Page 58: Opening The Q Cover
Depressurise the buffer chamber if necessary Chapter "Buffer chamber". Undo hexagon nuts (1) on the Q cover (2). Remove Q cover and remove the O-ring (3). Fig. 21: Opening/closing the Q cover Hexagon nut / washer Q cover O-ring WBV.PU.002.EN VX186Q V2.0... -
Page 59: Rotary Lobe Change
Carefully press the pressure discs and spring washers into the lobe groove. The spring washers must not fall into the extracting groove. Tighten the spring washers and pressure discs with the strain bolt. Install the strain bolt cover (4). Tightening torque for strain bolts WBV.PU.002.EN VX186Q V2.0... -
Page 60: Fig. 23: Hiflo And Hifloplus Arrangement
HiFloplus-rotary lobes, in contrast to HiFlo rotary lobes, have a second groove. The groove, which in the “arrangement HiFloplus" is not to be used, is marked in red. HiFlo HiFloplus Fig. 23: HiFlo and HiFloplus arrangement (L = left lobe, R = right lobe) WBV.PU.002.EN VX186Q V2.0... - Page 61 Repair Position of pressure disc and spring washer Correct position: Attention! Incorrect assembly: Fig. 1: Position of pressure disc and spring washer Pressure disc Spring washer WBV.PU.002.EN VX186Q V2.0...
-
Page 62: How The Lobe Puller Works
Hook the two puller arms (2) into the groove provided on the lobe Fig. "Hooking puller arm into 2. lobe". 3. Tighten the hexagon head bolts (1) with approx. 50 Nm. Tighten the pressure rod (3) to dismount the lobe Fig. "Pulling out the lobes with lobe puller". 4. WBV.PU.002.EN VX186Q V2.0... -
Page 63: Fig. 25: Components Of Lobe Puller With Stabilisation
Hook the two puller arms (2) into the groove provided on the lobe Fig. "Hooking puller arm into 2. lobe". 3. Tighten the wing nut (5) and hexagon head bolts (1) with approx. 50 Nm. Tighten the pressure rod (3) to dismount the lobe Fig. "Pulling out the lobes with lobe puller". 4. WBV.PU.002.EN VX186Q V2.0... -
Page 64: Fig. 26: Hooking Puller Arm Into Lobe
Fig. 27: Pulling out the lobes with lobe puller Maintenance instructions for lobe puller • Regularly check the puller arms for wear and breakage. • Keep the threaded bolt in the pressure rod clean at all times and lubricate it regularly. WBV.PU.002.EN VX186Q V2.0... -
Page 65: Change Of Wear Plates
Tightening torque Wear plate screws: 40 Nm (1) Wear plate on the gearbox (2) Wear plate on the cover (3) Hexagon head screw with microencapsulation Fig. 28: Installation position of the curved wear plates WBV.PU.002.EN VX186Q V2.0... -
Page 66: Change Of Cartridge Mechanical Seal
Before installing the rotary lobes, thoroughly clean the contact surfaces of the rotary lobes and the seal. Install rotary lobes, wear plates and Q cover. Top up buffer or quenching fluid. Readjust the pressure in the buffer chamber if necessary. Top up the gear oil. WBV.PU.002.EN VX186Q V2.0... -
Page 67: Fig. 29: Cartridge Mechanical Seal On The Gearbox
Repair Fig. 29: Cartridge mechanical seal on the gearbox Set screw O-ring (bearing seal housing) Cylinder head bolt* O-ring (seal carrier) Hexagon head bolt* Installation/disassembly tool* * included in tool with part no. WKZ0457 WBV.PU.002.EN VX186Q V2.0... -
Page 68: Closing The Q Cover
Adjusting of pump housing segments The pump housing segments of the Vogelsang rotary lobe pump can be adjusted to reduce the top clearance between the rotary lobe and the pump housing segment. The top clearance must be at least as large as one adjustment. -
Page 69: Reducing The Starting Torque
Attention! If more than two shims are placed on each distance nut of the Q cover, a thicker O-ring (part no. DOR.094) must be placed under the Q cover to maintain reliable sealing. In case of wear on lobes or plates, the gaps can be reduced again accordingly. WBV.PU.002.EN VX186Q V2.0... -
Page 70: Troubleshooting
Tighten in accordance with manufacturer's Belt tension too low specifications. Coupling not correctly Check the orientation and align according to "Base, support surface for aligned manufacturer's specifications if necessary. machine" Tighten in accordance with manufacturer's Belt drive slips specifications. WBV.PU.002.EN VX186Q V2.0... - Page 71 Adjust the tank pressure (buffer chamber pressure) to be higher than its design pressure. Observe max. permissible buffer chamber pressure (tank pressure): Single mechanical seal: 5 bar, double mechanical seal: 10 bar WBV.PU.002.EN VX186Q V2.0...
-
Page 72: Putting Out Of Operation And Disposal
Environmentally friendly disposal Working materials such as oils, hydraulic fluids and dangerous media should be treated as hazardous waste and disposed of properly. Hand over the pump for scrap. Observe notices and safety notes Chapter "Transport, storage". WBV.PU.002.EN VX186Q V2.0... - Page 73 Maintenance and service plan WBV.PU.002.EN VX186Q V2.0...
-
Page 74: Maintenance Plan
Check fixed coupling of coupling guard (base C) • Check the buffer or quenching fluid • Change the gear oil Every 200 operating hours: Check the buffer or quenching fluid Every 500 operating hours, at least once every three months: Check the gear oil WBV.PU.002.EN VX186Q V2.0... -
Page 75: 12.3 Additional Maintenance Intervals For Pumps With Belt Drive
Check belt tension and belt orientation After 0.5 to 4 operating hours: Check belt tension Every 6 months: • Check belt tension • Check belts and pulleys for wear. In the event of clear signs of wear, check the belt orientation. WBV.PU.002.EN VX186Q V2.0... -
Page 76: Service Plan
Service plan 13 Service plan Guarantee The guarantee is valid only if maintenance and service work is performed and documented acc. to Chap. “Maintenance plan”. Serial number: _________________________ On pumps with belt drive: Sign- Date Name ature WBV.PU.002.EN VX186Q V2.0... - Page 77 Vogelsang GmbH & Co. KG Holthöge 10-14 49632 Essen/Oldb. Phone: +49 (0) 54 34 83 0 Fax: +49 (0) 54 34 83 10 www.vogelsang.info info@vogelsang.info Australien Indien Rumänien Vogelsang Pty. Ltd. Vogelsang India Private Limited Vogelsang Romania SRL vogelsang.ro vogelsang.com.au vogelsangindia.com...
Need help?
Do you have a question about the VX186Q and is the answer not in the manual?
Questions and answers