Table of Contents

Related Manuals for Etac Prio


Summary of Contents for Etac Prio
- Page 1 Etac Prio Manual 75341F 2018-10-18 Applies to Etac Prio with serial no beginning with 38C...
-
Page 2: Table Of Contents
Etac / Prio / www.etac.com Content 1. General - introduction 7. Settings (continued) Back support height adjustment ..........37 Intended use ................3 Seat depth - front ..............38 Seat depth - rear ............... 39-41 2. Description Screw positions for seat depth ..........42 .................... -
Page 3: Intended Use
Intended use Etac Prio is intended for users who require high levels of comfort, Prio must not be used by people whose body size or weight does not support and relief in different seated positions. Prio is often used by... -
Page 4: Description
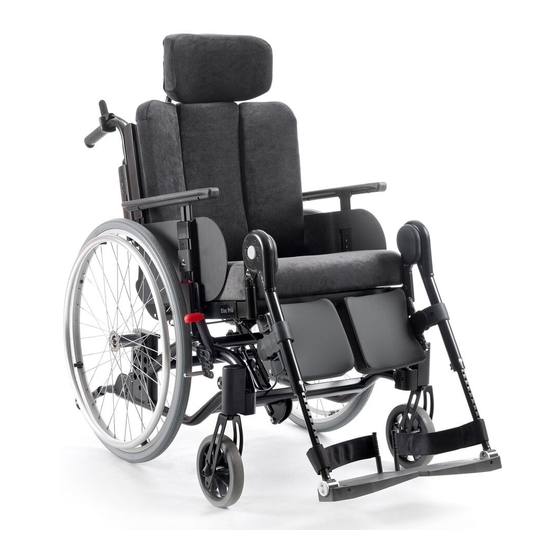
Etac / Prio / www.etac.com 2. Description Head support Front fork Tool - Allen key 3 mm Controls - back angle Castor wheel Tool - Allen key 5 mm Push handles Back cushion Snap lock - head support Locking knob, push handle... -
Page 5: Chair Options
Etac / Prio / www.etac.com 3. Chair options In the "Chair options" section you can see all configurations available for the wheelchair. For more information about chair options, see www. etac.com Settable= Adjusted using tools. Adjustable= Adjusted without tools. 38-52.5 cm With 20", 22"... -
Page 6: 3. Chair Options
Etac / Prio / www.etac.com 3. Chair options Curved cushion with soft padding, height, depth, side and angle-adjustable. Plush or hygiene cover Head support, angle-adjustable Curved cushion with side support and soft padding. Height, depth, side and angle-adjustable. Hygiene cover... - Page 7 Etac / Prio / www.etac.com 3. Chair options Leg support Cross model 15 cm deep Folding, angle and depth-settable Max. length: 51 cm. Min. length: 33 cm. Includes heel straps. 13 cm deep Standard Folding, angle and Max. length: 55 cm.
-
Page 8: Accessories
4. Accessories Assembly instructions are provided with all accessories when they are supplied by Etac. You can find the instructions as well as more information about the accessories on our website www.etac.com. Settable= Adjusted using tools. Adjustable= Adjusted without tools. -
Page 9: 4. Accessories
Etac / Prio / www.etac.com 4. Accessories Adapterkit For trunk support cushion R82 Spoke guards With grey or yellow print Tool kit Side cushion To be combined with back support cover Back support wedges Provides individual support. Available in multiple sizes. -
Page 10: Installation Upon Delivery
Etac / Prio / www.etac.com 5. Installation upon delivery Back support The wheelchair is supplied with push handles/bow handle and head supports unassembled. 1-3. Install fixed gas piston/actuator. Ensure that the locking pin is secured 10 mm 5 mm 6 Nm... -
Page 11: Head Support
Etac / Prio / www.etac.com 5. Installation upon delivery Head support Never lift the chair by the head support. Push handle/Bow handle Install the push handles/bow handle by loosening the handle and Make sure knobs are securely tightened. pushing in the locking pins on the push handle. Note! push handle... - Page 12 Etac / Prio / www.etac.com 5. Installation upon delivery Cross brace If the chair is equipped with a push brace, it can sometimes be deli- vered with the cross brace removed. Fit the cross brace as shown in the illustrations.
-
Page 13: Charging
Etac / Prio / www.etac.com 6. Charging Charging the battery (Electrical recline function) When the chair is delivered the battery is base charged. The battery When the battery level is low (0-35%) the hand control emits an must be charged fully before the product is used for the first time, audible signal when it is used. -
Page 14: Settings
Etac / Prio / www.etac.com 7. Settings Seat height Seat height adjustable using: Bear in mind the risk of tipping. - The rear wheel position in the gable and Always check the positioning of the anti-tips. the castor position in the fork. -
Page 15: Height Adjustment, Front
Etac / Prio / www.etac.com 7. Settings Seat height adjustment using the rear wheel position During installation, make sure that the hubs end up During installation, check that the rear wheel is in the same position on the right and left side. -
Page 16: Height Adjustment, Front, By Replacing The Front Fork/Castor Wheel
Etac / Prio / www.etac.com 7. Settings Height adjustment, front, by replacing the front fork/castor wheel See section “Height adjustment, front, using the castor wheel position in the front” and ”Seat height table”. Bear in mind the risk of tipping. -
Page 17: Seat Height Table
Etac / Prio / www.etac.com 7. Settings Seat height table Short Fork Medium Fork adapter Seat Pos. 6” 6.5" 8” 6” 6.5" 8” 6” 6.5" 8” 6” 6.5" 8” 6” 6.5" 8” 6” 6.5" 8” height 38.0 " 40.5 "... -
Page 18: Seat Height Adjustment Using The Attendant Brake
Etac / Prio / www.etac.com 7. Settings Seat height adjustment using the attendant brake Pos A2, A3, Pos A2, A3, Pos a2, A1, B1, C1 Pos D1 Pos D3 Pos a2, A1, B1, C1 Pos D1 Pos D3 B2, B3, C2, C3... -
Page 19: User Manual
Etac / Prio / www.etac.com User manual 75341F 2018-10-18 This part of the manual (User Manual) must be removed and always be supplied with the wheelchair as it contains important user information. Etac Prio... -
Page 20: Symbols And Warnings
Etac / Prio / www.etac.com User manual Contents User manual Symbols and warnings ............18 Seat comfort settings ..........19-21 Handling ..............22-26 Driving technique, use ..........27-29 Transport in vehicles ............30 Removal of upholstery .............31 Maintenance & Troubleshooting form .......32... -
Page 21: Seat Comfort Settings
Etac / Prio / www.etac.com User manual Seating comfort settings Seating comfort Good seating comfort depends on the needs and possibilities available to each individual. The following general guidelines here show what to consider when settings are made. Back support upholstery Bear in mind the risk of tipping. - Page 22 Etac / Prio / www.etac.com User manual Seating comfort settings Head support - height The head support height is adjusted by loosening the screws and nuts. Bear in mind the risk of tipping. Always check the positioning of the anti-tips.
- Page 23 Etac / Prio / www.etac.com User manual Seating comfort settings Footplates Tipping risk! Never stand on Adjust the height to support the feet and so that the footplates the thighs rest against the seat cushion. For outdoor use the footplates should be raised 4 –...
-
Page 24: Handling
Etac / Prio / www.etac.com User manual How to use Tilt function, comfort lock The chair is tilted by pressing down the adjustment on the right handle frame. On chairs equipped with comfort locks, forward tilting is stopped at the pre-installed comfort lock. - Page 25 Etac / Prio / www.etac.com User manual How to use Electrical recline function The hand control must not be handled by children or by cognitively impaired persons. Back angle and seat angle are adjusted by means of the hand control. The hand control is deactivated after not being used for 30 seconds.
- Page 26 Etac / Prio / www.etac.com User manual How to use Electrical recline function, back angle Bear in mind the risk of tipping. Always check the positioning of the anti-tips. The back angle is adjusted by means of the arrow buttons on the left-hand side of the hand control.
- Page 27 Etac / Prio / www.etac.com User manual How to use Rear wheel with quick release hub During installation, check that the rear wheel is securely mounted. The button in the hub should pop out to the original position. Anti-tips •...
- Page 28 Etac / Prio / www.etac.com User manual How to use The push handle/bow handle, height-adjustable Loosen the knob for the push handle lock (A). Install desired height. Ensure that the push handle is in a "snap lock" position, tighten the knob.
- Page 29 Etac / Prio / www.etac.com User manual How to use Attendant brake (motion brake) Attendant brake (parking brake) • Brake while in motion by pushing the brake handle • Activate the parking brake by pressing the brake handle upwards. upwards and pressing button A.
-
Page 30: Driving Technique, Use
Etac / Prio / www.etac.com User manual Driving technique, use Parking Do not park the wheelchair on a hill when it has a user in it. Transferring to/from the wheelchair Never stand on the footplates as there is a risk of tipping! - Page 31 Etac / Prio / www.etac.com User manual Carers, up forwards – Ensure that the anti-tips are disabled. Enable the anti-tips afterwards. Carers, up backwards – Ensure that the anti-tips are disabled. Enable the anti-tips afterwards. Carers, down forwards – Ensure that the anti-tips are disabled.
- Page 32 Etac / Prio / www.etac.com User manual Stairs, up We recommend there always being two carers for this transfer. One walking behind and holding the – Ensure that the anti-tips are disabled and that push handle and one walking in front, holding the height-adjustable handles are securely tightened.
-
Page 33: Transport In Vehicles
Accessories that can be removed without tools must wheelchair is tested and approved according to be removed and secured. ISO 7176-19. • A correctly configured Etac head support must be used (see Section ”Seat comfort settings”). Securing • Handrims must be installed on the rear wheels (not •... -
Page 34: Removal Of Upholstery
Etac / Prio / www.etac.com User manual Removal of covers Back cushion • The back cushion is removed and attached using the zipper. -
Page 35: Troubleshooting Form
Etac / Prio / www.etac.com User manual Fault-finding chart • Check that the front fork attachments are mounted correctly • Check that the rear wheels are mounted correctly The wheelchair pulls to the side • The user is distributing weight unevenly in the wheelchair •... -
Page 36: Transportations In Aeroplanes
Etac / Prio / www.etac.com User manual Transportation in aeroplanes Lithium batteries are subject to statutory regulations. Always contact your travel organiser or freight company for information about applicable freight regulations before transportation. Care and maintenance Rear Wheels: Clean the quick release axles when necessary. -
Page 37: Settings (Continued)
Etac / Prio / www.etac.com 7. Settings Back height adjustment The height of the back can be adjusted: 1. Loosen the screws on the side of the back support. 2. Gradually raise or lower using the scale. Ensure that both sides have the same height setting. -
Page 38: Seat Depth, Front
Etac / Prio / www.etac.com 7. Settings Seat depth, front 1. Loosen the screws on both sides of the seat. Bear in mind the risk of tipping. 2. Adjust the seat depth by pulling the seat out or Always check the positioning of the anti-tips. -
Page 39: Seat Depth, Rear
Etac / Prio / www.etac.com 7. Settings Seat depth, rear The seat depth can be adjusted in three fixed positions by reposi- Remember that the wheel positions might also tioning the back chassis and the rear seat plate. need to be re-adjusted to achieve correct balance in the chair. - Page 40 Etac / Prio / www.etac.com 7. Settings Seat depth, rear 5. Remove the rear wheels (not 16”). Remove one arm support and Bear in mind the risk of tipping. lock the back support angle using an Allen key or similar (later Always check the positioning of the anti-tips.
- Page 41 Etac / Prio / www.etac.com 7. Settings Seat depth, rear 8. Secure the gas spring in accordance with the illustrations for 11. Fit rear wheels, arm support and seat cushion. ”Screw positions for seat depth”. 12. Engage the anti-tips and check the seat and back angling Do not forget the washer in between.
-
Page 42: Screw Positions For Seat Depth
Etac / Prio / www.etac.com 7. Settings Screw positions for rear seat depth Screw positions seat board Short seat depth 39-46 cm Screw positions for side frame/gas piston attachment. NB For a chair equipped with electrical recline function, the above hole pattern ap- plies –... -
Page 43: Adjustment Of Comfort Lock
Etac / Prio / www.etac.com 7. Settings Adjustment of comfort lock 1. Undo screw and nut. Bear in mind the risk of tipping. 2. Adjust the seat angle for the comfort lock by moving and securing Always check the positioning of the anti-tips. -
Page 44: Readjustments
Etac / Prio / www.etac.com 8. Readjustments Brake, adjustment The brakes are variably settable 5. Make sure that the nut is positioned correctly and locks into the 1. Loosen the screw a few turns. nut pocket on the inside. 2. Adjust the brake position 3. -
Page 45: Brake, Mounting And Adjusting Adapter
Etac / Prio / www.etac.com 8. Readjustments Brake, mounting and adjusting adapter Brake adapter is required for the user brake to work with 20 "and 22" rear wheels (certain positions, see section "Adjustment of the centre of balance"). See also section "Brake, adjustment". -
Page 46: Adjustment Of The Centre Of Balance
Etac / Prio / www.etac.com 8. Readjustments Adjustment of the centre of balance The centre of balance is adjusted by changing the position of the rear wheels. When the position of the rear wheels is moved forwards the wheel- chair becomes much more manoeuvrable, but the tendency to tip... -
Page 47: Elevating Leg Support With Calf Support
Etac / Prio / www.etac.com 8. Readjustments Elevating leg support with calf support The calf support is height and depth-settable. Never stand on the footplates as there is a risk 1. Loosen the screw, adjust the height of the calf support and of tipping! tighten. -
Page 48: Accessories - Adjustment, Handling
Etac / Prio / www.etac.com 9. Accessories - adjustment, handling Assembly instructions are always provided with accessories when they are supplied by Etac. Instructions are also available on our website www.etac.com Positioning belt The positioning belt is in two parts, length-adjustable and equipped Ensure that the user does not slide forwards in with a snap lock. -
Page 49: Trunk Support
Etac / Prio / www.etac.com 9. Accessories - adjustment, handling Trunk support The trunk support is height and depth-adjustable 4. Loosen the knob on the rear to: and removable. 5. adjust the sides of the trunk support. 1. Loosen the screw on the side to adjust the trunk 6. -
Page 50: Technical Data
Etac / Prio / www.etac.com 10. Technical data Effective Transport Transport Max. Type of chair Art. no. Total width Seat height Seat depth* Weight** seat width width weight*** user weight 40 cm 13420305 59 cm 38-52.5 cm 39-51 cm 40 cm 56 cm 33.5... -
Page 51: Tests And Guarantees
Please contact Etac for up-to-date information. the product is used, but is at most 10 years. If the product is intended for use after the service life period specified by Etac, it is the responsibility of the product owner to ensure product functionality in 12. - Page 52 Etac / Prio / www.etac.com Etac Sverige AB Tel 0371-58 73 00 Etac GmbH Tel 02365-98710 Box 203 Fax 0371-58 73 90 Bahnhofstraße 131, Fax 02365-986115 334 24 Anderstorp info@etac.se 45770 Marl, info@etac.de Sweden www.etac.se Germany www.etac.de Etac AB (export)
Need help?
Do you have a question about the Prio and is the answer not in the manual?
Questions and answers