Table of Contents
Advertisement
Advertisement
Table of Contents

Related Manuals for Winterhalter UF Series UF-M


Summary of Contents for Winterhalter UF Series UF-M
- Page 1 Utensil Washer SeriesUtensil Washers UF Series Operating instructions...
-
Page 3: Table Of Contents
About this manual Operating instructions for Winterhalter utensil washers in the UF series (translation of the original German operating instructions) Contents 9.4 Switch off the machine --------------------------- 26 About this manual -------------------------------- 1 Servicing and maintenance ------------------ 27 Proper use ------------------------------------------ 2 10.1 Daily cleaning -------------------------------------- 27... -
Page 4: Proper Use
Do not wash without a wash rack. Do not make any changes, additions or modifications to the device without the approval of the manufacturer. Winterhalter Gastronom GmbH does not assume liability for any damage caused due to improper use of the warewasher. -
Page 5: Safety Notes
3.1 General safety notes Read through the safety notes and operating instructions in this manual carefully. Winterhalter Gastronom GmbH does not assume liability or warranty in case of non- compliance with these safety and operating instructions. Use the warewasher only after you have read and understood the operating instructions. -
Page 6: Before Working With The Machine
(water, waste water, electrical system) ( 15). After connecting the water and the power properly, contact the relevant Winterhalter dealer or your dealer for the commissioning of the machine and for providing training in its operation. Have yourself and your... -
Page 7: Machine Description
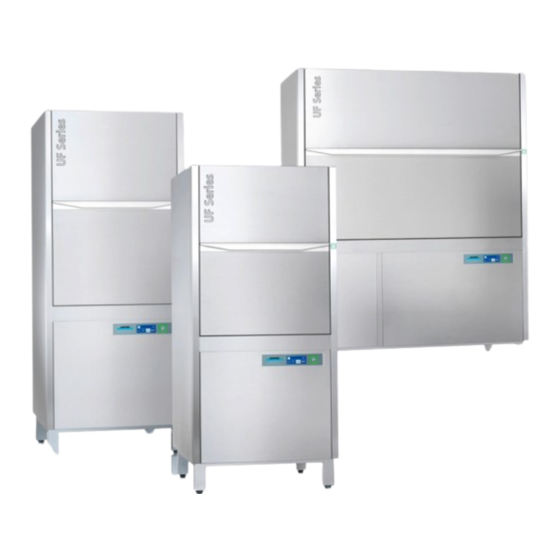
Machine description Machine description 5.1 Overview UF-M, UF-L UF-XL Item Description Item Description Energy module (optional) Filter cylinder Wash arm (crescent) Strainer Rinse arm (10) Lifting/hinged door Quick start button (11) Rack guide Display and start button (12) Suction tube Pump inlet filter (13) Chemicals compartment (only UF-XL) -
Page 8: Options
Machine description 5.3 Options The following options are available by default: Energy Requirement: Connect the machine to the cold water. The structure above the machine includes a fan motor and a heat exchanger. The fan motor extracts the moist, warm air (= vapours) out of the washing compartment and transfers the generated energy to the cold inlet water via a heat exchanger. -
Page 9: General Operation
General operation General operation 6.1 Display (touch screen) Operate the screen only with your fingers; do not use any sharp objects. Caution The display is a touch screen, which responds to touch. Each touch of a button is confirmed by a beep. Events such as the end of the programme or malfunctions are indicated by a sequence of tones. -
Page 10: Menu Levels
General operation 6.3 Menu levels Operating personnel have access to the following 3 levels: Main level ( 6.3.1) Info level 1 ( 6.3.2) Info level 2 ( 6.3.3) Standard washing Show temperatures List of events and Activate additional programme programmes malfunctions ... - Page 11 General operation 6.3.2 Info level 1 Item Description On/Off button IMPORTANT Once the machine has completed operation, drain with the self-cleaning programme ( 10.1.1) Info field Machine type Current rinse temperature INFO The rinse temperature is lowered between rinse stages to save energy. The effective rinse temperature is only displayed at the start of the rinse.
- Page 12 General operation Short programme Activate Tap the button. The background of the button becomes white. Press the start button to start the additional programme. INFO The additional programme remains stored until it is disabled or another additional programme is selected. Special programme The special programme can be freely programmed by an authorised service technician according to your wishes (time, temperature, rinse pressure and detergent metering).
- Page 13 General operation Use soaking programme Leave the door open for 6 seconds after loading. The soaking programme starts automatically once the door is closed. IMPORTANT Following the soaking programme, immediately start a washing programme, so that the tank water or crust cracker is rinsed off of the wash items. INFO We recommend a soaking time of 7 minutes.
- Page 14 General operation Use cold water pre-wash At the beginning of the washing programme, the wash items are automatically pre-washed with cold water. Start programme 1. 6.3.3 Info level 2 Item Description On/Off button IMPORTANT Once the machine has completed operation, drain with the self-cleaning programme (...
-
Page 15: Pin Menu
PIN menu PIN menu INFO If you switch to the PIN menu, the machine switches off. After leaving the PIN menu, the machine must be switched back on. Accessing the PIN menu Tap the following buttons in turn: Enter "1575". INFO Incorrectly entered digits can be corrected with the ... - Page 16 PIN menu Retrieving the settings Tap the following buttons in turn: Current date (Format: YYYY-MM-DD (year-month-day)) INFO You can only enter only a plausible date. Time format AM/PM = 12-hour mode 24 h = 24-hour mode Current time Temperature unit ...
-
Page 17: Programming Automatic Switch On / Switch Off
PIN menu 7.2 Programming automatic switch on / switch off Here you can: programme, when the machine is to fill and heat up automatically. programme, when the machine is to switch off automatically. The automatic switching on/off can be set either per day or for a special date. If the inputs overlap, a specific date always takes precedence over the weekly programme. -
Page 18: Operating Data
PIN menu Programming automatic switch off Tap the following buttons in turn: The setting of days of the week or special dates is much the same as for automatic switch on. Proceed as described in this section. Sequence of the automatic switch off 3 short 10 s 3 short... -
Page 19: Hygiene Logbook
For descaling, you need an acid-based descaler suitable for commercial dishwashers. We recommend the Winterhalter Descaler A 70 LS. When handling chemicals, observe the safety precautions and the dosage recommendations on the packaging. - Page 20 PIN menu Starting the descaling programme Tap the following buttons in turn: The button flashes while the programme is running. Descaler causes corrosion The descaling solution must not remain in the machine. If you switch off the machine when the descaling programme is in progress or if you terminate the programme, the machine must be Warning emptied, refilled and again emptied.
-
Page 21: Changing The Amount Of Detergent / Rinse Aid
PIN menu 7.5.2 Basic cleaning programme New dishes or glasses generally have a protective coating, which can be removed by using the basic cleaning programme. The programme can also be used if coatings such as starch have built up on the dishes. -
Page 22: Resetting The Water Back-Flow Counter
PIN menu Opening the menu Standard washing programmes Switch to rinse cycle Dosing amount and internal name (e.g. P003) Scroll keys Confirm input Symbol for detergent or rinse INFO The dosing amounts for each individual washing programme can be set differently. Changing the detergent dosing amount ... -
Page 23: Rinse Aid And Detergent
Danger the packaging. Use only products that are suitable for commercial warewashers. Such products are appropriately marked. We recommend Winterhalter products. These are specially adapted to Winterhalter warewashers. Caution Do not fill detergent in the container for rinse aid and vice versa. -
Page 24: Suction Tube With Level Control
A new detergent product usually requires re-configuration of the dosing device. Assign the required work to an authorised service technician to attain good wash results. If this is not done, Winterhalter Gastronom GmbH warranty and product liability will no longer apply. Procedure ... - Page 25 Rinse aid and detergent Item Description Float switch for level control Vent holes The float switch (1) promptly signals any lack of chemicals and indicates said information on the display: Lack of detergent or lack of crust cracker Lack of rinse aid or defoamer IMPORTANT If the container has still not been replaced after 20 wash cycles, the dosing device is automatically deactivated.
-
Page 26: Operation
Operation Operation 9.1 Before switching on the machine Possible risk of damage to the pumps by suction of e.g. cutlery items Only operate the machine when the pump inlet filter and filter cylinder are in place. Caution IMPORTANT Dosing devices must be primed when air gets into the dosing hose due to the containers not being exchanged or refilled in time (... - Page 27 Operation 9.3.1 Arranging the wash items in the wash rack Remove larger traces of food and waste from the wash items and eliminate liquid residues. Rack accessories 9.3.2 Start washing programme A washing programme can be started in the following ways: ...
-
Page 28: Switch Off The Machine
Operation 9.3.5 Terminating the washing programme A washing programme can be terminated in the following ways: Press the start button Press the quick start button Tap on the button of the selected washing programme 9.3.6 Tank water exchange programme If the tank water is very dirty due to excessive intake of soiled material and this impairs the end wash result, the tank water can be replaced, in whole or in part. -
Page 29: Servicing And Maintenance
Servicing and maintenance 10 Servicing and maintenance Do not spray the machine and the surrounding area (panels, base) using a water hose, steam-jet air ejector or high-pressure cleaner. Ensure that the base of the machine is not flooded when cleaning the floor in order to Warning prevent the uncontrolled inflow of water. - Page 30 Servicing and maintenance Terminating the self-cleaning programme Tap the button. The background of the button becomes blue. The machine is refilled. 10.1.2 Cleaning the interior Ensure that there are no rusty foreign objects in the machine which could cause even the "stainless steel rust-free"...
-
Page 31: Weekly Cleaning
Servicing and maintenance Cleaning Fold the basket upwards and rest it against the rear panel. Remove dirt with a brush or a cloth. Clean the tank heating element (A). IMPORTANT If the tank heating element is too heavily soiled, it switches itself off automatically in order to prevent damage. -
Page 32: Descaling
Servicing and maintenance 10.4 Descaling If the machine is operated with water of high hardness without water treatment, descaling is necessary at regular intervals ( 7.5.1). 10.5 Maintenance by the Customer Service Department We recommend that you have an authorised service technician carry out the maintenance of the machine at least once a year so that vulnerable parts subject to ageing and wear can be checked and replaced accordingly. -
Page 33: Malfunctions
Malfunctions 11 Malfunctions Danger of death: live components! Do not open any machine covers or machine parts if this requires tools. There is a risk of electric shock. Danger Only an authorised service technician may work on the electrical system. The machine must first be disconnected from the mains supply. -
Page 34: Accessing The Error Code
Malfunctions Pictogram Meaning Possible cause Remedy Wash arm too loose Secure wash arm in place. Unscrew wash arm, install with jets Error related to lower Wash arm incorrectly fitted pointing upwards and secure in place. wash arm Wash arm blocked Remove the obstruction. -
Page 35: Poor Wash Result
Switch off the machine during work breaks 11.2 Poor wash result Possible cause Remedy Set the dosing amount as per the manufacturer’s specifications ( 7.6). No or low detergent dosing Check the dosing hose (for kinks, breakage, etc.) Exchange the container, if empty. Do not stack wash items over each other Wash items not clean Wash items incorrectly sorted... -
Page 36: Putting The Machine Back Into Service After A Long Period Of Disuse
Putting the machine back into service after a long period of disuse 13 Putting the machine back into service after a long period of disuse Open the on-site water stop cock. Switch on the local mains disconnector. Close door. ... -
Page 37: Installation Diagram
Connecting the machine 15.2 Installation diagram IMPORTANT Provide the connections next to the machine on the left or the right. Define the precise dimensions taking the local circumstances into account. Main water connection (cold or hot) Cold water (optional) Only for machines with cold water pre-wash Hot water (optional) Tank filling with hot water with UF Energy Electrical connection (... -
Page 38: Connecting The Inlet Water Hose
Connecting the machine 15.4 Connecting the inlet water hose Do not shorten or damage the hose. Old existing hoses may not be re-used. Do not bend the hose when laying it. Caution The inlet water hose and dirt trap are located in the machine. INFO The dirt trap prevents particles from the water supply line entering the machine, thus preventing extraneous rust on the wash items and in the machine. -
Page 39: External Dosing Devices
16 External dosing devices Instead of the integral dosing device, external dosing devices can also be used. Follow the instructions in this section. Additional information can be found in German and English on the Winterhalter web site (Dosiertechnik / Dosing systems). -
Page 40: Electrical Connection
External dosing devices Right view (UF-M) Pos. Designation Dosing point for detergent (left) and defoamer (right) 16.2 Electrical connection IMPORTANT maximum current drain at the transfer strip: 0.5 A. Connect the external dosing device to the 5-pin plug. Terminals (arranged from top to bottom) Terminal Voltage is on Condition... -
Page 41: Setting Parameters
External dosing devices Connecting an external detergent dosing device Example 1: Example 2: Example 3: Hose pump with time-delay Hose pump with adjustable Hose pump with fixed output relay and fixed output output (e. g. ESP 166, ESP 166C, SP 166Z) ... -
Page 42: Technical Data
Technical data 17 Technical data General Operating conditions 0 – 40 °C Voltage Operating temperature Total connected load see rating plate Relative air humidity < 95 % Fuse protection Storage temperature > -10 °C Minimum flow pressure Maximum height of the 3000 m ... -
Page 43: Ec Declaration Of Conformity
EC Declaration of Conformity 20 EC Declaration of Conformity... - Page 44 Winterhalter Gastronom GmbH Winterhalter Gastronom GmbH Gewerbliche Spülsysteme Commercial Dishwashing Systems Winterhalterstraße 2–12 Winterhalterstraße 2–12 88074 Meckenbeuren 88074 Meckenbeuren Deutschland Germany Telefon +49 (0) 75 42/4 02-0 Telephone +49 (0) 75 42/4 02-0 www.winterhalter.de www.winterhalter.biz info@winterhalter.de info@winterhalter.biz...
Need help?
Do you have a question about the UF Series UF-M and is the answer not in the manual?
Questions and answers