Table of Contents
Advertisement
Quick Links
Advertisement
Table of Contents

Subscribe to Our Youtube Channel
Related Manuals for Lathem FaceIN FR700


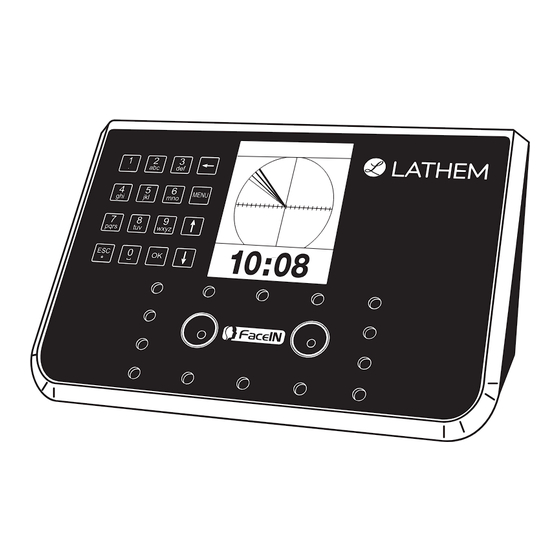
Summary of Contents for Lathem FaceIN FR700
- Page 4 Cet appariel numerique de la classe A est conforme a la norme NMB-003 du Canada. Lathem Time Corporation 210 The Bluffs, Suite 107 Austell, GA 30168 404-691-0400 www.lathem.com Copyright © 2010 Lathem Time Corporation. All rights reserved. Revised 03-26-2019 Document number: USG0098 Rev. H...
-
Page 5: Table Of Contents
Contents Welcome Package Contents ................. 4 Install the FaceIN Clock ..............5 FaceIN Startup Set up the Network Communications ........... 7 Set up an Administrator ..............8 Add the Clock in PayClock How do I add a FaceIN clock? ..........10 Install the PayClock Agent Software How do I install the PayClock Agent? ........ - Page 6 FaceIN Troubleshooting .............. 24 Appendix A - Enrollment Guide Appendix B - Access Control Clock Access Control Relay Connector Configuration ....28 Connecting the Clock to an Electromagnetic Lock ..... 29 Connecting the Clock to an Electromagnetic Lock using a Wiegand Signal ................
-
Page 7: Welcome
Welcome Reliability, functionality and ease of use are trademarks of PayClock Online and the facial recognition clock. The FaceIN clock connects to your network and uses the PayClock Agent software for communications to PayClock Online. Important note: The PayClock Agent software and FaceIN clock must be on the same subnet. The clock utilizes an “embedded facial recognition”... - Page 8 Note: The proximity badge reader and access control relay are not available on the FR650 model. Accessories Several accessories are offered to further enhance your PayClock Online system. Visit http://shop.lathem.com to purchase additional accessories. Getting Help You can access the help desk and get answers to issues in several different ways.
- Page 9 Online and Email Support Lathem.com provides access to numerous support resources that will allow you maximize your use of PayClock. Help may be accessed by visiting the following link: https://kb.lathem.com On the support page you may also submit a question through our online knowledgebase and one of our technicians will respond to your inquiry within 24 hours.
-
Page 10: Package Contents
Package Contents Please verify that your package includes ALL of the following items. If your package is missing an item, please call our help desk at (404) 691-0400. Recommended Installation Tools 4 • FaceIN... -
Page 11: Install The Facein Clock
Install the FaceIN Clock Step 1: Select a site to install your FaceIN clock that will be convenient to employees clocking in and out. When deciding where the clock will be installed, keep in mind that an 115vAC power outlet should be within 6 feet of the mounting location as well as a connection to the network (LAN). - Page 12 Step 3: Plug the RJ45 network cable into the Ethernet port and the Power Adapter plug into the Power Adapter port which is in the compartment on the back of the clock. Step 4: Align the FaceIN clock with the pins on the mounting-plate and secure the two together with the 2 Philips head screws.
-
Page 13: Facein Startup
FaceIN Startup After completing the installation and power-up the clock will display the normal screen with the date, day of week and time. You are now ready to set up the network communications and define the initial administrator. Note: You must set up at least one administrator. -
Page 14: Set Up An Administrator
Note: You may have to enter leading zeros when entering the addresses. For example, the address 10.0.0.1 would be entered as 010.000.000.001 at the clock. Set up an Administrator After setting up the network communications you will need to set up at least one administrator. - Page 15 When the face is successfully enrolled the clock will display, “Add as User?”. Ask yourself this question. Will the administrator be using the door access function or punching In and Out on the clock? Yes - The administrator will be using the door access function or punching In and Out at the clock.
-
Page 16: Add The Clock In Payclock
Add the Clock in PayClock After setting up the FaceIN add it to your PayClock Online software. Once the clock is added to PayClock Online you can install the PayClock Agent software. After adding the employees update the clock and the employee faces can be enrolled. See Appendix I if you are using the PayClock Desktop software. -
Page 17: Install The Payclock Agent Software
Install the PayClock Agent Software The FaceIN clock connects with the PayClock Agent which then communicates with PayClock Online. The PayClock Agent must be installed on a Windows computer on the same network as the FaceIN clock. How do I install the PayClock Agent? •... -
Page 18: Updating The Facein Clock
Updating the FaceIN Clock The PayClock Online and the PayClock Agent software are used to manage the FaceIN clock(s) which includes polling and updating the clock(s). This is done from the Clocks area within the PayClock Online software. When you add an employee in PayClock they are automatically assigned to the FaceIN clock(s). -
Page 19: Enrolling Employee Faces
Enrolling Employee Faces The FaceIN clock utilizes an “embedded facial recognition” system. This means that employees will punch in and out by presenting their face in front of the clock’s “Dual Sensors”. The FaceIN clock verifies the face image and records the punch. When you’re ready you simply poll the clock to add the punches to the database. -
Page 20: How Do I Enroll An Employee
How do I enroll an employee? • At the FaceIN clock press the MENU key. Administrator verification is required. • The administrator should present and position themselves for a facial scan. The Functions Menu will display upon a successful verification. Note: The FaceIN clock requires administrator verification in order to enroll employee faces. - Page 21 • Perform 2 small head circles to the left. • Move the face closer to the clock until the white dashed square appears. • Move the face back until there is 9 to 25 inches between their face and the clock. •...
- Page 22 • When “Please Swipe Card” displays present the card at the clock. • When the card is registered the clock will display, “Permit Open Door?” press ESC. • When “Permit Attendance?” displays, press OK. Note: You must press OK; otherwise punches will not be recorded for polling.
- Page 23 • Raise the head up slightly. • Lower the head down slightly. • Move the face back from the clock until there is 9 to 25 inches between the face and the clock (if adjust positioning message is still displaying). •...
-
Page 24: Using The Facein Clock
Using the FaceIN Clock The FaceIN will be ready for use when the facial registration process is complete. To punch, the employee will simply approach and look at the clock. Within seconds they are identified and punched In or Out. Upon successful verification the clock will play a confirmation sound and the screen will display the employee’s first name and time of punch. -
Page 25: Punching In / Out
Punching In / Out Employees can punch by presenting their face or a badge. Punching IN/Out - Face Verification • The employee should step towards the clock and stop when within 9 - 25 inches; the clock will detect the employee and start the face recognition automatically. -
Page 26: Punching In/Out - Card & Face Verification
• During the face recognition process, the clock will provide guidance for the employee, such as: “Please Get Closer”, “Please Get Farther” or “Adjust Your Action”. • Upon successful verification the clock will play a confirmation sound and the screen will display the employee’s first name and time of the punch. -
Page 27: Punching In/Out - Card Verification
Punching IN/Out - Card Verification (FR700 only) The Card Verification method only requires that the employee present their badge and then the clock will take a snapshot of the person presenting the badge. No facial verification occurs. • Move the badge over the badge reader symbol on the front of the FaceIN. -
Page 28: Polling The Facein Clock
Polling the FaceIN Clock The PayClock Online and PayClock Agent software is used to manage the FaceIN clock(s) which includes polling and updating the clock(s). This is done from the Clocks area within the PayClock Online software. How do I poll a clock? •... - Page 29 To poll every X minutes: • Select the “Continuously Poll”. • Select how often to poll the clock at the Poll Clock Every (Mins). • In the Start Polling At field, select a time when the auto polling will begin. •...
-
Page 30: Troubleshooting The Facein
Troubleshooting the FaceIN If the PayClock Online and PayClock Agent software doesn’t communicate with the FaceIN try these suggestions: General Troubleshooting • Make sure that all connections are secure, and the cable is intact. • Make sure that the network cable is securely connected to the Ethernet port on the clock. - Page 31 Note: If changes are needed, from the Functions Menu press 4 - System Setting and then 2 - Set Network. Make the needed adjustments and press OK to save the changes. #2 Make sure that the network communications settings are correct in the PayClock Online software.
-
Page 32: Appendix A - Enrollment Guide
Appendix A - Enrollment Guide Follow these guidelines for trouble-free enrollments. During the enrollment process the employee should keep their eyes centered on the screen at all times. Try to keep a solid green box around your face by following the steps below. The line of squares at the Position yourself and bend at bottom of the screen indicate... - Page 33 Enrollment Guide (cont.) Slowly move your face Slowly turn your head fully closer until the white- to the right, and then fully dashed frame appears and to the left, all the while then move away until the keeping you eyes centered white-dashed frame on the screen.
-
Page 34: Appendix B - Access Control
Appendix B - Access Control Access control is only available in the FR700 model. Use the FR700’s internal access control relay to integrate with a facilities entry access control system. Important Note: When enrolling an employee make sure to select OK at the Permit Open Door? prompt. -
Page 35: Connecting The Clock To An Electromagnetic Lock
Connecting the Clock to an Electromagnetic Lock FaceIN Connecting the Clock to an Electromagnetic Lock using a Wiegand Signal FaceIN Appendix • 29... -
Page 36: Clock 26-Bit And 34-Bit Wiegand Formats
Clock 26-Bit and 34-Bit Wiegand Formats Wiegand 26: 0 1- Site Code -8 9--- User ID ---24 25bit 0 1 1 0 0 1 0 0 X X X X X X X X X X X X X X X X Site Code for Clock : 100 (8 bits) User ID: 1-65536 (16 bits) Wiegand 34:... -
Page 37: Appendix C - Facein Settings
Appendix C – FaceIN Settings The FaceIN clock is designed with default settings so that it will be ready for use after being updated with the employees. While these default settings allow you to get up and running faster, you can make changes to the settings if desired. -
Page 38: How Do I Change The Displays Time Format
How do I change the displays time format? The time format selection will determine how the hours will show on the clock display. • At the FaceIN clock, press the MENU key, administrator verification is required. • The administrator should present and position the face for a facial scan. -
Page 39: How Do I Activate The Tamper Alarm On The Fr700 Clock
• Press 1 for YYYY-MM-DD (2011-03-01) or 2 for MM-DD- YYYY (03-02-2011). Note: March 01, 2011 was used in the example above. • After a few seconds the system will return to the “Set Date and Time” screen. Continue making changes to the clocks system settings or press ESC, ESC and ESC again to return to the normal time/date screen. -
Page 40: Appendix D - Exporting Punches To A Usb Drive
Appendix D - Exporting Punches to a USB Drive The USB Functions menu on the FaceIN clock allows you to export punch data to a USB thumb drive and then import the data into the PayClock Online database using the PayClock Agent software. Important Note: If the network connection for the FaceIN clock is temporarily down you can transfer punch data from the clock to the PayClock Agent software using a standard USB thumb drive. -
Page 41: Import The Data Into Payclock
• After a few seconds the system will return to the “Functions Menu” screen. • Press the ESC key. The clock will return to the normal time/date display. • Unplug the USB Flash drive. Import the data into PayClock • Plug the USB Flash Drive into a USB port on your computer. -
Page 42: Appendix E - Add Employees At The Clock
Appendix E - Add Employees at the Clock Employees can be added at the FaceIN clock first and then added in the PayClock software later. This could be useful when a new employee starts work before having a chance to add them to the PayClock software. - Page 43 • Press 1 or select the Register User menu and press OK to add a new employee at the clock. • The Input User No. screen will display. • Using the index/numeric keys enter the User Number and press OK. Note: This is the number that will be entered in the PayClock software as the employee’s PIN number.
-
Page 44: Appendix F - Record Management
Appendix F - Record Management The Record Management function allows you review punch data and clear records in the clock’s memory. Warning: Use extreme caution when clearing records. Once the records are cleared, they cannot be restored! Reviewing Punch Records •... -
Page 45: Clearing Punch Records
Clearing Punch Records The Record Management function allows you review punch data and clear records in the clock’s memory. Warning: Use extreme caution when clearing records. Once the records are cleared, they cannot be restored! • At the FaceIN clock press the MENU key. Administrator verification is required. -
Page 46: Appendix G - System Information
Appendix G - System Information The System Info function allows you review the clock’s capacity and product information. Reviewing Capacity Information • At the FaceIN clock press the MENU key. Administrator verification is required. • The administrator should present and position their face for a facial scan. - Page 47 Reviewing Product Information • At the FaceIN clock press the MENU key. Administrator verification is required. • The administrator should present and position their face for a facial scan. The Functions Menu will display upon a successful verification. • Press 5 or select the System Info. menu and press OK. •...
-
Page 48: Appendix H - Clock Specifications
Appendix H - Clock Specifications • Employee Capacity: 500 • Record Capacity:150,000 • Image Capacity:70,000 Images • Security Image Capacity:4GB SD Card (FR700) • Recognition Algorithm:Dual Sensor V2.0 • Lens:Specialized double lens • Verification Method:Face Recognition; Pin & Face Recognition; Card Recognition (FR700); Card & Face Recognition (FR700) •... -
Page 49: Appendix I - Payclock Desktop
Appendix I – PayClock Desktop Follow these steps if using the FaceIN clock with the PayClock Desktop software. Add the FaceIN in PayClock The Maintenance button group under the Terminal Manager tab is used to add or delete FaceIN terminals that are connected to the PayClock desktop system. -
Page 50: Updating The Facein
Updating the FaceIN The Update button group is used to update a single terminal or all terminals. After making changes to employees make sure to update the terminal(s) with the changes. How do I update a single terminal? • Open PayClock and select the Terminal Manager tab on the ribbon bar. -
Page 51: Auto - Polling The Facein
How do I poll all terminals? • Open PayClock and select the Terminal Manager tab on the ribbon bar. The Terminal Manager window will open. • Click the Poll All Terminals button. • The punch data residing in all of the terminals will be added to the database and will be available in the timecard. -
Page 52: Export The Data To Usb Thumb Drive
• The automatic polling will activate on the desired day(s) at the minutes selected. To poll at specific times: • Select the “Poll Clock at these specific times” option. • Set the first time the poll is to happen and click the Add button. -
Page 53: Import The Data-Payclock Desktop
• When the export is complete the data will be saved to a file named TIME .TXT (there are 3 spaces between TIME and .TXT) on the root of the USB Flash drive. • After a few seconds the system will return to the “Functions Menu”... -
Page 55: Glossary Of Terms
Glossary of Terms Administrator The FaceIN can have up to five administrators, the administrator function allows you review the device information, set up the network communications, set the time / date and reset the clock to the factory defaults Auto Poll When a clock is automatically polled, punch data is gathered and automatically added to the database allowing you to edit, export and report on the data. -
Page 56: Index
Index Access Control 28 Add the Clock in PayClock 10 Adding Employees at the FaceIN 36 Auto Poll 22 Clearing Punches at the FaceIN 39 Clock Access Control Relay Connector Configuration 28 Clock’s 26-Bit and 34-Bit Wiegand Formats 30 Connecting the Clock to an Electromagnetic Lock 29 Connecting the Clock to an Electromagnetic Lock using a Wiegand Signal 29 Enrolling Employee Faces 13... - Page 57 Importing the data into PayClock Online 35 Install the FaceIN 5 Install the PayClock Agent Software 11 Package Contents 4 PayClock Desktop - Adding the FaceIN 43 PayClock Desktop - Auto Poll 45 PayClock Desktop - Importing punch data 47 PayClock Desktop - Polling the FaceIN 44 PayClock Desktop - Updating the FaceIN 44 Polling the Clock 22...
- Page 58 Lathem or from an authorized Lathem reseller. The conditions of this warranty and the extent of the responsibility of Lathem Time Corporation (“Lathem”) under this warranty are listed below.
- Page 60 Lathem at 1-404-691-1064. 210 The Blu s, Suite 107 • Austell, GA 30168 Copyright © 2014 Lathem Time Corporation. FaceIn, Lathem and the Lathem logo are registered trademarks of Lathem Time Corporation. All rights reserved. Windows is a registered trademark of Microsoft Corporation.
Need help?
Do you have a question about the FaceIN FR700 and is the answer not in the manual?
Questions and answers