Table of Contents
Advertisement
Installation
&
Service
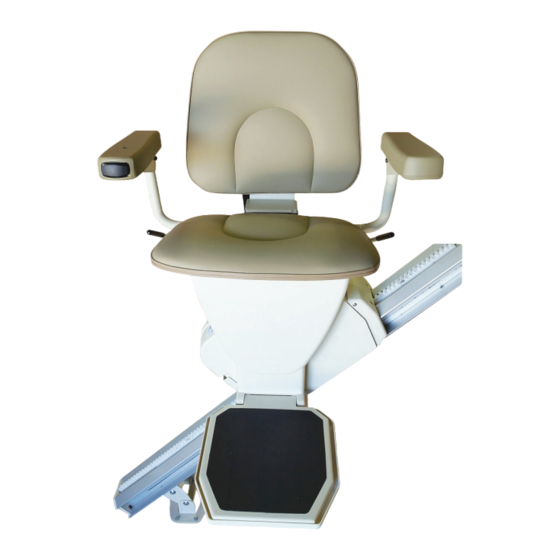
STAIR LIFT
WARNING! STRICT ADHERENCE TO THESE INSTALLATION INSTUCTIONS is required and will promote safety of those installing this
product, as well as those who will ultimately use the lift for its intended purpose. Any deviation from these instructions will void the
LIMITED WARRANTY that accompanies the product. Additionally, any party installing the product who deviates from the INSTALLATION
INSTRUCTIONS shall be taken to agree to INDEMNIFY, SAVE AND HOLD HARMLESS the manufacturer from any and all loss, liability or
damage including attorney fees, that might arise out of or in connection with such deviation.
20419 P/N: 630-00078 Rev E
Advertisement
Table of Contents

Subscribe to Our Youtube Channel
Related Manuals for AmeriGlide rave


Summary of Contents for AmeriGlide rave
- Page 1 Installation & Service STAIR LIFT WARNING! STRICT ADHERENCE TO THESE INSTALLATION INSTUCTIONS is required and will promote safety of those installing this product, as well as those who will ultimately use the lift for its intended purpose. Any deviation from these instructions will void the LIMITED WARRANTY that accompanies the product.
- Page 2 It is imperative that this manual be read and understood prior to attempting installation of the stair lift. Please observe all cautions and warnings in this manual, as well as on labels on the equipment. Rave Stair Lift Manual | www.Ameriglide.com | 866-378-6648 2 //...
-
Page 3: Table Of Contents
VI. FOLDING RAIL CONVERSION _______________________ 20 INDICATIONS OF USE STATEMENT The Rave stairway chairlift assists with the transfer of patients or mobility impaired persons, up and down between levels of a residential or private facility. Rave Stair Lift Manual | www.Ameriglide.com | 866-378-6648... -
Page 4: Preliminary Checks
• Rail Parts (plastic bag) • Adjustable seat height frame • Extra plastic racks (2 or 3) • Plastic vertical cover • Top limit cam • Nylon plugs • Seat swivel post with fasteners Rave Stair Lift Manual | www.Ameriglide.com | 866-378-6648 4 //... -
Page 5: Installation Procedures
DO NOT cut the end of the rail that contains the joint holes. Remove the charger strips and wire harness before cutting. Extension 7" 9" 11" 13" 3.9" 5" 6.1" 7.2" Horizontal intrusion on top landing Rave Stair Lift Manual | www.Ameriglide.com | 866-378-6648 5 //... -
Page 6: Rail Installation
When in final position, the nuts will be on the wall side. Step 5 Wall Side Step 6 Step 7 Rave Stair Lift Manual | www.Ameriglide.com | 866-378-6648 6 //... - Page 7 3/8" nut driver on a 6-10” extension of a cordless drill. bracket to the first step from the floor with 2-2" wood screws, using a " nut driver on a 6-10" extension of a cordless drill. Rave Stair Lift Manual | www.Ameriglide.com | 866-378-6648 7 //...
-
Page 8: Chassis Installation
Firmly tighten the two (2) bolts on the side of the chassis Step 3 facing the wall. CAUTION! Do not ride on the chassis or lift until the install is complete. Rave Stair Lift Manual | www.Ameriglide.com | 866-378-6648 8 //... -
Page 9: Final Rail Installation
Step 7: Plug in the battery charger at either end of the rail, depending on the closest or most convenient location of a wall power supply. Minimize wire length and intrusion. Step 7 Rave Stair Lift Manual | www.Ameriglide.com | 866-378-6648 9 //... -
Page 10: Footrest And Seat Installation
When the 6-pin footrest and the 8-pin chair cables are both connected to the chassis, the black installation switch on the chassis is disabled and will not function. Step 10 Rave Stair Lift Manual | www.Ameriglide.com | 866-378-6648 10 //... - Page 11 Turn the unit on again and recheck the LED indicator light cycle. When the LED indicator light remains green the lift is ready to operate. Rave Stair Lift Manual | www.Ameriglide.com | 866-378-6648 11 //...
-
Page 12: Remote Call/Send Control Operation
(the first remote control is now programmed). 7. Press and release the “UP” or “DOWN” button of the second remote control (the second remote control is now programmed). Rave Stair Lift Manual | www.Ameriglide.com | 866-378-6648 12 //... -
Page 13: Completion Procedures
Step 1: Install and fully tighten the rail bracket mounting screws — four (4) screws per bracket. For hardwood stairs, a pilot hold should be drilled first. For plywood or particle board stairs care must be taken to prevent stripping. Rave Stair Lift Manual | www.Ameriglide.com | 866-378-6648 13 //... -
Page 14: Set Upper And Lower Travel Limits
Do not use the lift until repaired. Rave Stair Lift Manual | www.Ameriglide.com | 866-378-6648 14 //... -
Page 15: Additional System Checks
Step 6: Drive to the top or bottom and check the battery charging light. If the light is orange or red, the batteries are being charged. THE LIFT IS NOW READY TO USE! Rave Stair Lift Manual | www.Ameriglide.com | 866-378-6648 15 //... - Page 16 • Folding track side-plate • Screw • Modified front and rear Rave safety switch bumpers. For new units, this box is omitted and these parts are already installed on the stair lift. Rave Stair Lift Manual | www.Ameriglide.com | 866-378-6648...
- Page 17 If you’re adding the folding rail to an existing stairway, run the Rave all the way to the top of the stairs so it is out of the way. Note that the track brackets install with the roundhead of the carriage bolts facing the stairs, the nuts are toward the wall.
- Page 18 Step 14 inside one to get it to seat flat on the floor, since the Rave track brackets intentionally lean the track toward the wall just a little. STEP 15: If you’re installing the feet onto carpet, you may want to screw-down a piece of wood or metal to make the feet seat reliably.
-
Page 19: Folding Rail Installation
STEP 19: Install the #8 screw, then tighten it and the two Allen head bolts. Step 18 If your Rave stair lift is still installed on the track, you’ll have to use a short wrench and maybe a right-angle screwdriver. -
Page 20: Folding Rail Conversion
Use a 13mm wrench to remove both ball mounts from the link arm and fork. Take both ball-ends out and set them aside. Leave the jam-nuts on them. Step 1 Rave Stair Lift Manual | www.Ameriglide.com | 866-378-6648 20 //... -
Page 21: Rave Stair Lift Manual | Www.ameriglide.com | 866-378-6648
Step 8 STEP 9: Use a " socket to loosen the two nuts that hold the lower slide-bracket tothe lower track. Don’t remove them, only loosen about two turns. Step 9 Rave Stair Lift Manual | www.Ameriglide.com | 866-378-6648 21 //... - Page 22 Loosen each about 2 turns. Step 14 STEP 15: Slide the upper bracket off the upper track out of the open ‘elbow.’ Step 15 STEP 16: Flip the upper bracket over. Step 16 Rave Stair Lift Manual | www.Ameriglide.com | 866-378-6648 22 //...
- Page 23 Don’t tighten both until both are started. Step 22 STEP 23: Put the two ball-studs for the gas strut, with their two jam- nuts, into their holes and tighten them. Step 23 Rave Stair Lift Manual | www.Ameriglide.com | 866-378-6648 23 //...
- Page 24 " socket wrench, ref. tighten to about 10' lb. Step 29 STEP 30: Now begin the changes necessary for the Rave unit. The changes are shown here on the bar chassis for clarity here. Use a #2 (medium size) Phillips screwdriver to remove the screw Step 30 toward the up-side of the Rave side-plate.
- Page 25 STEP 36: On the back side of the bumper, remove the two screws that hold the angled metal arm. This arm is to prevent the Rave from being able to travel down if the rail is already Step 36 folded down.
- Page 26 20419 P/N: 630-00078 Rev E NOTES: _______________________________________________________________________________ _______________________________________________________________________________ _______________________________________________________________________________ _______________________________________________________________________________ _______________________________________________________________________________ _______________________________________________________________________________ _______________________________________________________________________________ _______________________________________________________________________________ _______________________________________________________________________________ _______________________________________________________________________________ _______________________________________________________________________________ _______________________________________________________________________________ _______________________________________________________________________________ _______________________________________________________________________________ _______________________________________________________________________________ _______________________________________________________________________________ _______________________________________________________________________________ _______________________________________________________________________________ _______________________________________________________________________________ _______________________________________________________________________________ _______________________________________________________________________________ _______________________________________________________________________________ _______________________________________________________________________________ _______________________________________________________________________________ _______________________________________________________________________________ Rave Stair Lift Manual | www.Ameriglide.com | 866-378-6648 26 //...
- Page 27 20419 P/N: 630-00078 Rev E NOTES: _______________________________________________________________________________ _______________________________________________________________________________ _______________________________________________________________________________ _______________________________________________________________________________ _______________________________________________________________________________ _______________________________________________________________________________ _______________________________________________________________________________ _______________________________________________________________________________ _______________________________________________________________________________ _______________________________________________________________________________ _______________________________________________________________________________ _______________________________________________________________________________ _______________________________________________________________________________ _______________________________________________________________________________ _______________________________________________________________________________ _______________________________________________________________________________ _______________________________________________________________________________ _______________________________________________________________________________ _______________________________________________________________________________ _______________________________________________________________________________ _______________________________________________________________________________ _______________________________________________________________________________ _______________________________________________________________________________ _______________________________________________________________________________ _______________________________________________________________________________ Rave Stair Lift Manual | www.Ameriglide.com | 866-378-6648 27 //...
- Page 28 20419 P/N: 630-00078 Rev E...
Need help?
Do you have a question about the rave and is the answer not in the manual?
Questions and answers