
Subscribe to Our Youtube Channel
Related Manuals for Lighthouse Handheld 2016


Summary of Contents for Lighthouse Handheld 2016
- Page 1 Handheld P A R T I C L E C O U N T E R S OPERATING MANUAL Handheld 2016, 3016, 5016...
- Page 3 Lighthouse Worldwide Solutions HANDHELD 2016, 3016, 5016 Airborne Particle Counter Gen F Operating Manual...
- Page 4 Copyright © 2011-2017 by Lighthouse Worldwide Solutions. All rights reserved. No part of this document may be reproduced by any means except as permitted in writing by Lighthouse Worldwide Solutions. The information contained herein constitutes valuable trade secrets of Lighthouse Worldwide Solutions.
- Page 5 Medford, OR 97501 Declares that the product: Product Name: Handheld Airborne Particle Counter Model Number(s): Handheld 2016, 3016, 5016 Conforms to the following Product Specifications: SAFETY EN61010-1:2001 Safety Requirements for Electrical Equipment for Measurement, Control, and Laboratory Use Part I: General Requirements IEC 61010-1:2000 CAN/CSA C22.2...
-
Page 7: Table Of Contents
Table of Contents About this Manual Text Conventions ........................ i Additional Help ........................i Chapter 1 General Safety General Safety ....................... 1-1 Laser Safety Information ....................1-1 Chapter 2 Introduction Overview ........................2-1 Description ........................2-2 HANDHELD Specifications ..................2-3 Chapter 3 Unpacking, Inspecting and Installation Initial Inspection ...................... - Page 8 Lighthouse HANDHELD 2016, 3016, 5016 Gen F Operating Manual LOCATION Selection ..................4-7 Changing Locations ................4-7 Locations in AUTO Mode ..............4-7 Zoomed Data View .................... 4-8 Viewing Two Columns of Data ............4-10 CONFIGURATION Screen ..................4-13 DATA SETUP ......................4-14 Particle Channels .....................
- Page 9 Table of Contents Report Requirements ..................4-64 Fed Std ft3 .................... 4-64 ISO 14644-1 ..................4-64 EU GMP 2009 ..................4-64 Sample Printouts of Standard Reports ..........4-65 Power Shutdown Levels ....................4-68 Chapter 5 Setting up the Counter Using Report Parameters ....................5-1 Basic Requirements .......................
- Page 10 Lighthouse HANDHELD 2016, 3016, 5016 Gen F Operating Manual Valid Data in Channels (30073 - 30076) ............C-15 Data Type Registers ..................C-15 Data Units Registers ..................C-17 Index 248083400-1 Rev 7 t-iv...
-
Page 11: About This Manual
About this Manual This manual describes the detailed operation and use of the Lighthouse HANDHELD 2016, 3016 and 5016 Airborne Particle Counters. Text The following typefaces have the following meanings: Conventions Note: italics Represents information not to be typed A note appears in the sidebar to give extra or interpreted literally. - Page 12 Lighthouse HANDHELD 2016, 3016, 5016 Gen F Operating Manual 248083400-1 Rev 7...
-
Page 13: Chapter 1 General Safety
Figure 1-1 Example of Laser Warning Label seals and warranty stickers . For further technical assistance, contact Lighthouse at 800-945-5905 (USA Toll Free), 541-770-5905 (Outside of USA). 248083400-1 Rev 7... - Page 14 Lighthouse HANDHELD 2016, 3016, 5016 Gen F Operating Manual 248083400-1 Rev 7...
-
Page 15: Chapter 2 Introduction
This operating guide describes how to use the Lighthouse HANDHELD 2016, 3016 and 5016 Airborne Particle Counters. The HANDHELD 2016 has up to six particle-size channels starting at 0.2 microns with a flow of 0.1 CFM and a touch screen interface. The HANDHELD 3016 has up to six particle-size channels starting at 0.3... -
Page 16: Description
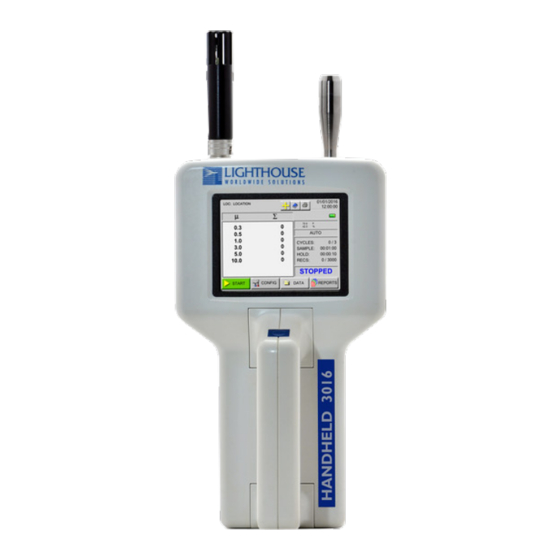
Lighthouse HANDHELD 2016, 3016, 5016 Gen F Operating Manual Description Ergonomically designed and lightweight, the Lighthouse HANDHELD 2016, 3016 and 5016 particle counters are the newest and most advanced handheld particle counters on the market. See Figure 2-1. Figure 2-1 Handheld 3016... -
Page 17: Handheld Specifications
Introduction HANDHELD Specifications 0.2 - 10.0 μm Size Range HANDHELD 2016 0.2, 0.3, 0.5, 0.7, 1.0, 2.0 μm Channel Thresholds HANDHELD 3016 0.3, 0.5, 0.7, 1.0, 2.5, 5.0 μm Channel Thresholds HANDHELD 5016 0.5, 0.7, 1.0, 3.0, 5.0, 10.0 μm Channel Thresholds Other sizing available for each model;... - Page 18 Lighthouse HANDHELD 2016, 3016, 5016 Gen F Operating Manual Power Unit: +12VDC; AC/DC Adapter: 100-240V, 50-60Hz Battery Li-Ion, removable and rechargeable Dimensions 8.75"(L) x 5.0"(W) x 2.5"(H) [22.23 x 12.7 x 6.35 cm] Weight 2.2 lb (1kg) Operating Temp/RH 50°F to 104°F (10°C to 40°C) / 20% to 95%...
-
Page 19: Chapter 3 Unpacking, Inspecting And Installation
The instrument was carefully inspected for broken parts, scratches, dents and other damage before use, even if the container appeared undamaged, and Any damages were reported to Lighthouse Technical Support at 800-945-5905 (USA Toll Free) or 541-770-5905 (Outside of USA) before proceeding. -
Page 20: Shipping Instructions
Return Merchandise Authorization (RMA) number on any the battery installed. unmarked corner. 4. Return the instrument to the address provided by your Lighthouse representative or the RMA website. Accessories You may order several optional accessories to tailor the unit to your needs. -
Page 21: Prepare Instrument For Use
The power adapter input requirement is 100-240VAC, 50-60Hz, 1.25 Amps. Its output is +12VDC, 3A. A power cord and power adapter are included with your HANDHELD 2016, 3016 or 5016. To protect the instrument from voltage spikes, Lighthouse recommends using protected power . Using an uninterruptible power supply (UPS) when the HANDHELD is kept in a stationary location will help prevent damage to the instrument or loss of data in the event of a power outage. - Page 22 Lighthouse HANDHELD 2016, 3016, 5016 Gen F Operating Manual Open the battery compartment by sliding the battery compartment door on the bottom of the unit to the left to unlock it. When the door is unlocked, open the door. The hinge is on the right side of the door.
- Page 23 Unpacking, Inspecting and Installation Figure 3-3 Insert Battery into Battery Compartment Tuck the battery release ribbon over the battery. See Figure 3-4. Figure 3-4 Tuck Battery Release Ribbon Close the door so that it is flush with the bottom of the HANDHELD as shown in Figure 3-5.
-
Page 24: Connect Power
Lighthouse HANDHELD 2016, 3016, 5016 Gen F Operating Manual Figure 3-6 Secure the Battery Compartment Door Connect Power Connect the power adapter as illustrated in the following steps: Insert the round DC power plug into its receptacle on the left side of the HANDHELD. -
Page 25: Battery Removal
Unpacking, Inspecting and Installation Plug the adapter’s AC power cord into the AC power source. The battery will begin and continue to charge until it is fully charged or DC power is removed. Battery Removal WARNING: Do not ship the instrument with the battery installed. - Page 26 Lighthouse HANDHELD 2016, 3016, 5016 Gen F Operating Manual Swing the battery compartment door open as shown in Figure 3- Figure 3-10 Open Battery Compartment Door Note: Hold the instrument securely then pull the battery release ribbon Remove the battery if the instrument will outward to disconnect the battery and slide the battery out.
-
Page 27: Optional Printer Accessory
Unpacking, Inspecting and Installation Optional Printer Accessory An optional external thermal printer can be used with the HANDHELD to print reports directly from the instrument. Connect the external printer as illustrated in the printer Read Me First, document #248083378-1, which is included on the Operating Manual Figure 3-12 HANDHELD External Printer 248083400-1 Rev 7... -
Page 28: Connecting To An External Computer Or Facility Management System
Lighthouse HANDHELD 2016, 3016, 5016 Gen F Operating Manual Connecting to an External Computer or Facility Management System The HANDHELD has the ability to be connected to the Lighthouse Monitoring System (LMS), LMS Express or LMS XChange Data Transfer Software to download its data. -
Page 29: Chapter 4 Operation
Operation This chapter describes how to use the HANDHELD 2016, 3016 and 5016 Airborne Particle Counters. Using the The HANDHELD comes with a charged battery and is ready for use. To start using the instrument, proceed as follows: Instrument WARNING: Insert the battery included with the shipment. -
Page 30: Touch Screen Overview
Lighthouse HANDHELD 2016, 3016, 5016 Gen F Operating Manual 10. When the HANDHELD starts counting, “COUNTING” appears on the display. Particle counts are displayed according to the size of each particle. Note: 11. If the instrument is in AUTO mode with cycles and a hold time,... -
Page 31: Main Screen
Operation MAIN Screen Note: The MAIN screen gives the user a single snapshot view of the status of The Screen Shots shown in this chapter were the instrument. The instrument can be powered by a power supply or taken from the 3016 from a removable battery. - Page 32 Lighthouse HANDHELD 2016, 3016, 5016 Gen F Operating Manual The MAIN screen displays the following options and information. • LOCATION: Displays the location that is currently being measured. Up to 200 alphanumeric locations can be configured. • LOCATION SELECT button: Allows user to change location before sampling.
- Page 33 Service Indicator: Indicates that the instrument may be in need of service. If wrench displays, please contact your authorized Lighthouse Service Provider for assistance or send an e-mail to techsupport@golighthouse.com. μ: The mu symbol indicates the particle sizes, in micrometers, •...
- Page 34 Lighthouse HANDHELD 2016, 3016, 5016 Gen F Operating Manual Note: • START/STOP: Press START button on the screen to start There is a one second startup during counting. When running, the instrument will display which the pump is “COUNTING” in the lower right portion of the screen as shown in accelerating to full power.
-
Page 35: Location Selection
Operation LOCATION Selection Changing Locations The location number for the environment to be measured can be changed by pressing the LOCATION button at the top of the MAIN screen. The Select Location screen opens as shown in Figure 4-6. Figure 4-6 Location Select Screen •... -
Page 36: Zoomed Data View
Lighthouse HANDHELD 2016, 3016, 5016 Gen F Operating Manual Zoomed Data View Press anywhere in the Particle Data area to display the Zoomed view. See Figure 4-7. Figure 4-7 Zoomed Data View 248083400-1 Rev 7... - Page 37 Operation In Figure 4-8, the following functions can be performed using the toggle buttons on the right side bar: START or STOP counting Display Particle data or Analog data Display Cumulative / Differential data Display Raw / Normalized particle data Display ft when configured PRINT the last record...
-
Page 38: Viewing Two Columns Of Data
Lighthouse HANDHELD 2016, 3016, 5016 Gen F Operating Manual Viewing Two Columns of Data The unit can display both Differential and Cumulative data at the same time on the Zoomed View screen. To enable this feature, go to the CONFIG: Options screen as shown in Figure 4-9. - Page 39 Operation Select the button “DiffCuml on Zoom” as shown in Figure 4-10; this will display both differential and cumulative data on the Zoomed View screen as shown in Figure 4-11. Figure 4-11 Differential and Cumulative Data in Zoomed View The buttons available when touching the data area of the screen after selecting DiffCuml on Zoom are shown in Figure 4-12.
- Page 40 Lighthouse HANDHELD 2016, 3016, 5016 Gen F Operating Manual To return the instrument to the default single-column zoom view, return to the MAIN Screen view, press CONFIG, Options and deselect the button “DiffCuml on Zoom” button. See Figure 4-13. Figure 4-13 DiffCuml on Zoom Disabled Select the MAIN button to return to the MAIN Screen view or press BACK to return to the previous level.
-
Page 41: Configuration Screen
Operation Press the MAIN button, then tap in the data area to go into the Zoomed View. See Figure 4-15. Figure 4-15 Zoomed View with Only Cumulative Data Only one column of data is displayed. CONFIGURATION Press CONFIG on the MAIN screen to display the Configuration Screen screen as shown inFigure 4-16 . -
Page 42: Data Setup
Lighthouse HANDHELD 2016, 3016, 5016 Gen F Operating Manual DATA SETUP Figure 4-17 displays the Data Setup option buttons. These options allow the user to configure the parameters for data collection during a sample. Figure 4-17 Data Setup Options Particle Channels The instrument’s particle channels can be enabled or disabled on the... -
Page 43: Analog Channels
Operation • Pressing MAIN or BACK will prompt to clear all collected data as shown in Figure 4-19. Figure 4-19 Clear Data Screen • From this screen, press CANCEL to cancel changes and return to the Configuration screen. When channels are disabled, they are removed from the MAIN screen display, from the reports, and from the printouts. - Page 44 Lighthouse HANDHELD 2016, 3016, 5016 Gen F Operating Manual To change to Celsius, press the C button. To change to Fahrenheit, press the F button. See Figure 4-20 & Figure 4-21. Figure 4-20 Analog Channels - Select Celsius Units Figure 4-21 Analog Channel - Select Fahrenheit Units...
- Page 45 Operation Temperature and relative humidity values appear on the MAIN screen with the units you selected as shown in Figure 4-22. Figure 4-22 Analog Data on MAIN Screen When the unit is not counting or when it is holding, you can display the instrument’s current Analog data by pressing press anywhere in the Particle Data area to bring up the Zoomed Data View, then press the Analog toggle button to display Analog data.
-
Page 46: Sample
Lighthouse HANDHELD 2016, 3016, 5016 Gen F Operating Manual SAMPLE Configure the Sample Time and the number of samples to be collected on the Sample screen as shown in Figure 4-24. Figure 4-24 Sample Timing Configuration Screen • CYCLES: The number cycles is set to determine how many times the instrument samples the air in a single location. - Page 47 Operation Note: The maximum hold time is 99 hours, 59 minutes and 59 seconds. If the Hold time is set to 00:00:00 in Auto This field will count down to indicate how much time is left for the Mode, the instrument will Hold period.
- Page 48 Lighthouse HANDHELD 2016, 3016, 5016 Gen F Operating Manual Note: If the particle volume is liters or m sample volume is displayed in liters. If the particle volume is cubic feet (ft ), the sample volume is displayed in cubic feet (ft...
-
Page 49: Settings
Operation SETTINGS The instrument can be configured to count in different modes and formats. See Figure 4-26. Figure 4-26 Sample Settings Screen COUNT MODE The following modes are available: Auto, Manual, Beep and Concentration. • AUTO - When the instrument is in Automatic Mode and the START button is pressed, the instrument will start counting particles automatically according to the Sample Time, Hold Time and the number of Cycles that are configured. -
Page 50: Geiger Counter Mode
Lighthouse HANDHELD 2016, 3016, 5016 Gen F Operating Manual Note: • BEEP - In this mode, the instrument is pre-configured to beep BEEP mode only works with CUMULATIVE according to the alarm threshold set in Alarm Configuration and the data and for Sample Times instrument’s sample time if the instrument is set to collect... -
Page 51: Particle Display
Operation PARTICLE Display Data on the instrument can be displayed in Differential (DIFF) or Cumulative (CUML) counts. For example, the cumulative count for the 1μm channel is the sum of that channel’s count + 2.5μm count + the 5μm count. The differential count for the 1μm channel is the number of particles between 1μm and 2.5μm. -
Page 52: Alarm Threshold
Lighthouse HANDHELD 2016, 3016, 5016 Gen F Operating Manual Note: To enable the alarming for any channel, press the “X” next to that Alarming is only applicable for AUTO and channel. When a checkmark is displayed, that channel is enabled for MANUAL mode. - Page 53 Operation Press BACK to return to the Configuration screen or press MAIN to return to the MAIN screen. Note: Alarms are triggered per sample record. At the end of the sample time, the alarms reset. Figure 4-29 2 channels Enabled for Alarming When a particle channel that is enabled for alarming goes into alarm, the selection cursor (>) and the channel size are highlighted in red as shown in Figure 4-30.
-
Page 54: Clear Buffer
Lighthouse HANDHELD 2016, 3016, 5016 Gen F Operating Manual Clear Buffer Press the Clear Buffer button to clear the instrument’s data buffer. See Figure 4-31. Figure 4-31 Clear Buffer Screen Press OK to clear the data or press Cancel to exit screen without clearing the data. -
Page 55: Clock
Operation CLOCK Use the Clock screen to set the instrument’s date and time. See Figure 4-33. Figure 4-33 Date & Time Configuration Screen Set the instrument’s Date by entering values for the desired month, day and year and then press the ENTER button. 248083400-1 Rev 7 4-27... - Page 56 Lighthouse HANDHELD 2016, 3016, 5016 Gen F Operating Manual Note: Change the Date’s format by pressing the M / D/ Y button to display the MONTH 1ST (M / D/ Y) is the default date format. date as month-first. Alternatively pressing the...
- Page 57 Operation Set the instrument’s Time by pressing the TIME button. See Figure 4-36. Figure 4-36 Configuring TIME Enter the desired Time in hours, minutes and seconds then press ENTER to save the new time. Press BACK to return to the Configuration screen or press MAIN to return to the MAIN screen.
-
Page 58: Options
Lighthouse HANDHELD 2016, 3016, 5016 Gen F Operating Manual OPTIONS Several optional configuration settings are found on the OPTIONS screen. See Figure 4-37. Figure 4-37 Options Configuration Screen CONTRAST ADJUST The contrast/brightness of the LCD screen can be adjusted by pressing the first set of UP and DOWN arrows. - Page 59 Operation WARNING: • The screen in Figure 4-38 appears. Touch anywhere on the screen to continue calibration. careful to touch the screen at the specified locations only. If touching the screen elsewhere during this process, the screen will be incorrectly aligned. Figure 4-38 Alignment Screen 1 Note: •...
- Page 60 Lighthouse HANDHELD 2016, 3016, 5016 Gen F Operating Manual • The third screen displays the arrow in the upper left corner. The arrow will have to be touched three times to ensure calibration as Figure 4-40 illustrates this. Figure 4-40 Alignment Screen 3 •...
-
Page 61: Autostart Mode
Operation Note: • Once the final alignment is complete, the following screen is The screen displayed. See Figure 4-42. Touch anywhere in the screen to return alignment function can also be accessed by to the OPTIONs screen. touching the screen when powering the instrument Figure 4-42 Alignment Saved Screen Autostart Mode... -
Page 62: One Second Output
Lighthouse HANDHELD 2016, 3016, 5016 Gen F Operating Manual Note: One Channel mode only affects how data is displayed on the MAIN If the first channel is disabled and One screen. Refer to Figure 4-43. Channel mode is enabled, the display and zoomed data view will be blank. -
Page 63: Pump Startup
Operation Pump Startup This is ON by default and sets a three-second pump ramp up time at the beginning of the first sample, or at the beginning of all samples if the HOLD time is greater than one minute, to stabilize the laser and air flow. -
Page 64: Comm Address
Lighthouse HANDHELD 2016, 3016, 5016 Gen F Operating Manual COMM ADDRESS When the HANDHELD is connected to a data collection system or daisy chained at the end of a chain of RS-485 instruments, the instrument’s COMM address is used to identify it. -
Page 65: Output Setup
Operation OUTPUT SETUP The Print configuration has several options for printing the data that the user sets on the Printer Setup screen shown in Figure 4-46. Figure 4-46 Printer Setup Screen • Output on Sample / Output on Alarm - When Output on Sample is enabled, a single record will print at the end of every sample. -
Page 66: Security
Lighthouse HANDHELD 2016, 3016, 5016 Gen F Operating Manual SECURITY To restrict access to the instrument and/or configuring the instrument, the HANDHELD has two different password levels. See Figure 4-47. Figure 4-47 Security Password Configuration Screen To restrict who can operate the instrument, enable the POWER ON password. -
Page 67: Power On Password
POWER ON password. See Figure 4-48. in a safe place. If the password is lost or forgotten, contact Lighthouse technical support for assistance. The unit may have to be returned to the factory to reset the password. -
Page 68: Service
Lighthouse HANDHELD 2016, 3016, 5016 Gen F Operating Manual SERVICE This section of the Configuration screen is reserved for Lighthouse Authorized Service Providers only. The correct service password must be entered to access this area. Three options on the lower CFG screen, STATUS, RECIPE and LOC display the instrument’s current status, configure user recipes and... -
Page 69: Recipe
Operation RECIPE Selecting the RECIPE button displays the Recipe setup screen. See Figure 4-51. Figure 4-51 Recipe Setup Screen The Recipe feature allows the user to save instrument settings for sampling and reports in a database that can store up to 50 recipes. Selecting the ADD button displays the RECIPE text screen. - Page 70 Lighthouse HANDHELD 2016, 3016, 5016 Gen F Operating Manual Pressing the ENTER button will add the recipe to the database and display the recipe CONFIG screen as shown in Figure 4-53. Each option allows the user to configure the instrument to the current recipe.
- Page 71 Operation The VIEW button displays the current settings for the highlighted recipe. See Figure 4-54. Figure 4-54 Recipe - Channel Settings Press the NEXT button to view the analog and output settings. See Figure 4-55. Figure 4-55 Recipe - Analog & Output Settings 248083400-1 Rev 7 4-43...
-
Page 72: Location
Lighthouse HANDHELD 2016, 3016, 5016 Gen F Operating Manual LOCATION The HANDHELD allows up to 200 different locations and associated alphanumeric labels. Press the LOC button on the Configuration screen to display the Select Location screen as shown in Figure 4-56. - Page 73 Operation • When selecting a location with a recipe, the user is provided with the option of loading the recipe as shown in Figure 4-57. If the user chooses not to load the recipe, the location can still be used with the current settings.
- Page 74 Lighthouse HANDHELD 2016, 3016, 5016 Gen F Operating Manual • Type in the name of the location using the alphanumeric and underscore keys. • Press the ERASE button to erase the last character typed, if needed. • Press ENTER. •...
-
Page 75: Data View Buffer Screen
Operation Data View Data that is stored on the instrument is viewed in the Data Screen. Buffer Screen When the buffer has filled to its limit of 3000 records, the newest records will overwrite the first records stored. The word “Records” on the MAIN screen will have an asterisk (*) next to it to indicate that the buffer has wrapped. - Page 76 Lighthouse HANDHELD 2016, 3016, 5016 Gen F Operating Manual Scroll through the data using the UP and DOWN arrow buttons. • The single arrow moves one record at a time. Figure 4-61 Data Screen - Normalized data in ft The Data screen displays the following information for each data record.
-
Page 77: Analog Data
OK or SRVC. If the laser needs to be serviced, it will print as Laser: Service. If laser state is SRVC, please contact Lighthouse Technical Support at 800-945-5905 (USA Toll Free), 541-770-5905 (Outside of USA). - Page 78 Lighthouse HANDHELD 2016, 3016, 5016 Gen F Operating Manual The UCL calculation will be printed for each channel size if the number of locations in the range is 2 through 9. The calculation will only print if the Format settings (Setting screen) are set to CUML and NORM.
-
Page 79: Printing Range
Operation Printing Range • To print a range of data from the buffer, scroll to the first data record to be included in the range. • Press the RANGE button. The following screen will display as shown in Figure 4-63. Figure 4-63 Print Range Screen •... - Page 80 Lighthouse HANDHELD 2016, 3016, 5016 Gen F Operating Manual ***** SUMMARY ***** **HANDHELD 3016** Serial #: 041004001 ----- Location: LOC002 06-20-2013, 15:34:30 Sample Time: 00:01:00 Flow: 0.1 cfm Laser: TEMP: 66.77 F 35.71 % Particle/ Ft^3: Size Cumul 4260.0 810.0 580.0...
-
Page 81: Reports
Operation REPORTS The HANDHELD can print the following Cleanroom Classification to Standards reports: Note: Federal Standard ft The EU GMP 2009 report is only valid if the ISO 14644-1 instrument is configured with EU GMP 2009 the 0.5 and 5.0 micron channel sizes. - Page 82 Lighthouse HANDHELD 2016, 3016, 5016 Gen F Operating Manual • When the reports mode is enabled, the currently selected report type and minimum required samples will be displayed on the MAIN screen as shown in Figure 4-66. Figure 4-66 Reports Data •...
- Page 83 Operation When one of the report options buttons is pressed, the instrument uses the current Room Area, Class Level, Air Flow and Room Status parameters to determine the minimum number of locations, samples and volume per channel in order to classify a cleanroom with that standard.
- Page 84 Lighthouse HANDHELD 2016, 3016, 5016 Gen F Operating Manual • Press the CLASS button and the Select Class screen displays as shown in Figure 4-69. Figure 4-69 Select Class Level • Press the displayed values to select the desired Class Level. The selected level will be highlighted in blue.
- Page 85 Operation Note: • Press the AREA button to display screen shown in Figure 4-70. If the entered Area values needs more locations than available, a “Not enough locations” message will be displayed and the user will be asked to enter a lesser area. Figure 4-70 Reports Area Setup Screen •...
- Page 86 Lighthouse HANDHELD 2016, 3016, 5016 Gen F Operating Manual • Press the FLOW button to display screen shown in Figure 4-72. Figure 4-72 Reports Air Flow Screen • Choose the appropriate type of air flow (Unidirectional, Non- Unidirectional), then press the BACK button to return to the SETUP screen.
- Page 87 Operation • Select the PARTICLE button to enable or disable particle channels as shown in Figure 4-74. Figure 4-74 Reports Particle Screen • Press the BACK button. • Select the SAMPLE button to configure the number of Cycles, Delay time, Hold time, Sample time and Volume. See Figure 4-75. Figure 4-75 Reports Sample Screen •...
- Page 88 Lighthouse HANDHELD 2016, 3016, 5016 Gen F Operating Manual • Select the SETTING button to format the instrument for CUML/ DIFF, RAW/NORM, ft as shown in Figure 4-76. Figure 4-76 Reports Settings Screen • Press the BACK button. • Select the LOC button to select, add or delete locations or enable Auto Inc as shown in Figure 4-77.
- Page 89 Operation • Select BACK to return to the main REPORTs screen or select SAVE to save the configuration in the Recipe database. See Figure 4-78. Figure 4-78 Reports Setup Screen • When "REPORTS" are enabled, the "LOC" and "SAVE" buttons are displayed only when thre are at least the minimum number of locations needed for the recipe area available.
-
Page 90: Setting Up Counter To Run Reports
Lighthouse HANDHELD 2016, 3016, 5016 Gen F Operating Manual Setting up Counter to Run Reports For this example, the FED STD FT report will be used. See Figure 4-80. Figure 4-80 FED STD FT3 Report Screen • Set the instrument for the Fed Std ft... -
Page 91: Report Output Setup
Operation • Press MAIN to return to the MAIN screen. • Press CFG to enter the Configuration screen. • Press SAMPLE to set the Sample time. • Press the VOLUME button to set the instrument’s sample volume. • Type in 146 and press ENTER. This sets the instrument for the channel size with the largest minimum volume requirement. -
Page 92: Report Requirements
Lighthouse HANDHELD 2016, 3016, 5016 Gen F Operating Manual • The display will return to the main REPORTS screen and start printing the report. Note: • To stop printing, press the CANCEL button. If CANCEL is pressed, the report may not stop printing right away. -
Page 93: Sample Printouts Of Standard Reports
Operation Sample Printouts of Standard Reports Figure 4-81, Figure 4-82 and Figure 4-83 are examples of a Federal Standard Ft3, ISO 14644-1 and a EU GMP 2009 reports. Note: If a recipe is loaded, the name of the recipe will be printed on ************* the report. - Page 94 Lighthouse HANDHELD 2016, 3016, 5016 Gen F Operating Manual Note: If a recipe is loaded, the name of the recipe will be printed on ************* the report. ISO 14644-1 **HANDHELD 3016** Serial#: 130602001 Targeted Class: 8 Room Area: 1.49 m^2...
- Page 95 Operation Note: If a recipe is loaded, the name of the recipe will be printed on the report. ************ EU GMP 2009 **HANDHELD 3016** Serial #: 130602021 Targeted Class: C Room Area: 1.49 m^2 Room Status: Operational Air Flow: Unidirect Min Locations: 2 Min Samples/Room: 2 Recipe: TEST...
-
Page 96: Power Shutdown Levels
Lighthouse HANDHELD 2016, 3016, 5016 Gen F Operating Manual Power When the HANDHELD is powered from its rechargeable battery, a Power Shutdown feature protects the battery from discharging Shutdown completely. A complete discharge could damage the battery. Levels Note: The battery levels are displayed in Table 4-2. -
Page 97: Chapter 5 Setting Up The Counter
Setting up the Counter Using Report Besides printing reports, the Report Setup screen can be used to display Parameters each report’s minimum requirements - such as how many data records are required and from how many different locations data must be recorded to meet a given class for a given cleanroom area. -
Page 98: Iso 14644-1
Lighthouse HANDHELD 2016, 3016, 5016 Gen F Operating Manual For the Fed Std 209E (ft) report, the classification for a particle size is based on its samples taken from all locations in the cleanroom. Each particle size is given one of the following results: •... - Page 99 Setting up the Counter The classification for a particle size is determined based on the mean of all average concentrations taken from all locations in the cleanroom. If the mean exceeds all limits, then the classification is “Out of Range”. The counter will only print channels 0.5 and 5.0 in this report.
- Page 100 Lighthouse HANDHELD 2016, 3016, 5016 Gen F Operating Manual 248083400-1 Rev 7...
-
Page 101: Chapter 6 Maintenance Procedures
Calibration To maintain optimum performance of this instrument, it should be recalibrated annually by a Lighthouse Authorized Service Provider. Cleaning This procedure may be superceded by customer requirements; however, not under any circumstances apply Acetone to the HANDHELD instrument. - Page 102 Lighthouse HANDHELD 2016, 3016, 5016 Gen F Operating Manual Allow the instrument to sample through a 30 minute period. This time allows the unit to warm up and purge any residual particles that might be inside it. Configure the unit via the touchscreen interface to sample for 5 minutes and set a 10 second hold.
-
Page 103: Appendix A Limited Warranty
Upon expiration of the initial two-year warranty, all parts and period of two years, except as noted below, without regard to repairs completed by an authorized Lighthouse repair technician whether any claimed defects were discoverable or latent on the are subject to a six (6) month warranty. - Page 104 Lighthouse HANDHELD 2016, 3016, 5016 Gen F Operating Manual 248083400-1 Rev 7...
-
Page 105: Appendix B Handheld Default Settings
HANDHELD Default Settings MENU Items and their default settings: MENU ITEM VALUE MODE AUTO DATA DISPLAY CUML DATA FORMAT PARTICLE VOL FT^3 ENVIRON UNIT PASSWORD 000000 SAMPLE TIME 00:01:00 HOLD TIME 00:00:10 # OF CYCLES COMM ADDR AUDIBLE ALERT THRESHOLD 1000 STORAGE SETUP ALL CH ON... - Page 106 Lighthouse HANDHELD 2016, 3016, 5016 Gen F Operating Manual MENU ITEM VALUE PRINT ALARM 248083400-1 Rev 7...
-
Page 107: Comm Settings
HANDHELD MODBUS Register Map v1.48 COMM Lighthouse particle counters with MODBUS have the following Settings communications settings: Table C-1 MODBUS Communications Settings Baud Rate 19200 Data Bits Stop Bits Parity None Hardware Protocol RS-232C or RS-485 Standard Software Protocol MODBUS ASCII (supports upper/lower case) The MODBUS slave address is set on the particle counter. -
Page 108: Register Map
Lighthouse HANDHELD 2016, 3016, 5016 Gen F Operating Manual Register Map Sensor Settings Registers Instrument settings are stored in holding registers (the 4xxxx series), which are mostly read/writable. Not all holding registers are writable. Table C-3 describes the content of these registers. - Page 109 HANDHELD MODBUS Register Map v1.48 Table C-3 Sensor Settings Registers Register Data Type Description 40020 ASCII string Model Name char[10], char [11] 40021 ASCII string Model Name char[12], char [13] 40022 ASCII string Model Name char[14], char [15] 40023 unsigned integer Flow Rate.
- Page 110 Lighthouse HANDHELD 2016, 3016, 5016 Gen F Operating Manual Table C-3 Sensor Settings Registers Register Data Type Description 40034 unsigned integer Sample Time [low] 40035 unsigned integer Data Set [high]. Works in conjunction with 40036. Data entered here is applied to the device through the command register.
-
Page 111: Device Status
HANDHELD MODBUS Register Map v1.48 associated with location index values. Thus the name for location =3 would be located at registers 40208-40211. Up to two hundred locations can be specified. Register 40199 indicates the number of location names supported on this device. -
Page 112: Command Register
Lighthouse HANDHELD 2016, 3016, 5016 Gen F Operating Manual Table C-4 Device Status Description DEVICE ERROR: In the event that there is a failure on the device, this bit is set to indicate possible invalid data collected. An example of a device error could be a positioning error on a manifold device. - Page 113 HANDHELD MODBUS Register Map v1.48 Table C-5 Command Register Value Action Instrument Start (Automatic Counting). Particle Counters: Uses defined Initial Delay, Hold Time, Sample Interval and counting mode. Instrument executes samples and holds until an Instrument Stop command is issued. For instruments with pumps, this command will start the pump.
-
Page 114: Data And Alarm Registers
Lighthouse HANDHELD 2016, 3016, 5016 Gen F Operating Manual Data and Data and Alarm Enable Registers Alarm The Data and Alarm Enable input registers (43xxx series) are read/ Registers write. All enable data items are 4 bytes long and are stored across 2 registers. -
Page 115: Enable Alarming For A Channel
HANDHELD MODBUS Register Map v1.48 Table C-7 Alarm Enable Registers Register Data Type Description 43016 unsigned int Enable for Particle Channel 4 [low] 43017 unsigned int Enable for Particle Channel 5 [high] 43018 unsigned int Enable for Particle Channel 5 [low] 43019 unsigned int Enable for Particle Channel 6 [high]... -
Page 116: Threshold Setup Registers
Lighthouse HANDHELD 2016, 3016, 5016 Gen F Operating Manual Table C-8 Example of Alarming on Channel 2 Particle Bit 1 Registers Channel Enabled 43013 - 43014 43015 - 43016 43017 - 43018 43019 - 43020 Use the Threshold registers to set the alarm threshold value. This is described in the next section. -
Page 117: Setting The Alarm Threshold Value
HANDHELD MODBUS Register Map v1.48 Table C-9 Alarm Threshold Registers Register Data Type Description 45014 unsigned int Threshold for Particle Channel 3 [low] 45015 unsigned int Threshold for Particle Channel 4 [high] 45016 unsigned int Threshold for Particle Channel 4 [low] 45017 unsigned int Threshold for Particle Channel 5 [high]... -
Page 118: Data Registers
Lighthouse HANDHELD 2016, 3016, 5016 Gen F Operating Manual Data Data is stored in the input registers (30xxx series), which are read-only. All data items are four bytes long and are stored across two registers. Registers Byte and word order for particle data is big-endian. Thus, data items are formed by placing the high bytes in front of the low bytes. - Page 119 HANDHELD MODBUS Register Map v1.48 Table C-11 Data Registers Register Data Type Description 30010 unsigned integer Particle Channel 1 [low] 30011 unsigned integer Particle Channel 2 [high] 30012 unsigned integer Particle Channel 2 [low] 30013 unsigned integer Particle Channel 3 [high] 30014 unsigned integer Particle Channel 3 [low]...
-
Page 120: Device Status Word (30007 - 30008
Lighthouse HANDHELD 2016, 3016, 5016 Gen F Operating Manual Note: The timestamp field indicates when the data record was recorded. Particle data is always a cumulative raw Timestamps are stored as the number of seconds since 1/1/1970, the count regardless of the Unix time epoch. -
Page 121: Valid Data In Channels (30073
HANDHELD MODBUS Register Map v1.48 Valid Data in Channels (30073 - 30076) Register 30073 represents the flag bits corresponding to valid data present in the analog register range. The mapping is such that bit 0 set to TRUE (=1) would correspond to valid data present in Analog Channel 1. - Page 122 Lighthouse HANDHELD 2016, 3016, 5016 Gen F Operating Manual Table C-13 Data Types String Description TIME Timestamp STIM Sample Time SVOL Sample Volume Location STAT Status TEMP Temperature Relative Humidity AIRV Air Velocity DPRS Differential Pressure Electrostatic Discharge FLOW Flow Rate...
-
Page 123: Data Units Registers
HANDHELD MODBUS Register Map v1.48 Data Units Registers The 42xxx register series identifies units used by data items in the 30xxx series and run in parallel with the Data Registers. For example, Data Register 30010’s Units Register is 42010. Note: Units are stored as 4 character ASCII strings across 2 registers. - Page 124 Lighthouse HANDHELD 2016, 3016, 5016 Gen F Operating Manual 248083400-1 Rev 7 C-18...
- Page 125 Index Numerics 5 Second Startup 4-35 Calibration 2-3 CFG password Enabling 4-38 Changing Locations 4-7 Channel Threshold 2-3 AC Indicator 4-3, 4-4 Class Level 4-56, 4-62, 5-1 Accessories, list of 3-2 Clear Buffer 4-26 Carrying Case 3-2 Clock 4-27 External Battery Charger 3-2 COMM Address 4-36 Isokinetic Sample Probe 3-2 Command Register C-6...
- Page 126 Lighthouse HANDHELD 2016, 3016, 5016 Gen F Operating Manual Sample Volume 4-19 Security 4-38 Service Screen 4-40 Features 2-2 Configuration Password 4-39 Fed Std 209E 5-1 Configuration Screen 4-13 feet 5-1 Data Setup 4-13 Fed Std 209E (ft) 4-64 Device Setup 4-13...
- Page 127 Index MANUAL 4-21 Print Record Button 4-50 Manual Mode 4-5 Print Separator 4-37 Minimum Locations 5-1 Print Serial Number 4-37 Minimum Samples 5-1 Print Setup Minimum Volume 5-1 Print Cumulative Data 4-37 MODBUS output Print Differential Data 4-37 One second 4-34 Print Model Name 4-37 Mode 4-5 Print On Alarm 4-37...
- Page 128 Lighthouse HANDHELD 2016, 3016, 5016 Gen F Operating Manual Sample Setting 4-21 Laser Status 4-49 Count Mode 4-21 Print Record 4-50 Sample Time 4-5, 4-19 Viewing Analog Data 4-49 Sample Timing 4-18 Sample Volume 4-19 Security 4-38 Select Location 4-4...
- Page 130 Service and Support Tel. 1-800-945-5905 (USA Toll Free) Tel. 1-541-770-5905 (Outside of USA) techsupport@golighthouse.com www.golighthouse.com...
Need help?
Do you have a question about the Handheld 2016 and is the answer not in the manual?
Questions and answers