
Related Manuals for Allsheng AMR-100


Summary of Contents for Allsheng AMR-100
- Page 1 Operations Manual Version 2.0 AMR-100 Microplate Reader Hangzhou Allsheng Instruments Co.,Ltd.
- Page 2 Foreword Thank you for purchasing our Microplate Reader. This user manual describes how the instrument works and the operation guide, please read carefully before operation and keep for future reference.
- Page 3 Please check the instruments as well as all accessories with packing list when you first open it. If you find any wrong or missing, please contact distributor or manufacturer. HANGZHOU ALLSHENG INSTRUMENTS CO., LTD. Address: #2, Xiyuan 6th Road, Xihu Economic & Technology Zone, Hangzhou, Zhejiang 310030 China...
-
Page 4: Safety Warming And Guidelines
Safety warming and guidelines 1. Important information for safe use Users should have a clear main idea on how to use this instrument before operate, do read this user manual carefully. Any improper operation without reading manual is forbidden, otherwise there will be risks in cause accidental injury or electrical shock. - Page 5 The operator should not open or repair the Instrument by himself, which will result in losing the qualification of repair guarantee or occur accident. If there is some wrong with the Instrument, please contact manufacturer for repair. Before power on, guarantee the voltage used should be accordant to the voltage needed, and the rated load of electrical outlet should not lower than the demand.
-
Page 6: Table Of Contents
Contents Foreword..............................I Opening check............................II Safety warming and guidelines......................III Important information for safe use..................III 2. Safety Tips..........................III Chapter 1 Brief introduction......................1 Chapter 2 Features..........................2 Chapter 3 Instrument structure......................3 Chapter 4 Installation......................... 4 Opening check......................... 4 Installation..........................4 Installation steps........................ -
Page 7: Chapter 1 Brief Introduction
Chapter 1 Brief introduction This automatic microplate reader AMR-100 is professional instrument for EIA test , measuring concentration, absorbance, positive or negative of the antibody and antigen in the sample by testing the color of the Enzyme - Linked Immunosorbent Assay ( ELISA ). This reader is widely used in clinical test, biology agriculture, food and environment research, especially benefit from ELISA kits increasingly wide utilization. -
Page 8: Chapter 2 Features
AMR-100 Microplate Reader User manual Chapter 2 Features Chapter 2 Features Working conditions: Ambient temperature: 4C~45C The relative humidity: ≤70% Power: AC100-240V 50-60Hz 2A The basic parameters and characteristics Model AMR-100 Parameter Light source 6V 10W Quartz-Halogen lamp Wavelength 400~750nm Optical filter Four standard filter 405/450/492/630 nm, max load eight filters. -
Page 9: Chapter 3 Instrument Structure
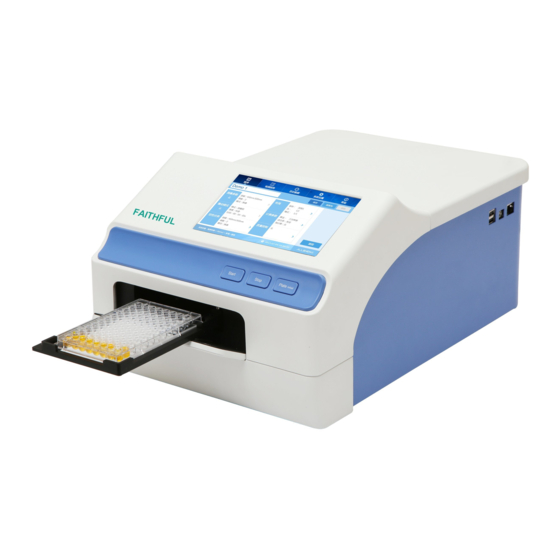
AMR-100 Microplate reader user manual Chapter 3 Instrument structure Chapter 3 Instrument structure Before first use of this instrument, please read this chapter carefully to make a better preparation. Structure Touch screen Rear cover Roof cover Decoration bar Rear cover... -
Page 10: Chapter 4 Installation
Chapter 4 Installation 1. Opening check Each AMR-100 is completely checked before package, please check again when you receive instrument after transportation, contact your local distributor or manufacturer in case of: The outer package inverted or deformation. The outer package has an obvious stains of water. -
Page 11: Chapter 5 Operation Guide
AMR-100 Microplate reader user manual Chapter 5 Operation guide Chapter 5 Operation guide Section 1 Instrument self checking This chapter introduces default programs operation, it begins to self checking after turned on. Refer to the picture below fig 1 There are 4 parts in the software: Programs, Report, Settings, Help. -
Page 12: Section 2 Program Interface
AMR-100 Microplate reader user manual Chapter 5 Operation guide Section 2 Program interface After self-check complete, enter the software main “Program” interface. File management Parameter setting Function Key fig 2 File management, Function Key and Qperation 1.1. File management The name of current program file:... - Page 13 AMR-100 Microplate reader user manual Chapter 5 Operation guide fig 3 Save the current program Click “Save” button to save the setting program and view it in “File List”. Note: The new program will not be set after detecting sample and display in gray font;...
- Page 14 AMR-100 Microplate reader user manual Chapter 5 Operation guide fig 4 Click “Batch OP” to enter the interface(Fig 5): fig 5 You can batch deletion, import and export the program files. :Delete the program file(Fig 7). :Click “USB Drive” button to exchange the program files between hard disk drive and external USB drive(Fig 6,8).
- Page 15 AMR-100 Microplate reader user manual Chapter 5 Operation guide :Import the external USB drive data to hard disk drive. :Select the whole program files in the hard disk drive (external USB drive) and then the button will be change to “...
- Page 16 AMR-100 Microplate reader user manual Chapter 5 Operation guide fig 8 1.2. Function button :Click to detect the sample. :Click to stop the detection. : Click to control the Elisa plate in and out. Note: It will create a new file when click “Run” button and then input the name of program file.
- Page 17 AMR-100 Microplate reader user manual Chapter 5 Operation guide fig 9 Click “ ” on the screen or “Start” button on the front panel to start the running(Fig 10). fig 10 Note: You can only click “Stop” button to stop the running.
- Page 18 AMR-100 Microplate reader user manual Chapter 5 Operation guide fig 11 2. Programs setting This part introduces how to create program, set parameters(wavelength, shaking mode), layout, shaking setting, data calculate, qualitative setting, quality control setting and program save. 2.1. Mode setting(Measure)...
- Page 19 AMR-100 Microplate reader user manual Chapter 5 Operation guide Filter1 setting Click right part near “Filter1” to choose wavelength(Fig 9). fig 13 There are 4 standard filter equipped: 405nm, 450nm, 492nm, 630nm, choose one as Filter1’s wavelength. Filter2 Setting This instruments can measure with single wavelength as well as double wavelength.
- Page 20 AMR-100 Microplate reader user manual Chapter 5 Operation guide Measurement speed choice: Two mode available : Fast, Normal. Click right part near ”Mode” to choose , see picture below: fig 15 Note: “Normal” mode is recommended . Press “OK” to finish setting and return back to main interface.
- Page 21 AMR-100 Microplate reader user manual Chapter 5 Operation guide How to set layout: Firstly choose a type needed (the one be selected will be marked with read frame, like picture above UD(unknown sample) Type, then select well positions on plate layout (all positions are correspondent between plate layout and microplate) , the selected positions on layout will show the color of the type.
- Page 22 AMR-100 Microplate reader user manual Chapter 5 Operation guide fig 18 You can set 9 QA control positions, and can set several wells with same number. : Unknown sample position. Set several position as unknown position. Instrument default setting all positions on plate as unknown sample.
- Page 23 AMR-100 Microplate reader user manual Chapter 5 Operation guide 2.2.2. Standard sample concentration setting On interface “Plate layout”, press “Concentration” at the right side, you will come to concentration setting interface as below(Fig 19): fig 19 It will show all 12 standard samples on this interface, only set the concentration for position ...
- Page 24 AMR-100 Microplate reader user manual Chapter 5 Operation guide curve fitting and measurement result. “Unit” can set/select by pressing button of ”Unit” at right side(Fig 21). fig 21 Press “OK” to confirm and return back to main interface.
- Page 25 AMR-100 Microplate reader user manual Chapter 5 Operation guide Click button right beside “Shake” to choose “On” or “Off”(Fig 23). fig 23 ” to set speed, Click button right beside “Speed Slow, Normal, Fast(Fig 24). fig 24 to set time, input numbers to set ...
- Page 26 AMR-100 Microplate reader user manual Chapter 5 Operation guide fig 25 Press to complete settings, and return back to “Programs” interface. 2.4. Calculate This part is setting for sample testing result processing method, including Kinetic, Pre-process, Curves. 2.4.1. Kinetic setting On interface “Programs”, click white area near “Calculate”...
- Page 27 AMR-100 Microplate reader user manual Chapter 5 Operation guide Click button right beside “Interval” to set interval of each reading, time format: hour/minute/second. At right side of interface , click “Parameters” to set(Fig 27). fig 27 Type: There are different Results in report indicating Rate of change, time to change, absorbance rate, due to different types you choose.
- Page 28 AMR-100 Microplate reader user manual Chapter 5 Operation guide fig 28 2.4.2. Pre-process setting (double wavelength) In the interface of “Calculate parameters”, click button right beside “Preprocess”, interface comes out as below(Fig 29): fig 29 You can choose the preprocess method when testing by double wavelength as needed.
- Page 29 AMR-100 Microplate reader user manual Chapter 5 Operation guide 2.4.3. “Curves fitting” setting In the interface “Calculate parameters” , click button right beside “Curves”, interface comes out as below(Fig 30): fig 30 Here, you can set curving fitting by different options: linear, logistic, CubicSpline, PtoP, Factor.
- Page 30 AMR-100 Microplate reader user manual Chapter 5 Operation guide Click button right beside “source”, choose one from ”ABS” and con.(for concentration) as , the “ a,b,c” are reagent needed. Formula for threshold value “cutoff”: control coefficient, can be set as needed, “NC” is negative control average value, “PC” is positive control average value.
- Page 31 AMR-100 Microplate reader user manual Chapter 5 Operation guide fig 33 Click button “On” to set quality controls function by choosing Open or Close. Click “Target” column date to set Quality controls concentration or ABS value, click SD column date to set the standard deviation value for QC concentration or ABS.
-
Page 32: Section 3 Report
AMR-100 Microplate reader user manual Chapter 5 Operation guide Section 3 Report Report interface is for showing you measurement result as well as the history data of latest measurement. After measurement in interface Programs, software will go to “Report” automatically, showing the current program measurement result. - Page 33 AMR-100 Microplate reader user manual Chapter 5 Operation guide fig 35 End point method export interface fig 36 Dynamics data export interface Note: Check the USB flash disk has been inserted in the instrument before export data. Click “Print” button to print the data when connect the thermal printer(Optional).
- Page 34 AMR-100 Microplate reader user manual Chapter 5 Operation guide fig 37 “ ” “ ” “ ” Symbol above each ABS means positive, red : positive, yellow : weak positive. Right side shows threshold value “Cutoff”, refer part 2.5 for details(Fig 37).
- Page 35 AMR-100 Microplate reader user manual Chapter 5 Operation guide fig 38 1.4 “Curves” Standard curve fitting result with formula, you can preprocess the ABS and input standard concentration and then make curve fitting if the previous fitting is not good enough(Fig 39).
-
Page 36: Kinetics Report Interface
AMR-100 Microplate reader user manual Chapter 5 Operation guide fig 40 2. Kinetics Report interface 2.1 Kinetics measurement Raw data fig 41 The picture above(Fig 41) showing the ABS value under the current measurement cycle, click to shift the cycles. - Page 37 AMR-100 Microplate reader user manual Chapter 5 Operation guide fig 42 indicating the data process method of kinetics measurement(Fig 42). (See section 2, 2.4.1 Kinetics setting) 2.3 Kinetics measurement Curve fig 43 It indicates change curve of each sample position ABS detection according to different cycles under kinetics measurement(Fig 43).
- Page 38 AMR-100 Microplate reader user manual Chapter 5 Operation guide Press to shift sample position on microplate, when at A1 and click to see absorbance change curve all of sample positions(Fig 44). Can input the sample position No. To check curve(Fig 45).
-
Page 39: Section 4 Settings
AMR-100 Microplate reader user manual Chapter 5 Operation guide Section 4 Settings This part mainly introduces settings of Language, filter, maintenance, print, quality control, screen calibration, date and time. Click Setting at the upper are of the main interface: fig 46... -
Page 40: Filter Setting
AMR-100 Microplate reader user manual Chapter 5 Operation guide fig 48 Select one language needed and press OK to complete. Now only English and Chinese are available. Filter setting This instrument is equipped with four standard filters which have positions on the filter wheel from 1-4. -
Page 41: Maintenance
AMR-100 Microplate reader user manual Chapter 5 Operation guide lick the blank position No., input the wavelength, default unit is nm(Fig 50). fig 50 In case of wrong input, double click to input again. Standard equipped with 1-4 filter, and the wavelength are as picture above. -
Page 42: Print Setting
AMR-100 Microplate reader user manual Chapter 5 Operation guide control microplate holder position in or out of the instrument. Click “Keep in” button to choose “Keep in” or “Keep out” . “Keep in” will make microplate holder in side after measurement, while “Keep out”... -
Page 43: Help
AMR-100 Microplate reader user manual Chapter 5 Operation guide fig 53 In case that you want to change date and time, click the area to set(Fig 54), fig 54 Click “OK” to complete setting. Help Help function is unavailable for the moment. -
Page 44: Chapter 6 Maintenance, Storage, Transportation
AMR-100 Microplate reader user manual Chapter 6 Maintenance, storage, transportation Chapter 6 Maintenance, storage, transportation Maintenance Keep storage environment dry and clean to prevent moisture, corrosion, away from strong electromagnetic interference sources. Instrument already calibrated before leave factory. User is not allowed to disassembly and make adjustment. - Page 45 AMR-100 Microplate reader user manual Chapter 6 Maintenance, storage, transportation Light source connector Light source Light source pressing plate Light source assembly part fig 55 fig 56 2) Install optical filter Instrument is equipped with four standard filter inside, in case of need other wavelength, please operate as following steps, turn off the instrument before changing filter.
- Page 46 AMR-100 Microplate reader user manual Chapter 6 Maintenance, storage, transportation Filter wheel Screw Light incident direction fig 57 fig 58 Note: Instrument is equipped with four standard filter inside, please ignore this step if you don’t need other filters.
-
Page 47: Storage And Transportation
AMR-100 Microplate reader user manual Chapter 6 Maintenance, storage, transportation Don’t touch filter to avoid contamination or affect the precision. Don’t touch any other mechanical or electric part when installing the filter wheel. Storage and transportation Storage in room temperature -10℃~40℃, relative humidity less than 80%, without corrosive gas and with good ventilation. -
Page 48: Chapter 7 Trouble Shooting
AMR-100 Microplate reader user manual Chapter 7 Trouble shooting Chapter 7 Trouble shooting Fault phenomenon Possible Causes Solutions Check power supply, Check cable plug status, Instrument can not start Power defective Check fuse, Check voltage Power to lamp failure, Check power before replace,... -
Page 49: Chapter 8 Accessories
AMR-100 Microplate reader user manual Chapter 8 Accessories Chapter 8 Accessories Item Specs Unit Remark Power cable Touch pen Mouse Logitech Install or change Allen wrench 2.5mm optical filter U Disk Kingston-4G Export/Import data User’s manual Standard equipped with four filters: 405nm, 450nm, 492nm, 630nm. - Page 50 AMR-100 Microplate reader user manual Chapter 8 Accessories Memo ─ ─...
Need help?
Do you have a question about the AMR-100 and is the answer not in the manual?
Questions and answers