
Related Manuals for Allsheng Auto-Pure Mini


Summary of Contents for Allsheng Auto-Pure Mini
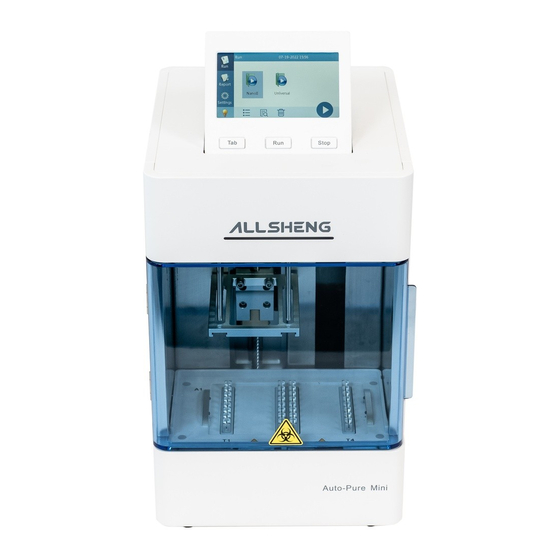
- Page 1 Operation Manual V1.0 Auto-Pure Mini Nucleic Acid Purification System Hangzhou Allsheng Instruments Co., Ltd.
- Page 2 If anything wrong or missing, please contact the distributor or the manufacturer. HANGZHOU ALLSHENG INSTRUMENTS CO., LTD. Add: Building 1 & 2, Zheheng Science Park, Zhuantang Town, Xihu District, Hangzhou, Zhejiang 310024, China Tel.: 0086-0571-89948289...
- Page 3 The operator should not repair the instrument in case any injury or out-of warranty. If service required, please contact Allsheng or your local distributor for repair. Before powering on, please make sure the voltage of the power supply is consistent with the required voltage.
- Page 4 Disconnect the power cord from the jack at once in the following cases, and contact your local distributor or Allsheng: Liquid enters into the Instrument; Instrument was rained or watered.
- Page 5 The above warranty is not applicable to the damage caused by users' improper maintenance, use under non-conforming conditions, repair or modify without authorization. After-sales service: HANGZHOU ALLSHENG INSTRUMENTS CO., LTD. Add: Building 1 & 2, Zheheng Science Park, Zhuantang Town, Xihu District, Hangzhou, Zhejiang 310024, China Tel.: 0086-0571-89948289...
-
Page 6: Table Of Contents
Contents Chapter 1 Introduction ..................1 1. Application ...................... 1 2. Contraindication..................... 1 3. Service Life ...................... 1 Chapter 2 Specifications .................. 2 1. Working Conditions..................2 2. Basic Parameters ..................... 2 3. Outline Dimension ..................3 Chapter 3 Basic Operating Instructions............4 1. -
Page 7: Chapter 1 Introduction
Auto-Pure Mini Operation Manual Chapter 1 Introduction Chapter 1 Introduction Auto-Pure Mini nucleic acid purification instrument is a newly launched automatic extraction and purification system for DNA/RNA, proteins and cells. It can absorb, transfer and release magnetic beads by magnetic rod and magnetic rod's tip to separate magnetic beads and samples. -
Page 8: Chapter 2 Specifications
Auto-Pure Mini Operation Manual Chapter 2 Specifications Chapter 2 Specifications 1. Working Conditions Environmental Temperature: 10C~40C Relative Humidity: ≤80% Input Voltage: AC 100~240V, 50Hz/60Hz Basic Parameters Table 1 Parameters Model Auto-Pure Mini Parameters Principle Magnetic Particle Method, Magnet type Sample Volume 50μL—1000μL... -
Page 9: Outline Dimension
Auto-Pure Mini Operation Manual Chapter 2 Specifications Special magnetic rod tip, 96-Deepwell plate, special single sample consumables Purification Fan exhaust, UV disinfection disinfection Power Supply 100-240V±10%、50-60Hz±5%; support battery power Power Standby 10W, MAX 150W Operating 10℃~ 40℃ temperature Operating humidity Less than 80% 3. -
Page 10: Chapter 3 Basic Operating Instructions
Auto-Pure Mini Operation Manual Chapter 3 Basic Operating Instructions Chapter 3 Basic Operating Instructions This chapter mainly introduces structures, basic operation keys, displays, as well as preparations before starting up. Please read this chapter carefully before using 1. Structure 1.1. Front... - Page 11 Auto-Pure Mini Operation Manual Chapter 3 Basic Operating Instructions Power Socket Fuse Power Switch RS232 Port Fig 3 Back 1.3. Side USD Port Fuse PC Port Fig 4 Side...
-
Page 12: Operation Panel
Auto-Pure Mini Operation Manual Chapter 3 Basic Operating Instructions 1.4. Test area Lighting, UV lamp (top of test area) State lamp Magnetic rod holder Magnetic rods Magnetic rod's tip holder Magnetic rod's tip 96-Deepwell plate Cooling fan (bottom of test area) -
Page 13: Chapter 4 Operations
Auto-Pure Mini Operation Manual Chapter 4 Operations Chapter 4 Operations 1. Preparation before use Remove the instrument from the packing case, Remove the tape holding the cabin door, open the door, remove the fastening belt between the magnetic rod holder and the Magnetic rod's tip holder. Then unscrew the hexagonal screw fixing the lifting part at the bottom of the instrument to release the lifting part. -
Page 14: Power Connection
Auto-Pure Mini Operation Manual Chapter 4 Operations Note: Please pay more attention to magnetic rods during the operation in case any damage! 2. Power Connection AC 100 ~ 240V 3. Kits Installation 3.1. 96-Deepwell plate installation Open the cabin door. First, place the plate with the sample in the position slot according to the arrow ①. -
Page 15: Magnetic Rod's Tip Installation
The number of magnetic rod's tip can be determined according to the number of samples. Magnetic rod's tip Fig 11 Magnetic rod's tip installation Note: Up to 2 pcs magnetic rod's tip for Auto-Pure Mini. -
Page 16: Remove Magnetic Rod's Tip
Auto-Pure Mini Operation Manual Chapter 4 Operations 5. Remove magnetic rod's tip Press the button on the magnetic rod's tip by the arrow ①, and pull out the it along the direction of the arrow ②. Fig 12 Remove magnetic rod's tip 6. - Page 17 Auto-Pure Mini Operation Manual Chapter 4 Operations Fig 13 Installation path 6.1.2 Main interface After the software installed, click “ ”software icon on the interface, After the startup is completed, you will enter the startup interface, where the software version information will be displayed. Then into the main interface, whose...
- Page 18 Auto-Pure Mini Operation Manual Chapter 4 Operations Table 2 Title bar menu Icon Name Function Protocol Click into protocol interface Click to quickly create new protocol Download Click into download protocol interface Instrument Click into instrument management and setting interface...
- Page 19 Auto-Pure Mini Operation Manual Chapter 4 Operations Fig 15 Protocol list interface The protocol interface mainly displays the protocol list, with new, preview, selection, protocol search and other function. Fig 16 Preview protocol...
- Page 20 Auto-Pure Mini Operation Manual Chapter 4 Operations Fig 17 Preview protocol When selecting a single protocol, four buttons appear at the bottom of the interface, Transmission, Delete, Protocol code and Save as, which can carry out Bluetooth transmission, protocol Delete, generate the QR code of the protocol and save the protocol;...
- Page 21 Auto-Pure Mini Operation Manual Chapter 4 Operations Fig 18 1 protocol selected Fig 19 Multiple protocol selected When multiple protocols are selected, only Bluetooth transmission and protocol deletion can be performed. Transmission: Transfer the selected protocol on the APP to the instrument;...
- Page 22 Auto-Pure Mini Operation Manual Chapter 4 Operations Fig 20 Protocol transmission Fig 21 Protocol deletion Delete: Removal unnecessary protocol; Save as: The selected single protocol can be saved as a new protocol (default save protocol name is current time + serial number, up to 8 characters, letters,...
- Page 23 Auto-Pure Mini Operation Manual Chapter 4 Operations Fig 22 Protocol save as Fig 23 QR code generation Protocol QR code: Click “QR code”, Pop-up code generation interface, every 15 steps to generate a QR code (operation under a single protocol);...
- Page 24 Auto-Pure Mini Operation Manual Chapter 4 Operations 6.1.4 New protocol Click the "New" icon on the protocol interface to customize the protocol name. The default protocol name is the time. For example, The current time is 7:14, so the first protocol is 07141, the second protocol is 07142, and so on.As shown in the figure below;...
- Page 25 Auto-Pure Mini Operation Manual Chapter 4 Operations Fig 26 New step Fig 27 Custom steps added...
- Page 26 Auto-Pure Mini Operation Manual Chapter 4 Operations Table 3 Project interface function Icon Name Function Move Long press this key to drag step sequence Select circle Select step Step New steps Protocol code Generates the code for the selected protocol...
- Page 27 Auto-Pure Mini Operation Manual Chapter 4 Operations Fig 28 Step delete and copy 6.1.4.1 Step parameters settings Click a single step to enter the parameter setting interface, as shown in Table 4, Only 1 and 6 hole have heating function, the top display is the current set hole...
- Page 28 Auto-Pure Mini Operation Manual Chapter 4 Operations Fig 29 General parameter settings Fig 30 Advanced parameter...
- Page 29 Auto-Pure Mini Operation Manual Chapter 4 Operations The parameters of each step are shown in the following table: Table 4 Step information description Name Meaning Save Click to save settings Name of step. A step is not allowed to be renamed. Only a Name custom step can be renamed.
- Page 30 Auto-Pure Mini Operation Manual Chapter 4 Operations Fig 31 Option settings The setting meanings of each option are shown in the following table; Table 5 Option settings Step Option Meaning When running to the heating hole position, the magnetic rod's tip or magnetic rod will start to action...
- Page 31 Auto-Pure Mini Operation Manual Chapter 4 Operations rod action Cooling fan Optional on or off, off by default When wait step performed, the bottom of the Above the kit magnetic rod's tip is placed The default drying above the kit position is on the top of the kit;The default...
- Page 32 Auto-Pure Mini Operation Manual Chapter 4 Operations 6.1.6 Download Before using this function, it is necessary to connect the Bluetooth of the mobile phone. After successfully connecting the Bluetooth, APP can acquire the protocol list and running log list of the instrument and download them. The downloaded protocol can be viewed and edited in the "Protocol - Instrument...
- Page 33 Auto-Pure Mini Operation Manual Chapter 4 Operations Fig 34 Acquire the protocol list Fig 35 Protocol download...
- Page 34 Auto-Pure Mini Operation Manual Chapter 4 Operations After the protocol is downloaded successfully, duplicate name detection is performed, as shown in Figure 36. Fig 36 Duplicate name detection Note: The detection of duplicate name conditions for downloading and receiving APP are: ① The protocol name is the same; ② The SN number of the instrument is the same;...
- Page 35 Auto-Pure Mini Operation Manual Chapter 4 Operations Fig 37 Running log download Fig 38 Log preview...
- Page 36 Auto-Pure Mini Operation Manual Chapter 4 Operations 6.1.7 Instrument 6.1.7.1 Instrument interface Bluetooth can be turned on or off: When Bluetooth is not turned on the mobile device, a prompt box will ① appear when Bluetooth is enabled in the APP, as shown in figure 40;...
- Page 37 Auto-Pure Mini Operation Manual Chapter 4 Operations Fig 40 Bluetooth on prompt Fig 41 Instrument connection prompt Note: The default Bluetooth name is corresponding to the SN number of the device to be connected. 6.1.7.2 Modify instrument information Click on instrument interface to enter modify instrument information interface, as shown in figure 42.
- Page 38 Auto-Pure Mini Operation Manual Chapter 4 Operations 6.2 Instrument software 6.2.1 Start-up Interface Turn on the instrument, start-up interface will comes up. Fig 43 Start-up Interface 6.2.2 Protocol running After self-check, enter the protocol run interface, the interface is divided into two types: quick display mode and list display mode;...
- Page 39 Auto-Pure Mini Operation Manual Chapter 4 Operations Fig 45 Protocol running-- List mode Click “ ”, the preview button can preview the selected protocol, as shown in the figure below; Fig 46 Preview protocol Several function buttons of run interface are shown in the table below.
- Page 40 Auto-Pure Mini Operation Manual Chapter 4 Operations Run, click and run the selected protocol 6.2.3 Run Click the "Run" button to enter the run interface directly; Fig 47 Run interface 6.2.4 Report interface Each time to run the protocol, the instrument automatically generates and stores an running report, which contains name, time, step information, alarm record and instrument information, etc., and can be exported.
- Page 41 Auto-Pure Mini Operation Manual Chapter 4 Operations Table 7 Button function description Icon Function Delete, used to delete the selected report Search, used to search for the specified report Export, can be exported to U disk 6.2.5 Settings interface The Settings interface mainly has four functions: “UV”, “Fan”, “settings” and “Instrument”;...
- Page 42 Auto-Pure Mini Operation Manual Chapter 4 Operations Fig 49 UV sterilization Fan: users can choose “On” or “Off”; Fig 50 Fan Settings interface is divided into “Time”, “Language”, “Transfer”, “Bluetooth” and “Version”, as shown in the figure below;...
- Page 43 Auto-Pure Mini Operation Manual Chapter 4 Operations Fig 51 System Settings Fig 52 Settings Time Settings, as shown in the figure below; Fig 53 System time...
- Page 44 Auto-Pure Mini Operation Manual Chapter 4 Operations Language Setting, support in Chinese and English; Fig 54 Language Settings After inserting the U disk, import or export the program by click “Transfer”; Fig 55 Transfer...
- Page 45 Auto-Pure Mini Operation Manual Chapter 4 Operations Bluetooth Setting, open or close Bluetooth, and the name of Bluetooth is the serial number of the corresponding instrument; Fig 56 Bluetooth System maintenance Settings, this function is only open to after-sales maintenance personnel, the instrument has been adjusted before leaving the factory, the user does not need to set.
-
Page 46: Chapter 5 Trouble Shooting
Auto-Pure Mini Operation Manual Chapter 5 Trouble Shooting Chapter 5 Trouble Shooting Trouble shootings Symptom Causes Analysis Method Power not connected Check power Switch failure Replace switch No display after switch on Fuse failure Replace fuse (250V F6.3A 5X20) Others... - Page 47 Auto-Pure Mini Operation Manual Chapter 5 Trouble Shooting Software Error Alarm List Trouble Error T1, T2, T3, T4 temperature overheat E011, E021, E031, E041 T1, T2, T3, T4 open circuit E015, E025, E035, E045 T1, T2, T3, T4 short circuit...
-
Page 48: Chapter 6 Acronyms And Marks
Auto-Pure Mini Operation Manual Chapter 6 Acronyms and Marks Chapter 6 Acronyms and Marks 1. Acronyms For reference only, may appear in the above user manual. Ampere Alternating Current Volt Hertz Watt Universal Serial Bus Safety Digital Code WiFi Wireless LAN... -
Page 49: Marks
Auto-Pure Mini Operation Manual Chapter 6 Acronyms and Marks 2. Marks The following marks appear on the device. Warning Heating European standard Beware of clamping hand... -
Page 50: Appendix: Wiring Diagram
Auto-Pure Mini Operation Manual Appendix: Wiring Diagram Appendix: Wiring Diagram ( For reference only, without notification if updated.) The stepper motor Bluetooth module moves left and right Scanner Photoelectric switch Photoelectric switch LCD panel key The main board Stepper motor, magnetic rods’... - Page 51 Memo...
Need help?
Do you have a question about the Auto-Pure Mini and is the answer not in the manual?
Questions and answers