Table of Contents
Advertisement
Quick Links
Advertisement
Table of Contents

Subscribe to Our Youtube Channel
Related Manuals for Sunny Health & Fitness SF-BH6802


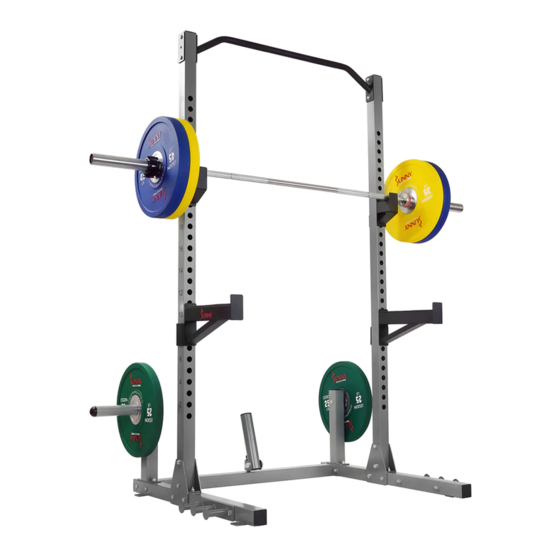
Summary of Contents for Sunny Health & Fitness SF-BH6802
-
Page 1: User Manual
POWER RACK SF-BH6802 USER MANUAL IMPORTANT! Please retain owner’s manual for maintenance and adjustment instructions. Your satisfaction is very important to us, PLEASE DO NOT RETURN UNTIL YOU HAVE CONTACTED US: support@sunnyhealthfitness.com or 1- 877 - 90SUNNY (877-907-8669). -
Page 2: Important Safety Information
IMPORTANT SAFETY INFORMATION We thank you for choosing our product. To ensure your safety and health, please use this equipment correctly. It is important to read this entire manual before assembling and using the equipment. Safe and effective use can only be achieved if the equipment is assembled, maintained and used properly. -
Page 3: Exploded Diagram
EXPLODED DIAGRAM... -
Page 4: Hardware Package
HARDWARE PACKAGE SPANNER 2PC... -
Page 5: Parts List
PARTS LIST Ordering Replacement Parts (U.S. and Canadian Customers only) Please provide the following information in order for us to accurately identify the part(s) needed: √ The model number (found on cover of manual) √ The product name (found on cover of manual) √... -
Page 6: Assembly Instructions
ASSEMBLY INSTRUCTIONS STEP 1: Attach Stabilizer (No. 2) to Right Center Stabilizer (No. 3) using 2 Bolts (No. 19), 4 Washers (No. 23), and 2 Nuts (No. 22). Tighten and secure with Spanner. Repeat these steps to attach the Left Stabilizer (No. 1). STEP 2: Attach Support Tube (No. - Page 7 STEP 3: Attach Upright Posts (No. 4) to Stabilizer (No. 2) using 2 Right Bolts (No. 17), 2 Washers (No. 23), and 2 Nuts (No. 22). Tighten and secure with Spanner. Repeat to attach Upright Post (No. 4) to Left Stabilizer (No. 1). Attach Pull Up Bar (No.
- Page 8 STEP 5: Attach Band Peg (No. 9) to the Right Stabilizer (No. 2) using 2 Bolts (No. 19), 4 Washers (No. 23), and 4 Nuts (No. 22). Tighten and secure with Spanner. Repeat to attach Band Peg (No. 9) to the Left Stabilizer (No. 1). STEP 6: Attach Pivot Bracket (No.
- Page 9 STEP 7: Attach Plate Holders (No. 12) to Support Tubes (No. 8) using 2 Buffer Washers (No. 28), 2 Washers (No. 23) and 2 Bolts (No. 21). Tighten and secure with Spanner. Hold the Right Bar Holder (No. 16) horizontally with the bracket on the right.
-
Page 10: Maintenance
OPTIONAL: This power rack has floor anchors to mount the rack to the floor. Mounting the rack to the floor is optional. It increases stability for equipment that are used with heavy weight. Installation hardware is not included, but you can get it at a local hardware store. Make sure to use the proper installation hardware for your floor type.
Need help?
Do you have a question about the SF-BH6802 and is the answer not in the manual?
Questions and answers