Table of Contents
Advertisement
Advertisement
Table of Contents

Related Manuals for Vertiv Liebert RX


Summary of Contents for Vertiv Liebert RX
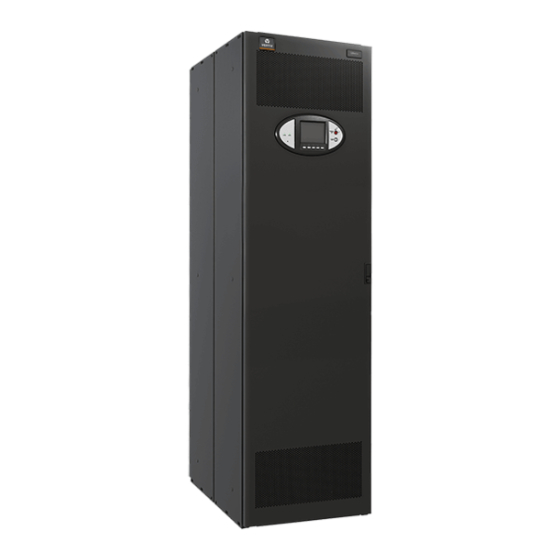
- Page 1 Liebert® RX™ Remote Distribution Cabinet User Manual...
- Page 2 The products covered by this instruction manual are manufactured and/or sold by Vertiv This document is the property of Vertiv and contains confidential and proprietary information owned by Vertiv. Any copying, use or disclosure of it without the written permission of Vertiv is strictly prohibited.
-
Page 3: Table Of Contents
Configurations for Liebert RX Installation ........ - Page 4 Figure 1 Typical cabinet and floor planning dimension data ........3 Figure 2 Configuration 2 and Configuration 3—Two Liebert RX units ......6 Figure 3 Configuration 4—Three units and Configuration 5—Four units.
-
Page 5: Important Safety Instructions
Only properly trained and qualified personnel wearing appropriate safety headgear, gloves, shoes and glasses should be involved in installing the Liebert RX or preparing the unit for installation. In case of fire involving electrical equipment, use only carbon dioxide fire extinguishers or those approved for use in fighting electrical fires. - Page 6 Operating this device in a residential area is likely to cause harmful interference that users must correct at their own expense. The Liebert RX complies with the requirements of EMC Directive 2004/108/EC and the published technical standards. Continued compliance requires installation in accordance with these instructions and use of accessories approved by Vertiv.
-
Page 7: Installation
Handling Considerations The Liebert RX is bolted to a wooden pallet to allow handling by a forklift, pallet jack or similar equipment. Check size and weight—Refer to the cabinet drawings furnished with the unit for size and weight information. -
Page 8: Figure 1 Typical Cabinet And Floor Planning Dimension Data
(11.1mm) 24" included with each unit. (41.3mm) Clearance RX11000 (610mm) 5. Shown with optional monitoring display. Holes Rev. 4 6. See Drawing RX11001 for conduit plate details. Floor Mounting Vertiv | Liebert Remote Distribution Cabinet User Manual | ® ™... -
Page 9: Unit Preparation
The Liebert RX may be easily removed from the shipping pallet and installed by customer personnel. A typical procedure is as follows: • Set the shipping pallet in a level area where there is enough room lift the Liebert RX off the pallet onto the raised floor. •... -
Page 10: Configurations For Liebert Rx Installation
The two units can be can be installed in place of a floor tile. Remove one 24" x 24" (610 x 610mm) floor tile and position the Liebert RX over the opening, the unit will rest on top of the raised floor cross members on all four sides. -
Page 11: Configuration 4-Three Units
Figure 2 Configuration 2 and Configuration 3—Two Liebert RX units 25.86" (657mm) 12.93" (328mm) 78.74" (2000mm) 78.74" (2000mm) 47.5" 23.75" 23.75" (1207mm) (603mm) (603mm) CONFIGURATION 3 CONFIGURATION 2 Side-by-Side Back-to-Back NOTES: 6. Configuration 3 requires front service access. 1. Units are ordered and shipped separately. -
Page 12: Figure 3 Configuration 4-Three Units And Configuration 5-Four Units
Figure 3 Configuration 4—Three units and Configuration 5—Four units Vertiv | Liebert Remote Distribution Cabinet User Manual | ® ™... -
Page 13: Power Wiring
The main input feeder must consist of 3-phase conductors, one neutral and one (safety) ground conductor (4W + G). Vertiv | Liebert Remote Distribution Cabinet User Manual | ®... -
Page 14: Figure 4 Input Electrical Field Connection Location For Units With Main Panelboard Breaker
1.22" (31mm) 0.75" (19.1mm) 0.89" (23mm) 1.75" (44mm) Ø 0.563 (14.29mm) 4 Places DETAIL A Distribution Cable Conduit Plate 84 knockouts, each Ø 0.875" RX15002 for 1/2" conduit Rev. 2 Vertiv | Liebert Remote Distribution Cabinet User Manual | ® ™... -
Page 15: Figure 5 Input Electrical Field Connection Location For Units Without Main Panelboard Breaker
0.89" (23mm) 84-Pole Distribution Panelboard 1.75" (44mm) Ø 0.563 (14.29mm) DETAIL A 4 Places Distribution Cable Conduit Plate RX15005 84 knockouts, each Ø 0.875" Rev. 2 for 1/2" conduit Vertiv | Liebert Remote Distribution Cabinet User Manual | ® ™... -
Page 16: Figure 6 Electrical Field Connections For Units With Ldmf Monitoring
See Detail B Distribution Cable LDMF Conduit Plate 84 knockouts, each Ø 0.875" DETAIL B for 1/2" conduit (See drawings LDM13004 and RX15000 LDM13008 for connection details.) Rev. 3 Vertiv | Liebert Remote Distribution Cabinet User Manual | ® ™... -
Page 17: Figure 7 Electrical Field Connection For Units With Current Plus Monitoring
1.22" (31mm) (19.1mm) 0.89" (23mm) 1.75" (44mm) Ø 0.563 (14.29mm) 4 Places DETAIL A Distribution Cable Conduit Plate 84 knockouts, each Ø 0.875" RX15001 for 1/2" conduit Rev. 2 Vertiv | Liebert Remote Distribution Cabinet User Manual | ® ™... -
Page 18: Figure 8 Liebert Ldmf ™ , Liebert Sitescan
See Detail A Liebert IntelliSlot Bays Liebert LDMF Liebert SiteScan Interface (optional) Detail A See Detail B Detail B DB-9 Connector-Liebert RX15006 LDMF/Current Plus Rev. 1 Setup Port Connection Vertiv | Liebert Remote Distribution Cabinet User Manual | ® ™... -
Page 19: Output Power Connections
• Initial system output loading should be between 50% and 75% of rated capacity. This allows the addition of future loads without immediately investing in another Liebert RX. • Balancing of loads is good design practice on any 3-phase system. -
Page 20: Current Plus Monitoring-Optional
IS-IPBMS card for Modbus IP output using an RJ-45 connection • IS-UNITY-DP card for HTTP/HTTPS, Vertiv Protocol, e-mail, SMS, SNMP v1/v2c/v3, BACnet IP/MSTP and Modbus TCP/RTU output using a serial RS-485 two-wire connection Check Liebert IntelliSlot slots on the back of the door to determine which card is supplied, more than one card might be supplied. -
Page 21: Liebert Ldmf ™ Monitoring-Optional
In the unlikely event a CT in the CT Module should fail, up to six replacement CTs may be installed using a split core CT kit, available separately from your local Vertiv representative. Verify that the branch breaker is Off and power is de-energized. -
Page 22: Figure 10 Electrical Field Connections For Ct Module Replacement Cts
* WARNING: DO NOT OPEN CIRCUIT THE SECONDARY WINDINGS OF CURRENT TRANSFORMERS. FAILURE TO FOLLOW THESE INSTRUCTIONS MAY RESULT IN SERIOUS INJURY OR DEATH. PANELBOARD A PANELBOARD B LDM13004 Rev. 0 DETAIL A Vertiv | Liebert Remote Distribution Cabinet User Manual | ® ™... -
Page 23: Liebert Ldmf Communication
Connecting locally to the Liebert LDMF Monitoring option requires a female-to-female (F-F) DB9 null modem cable. There will be an external port on the Liebert RX labeled LDMF SETUP. Connect the DB9 null modem cable to a local PC. Once connected you may run any of the provided software tools that can be downloaded from the Support area of the Vertiv Web site, www.vertivco.com... -
Page 24: Ldmf Setup Port Connection
SiteScan Web 4.0 or greater. The option includes software and graphics that support up to 168 branch breakers using an Ethernet connection. The monitoring interface is on the back of the Liebert RX front door and has connections for RJ-45 Ethernet and BACnet. See Figure 8 for location and wiring details. -
Page 25: Equipment Inspection And Startup
Verify that all incoming power circuits are de-energized and locked out before performing the internal inspection. Gain access to the internal components of the Liebert RX by opening the accent panel. Inspect the wiring and components to be sure they are not damaged. - Page 26 A copy of the appropriate checklist (furnished with the equipment) must be completed, signed, dated and returned to Vertiv. Warranty coverage of the equipment is not effective unless the Checklist is received by the factory. WARNING Risk of improper startup. Can cause equipment damage, personal injury and death.
-
Page 27: Inspection And Startup Checklist
Exterior Inspection ___ 1. Confirm that the exterior of unit is undamaged. ___ 2. Confirm that service and ventilation clearances are adequate. (See 1.5 - Configurations for Liebert RX Installation). Interior Inspection ___ 1. -
Page 28: Startup
Volts, phase B to phase C = Volts, phase C to phase A = If output voltage is incorrect, check for wiring errors or incorrect input voltage. Contact Vertiv at 1-800-543- 2378 in the USA or the local factory representative for assistance. -
Page 29: Operating Instructions
The load equipment can be turned Off at each piece of load equipment or at the Liebert RX panelboards (circuit breaker) located behind the unit’s front door. Turn Off the unit panelboard main breaker. To remove all power from the unit, turn Off the building power to the unit. - Page 30 IS-IPBMS card for Modbus IP output using an RJ-45 connection • IS-UNITY-DP card for HTTP/HTTPS, Vertiv Protocol, e-mail, SMS, SNMP v1/v2c/v3, BACnet IP/MSTP and Modbus TCP/RTU output using a serial RS-485 two-wire connection Check the Liebert IntelliSlot ports on the back of the door to determine which cards are supplied;...
-
Page 31: Liebert Ldmf ™ -Optional
Liebert LDMF —Optional If the Liebert RX is equipped with the optional Liebert LDMF, the monitoring unit is On whenever power is supplied to the unit. The Liebert LDMF is factory-configured for 1-pole, 20A branch breakers. Alarms, alarm setpoints, circuit breaker names and circuit breaker ratings are all field- adjustable through the DB9 connector (LDMF SETUP port;... -
Page 32: Maintenance
MAINTENANCE Repair Even the most reliable equipment may fail. Vertiv is at your service to assure fast repair of your unit and minimum down-time of your installation. WARNING Risk of electric shock. May cause personal injury or death. Only properly trained and qualified service personnel wearing appropriate safety headgear, gloves, shoes and glasses should perform maintenance on the Liebert RX. - Page 34 © 2018 Vertiv Co. All rights reserved. Vertiv and the Vertiv logo are trademarks or registered trademarks of Vertiv Co. All other names and logos referred to are trade names, trademarks or registered trademarks of their respective owners. While every precaution has been taken to ensure accuracy and completeness herein, Vertiv Co.
Need help?
Do you have a question about the Liebert RX and is the answer not in the manual?
Questions and answers