Table of Contents

Related Manuals for Powrmatic NVx10


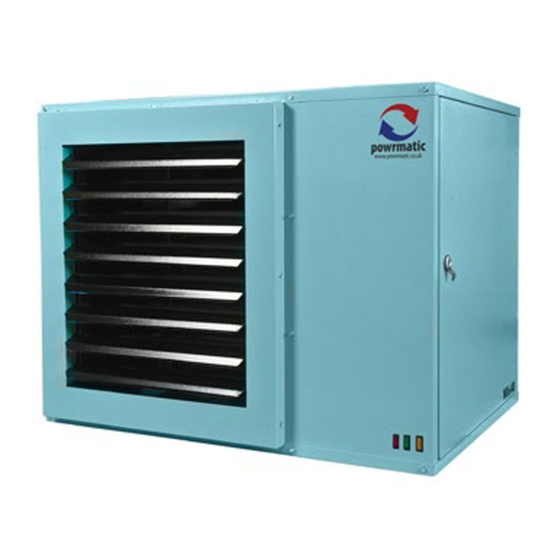
Summary of Contents for Powrmatic NVx10
- Page 1 The NVx Range Users, Installation and Servicing Instructions (Brahma Control) WARNING: THIS APPLIANCE MUST BE EARTHED IMPORTANT: Reset from Lockout is by a switched Neutral NVx Range Users, Installation & Servicing Instructions Issue 1.9 March 2012...
- Page 2 7. Powrmatic ‘General Conditions of Sale’ have been observed. 8. Except for the obligation of Powrmatic Ltd to perform warranty repairs during the guarantee period, Powrmatic will not be liable in respect of any claim for direct or indirect consequential losses, including loss of profits or increased costs arising from loss of use of the heater, or any event arising there from.
- Page 3 On initial lighting of the heater(s), it may take some time to panel is illuminated. NVx10 - 75 units have the thermostat purge the internal pipe work of air. If it is not possible to light located inside the controls section.
-
Page 4: Table Of Contents
Installation & Servicing Instructions C O N T E N T S Section Title Page Introduction Technical Data General Requirements Installation Air Distribution System Commissioning & Testing Servicing Functional Flow Diagram Connections to External Controls Fault Finding Flow Chart Short List of Parts Tables Title Page... -
Page 5: Introduction
The air heater must be connected to the flue system that is provided by Powrmatic Ltd. They may be used where the atmosphere inside the premises could be contaminated e.g. Dust, oil mist etc. but the heaters... -
Page 6: Technical Data
2. TECHNICAL DATA ø D POWRMATIC GAS ENTRY POINT FRONT VIEW R/H SIDE VIEW REAR VIEW NOTE: For dimensioning purposes both top and rear flue and combustion air connections are shown 228 CTRS PLAN 228 CTRS J CTRS ø D... -
Page 7: Dimensions
NOTE: For dimensioning purposes both top and rear flue and combustion air connections are shown 228 CTRS PLAN 228 CTRS J CTRS Table 1. Dimensions inlet Model ØD Ø NVx10 NVx15 NVx20 NVx25 225.5 NVx30 1000 232.5 NVx35 NVx40 ¾'’... -
Page 8: Specifications
2 x 1.50 363.5 2 x 0.550 NVx140 152.1 140.0 98.92 92.55 3.6418 13110 2 x 1.50 Note: /D data refers to Powrmatic supplied centrifugal/silencer duct section Table 3 Electrical Loadings 1ph /F Models /C Models NOMINAL PLATE START FUSE NOMINAL PLATE... -
Page 9: Injector Sizes & Burner Pressures Natural Gas - Group H - G20
Low Fire Inlet INJECTORS Pressure Burner Burner Gas Rate Gas Rate 20mb Pressure Pressure MODEL Size Marked mbar m³/h mbar m³/h NVx10 1.36 13.8 1.14 0.69 NVx15 1.67 12.5 1.69 0.87 Minimum NVx20 1.94 12.7 2.31 1.26 Inlet pressure NVx25 1.94... -
Page 10: General Requirements
The local gas undertaking must be consulted before a gas Those appliances having a gross input rating not exceeding pressure booster is fitted. 60kW viz. NVx10 to NVx50 inclusive and installed to take their combustion air from within the building must be installed in 3.4 Flue System... -
Page 11: Installation
NVx10 - 30F 2.5m - 3m adequate strength and dimensionally stable for the maximum... -
Page 12: A. Exhaust Only System - Horizontal
Adjustable Combustion air entry length or top of heater) shall not be less than 1.0m for the NVx10 - 50 (fitted with inlet grille) and 1.3m for the NVx60 - 140. All outer joints must be finished with the provided locking... -
Page 13: A. Individual System - Horizontal
Fig 2a Individual system - horizontal then extend down to the heater using straight lengths. Fit adjustable lengths as the final connection pieces, to facilitate flue disconnection for servicing. Extend the adjustable lengths Single to twin Terminal to make the final connection but do not exceed the maximum adaptor Flue socket extended length so as to maintain joint integrity. -
Page 14: Air Distribution System
6. Commissioning & Testing 5. Air Distribution System 6.1 Electrical Installation 5.1 General Checks to ensure electrical safety must be carried out by a NVx/D and NVx/C models are designed for use with duct work qualified person. to more precisely define the point of air delivery, and /or provide ducted return air or ducted fresh air inlet. -
Page 15: High/Lo Regulator
6.5 Lighting the Air Heater regulator screw anticlockwise to decrease the pressure, or clockwise to increase the pressure. NOTES: 3. In addition it is advisable to check the gas rate using the gas 1. On initial lighting of the heater(s), it may take some time to meter dial pointer. -
Page 16: Servicing
Fig 8 Flame Current Measurement Reconnect high/low regulator and check high fire pressure. Repeat both steps if necessary and then replace cover cap. 5. Turn off the main burner, disconnect the pressure gauge and replace the sealing screw. Turn on the main burner and test for gas soundness around pressure test joint using a leak detection fluid. -
Page 17: Ignition Electrode Spark Gap
removing the four screws. 2. Remove the electrical plug connections from the top of the 5. If required remove the manifold by removing the four screws multifunctional control. securing it to the burner assembly. 3. Release the flanged connections at the inlet and outlet of the 6. - Page 18 7.6.5 Exhaust Fan 1. Remove the four screws securing the flue outlet socket. 2. Disconnect the fan electrical connections from the main terminal strip 3. Remove the screws securing the fan mounting box to the exhaust header plate. 4. Remove fan assembly. 5.
-
Page 19: Functional Flow Diagram
8. Functional Flow Diagram 8.1 NVx10 - 75 Basic Unit Neutral Live Grey 0.5 Blk 0.5 Or 0.5 3.15A FUSE Or 0.5 Br 0.5 Blu 0.5 Yel 0.5 Wh 0.5 °C °C Br 0.5 Blk 0.5 Blk 0.5 Wh 0.5 Blu 0.5... - Page 20 8.2 NVx90 - 140 Basic Unit Live Neutral Grey 0.5 Blk 0.5 Or 0.5 3.15A FUSE Yel 0.5 Br 0.5 Grey 0.5 Or 0.5 Br 0.5 Blu 0.5 Wh 0.5 °C °C °C °C Br 0.5 Blk 0.5 Blk 0.5 Wh 0.5 Blu 0.5 GREEN...
-
Page 21: Connections To External Controls
9. Connections to External Controls Note: To comply with ECA requirements and to achieve maximum system e ciency it is recommended that NVx units are controlled by an MC200 Fuel Saver unit. Simple room thermostat and room thermostat/time clock control systems will not provide optimum system e ciency and fuel savings. LIVE LIVE NEUTRAL... - Page 22 ON/OFF NVx LIVE NEUTRAL EARTH LIVE LIVE NEUTRAL NEUTRAL EARTH EARTH Lockout Indicator Lockout Indicator 230V 230V Push Button Push Button Reset Reset ROOM ROOM TIME STAT STAT SWITCH Note: The NVx Heater, Powrtrol, time clock or room Warning: If external controls are not isolated 230V thermostat may be fed by separate electrical supplies may be present at heater terminals even when the heater is isolated.
-
Page 23: Fault Finding Flow Chart
9. Fault Finding Flow Chart START Gas & Electrical supplies present at heater? Turn supplies on, Check fuses/connections Unit at lockout (lockout lamp on low level controls Press lockout reset button on low level controls or on internal control panel and on internal control panel alight)? Limit thermostat tripped (red lamp on front panel on)? Press red reset button on fan/limit thermostat (in controls section) -
Page 24: Short List Of Parts
Only originally speci ed parts may be tted as service replacements and all items are available from the Powrmatic Ltd Spares Department. Please refer to Powrmatic Ltd for any parts not shown in the listing. Powrmatic Ltd must also be consulted before parts other than those speci ed or recommended in the servicing instructions are replaced. - Page 25 ITEM USAGE PART # Main Air Fan - Axial 140232001 Main Air Fan - Axial 140232002 Main Air Fan - Axial 140232003 Main Air Fan - Axial 25/30 140232004 Main Air Fan - Axial 35/40 140232005 Main Air Fan - Axial 50/90 140232006 Main Air Fan - Axial...
Need help?
Do you have a question about the NVx10 and is the answer not in the manual?
Questions and answers