Table of Contents
Advertisement
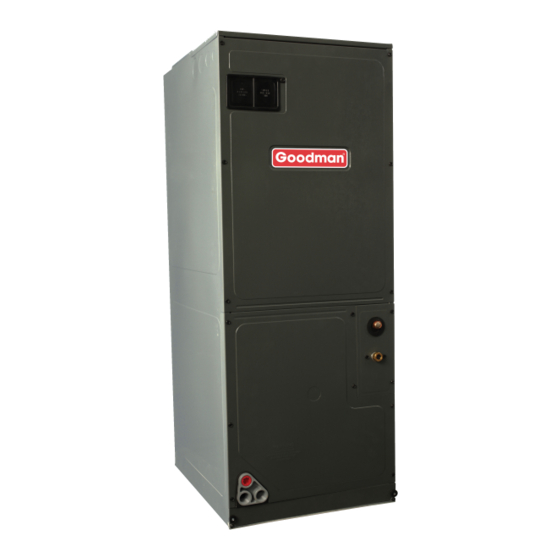
ARUF**14**/ARPT**14**
ASPT**14**/ASUF**14**
AIR HANDLERS INSTALLATION & OPERATING INSTRUCTIONS
Contents
1 Important Safety Instructions .................................. 1
2 Shipping Inspection ................................................. 2
2.1 Parts ........................................................................ 3
2.2 Handling .................................................................. 3
3 Codes & Regulations ................................................ 3
4 Replacement Parts ................................................... 3
5
Pre-Installation Considerations .............................. 3
5.1 Preparation .............................................................. 3
5.2 System Matches ...................................................... 3
5.3 Interconnecting Tubing ............................................ 3
5.4 Clearances .............................................................. 3
5.5 Horizontal Applications ............................................ 4
6
Installation Location ................................................ 4
6.1 Upflow Installation .................................................... 4
6.2 Horizontal Left Installation ....................................... 4
6.3 Downflow/Horizontal Right Installation .................... 5
7 Refrigerant Lines ...................................................... 7
7.1 Tubing Size .............................................................. 7
7.2 Tubing Preparation .................................................. 7
7.3 Special Instructions ................................................. 8
7.4 Tubing Connections for Flowrator Model ................. 8
7.5 Tubing Connections for TXV Models ....................... 8
8 Condensate Drain Lines ........................................... 9
9 Ductwork ................................................................... 9
9.1 Return Ductwork ...................................................... 9
10 Return Air Filters .................................................. 10
11 Electric Heat .......................................................... 10
12 Electrical and Control Wiring ............................... 12
12.1 Building Electrical Service Inspection .................. 12
12.2 Wire Sizing .......................................................... 12
12.3 Maximum Overcurrent Protection (MOP) ............ 12
12.4 Electrical Connections - Supply Voltage ............. 13
12.4.3 Air Handler With Circuit Breaker Heat Kit ......... 13
12.5 Low Voltage Connections .................................... 13
12.5.1 Thermostats .................................................... 13
12.6 Speed Tap Adjustment ......................................... 13
13 Achieving 2% Low Leakage Rate ........................ 14
14 Start-Up Procedure ............................................... 14
15 Regular Maintenance ............................................ 14
16
Airflow Data .......................................................... 15
21
Wiring Diagrams ................................................... 21
IO-427K
10/2014
It is your responsibility to install the product safely and to educate the customer on its safe use.
ATTENTION INSTALLING PERSONNEL
Prior to installation, thoroughly familiarize yourself with this Installation Manual.
Observe all safety warnings. During installation or repair, caution is to be observed.
RECOGNIZE THIS SYMBOL
AS A SAFETY PRECAUTION.
1 Important Safety Instructions
The following symbols and labels are used throughout this
manual to indicate immediate or potential safety hazards. It
is the owner's and installer's responsibility to read and com-
ply with all safety information and instructions accompanying
these symbols. Failure to heed safety information increases
the risk of personal injury, property damage, and/or product
damage.
Advertisement
Table of Contents

Related Manuals for Goodman ARUF**14 Series


Summary of Contents for Goodman ARUF**14 Series
-
Page 1: Table Of Contents
ARUF**14**/ARPT**14** ASPT**14**/ASUF**14** AIR HANDLERS INSTALLATION & OPERATING INSTRUCTIONS Contents 1 Important Safety Instructions ........1 2 Shipping Inspection ..........2 2.1 Parts ................ 3 2.2 Handling ..............3 3 Codes & Regulations ..........3 4 Replacement Parts ........... 3 Pre-Installation Considerations ......3 5.1 Preparation .............. - Page 2 HIGH VOLTAGE! Disconnect ALL power before servicing. Multiple power sources may be present. Failure to do so may cause property damage, personal injury or death. Installation and repair of this unit should be performed ONLY by individuals meeting the requirements of an “entry level technician”...
-
Page 3: Shipping Inspection
Replacement parts for this product are available through your contractor or local distributor. For the location of your nearest distributor consult the white business pages, the yellow page section of the local telephone book or contact: CONSUMER AFFAIRS GOODMAN MANUFACTURING COMPANY, L.P. 7401 SECURITY WAY HOUSTON, TEXAS 77040 (877) 254-4729 Pre-Installation Considerations 5.1 Preparation... -
Page 4: Clearances
5.4 Clearances The unit clearance from a combustible surface may be 0". However, service clearance must take precedence. A mini- mum of 24" in front of the unit for service clearance is required. Additional clearance on one side or top will be required for electrical wiring connections. -
Page 5: Downflow/Horizontal Right Installation
6.3 Downflow/Horizontal Right Installation MODEL LIST FOR DOWNFLOW KITS IMPORTANT NOTE: In the downflow application, to pre- DFK-B DFK-C DFK-D vent coil pan “sweating”, a downflow kit (DFK) is available Downflow Kit Downflow Kit Downflow Kit through your local distributor. The DFK is not supplied with ARUF18B14** ARUF30C14** ARUF48D14**... - Page 6 Blower Access Panel Coil Access Panel HORIZONTAL LEFT Secondary Drain Port Figure 4 for Horizontal Application Tubing Panel Secondary Drain Port for Upflow/Downflow Application Thumb Screw HORIZONTAL RIGHT EXTERNAL PART TERMINOLOGY Figure 5 Figure 7 Upper Tie Plate Coil Slides on the downflow bracket Control Deck...
-
Page 7: Refrigerant Lines
ACCESS PANEL CONFIGURATION FOR DOWNFLOW OR HORIZONTAL RIGHT Figure 9 7 Refrigerant Lines NOTE: Refrigerant tubing must be routed to allow adequate This product is factory-shipped with R410A and dry access for servicing and maintenance of the unit. nitrogen mixture gas under pressure. Use appropriate service tools and follow these instructions to prevent injury. -
Page 8: Special Instructions
7.3 Special Instructions Units without a factory installed TXV come equipped with a flowrator piston for refrigerant expansion. For most instal- lations with matching applications, no change to the flowrator piston is required. However, in mix-matched applica- tions, a flowrator piston change may be required. See the piston kit chart (provided in the literature packet) or consult your local distributor for details regarding mix-matched flowrator piston sizing. -
Page 9: Condensate Drain Lines
8 Condensate Drain Lines The coil drain pan has a primary and a secondary drain with 3/4" NPT female connections. The connectors required are 3/ 4" NPT male, either PVC or metal pipe, and should be hand tightened to a torque of no more than 37 in-lbs. to prevent damage to the drain pan connection. -
Page 10: Return Air Filters
TIONABLE FUMES/ODORS INTO THE DUCTWORK. The return ductwork is to be connected to the air handler bottom (upflow configuration). 10 Return Air Filters Each installation must include a return air filter. This filtering may be performed at the air handler using the factory filter rails or externally such as a return air filter grille. - Page 11 HEAT KIT NOMINAL kW 19/20 25 1000 1200 1400 1600 1800 2000 208/1/60 SUPPLY VOLTAGE - TEMP. RISE °F Table 4 HEATER (Kw) *ARUF ARPT 1170 1170 1170 1170 1345 1345 1170 1170 1170 1170 1345 1345 1170 1170 1170 1170 1345 1345...
-
Page 12: Electrical And Control Wiring
12 Electrical and Control Wiring IMPORTANT: All routing of electrical wiring must be made through provided electrical knockouts. Do not cut, puncture or alter the cabinet for electrical wiring. 12.1 Building Electrical Service Inspection This unit is designed for single-phase electrical supply only. DO NOT OPERATE ON A THREE-PHASE POWER SUPPLY. -
Page 13: Electrical Connections - Supply Voltage
12.4 Electrical Connections – Supply Voltage Top of Cabinet IMPORTANT NOTE: USE COPPER CONDUCTORS ONLY. Knockouts are provided on the air handler top panel and sides of the cabinet to allow for the entry of the supply voltage conductors, as shown in Figure 13. -
Page 14: Achieving 2% Low Leakage Rate
13 Achieving 2% Low Leakage Rate Ensure all the gaskets remain intact on all surfaces as shipped with the unit. These surfaces are areas between the upper tie plate and coil access panel, blower access and coil access panels, and between the coil access and filter access panels. Ensure upon installation, that the plastic breaker cover is sitting flush on the blower access panel and all access panels are flush with each other and the cabinet. -
Page 15: Airflow Data
16 Airflow Data Static Pressure (in w.c) Blower Model Number Speed High 1150 1095 1045 1025 ARUF18B14* Medium High 1150 1095 1045 1025 ARUF24B14* Medium High 1145 1085 1020 ARUF30B14* Medium High 1485 1435 1385 1345 1275 1205 1125 ARUF30C14* Medium 1300 1270... - Page 16 Airflow Data S t a t ic P r e s s u r e ( in w .c ) B lo w e r M o d e l N u m b e r S p e e d T a p 0 .1 0 .2 0 .3...
- Page 17 Air Handler Low Voltage Connections The following composite wiring diagrams detail various configurations in which the air handlers can be used. Examples include single-stage cooling and heat pump with single or two-stage electric heating. All these configurations can be applied with convenient connections to outdoor thermostat applications.
- Page 18 HIGH VOLTAGE! DISCONNECT ALL POWER BEFORE SERVICING. WARNING MULTIPLE POWER SOURCES MAY BE PRESENT. FAILURE TO DO SO MAY CAUSE PROPERTY DAMAGE, PERSONAL INJURY OR DEATH. #18 GA. 5 WIRES WITH COOLING 4 WIRES WITHOUT AIR HANDLER CONDENSING UNIT 24V CONNECTION COOLING UNIT WITH OPTIONAL HEAT KITS OF 15 kW AND ABOVE AND ROOM THERMOSTAT WITH TWO STAGES OF HEAT #18 GA.
- Page 19 HIGH VOLTAGE! DISCONNECT ALL POWER BEFORE SERVICING. WARNING MULTIPLE POWER SOURCES MAY BE PRESENT. FAILURE TO DO SO MAY CAUSE PROPERTY DAMAGE, PERSONAL INJURY OR DEATH. #18 GA. 7 WIRE AIR HANDLER HEAT PUMP UNIT WITH OPTIONAL HEAT KITS OF 15 kW AND ABOVE NOTES: NOMENCLATURE: COLOR CODES...
- Page 20 HIGH VOLTAGE! DISCONNECT ALL POWER BEFORE SERVICING. WARNING MULTIPLE POWER SOURCES MAY BE PRESENT. FAILURE TO DO SO MAY CAUSE PROPERTY DAMAGE, PERSONAL INJURY OR DEATH. ELECTRONIC BLOWER TIME DELAY RELAY TSTAT 120/240VAC SYSTEM XFMR-R PARK TERMINAL TRANSFORMER MOTOR NEUTRAL 24 VAC B13707-35 XFMR-C...
-
Page 21: Wiring Diagrams
21 Wiring Diagrams HIGH VOLTAGE! DISCONNECT ALL POWER BEFORE SERVICING. WARNING MULTIPLE POWER SOURCES MAY BE PRESENT. FAILURE TO DO SO MAY CAUSE PROPERTY DAMAGE, PERSONAL INJURY OR DEATH. ARUF**14**/ARPT**14** 208/240 TERMINAL BLOCK SHOWN SEE NOTES 2 & 6 VOLTS EQUIPMENT GROUND FOR 50HZ MODELS ONLY USE COPPER WIRE... - Page 22 Wiring Diagrams HIGH VOLTAGE! DISCONNECT ALL POWER BEFORE SERVICING. WARNING MULTIPLE POWER SOURCES MAY BE PRESENT. FAILURE TO DO SO MAY CAUSE PROPERTY DAMAGE, PERSONAL INJURY OR DEATH. ASPT**14**/ASUF**14** 208/240 VOLTS L G N SEE NOTE 1 NOTE 4 FUSE HOLDER (OPTIONAL) NOTE 1...
- Page 23 HIGH VOLTAGE! DISCONNECT ALL POWER BEFORE SERVICING. WARNING MULTIPLE POWER SOURCES MAY BE PRESENT. FAILURE TO DO SO MAY CAUSE PROPERTY DAMAGE, PERSONAL INJURY OR DEATH. 3-Phase Heat Kit Wiring is subject to change. Always refer to the wiring diagram on the unit for the most up-to-date wiring.
- Page 24 • Parts • Financing Options 5151 San Felipe, Suite 500, Houston, TX 77056 © 2012 - 2014 Goodman Manufacturing Company, L.P. is a registered trademark of Maytag Corporation or its related companies and is used under license. All rights reserved.
Need help?
Do you have a question about the ARUF**14 Series and is the answer not in the manual?
Questions and answers
How do you open secondary port on 14 series?
is it a single or multi stage
18 by 8 duck from heat pump 2.5 ton Goodman 1500 square foot is that correct