Table of Contents
Advertisement
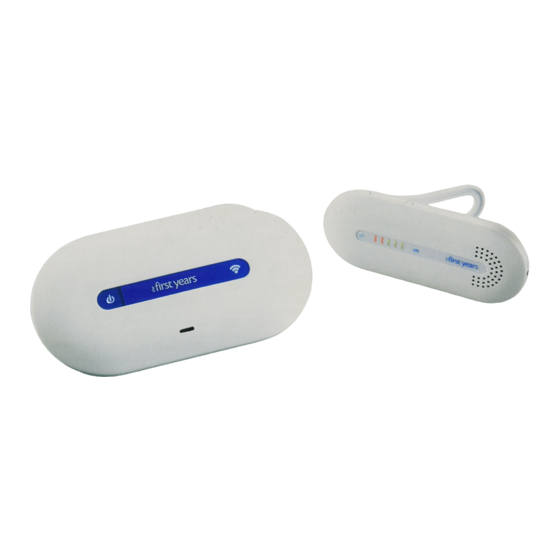
True Choice
(A100 and A200)
Note:
A100 comes with one Child Unit,
one Parent Unit and two AC adaptors.
A200 comes with one Child Unit,
two Parent Units and three AC adaptors.
Except for setting up (and using) the second
Parent Unit, instructions for both models are
the same.
QUICK START INSTRUCTIONS
You'll find detailed instructions inside.
Please read the safety instructions on page 2.
Set up the Parent Unit(s)
For portable use: Install the 3 AAA batteries (not included). Battery
compartment is located on the back of the unit. Loosen screw to release
it, and lift cover off (for easier access, press on top of belt clip to hold it
out of the way). Insert 3 AAA batteries aligning + and – symbols to match
markings in battery box.
Tip: Use Alkaline batteries for longer use.
For plug-in use: Connect one of the AC adapters provided
Set up the Child's Unit
Place the Child Unit near your child (within 6 feet, but well beyond child's reach).
Connect the remaining AC adaptor to the unit and plug into wall outlet
To Use:
1 Press and release power button
2 Press and release the power button
3 Connection indicators on all units should glow blue indicating connection.
4 Press [+] or [-] to adjust volume of Parent Unit(s).
5 Keep the Parent Unit within hearing distance.
Before returning this product to the store for any reason, please contact our
Parent Service Center at 1-800-704-8697 or www.learningcurve.com
Often, we can provide helpful tips and instructions to resolve your problem
WARNING:
!
To
Model: Y7443/Y7444
Model:Y7443C,Y7444C
Model:Y7443P, Y7444P
Digital Monitor
™
A100_A200 Child Unit
A100 Parent Unit
to turn the Child Unit on and wait for connection indicator
on the side of the Parent Unit to turn it on.
quickly over the phone or by e-mail.
A200 Parent Units
AC jack
adaptor
to blink.
Questions? Comments?
Contact Consumer Care
www.learningcurve.com
800-704-8697
Advertisement
Table of Contents

Subscribe to Our Youtube Channel
Related Manuals for The First Years True Choice A100


Summary of Contents for The First Years True Choice A100
- Page 1 True Choice Digital Monitor ™ (A100 and A200) Note: A100 comes with one Child Unit, one Parent Unit and two AC adaptors. A200 comes with one Child Unit, A100_A200 Child Unit two Parent Units and three AC adaptors. Except for setting up (and using) the second Parent Unit, instructions for both models are the same.
-
Page 2: Safety Instructions
Safety Instructions This symbol is intended to warn the user of This symbol is intended to alert the user to potential safety hazards. a potential risk of electric shock and other electrical safety issues. WARNING: To reduce the risk of fire or electrical shock, do not open this product or expose this product to: Water And Moisture: This product should not be used near water, for example, near a bathtub or sink, in a wet basement or near a swimming pool. -
Page 3: Contents And Features
Contents and Features Child Unit, Parent Unit(s) and AC Adapter Removable belt Volume switch clip/stand Connection indicator Power button Sound lights Sound lights Speaker Power indicator Power button Power indicator Connection indicator AC adapter Connection indicator Microphone Parent Units Child Unit AC jack Cord channel AC jack... -
Page 4: To Set Up - Child Unit
To Set Up - Child Unit For wall mounting (optional) 1. Press the adapter cord into the grooved channel on 1. Position the Child Unit within 4 to 6 feet of your child. NEVER position the unit within a the back of the unit, making certain to slide it under the two holding clips. - Page 5 To Set Up - Parent Unit(s) To install batteries For plug-in use 1. Loosen the screw to release the battery Connect the Parent Unit to the AC adapter and plug compartment cover. Then, lift the cover off. the adapter into an electrical outlet. If desired, (For easier access, press on the top of the open stand to support unit in an upright position.
- Page 6 To Use Belt Clip/Stand Child unit Parent unit 1. Press and release the power button on the Press on the top of the belt clip to open; slide it Child unit to turn it on and wait for the onto waistband or belt and release. connection indicator to blink.
- Page 7 To Use (continued) Lights Here’s how to interpret the lights on the Parent Unit(s) and the Child Unit: Power Indicator Blue Light Unit is on. Red Light Batteries are weak and need to be replaced. (Parent Unit(s) only) Remove dead batteries from parent unit(s) immediately. (See “To install batteries,”...
- Page 8 To Use (continued) Replacing Batteries Care Parent Unit(s): To Clean: If Power indicator on the Parent Unit(s) glows red Do not immerse the parent unit(s) or the child instead of blue when unit is turned on, batteries unit in water. Do not use cleaning spray or liquid are low.
-
Page 9: Troubleshooting
Troubleshooting PROBLEM POSSIBLE CAUSE SOLUTION No power Parent Unit: (No lights on unit) Unit is not turned on. Press and release power button. Batteries are dead. Replace batteries (See “To Set Up- Parent Unit(s) p.5” ), or plug in adapter. AC adaptor is not plugged into Plug must be plugged into AC adaptor correct jack... - Page 10 About Pairing Codes The Parent Unit(s) and Child Unit are digitally “paired” at the factory. This means they are digitally encrypted with the same electronic code so that they can securely communicate with each other and not be confused by the signals sent out by other electronic devices, such as cell phones or other monitors. It is unlikely, but possible, that strong electronic interference, such as a power surge, could erase this coding.
-
Page 11: Proper Disposal
Proper Disposal This symbol on the product or on its packaging indicates that this product shall not be treated as household waste. Instead it shall be handed over to the applicable collection point for the recycling of electrical and electronic equipment. By ensuring this product is disposed of correctly, you will help prevent potential negative consequences for the environment and human health, which could otherwise be caused by inappropriate waste handling of this product. -
Page 12: Limited Warranty
Limited Warranty Our Limited Warranty and Warranty Period When we use the terms "we," "us" and "our," we are referring to Learning Curve Brands, Inc., and when we use the terms "you" and "your" we mean the original end-user customer. Our products are guaranteed to be free from defects in material and workmanship under normal and intended use for a period of 90 days from the date of your purchase.
Need help?
Do you have a question about the True Choice A100 and is the answer not in the manual?
Questions and answers