Table of Contents
Advertisement
Quick Links
Advertisement
Table of Contents

Related Manuals for Uwatec Z1


Summary of Contents for Uwatec Z1
- Page 1 User Manual...
- Page 2 Welcome to the SCUBAPRO Z1 and thank you for purchasing the Z1. You are now the owner of an extraordinary partner for your dives. This manual provides you with easy access to the Z1’s key features and functions. IMPORTANT •...
-
Page 3: Introduction
(Desat time). In Watch Mode, it acts as a world time watch. • The Z1 is capable of programming up to 4 diff erent Nitrox gases. Com- prehensive accelerated decompression is possible because the oxygen ) level can be set from 21% to 100% in 1% increments. -
Page 4: Features & Functions
Directional compass bearing. You can check the direction and current position of selected target. • Alarm setting (in Watch Mode). When the set time arrives, the Z1 issues an audible alarm. • Can be used as a stopwatch. Measures elapsed time. -
Page 5: Safety Precautions
Z1 itself, incorporate various labels, icons and terms to ad- vise you of the correct way to operate your Z1 to prevent harm or damage to you as well as to other people. This user manual also provides adviso- ries, defi... - Page 6 Z1 into the water. It is recommended that you use your Z1 in a closed water or pool environment before using it in open water.
- Page 7 WARNING • Check to make sure the battery power level your Z1 is at “H” before diving. In the event of a low power level, resulting in a warning displayed while diving, safely exit the water as soon as possible and recharge your Z1.
- Page 8 • Please be sure to remove any product protection stickers before using your Z1. If you use your Z1 without fi rst peeling off the stickers, dirt can become trapped which may cause rust and skin irritation. •...
-
Page 9: Table Of Contents
1. Introduction •••••••••••••••••••••••••••••••••••••••••••••••••••••• 3 2. Features & Functions ••••••••••••••••••••••••••••••••••••••••• 4 3. Safety Precautions •••••••••••••••••••••••••••••••••••••••••••• 5 4. Things To Check Before Using the Z1••••••••••••••••••• 13 4-1. Check the Battery Power Level••••••••••••••••••••••••••••••••••••••••• 13 4-2. Charging with Light (Solar Charge)•••••••••••••••••••••••••••••••••• 13 4-3. How to Charge •••••••••••••••••••••••••••••••••••••••••••••••••••••••••••••••••• 13 4-4. - Page 10 7. Watch Mode / Surface Mode(TIME) ••••••••••••••••••••• 33 7-1. Displayed Contents of Surface Mode ••••••••••••••••••••••••••••••• 34 8. Dive Mode (DIVE) ••••••••••••••••••••••••••••••••••••••••••••••• 35 8-1. How to Switch the Mode to Dive Mode ••••••••••••••••••••••••••••• 35 8-2. No Decompression Mode ••••••••••••••••••••••••••••••••••••••••••••••••• 36 8-3. Safety Stop •••••••••••••••••••••••••••••••••••••••••••••••••••••••••••••••••••••• 37 8-4.
- Page 11 11. Compass(COMP) ••••••••••••••••••••••••••••••••••••••••••••• 58 11-1. To Take a Direction Reading ••••••••••••••••••••••••••••••••••••••••••• 58 11-2. Calibrate the Bearing ••••••••••••••••••••••••••••••••••••••••••••••••••••• 58 11-3. Digital Compass Precautions ••••••••••••••••••••••••••••••••••••••••• 60 12. Stopwatch(STW) ••••••••••••••••••••••••••••••••••••••••••••• 61 12-1. Stopwatch Mode •••••••••••••••••••••••••••••••••••••••••••••••••••••••••••• 61 12-2. Measure ••••••••••••••••••••••••••••••••••••••••••••••••••••••••••••••••••••••••• 61 13. Timer(TMR) ••••••••••••••••••••••••••••••••••••••••••••••••••••• 62 13-1.
- Page 12 17. Free Diving Mode ••••••••••••••••••••••••••••••••••••••••••••• 68 17-1. Switch to Free Diving Mode •••••••••••••••••••••••••••••••••••••••••••• 68 17-2. End of Free Diving Mode ••••••••••••••••••••••••••••••••••••••••••••••••• 68 17-3. Free Diving Functions •••••••••••••••••••••••••••••••••••••••••••••••••••• 68 17-4. Button Operation (Free Diving Mode) •••••••••••••••••••••••••••• 69 18. Gauge Mode •••••••••••••••••••••••••••••••••••••••••••••••••••• 70 18-1.
-
Page 13: Things To Check Before Using The Z1
4. Things to Check Before Using the Z1 Before using your Z1, fi rst you’ll need to charge the unit and set the time and date. Please fully charge and match the time and date display before use. 4-1. Check the Battery Power Level The battery’s state of charge can be determined by checking whether [H],... -
Page 14: Insuffi Cient Charge Or Out Of Charge
• Kept in any direct sunlight for long periods of time. Allowing the Z1 to become too hot can cause its liquid crystal display (LCD) to black out. The LCD should normalize once the Z1 returns to a lower temperature. -
Page 15: Charging Times
In order to reset settings such as time and date, you need to charge the Z1 to a point where the charge sta- tus at the bottom of the screen reads [M] or [H]. -
Page 16: Power Saving
Power Saving state. More on Power Saving: • The Z1 will not enter a sleep state while it is in Dive Mode, Stopwatch Mode or Countdown Timer Mode. • The Power Saving function can be set to ON or OFF. -
Page 17: Mode Reference Guide
5. Mode Reference Guide The following chart shows the Z1’s modes. 5-1. Mode Functions Modes Functions Ref. page Watch Mode • To display current time, date, day and Surface Mode • To confi gure Home City and daylight saving P.33... -
Page 18: Button Operation And Switching Mode
JUST button to select and save the settings for that particular mode. NOTES: • When the button operation sound is set to ON, your Z1 will emit a beep each time you press the MODE button. When returning to Watch Mode, a slightly higher-tone beep sounds. - Page 19 LIGHT/LOG button Press the LED/LOG button to activate the backlight. Press-and-hold this button while in Watch Mode to switch to Log Mode. Ref: To display the Dive Log • • • P.44 Ref: Automatic Light-Up (Auto Light) • • • P.67 NOTE: When set to Auto Light, the backlight turns on frequently and the capacity of the rechargeable battery decreases quickly.
-
Page 20: Setting Your Z1
6. Setting Your Z1 IMPORTANT Before making any other settings on your Z1 you must fi rst set your Home City. 1. In Watch Mode or Surface Mode, press-and-hold the ADJUST button for about 2 seconds. [SET] [Hold] fl ashes and [CITY] appears for about 1 second, followed by the city code and the city name which will scroll in the upper right-hand corner of the screen. - Page 21 3. Press the LED/LOG or PLAN button to change the following settings. Display(e.g.) Change item Operation Press PLAN or LED/LOG Change city code button Switch between daylight savings time Press PLAN button and standard time Toggle between 12-hour (12 H) and Press PLAN button 24-hour (24 H) Reset seconds to "00"...
-
Page 22: Confi Gure Home City And Daylight Saving Time Settings
6-1. Confi gure Home City and Daylight Saving Time Settings To use your Z1 you need to select your Home City and Time Zone from the 48 cities (31 time zones) in the Z1’s city code list. You can also set either Standard Time or Daylight Saving Time (DST) corresponding to the country or region you fi... - Page 23 2. Use the PLAN and LED/LOG buttons to scroll forward or backward through the available city codes. Select the city closest to your location for your Home City. 3. A press of the MODE button advances you to the Daylight Saving Time (DST) setting screen.
-
Page 24: Select 12-Hour Or 24-Hour Clock
6-2. Select 12-Hour or 24-Hour Clock NOTE: When using a 12-hour clock, [P] (indicating afternoon) will be visible from noon to 11:59 pm. When using a 24-hour clock [P] does not appear on the screen. How to set 1. In Watch Mode or Surface Mode, press-and-hold the ADJUST button for about 2 seconds. -
Page 25: Set Current Time And Date
Once you set the Year, Month and Day, the Day-of-Week is automati- cally set. • When using your Z1 outside the region of the Home City setting, it’s necessary to reset the Home City to the city nearest your present loca- tion. -
Page 26: Set Button Operation Sound
6-4. Set Button Operation Sound When the button function audible signal is set to ON, every time you press the button an audible signal will sound, indicating the button press was successful. When this function is turned OFF, button operation is silent. The factory default for this button function is ON. -
Page 27: Select Backlight Duration
6-5. Select Backlight Duration How to Set 1. In Watch Mode or Surface Mode, press-and-hold the ADJUST button for about 2 seconds. [SET] [Hold] fl ashes and [CITY] appears for about 1 second, followed by the city code and the city name which will scroll in the upper right hand corner of the screen. -
Page 28: Set Power Saving
6-6. Set Power Saving How to set 1. In Watch Mode or Surface Mode, press-and-hold the ADJUST button for about 2 seconds. [SET] [Hold] fl ashes and [CITY] appears for about 1 second, followed by the city code and the city name which will scroll in the upper right hand corner of the screen. -
Page 29: Set Units Of Measure
6-7. Set Units of Measure NOTE: This setting can be programmed only when using a Home City other than TYO (TOKYO). How to Set 1. In Watch Mode or Surface Mode, press-and-hold the ADJUST button for about 2 seconds. [SET][Hold] fl ashes and [CITY] appears for about 1 second, followed by the city code and the city name which will scroll in the upper right hand corner of the screen. -
Page 30: Set The Mmdd/Ddmm Display
6-8. Set the MMDD/DDMM Display With the Z1 you can choose either the month-day or day-month display. However, this can be set only when using a Home City other than TYO (TO- KYO). How to Set 1. In Watch Mode or Surface Mode, press-and-hold the ADJUST button for about 2 seconds. -
Page 31: Main Display Setting In Dive Mode
6-9. Main Display Setting in Dive Mode It is possible to switch the main display for Dive Mode to either no-decom- pression diving time or depth. The default setting is depth, indicated by DEP 1. How to Set 1. In Watch Mode or Surface Mode, press-and-hold the ADJUST button for about 2 seconds. -
Page 32: Set Auto Light
6-10. Set Auto Light The Z1 off ers an Auto Light function that enables the backlight to activate without manually pressing the LED/LOG button. NOTE: The default position for the Auto Light function is OFF. How to Set 1. In Watch Mode or Surface Mode, press-and-hold the ADJUST button for about 2 seconds. -
Page 33: Watch Mode/Surface Mode (Time)
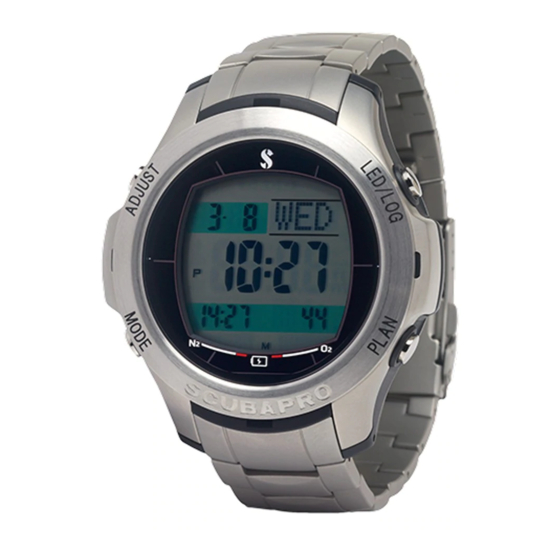
7. Watch Mode/Surface Mode (TIME) Watch Mode and Surface Mode display the current Time and Date. NOTE: Surface Mode is used when nitrogen remains in the body after div- ing. It displays the same data as Watch Mode (current Time, Date, Day of Week), plus includes Desaturation and Surface Interval time. -
Page 34: Displayed Contents Of Surface Mode
The NO FLY icon will disappear from the screen after 18 hours. Con- versely, even if nitrogen saturation or oxygen uptake times out and your Z1 switches to Watch Mode, the NO FLY icon will remain until 18 hours have elapsed. -
Page 35: Dive Mode (Dive)
NEVER fl y when your Z1’s NO FLY icon is displayed. • NEVER fl y when you have desaturation time still showing on your Z1. 8. Dive Mode (DIVE) In the Dive Mode, important information for a scuba dive is shown. -
Page 36: No Decompression Mode
8-2. No-Decompression Mode During no-decompression diving, the following information is displayed. No decompression limit Time you can stay at the current depth without (NDL) decompression. * Max. 200 minutes Current depth is shown, starting at a depth of 1.6m/5ft. Current depth * Max. -
Page 37: Safety Stop
8-3. Safety Stop The Z1 features a Safety Stop function. After a dive of 10m/33ft or deeper, when ascending without a decompres- sion stop, a 3-minute countdown timer will activate at a depth of 6m/20ft. This timer will continue to run from a depth of 6m/20ft and will stay on until you reach a depth of 1.6m/5ft. -
Page 38: Decompression Dive
8-4. Decompression Dive The Z1 provides the following information during a decompression dive. Displayed every 3m/10ft (3m, 6m, 9m, 12m, etc.). Depth to stop for First (deepest) deco stop is determined by the length decompression and depth of the dive. -
Page 39: Warnings In Dive
When you make your decompression stop at the indicated depth, DECO turns off , the N indicator changes from blinking to ON, and the dive reverts to a no-decompression dive. • The decompression dive event is then recorded in your Z1’s dive log. - Page 40 In such an event, after 3 minutes your Z1 will not be able to be used for diving for the next 48 hours. DECO and current time will continue to blink, indicating that the Z1’s functions are...
- Page 41 EEEE appears in the 7-segment display area, and an alarm sounds for 3 seconds. • The Z1 cannot be used for diving for 48 hours after the warning is acti- vated (except when dive time exceeds 599 minutes). • All Out of Measurement Range events are automatically recorded in the dive log.
-
Page 42: Gas O
In Watch Mode or Surface Mode, press the PLAN button. [PLAN] appears for about 1 second, then the Z1 switches to Plan Mode. (NOTE: The Z1 will not make this switch when in Gauge Mode.) 2. Press-and-hold the ADJUST button for about 2 seconds. - Page 43 % will blink. By pressing the PLAN button, the gas number advances. If the next gas in line has not been preset, or if it cannot be dived, the Z1 will return to gas 1. NOTE: A gas cannot be dived when the ppO exceeds 1.6 bar.
- Page 44 EANx (Enriched Air Nitrox) is a mixed gas in which the percentage of oxy- gen exceeds that which is used in compressed air. The Z1 can be used with compressed air (21% O ), or with EANx (22%-100% ). In diving with Nitrox (EANx), in addition to tracking dive data during an air dive, the Z1 monitors the 0 infl...
-
Page 45: Log Mode (Log)
9. Log Mode (LOG) You can access the Z1’s Log Mode from either the Watch Mode or Surface Mode. Logs of your last 30 dives are provided, from newest to oldest. Scu- ba diving log data and freediving log data are mixed in chronological order. -
Page 46: Check The Dive Log
9-2. Editing Dive Numbers in Dive History When viewing the dive history screen (DHIST), press the ADJUST and LED/ LOG buttons simultaneously and the total dive number fl ashes. Press the LED/LOG or PLAN to increase or decrease the number of dives. Finally, press ADJUST and the update is complete. - Page 47 Display information on the LOG screen Dive year/ Date you dived (year/month/day) month/date Alternate display Diving Mode, Gauge Mode, Dive number of dives a day DIVE/GAUGE (See the circle in the LOG dia- gram, 2 dots in the fi gure = the second dive of the day) Log number 1 to 9999 Log No.
- Page 48 Display Information on the L-2 Screen Safety factor settings for that Safety factor dive [*] % used in the tank for the dive % /GAUGE Ratio of limit value to prevent oxygen poisoning in the central nervous system [*] Ratio of limit value to prevent oxygen poisoning in the lungs [*] L - 2 The following information is displayed for the Freedive Log...
- Page 49 1. Go to Log Mode. • Press-and-hold the LED/LOG for about 2 seconds while in Watch Mode or Surface Mode. [LOG] is displayed on the screen, and the Z1 switches to Log Mode after about 1 second. • When in Log Mode, the latest dive is displayed. (“FREE” means you’re in the freedive log.)
-
Page 50: Warnings Recorded In The Log
The Z1 can hold about 80 hours of profi le data at the default sampling rate of 20 seconds. If you set the sampling rate to 10 seconds, the Z1 will be able to hold about 40 hours of data. How to Set •... -
Page 51: Oxygen Uptake/Ppo 2 Profi Le Saving Setting
1. Go to Log Mode. In Watch Mode or Surface Mode, press-and-hold the LED/LOG button for about 2 seconds. [LOG] appears on the screen, and the Z1 switches to Log Mode after about 1 second. NOTE: In Log Mode, the latest logged dive is displayed. - Page 52 When the last depth graph data is displayed, the graph is scroll-dis- played. When you press anything other than the MODE button, the display stops. When you press anything other than MODE button, the auto- matic display stops. Elapsed Display elapsed time since start of dive time in minutes and seconds Depth...
- Page 53 1. Go to Log Mode. In Watch Mode or Surface Mode, press-and-hold the LED/LOG button for about 2 seconds. [LOG] appears on the screen, and the Z1 switches to Log Mode after about 1 second. 2. Every time the LED/LOG button is pressed, it displays the newest free- dive session in the newest order.
-
Page 54: Plan Mode(Plan)
3. Press-and-hold the MODE button to return to Watch Mode or Surface Mode. 10-1. Set Safety Factor The Z1 lets you adjust your decompression schedule by selecting from 3 Safety Factor levels. depth 200 104 66 200 95 180 80 *These NDLs are based on an atmospheric pressure of 1013 mbar. -
Page 55: Depth Interval Alarm Setting
Z1 changes to Plan Mode after about 1 second. 2. Press-and-hold the ADJUST button for about 2 seconds. When [GAS1] [21 - 100%] appears after a blinking [SET] [Hold], re- lease the button. (When the Gauge Mode is ON, this function is not possible.) - Page 56 10-3. Maximum Depth Warning The Z1 is equipped with a maximum depth warning that sounds when the set depth is reached in Dive Mode, Freedive Mode and Gauge Mode. The default setting is OFF.
- Page 57 2. Press-and-hold the ADJUST button for about 2 seconds. After [SET] [Hold] blinks, release the button when you see [GAS1] [21 - 100%]. (If the Gauge Mode is set to ON, at this point it will switch to the inter- val alarm screen immediately, in which case you can move directly to Step 5.) 3.
- Page 58 1. Go to Plan Mode. Press the PLAN button once in Watch Mode or Surface Mode. [PLAN] appears on the screen and the Z1 enters Plan Mode in about 1 second. No Decompression Time allowed to stay at the expected water depth Limit(NDL) *Max 200 min...
-
Page 59: Compass(Comp)
(N, S, NW, etc.) and angle value in degrees (90º, 180º, 270º, etc.) are displayed. 4. After the fi rst reading is obtained, the Z1 will continue to take digital compass readings automatically every second for up to 60 seconds. -
Page 60: Digital Compass Precautions
(If [ERR] [- 1 -] is displayed, repeat the process from step 2.) NOTE: If during this process no action is taken for 1 minute your Z1 returns to Watch Mode or Surface Mode. - Page 61 – especially inside ferro-concrete structures. • Storage The accuracy of the bearing sensor may deteriorate if your Z1 becomes magnetized. Because of this, you should store your Z1 away from magnets or other sources of strong magnetism, including: permanent magnets (magnetic necklaces, etc.) and household appliances (TVs,...
-
Page 62: Stopwatch(Stw)
12. Stopwatch (STW) The Z1’s stopwatch function can be used in Watch Mode or Surface Mode. The Stopwatch Mode can indicate elapsed time up to 999 hours, 59 minutes and 59.9 seconds. If it exceeds the measurement range, it will return to 0 and continue its measurement. -
Page 63: Timer(Tmr)
To set the starting value of the countdown time to 24 hours, set 0H 00’00. 5. Press the ADJUST button to exit the Timer set screen. If no action is taken for 2 to 3 minutes, the Z1 automatically ends the Timer set screen. -
Page 64: Using The Alarm(Alm)
5 minutes up to 7 times or until it is turned off . You can also turn on an Hourly Time Signal, which will cause the Z1 to beep twice every hour on the hour. The other alarms are one-time alarms. -
Page 65: To Set An Alarm Time
14-2. To Set an Alarm Time 1. In the Alarm Mode, press the PLAN button to scroll through the alarm screens until the one you want to set is displayed. (There is no time setting for the hourly time signal.) AL-1 PLAN →... -
Page 66: World Time(Wt)
14-4. Stopping the Alarm Press any button. NOTES: • Even if you switch to another mode, such as Dive Mode, an alarm sounds. • The snooze alarm sounds up to7 times at intervals of about 5 minutes. • The snooze alarm will be canceled when any of the following occurs while the SNZ indicator is blinking on the display. -
Page 67: To View The Time In Another Time Zone
15-2. View the Time in Another Time Zone In the World Watch Mode, press the PLAN button to select city codes. • The display shows the current time of the selected city. • Press-and-hold the PLAN button to fast-forward through the selection. 15-3. -
Page 68: Illumination
16. Display of Solar Charge (SLR) The Z1 lets you check the status of its solar charge. You can also see the estimated time it will take to reach full charge at the current charging rate, based on the amount of available light. However, this is just an estimate and should be used as a reference only. - Page 69 If the Z1 is inclined more than 15 degrees from the horizontal state, it will be diffi cult to light up. • If the Z1 is hidden under a shirt sleeve, the light will be constantly lit and the charge will decrease. •...
- Page 70 1m/3ft in depth, the Freedive Mode will not end – although if this situation persists at more than 1m/3ft in depth for 99 minutes, your Z1 will automatically termi- nate the freedive session.
- Page 71 18-4. Button Functions in Freedive Mode 1. Pressing the MODE button takes you to Compass Mode. 2. Pressing the MODE button in Compass Mode takes you to Stopwatch Mode. 3. Pressing the MODE button in Stopwatch Mode takes you to Dive Mode. 4.
-
Page 72: Gauge Mode
19. Gauge Mode In Gauge Mode, the Z1 does not calculate no-decompression dive time or decompression dive time. Gauge Mode provides only basic data like depth and dive time. 19-1. Activating Gauge Mode 1. In Watch Mode or Surface Mode, press the PLAN button to go to Plan Mode. - Page 73 Display Time elapsed from diving start *Max. 599 min Dive time Title GAUGE Current depth resolution is 0.1m (1ft) Depth *Max 99.9m/328ft Maximum water depth in the dive *Max 99.9m/328ft Max depth (MAX) Display current water temperature Water temperature Ref. Digital compass• • • P.58 Compass Bearing Display elapsed time up to 0.1 second increments•...
-
Page 74: Bluetooth Data Transfer Mode(Ble)
20. Bluetooth Data Transfer Mode (BLE) By setting your Z1 to Bluetooth Data Transfer Mode, you can transfer dive data wirelessly to various desktop and hand-held devices, and you can also use it to make adjustments in your Z1 settings. - Page 75 Z1 turns off automatically in about 10 minutes. Depending on the smartphone, it may not be possible to fi nd the Z1 from the application. In this case, you can connect by changing the interval time (4 types).
-
Page 76: Troubleshooting
EEEE and current time are Out of measurement range warning is displayed. The shown in turn Z1 cannot be used within the next 48 hours for diving. When O % was set between 22 to 100% in Nitrox The number of O... - Page 77 Ref. Set home city, daylight saving time.• • • P.22 <Sensor> Situation Cause and Remedy Subjecting Z1 to strong impact can cause a sensor malfunction or damage internal circuitry. When this happens, ERR (error) will appear on the display and sensor operations will be disabled.
- Page 78 • If all of the battery power indicators [H][M][L] are blinking with [CHG], it means the battery level is very low. Expose the Z1 to bright light as soon as possible. The battery is recharged by light striking the solar panel, so you don’t need to replace the battery...
-
Page 79: Specifi Cation
22. Specifi cations Accuracy at normal ±15 seconds a month temperature Hour, minutes, seconds, year, month, day, day of the week, p.m. Timekeeping, (P), /Time format: 12-hour and 24-hour, Full Auto-calendar Calendar system pre-programmed from the year 2000 to 2099 •Direction sensor accuracy ±10 °... -
Page 80: Precautions For Use
• If your Z1 is suddenly subjected to extreme cold, the inside of the glass may become cloudy. However, this shouldn’t present a problem as long as the cloudiness disappears relatively soon. If the cloudiness persists, or if water is visible inside, stop using your Z1 immediately and consult your dealer. - Page 81 Since your Z1 is a precision machine, never attempt to disassemble it. Also, be careful not to pierce the sensor part of your Z1 with a thin rod as this may cause dust to enter. Always rinse with fresh water after using your Z1 in salt water.
- Page 82 • Depending on the condition of your Z1 and the condition of your skin, the wristband – especially a resin band – can cause a rash. Always keep your Z1 clean and dry. If you do get a rash, stop wearing your Z1 and consult a dermatologist.
- Page 83 About the Batteries Used in Your Z1 • The Z1 uses a rechargeable battery. Please do not remove the battery yourself. Attempting to replace it with anything other than the approved rechargeable battery will cause damage. • The Z1’s battery is recharged by way of electricity generated by sunlight or certain types of artifi...
-
Page 85: Utc (Coordinated Universal Time) And Time Zone
25. UTC (Coordinated Universal Time) and Time Zone Please check your time zone from the world map on the previous page. 26. City Code List The following table is the city code list for the Z1. City Code Time Zone... - Page 86 • If you do not see your city code in the above list, check for the city clos- est to where you are using your Z1, and use its city code. • The time diff erence is based on Coordinated Universal Time (UTC).
- Page 87 About Trademarks • The name Bluetooth® and its logos are registered trademarks owned by Bluetooth SIG, Inc. Any use of these marks by SCUBAPRO is under li- cense. Other trademarks and trade names are those of their respective owners. • Android, Google Play and other marks are trademarks of Google Inc.
Need help?
Do you have a question about the Z1 and is the answer not in the manual?
Questions and answers