Table of Contents
Advertisement
Quick Links
Advertisement
Table of Contents

Related Manuals for Lovibond TB300 IR


Summary of Contents for Lovibond TB300 IR
- Page 1 Turbidimeter TB300 IR Instruction Manual...
- Page 3 Important steps before using the TB300 IR Please carry out the following steps as described in the Instruc- tion manual. Become familiar with your new TB300 IR before starting with the first tests: • Unpacking and inspection of delivery contents, see page 42.
- Page 5 Wichtige Information Um die Qualität unserer Umwelt zu erhalten, beschützen und zu verbessern Entsorgung von elektronischen Geräten in der Europäischen Union Aufgrund der Europäischen Verordnung 2002/96/EC darf Ihr elektronisches Gerät nicht mit dem normalen Hausmüll entsorgt werden! Tintometer GmbH entsorgt ihr elektrisches Gerät auf eine professionelle und für die Umwelt verantwortungsvolle Weise.
- Page 6 Información Importante Para preservar, proteger y mejorar la calidad del medio ambiente Eliminación de equipos eléctricos en la Unión Europea Con motivo de la Directiva Europea 2002/96/CE, ¡ningún instrumento eléctrico deberá eliminarse junto con los residuos domésticos diarios! Tintometer GmbH se encargará de dichos instrumentos eléctricos de una manera profesional y sin dañar el medio ambiente.
- Page 7 Wichtiger Entsorgungshinweis zu Batterien und Akkus Jeder Verbraucher ist aufgrund der Batterieverordnung (Richtlinie 2006/66/ EG) gesetzlich zur Rückgabe aller ge- und verbrauchten Batterien bzw. Akkus verpflichtet. Die Entsorgung über den Hausmüll ist verboten. Da auch bei Produkten aus unserem Sortiment Batterien und Akkus im Lieferumgang enthalten sind, weisen wir Sie auf folgendes hin: Verbrauchte Batterien und Akkus gehören nicht in den Hausmüll, sondern können unentgeltlich bei den öffentlichen Sammelstellen Ihrer Gemeinde und überall...
- Page 8 Indicación importante acerca de la eliminación de pilas y acumuladores Basado en la norma relativa a pilas/ baterías (directiva 2006/66/CE), cada consumidor, está obligado por ley, a la devolución de todas las pilas/ baterías y acumuladores usados y consumidos. Está prohibida la eliminación en la basura doméstica. Ya que en productos de nuestra gama, también se incluyen en el suministro pilas y acumuladores, le sugerimos lo siguiente: Las pilas y acumuladores usados no pertenecen a la basura doméstica, sino que pueden...
- Page 9 Data Sheets). Failure could result in serious injury to the operator or damage to the instrument. MSDS: www.lovibond.com CAUTION Use the charger unit only with rechargeable batteries. Failure can result in serious injury to the operator or damage to the instrument.
-
Page 10: Table Of Contents
Table of contents Part 1 Descriptions ................... 5 General description ..................6 Operating principles ..................6 Factory calibration .................... 7 Important Notes ....................7 1.4.1 Guidelines for turbidity measurements ............. 7 1.4.2 Cleaning of vials & sampling containers ............8 Part 2 Operating manual ................ - Page 11 2.3.7.1 Preparation of dilution water ................20 2.3.7.2 Preparation of 4000 NTU Formazin Stock Solution .......... 20 2.3.7.3 Preparation of dilutions from the 4000 NTU Formazin Stock Solution ..... 21 2.3.8 Measurement techniques ................22 2.3.8.1 Degassing – Removal of Bubbles ..............22 2.3.8.2 Measurement of high turbidity values .............
- Page 12 2.3.7.1 Preparation of dilution water ................20 2.3.7.2 Preparation of 4000 NTU Formazin-stock solution ...........20 2.3.7.3 Preparation of dilutions from the 4000 NTU Formazin-stock solution ....21 2.3.8 Measurement techniques ................22 2.3.8.1 Degassing – removal of bubbles ..............22 2.3.8.2 Measurement of high turbidity values ..............23 2.3.8.3 Measurement of low turbidity values ...............23 2.3.8.4...
-
Page 13: Part 1 Descriptions
Part 1 Descriptions TurbiDirect_6 02/2019... -
Page 14: General Description
The TB300 IR is a portable turbidity meter, based on the requirements of ISO 7027 (Water Quality – Determination of Turbidity). The instrument works with rechargeable batteries as well as with mains. As soon as the TB300 IR is connected with the adapter to the mains the batteries are charged. -
Page 15: Factory Calibration
1.3 Factory calibration The turbidimeter TB300 IR is factory calibrated with Formazin Primary Standard and does not require user calibration before use (see chapter 2.3.5 User calibration). 1.4 Important Notes 1.4.1 Guidelines for turbidity measurements a) Vials and caps should be cleaned thoroughly after each test to avoid interferences. Minor residuals can cause errors. -
Page 16: Cleaning Of Vials & Sampling Containers
1.4.2 Cleaning of vials & sampling containers Vials, caps and sampling containers should be cleaned thoroughly after each test to avoid interferences. Minor residuals can cause errors. Residuals: The vial must be cleaned according to the type of sample measured. •... -
Page 17: Part 2 Operating Manual
Part 2 Operating manual TurbiDirect_6 02/2019... -
Page 18: Operation
2.1 Operation 2.1.1 Commissioning Before working with the TB300 IR insert the rechargeable batteries and the Lithium battery (part of delivery). The rechargeable batteries are not charged. See chapter 2.1.2 Saving data – Important Notes, 2.1.3 Replacement of rechargeable batteries resp. Lithium battery. and 2.1.4 Charging the rechargeable batteries. -
Page 19: Fuse
2.1.5 Fuse The instrument has a fuse (E) (type: 1 A, inert, 20 mm). If a replacement is necessary proceed as described in “Replacement of rechargeable batteries resp. Lithium-battery". If the instrument can be operated with the mains adapter but not with the recharcheable batteries, the fuse could be defect (try new recharcheable batteries first). -
Page 20: Overview Of Funktion Keys
2.2 Overview of funktion keys 2.2.1 Overview Switching the instrument on or off Returning to previous menu Function key: description in the text if key available Function key: description in the text if key available Function key: description in the text if key available Confirming Mode Menu of instrument settings and further functions... -
Page 21: User Countdown
2.2.3 User countdown With this function the operator is able to define his own countdown. Press [“clock”] key. 19:20:20 15.04.2014 The display shows time and date: Press [“clock”] key. Count-Down The display shows: mm : ss 99 : 99 Either press [ ] key to accept the last used user count- down press any number key to start entering a new value The entering comprises two digits each. -
Page 22: Operation Mode
2.3.2.2 Read key – quick measurement Read Press [Read] key to perform a quick test. By pressing the [Read] key Signal averaging function is not active. The TB300 IR measures and averages 9 measurements. The result is shown in NTU... -
Page 23: Performing Turbidity Measurement
2.3.2.3 Performing Turbidity measurement Accurate turbidity measurements depend on good, consistent measurement techniques. This includes working with clean sample vials in good condition and removing air bubbles. Samples should be measured immediately to prevent changes in sample characteristics due to temperature shifts and settling. Instrument operation: Take a representative sample in a clean container. -
Page 24: Storing Results
Place the vial in the sample chamber making sure that the positioning is correct, with the marks aligned. Close the sample chamber with the cap. Read Read Press [Read / Avg] or [Read] key. 1.02 NTU The result is shown in the display in NTU. 1.00 NTU Remove the vial and clean it. -
Page 25: Printing Results
The data set is stored with date, time, code-No. and test result. Stored! The display shows: The test result is then shown again. Note: Storage: 900 The display shows the number of free data sets. free records left Storage: If there are less than 30 data sets free the display shows: only 29 free records left Clear the memory as soon as possible (see chapter 2.4.4 Delete stored results). -
Page 26: User Calibration
2.3.5 User calibration 2.3.5.1 When to calibrate The turbidimeter was calibrated at the factory with Formazin Primary Standard and does not require user calibration before use. As the electronic and optical design of this instrument provides long-term stability the need for frequent calibration is minimised. -
Page 27: Calibration Standards
Read Press [Read / Avg] key. Count-Down The countdown starts. 1:00 After the countdown is finished the reading starts auto- matically. <NTU adjustment> store Press [ ] key to store. Pess [Esc] key to cancel the calibration. 2.3.6 Calibration standards The T-CAL standards purchased with the instrument should be used to calibrate the instrument. -
Page 28: Formazin Standards - Preparation And Handling
Preparing and using standards – infrequent use Note: These instructions apply to all standards except the < 0.1 NTU standard. If you are using the < 0.1 NTU standard follow the instructions given above.These instructions apply to standards that have been sitting undisturbed for more than one week or to new standards. 1. -
Page 29: Preparation Of Dilutions From The 4000 Ntu Formazin Stock Solution
2.3.7.3 Preparation of dilutions from the 4000 NTU Formazin Stock Solution To prepare the dilutions from a 4000 NTU Formazin Stock Solution and dilution water: Standard Step 1 Step 2 Step 3 20 NTU Add 100 ml of Pipette 1.00 ml well Fill to the mark dilution water to mixed 4000 NTU... -
Page 30: Measurement Techniques
2.3.8 Measurement techniques 2.3.8.1 Degassing – Removal of Bubbles Note: Do not use with T-Cal Standards If the Turbidity is low it is important to remove air bubbles from the sample, using one or a combination of the following methods: •... -
Page 31: Measurement Of High Turbidity Values
2.3.8.2 Measurement of high turbidity values High turbidity samples with more than 1100 NTU ("overrange") may be diluted. The dilution water should be a water with very low turbidity as described in chapter 2.3.7.1 "Preparing dilution water". For accurate dilution proceed as follows: Mix the water sample well and pipette x ml of the water sample (see table below) into a 100 ml volumetric flask. -
Page 32: Indexing And Matching Sample Vials
2.3.8.4 Indexing and matching sample vials Matched sample vials are required to minimise the effects of optical variation from glass vial to glass vial. Alternatively an indexed single sample vial can be used for every measurement. Once vial orientation in the sample chamber is located, always use this new orientation mark for all measurements independent of the white pre-printed triangle mark. -
Page 33: Indexing A Set Of Sample Vials
Read Read Press [Read/Avg] or [Read] key. or 1.02 NTU 1.00 NTU Note the displayed result. Rotate the vial in the sample chamber about 45°. Place the cover on the instrument. Read Read Press [Read/Avg] or [Read] key. Note the displayed result. 1.02 NTU 1.00 NTU Repeat this procedure until the smallest NTU value is... - Page 34 11. Press [Read / Avg] or [Read] key. 12. Note the displayed result. Repeat this procedure until the smallest NTU value is obtained. 13. Mark the vial. 14. To index more vials, repeat points 1. to 13. for each vial. 15.
-
Page 35: Settings: Table Of Mode Functions
2.4 Settings: Table of MODE Functions Mode-Function Description Page Clear calibration Deleting user calibration Clock Setting date and time Delete data Deleting all stored results Key beep Switching the acoustic signal on/off to indicate key-pressing Language Selecting language LCD contrast Setting the display contrast Print Printing all stored results... -
Page 36: Blank Because Of Technical Requirements
2.4.1 blank because of technical requirements 2.4.2 Instrument basic settings 1 Selecting a language Mode Press [MODE] [1] [0] keys. Confirm with [ ] key. <Language> The display shows: Deutsch >> English Press arrow key [ ] or [ ] to select the required language Francais from the displayed list. - Page 37 Setting date and time Mode Press [MODE] [1] [2] keys. Confirm with [ ] key. The display shows: <Clock> yy-mm-dd hh:mm _ _-_ _-_ _ _ _:_ _ The entry comprises two digits each. Enter year, month and day, yy-mm-dd hh:mm 14-05-15 _ _:_ _...
- Page 38 Signal beep Performing a measurement takes several seconds. The instrument indicates the end of measuring by a short beep. Mode Press MODE [1] [4] keys. Confirm with [ ] key. <Signal-Beep> The display shows: ON: 1 OFF: 0 • Press [0] key to switch the signal beep off. •...
-
Page 39: Printing Of Stored Results
2.4.3 Printing of stored results Printing all results Mode Press MODE [2] [0] keys. Confirm with [ ] key. <Print> The display shows: Print all Data Start: cancel: Press [ ] key for printing out all stored test results. Test No.: The display shows e.g.: After printing the instrument goes back to mode menu automatically. - Page 40 Printing results of a selected time period Mode Press MODE [2] [1] keys. Confirm with [ ] key. The display shows: <Print> sorted: date from yy-mm-dd Enter year, month and day for the first day of the required __-__-__ period, e.g.: 15 May 2014 = [1][4][0][5][1][5] Confirm with [ ] key.
- Page 41 Printing results of a selected Code No. range Mode Press MODE [2] [2] keys. Confirm with [ ] key. <Print> The display shows: sorted: Code-No. from _ _ _ _ _ _ Enter numeric code number (up to 6 places) for the first required code no., e.g.: [1].
- Page 42 Printing Parameter Mode Press MODE [2] [9] keys. Confirm with [ ] key. <printing parameter> 1: Flow control 2: Baud rate The display shows: cancel: Press [1] key to select ”Protocol”. <Flow Control> is: Hardware The display shows: select: [ ] [ ] save: cancel: Press arrow key [ ] or [ ] to select the required Protocol...
-
Page 43: Recall / Delete Stored Results
Press arrow key [ ] or [ ] to select the required Baud rate. (600, 1200, 2400, 4800, 9600, 14400, 19200) Confirm with [ ] key. End with [ESC] key. Back to Mode Menu with [ESC] key. Note: Select “Hardware” as Flow control and “9600” as Baud rate for using the printer DPN 2335. - Page 44 Recall results of a selected time period Mode Press MODE [3] [1] keys. Confirm with [ ] key. <Storage> The display shows: sorted: date from yy-mm-dd Enter year, month and day for the first day of the required __-__-__ period, e.g.: 15 May 2014 = [1][4][0][5][1][5] Confirm with [ ] key.
- Page 45 Recall results of a selected Code No. range Press MODE [3] [2] keys. Mode Confirm with [ ] key. The display shows: <Storage> sorted: Code-No. from _ _ _ _ _ _ Enter numeric code number (up to 6 places for the first required code no., e.g.: [1].
- Page 46 Delete stored results Mode Press MODE [3] [4] keys. Confirm with [ ] key. <Delete data> The display shows: Delete all data? YES : 1 NO : 0 • Press [0] key to retain the data sets in memory. • After pressing key [1] the following acknowledgment is displayed: <Delete data>...
-
Page 47: 2.4.8 Blank Because Of Technical Requirements
2.4.5 – 2.4.8 blank because of technical requirements 2.4.9 Instrument basic settings 2 Adjusting display contrast Press [MODE] [8] [0] keys. Mode Confirm with [ ] key. The display shows: <LCD contrast> • Press arrow key [ ] to increase contrast of the LCD display. -
Page 48: Data Transfer
2.5 Data transfer Switch the instrument and the personal computer or printer off. Connect the instrument (RS232 interface) and the serial interface of the personal computer or printer using a cable in line with the specified assignment (see technical data). The cable for connection to a personal computer is included in delivery contents. -
Page 49: Part 3 Enclosure
Part 3 Enclosure TurbiDirect_6 02/2019... -
Page 50: Unpacking The Instrument
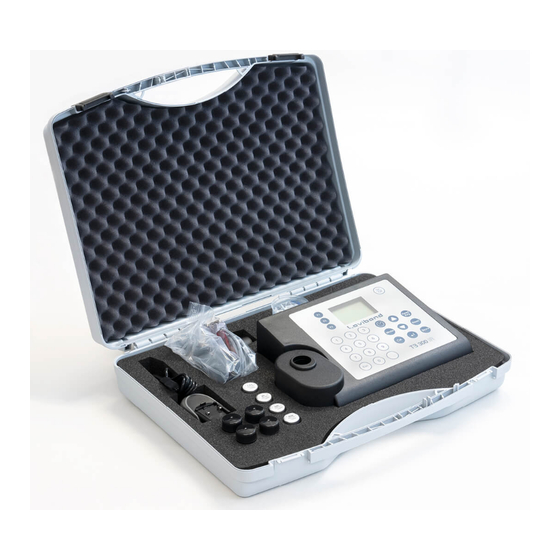
3.1 Unpacking the instrument Carefully inspect all items to ensure that every part of the list below is present and no visible damage has occurred during shipment. If there is any damage or something is missing, please contact your local distributor immediately. 3.2 Delivery content Standard contents for Turbidimeter: 1 Turbidimeter in plastic case... -
Page 51: Technical Data
3.4 Technical data Display Graphic Display (7-line, 21-characters) Serial Interface serial RS232 for printer- and PC-connection; 9-pin D-sub-mail connector, data format ASCII, 8-bit Data, no parity, 1 start-bit, 1 stop-bit, baud rate and protocol: adjustable Pin assignation: Pin 1 = free Pin 6 = free Pin 2 = Rx Data Pin 7 = RTS... -
Page 52: Abbreviations
3.5 Abbreviations Abbreviation Definition Read/Avg Signal Average function Nephelometric Turbidity Unit Formazine Turbidity Unit Formazine Nephelometric Units Formazine Attenuation Units ASBC American Society of Brewing Chemists European Brewery Convention mg/l Milligram per litre Parts per million TurbiDirect_6 02/2019... -
Page 53: Trouble-Shooting
3.6 Trouble-shooting 3.6.1 Operating messages in the display / error display Display Meaning Trouble shooting Overrange Reading is exceeding the range too • If possible dilute sample. much light on the photo cell. • Cell chamber lid closed? • Repeat measurement with closed lid. -
Page 54: Declaration Of Ce-Conformity
3.7 Declaration of CE-Conformity The manufacturer: Tintometer GmbH Schleefstraße 8 a 44287 Dortmund Deutschland declares, that this product TB 300 IR Product name: Conforms with DIN EN 61 326 for specific defined electromagnetic enviroments. Conforms with DIN EN 61 326 (domestic). Dortmund, 06. - Page 55 TurbiDirect_6 02/2019...
- Page 56 Tintometer GmbH The Tintometer Ltd Tintometer AG Tintometer Inc. Lovibond ® Water Testing Lovibond ® House Hauptstraße 2 6456 Parkland Drive Schleefstraße 8-12 Sun Rise Way 5212 Hausen AG Sarasota, FL 34243 44287 Dortmund Amesbury Tel.: +41 (0)56/4422829 Tel: 941.756.6410 Tel.: +49 (0)231/94510-0...
Need help?
Do you have a question about the TB300 IR and is the answer not in the manual?
Questions and answers