Table of Contents
Advertisement
Advertisement
Table of Contents

Related Manuals for SCHUBERTH C4 BASIC


Summary of Contents for SCHUBERTH C4 BASIC
- Page 1 MANUAL BASIC...
- Page 2 In our decades of experience in the development and manufacture of motorcycle helmets. We’re delighted that you have chosen the SCHUBERTH C4 BASIC. Each and every C4 BASIC that leaves our factory has been made with exquisite craftsmanship using state-of-the-art manufacturing techniques.
-
Page 3: How To Use The Manual Correctly
A. HOW TO USE THIS MANUAL CORRECTLY Please take time to read through this manual carefully so that your helmet protects you properly when riding your motorcycle. In order to ensure that you do not overlook any aspect of the manual that is relevant to your safety, we recommend that you read it in the order in which it appears. -
Page 4: Table Of Contents
B. CONTENTS How to use the manual correctly Contents The helmet Standard ECE approval Anatomy the helmet Outer shell Inner shell Aerodynamics Aeroacoustics Wind deflector Chin bar Chinstrap with Micro-Lock ratchet fastener Visor with anti-fog lens Sun visor Inner lining Ventilation systems Additional safety features Putting on the helmet and taking it off... - Page 5 Safety advice concerning modifications / accessories Maintenance and care Outer shell Chin section Face shield and sun visor Inner lining Ventilation Retention system Storing the helmet Accessories and spare parts Accessories and spare parts Ordering original SCHUBERTH parts SCHUBERTH service Warranty How to contact us...
-
Page 6: The Helmet
It also guarantees conformity with all insurance requirements that are important in the event of a claim. Please note that this C4 BASIC with ECE approval is not certified for the USA, Canada or any other EU countries. It is only permitted for use in countries where the ECE standard is valid. -
Page 7: Anatomy The Helmet
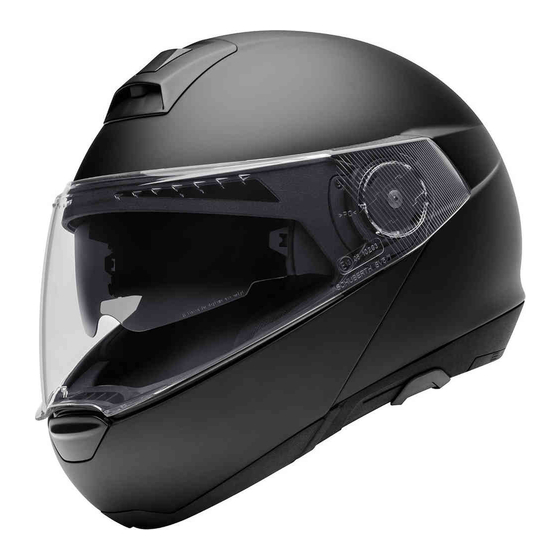
Chin bar release Chinstrap buckle 4. OUTER SHELL The outer shell of the C4 BASIC helmet combines an aerodynamically optimal shape with consistent protection. It consists of a special glass-fibre reinforced duroplastic matrix developed by SCHUBERTH, which gives the helmet the high level of strength needed for your protection. -
Page 8: Aerodynamics
C. THE HELMET 6. AERODYNAMICS Wind noise is low with the C4 BASIC, both for race-riding and during long touring rides. The C4 BASIC produces practically no uplift even at speed. Note: Please note that the strong eddy currents that can occur as a result of the fairing on faired motorcycles may have a significant effect on the aerodynamic characteristics of a helmet. - Page 9 Note: With faired motorcycles, strong eddy currents occur at the edges of the wind shadow. These may significantly reduce the aeroacoustic performance of the helmet. The motorcycle fairing should be adjusted so that the turbulence created does not reach the bottom surface of the helmet.
-
Page 10: Wind Deflector
9. CHIN BAR The C4 BASIC is equipped with a chin bar that pivots up and can be easily opened and closed by means of the operating element located in the middle of the chin bar. The movement of the section required for this is optimised for convenient, smooth operation. - Page 11 OPENING THE CHIN BAR 1. Open the chin bar by sliding the red button located in the middle of the chin zone forwards in the direction of the arrow as far as it will go, using your thumb. 2. The chin section flips right up. CLOSING THE CHIN BAR To close the chin bar, pivot it down with one hand until both locks audibly engage.
-
Page 12: Chinstrap With Micro-Lock Ratchet Fastener
Never ride with the chin bar raised. 10. CHINSTRAP WITH MICRO-LOCK RATCHET FASTENERS The C4 BASIC is fitted with a ratchet strap. This locking system is easy to use and enables you to adjust the chinstrap perfectly to your head every time you put the helmet on. - Page 13 Caution: When adjusting the strap, make sure that the helmet cannot be pulled off in a forward direction with the chinstrap closed. Caution: Check the adjustment of the chinstrap length at regular intervals. OPENING AND CLOSING To close the chinstrap fastener, slide the ratchet tongue step by step into the locking buckle.
-
Page 14: Visor With Anti-Fog Lens
C. THE HELMET 11. VISOR WITH ANTI-FOG LENS The visor is a fog-free double-lens visor. By fixing the inner anti-fog lens using eccentric pins, the two visor panes are pre-tensioned together and are thereby sealed. An insulating air cushion is thus formed between the visor’s main plate – i.e. - Page 15 • When you push the face shield open, it may well travel beyond the urban position • but it is easy to find this position by moving it downwards again. The face shield mechanism requires no additional lubrication. The face shield can be operated at any time irrespective of the position of the sun visor.
- Page 16 C. THE HELMET 2. Press the spring underneath the face shield mechanism on one side towards the face shield opening, then do the same with the spring on the other side. 3. Move the face shield upwards until it is released from the face shield mechanism.
- Page 17 3. Check the function of the visor mechanism by closing the visor once and opening it as far as possible. ANTI-FOG LENS Fitting 1. Lay the anti-fog lens in the face shield in such a way that one side of it is already slotted into the locking pin.
- Page 18 C. THE HELMET 4. Check all around the anti-fog lens to make sure that it fits tightly and evenly against the face shield. Only if this is the case will the anti-misting properties function properly. 5. If you have not done so already, remove the protective film from the anti- fog lens.
- Page 19 Note: To avoid scratching the face schield, never remove or fit the anti-fog lens unless the visor unit is clean and dry. When fitting the anti-fog lens, check that neither dust nor moisture are able to get between the two surfaces. When removing or fitting the anti-fog lens, it is always best to lay the face schield unit on a clean, dry cloth.
-
Page 20: Sun Visor
C. THE HELMET Safety note Check before each journey that the face shield and sun visor mechanism are functioning correctly and that the face shield and sun visor will provide good visibility. Any dirt should be removed before setting off. Check the face shield and sun visor for physical damage and cracks. - Page 21 Note: Only use the slide to operate the sun visor. Caution: Never ride in the dark or in conditions of poor visibility with the sun visor down. Always raise the sun visor before entering a tunnel. Caution: Riding without the face shield or with an open face shield can result in injury to the eyes and face from stones, dust, insects and other flying objects.
-
Page 22: Inner Lining
13. INNER LINING The interchangeable, washable and seamless inner lining of the C4 BASIC ensures a secure and comfortable fit, as well as improved helmet ventilation. The high-comfort cheek pads ensure that the helmet fits comfortably around the cheeks, and the head pad provides an optimal fit all around the head. - Page 23 REMOVING THE INNER LINING REMOVING NECK PAD 1. Undo the buttons on the front tabs of the neck pad. Detach the neck pad from its fixing and pull it in the direction of the arrow. 2. Undo the plastic hooks between the helmet shell and the inner lining on the...
- Page 24 C. THE HELMET REMOVING CHEEK PAD 1. Remove the cheek pad by pulling the three snaps out of the red plugs and sockets. 2. Unzip the zipper. 3. Thread the chinstrap through the neck band loop and pull them both out of the cheek padding.
- Page 25 2. Undo the two buttons in the forehead area and remove the head padding. INSTALLATION INNER LINING INSTALLATION HEAD PAD 1. Using the red pins, attach the head padding to the two connectors in the forehead area and the one at the back of the helmet. 2.
- Page 26 C. THE HELMET INTALLATION CHEEK PAD 1. Push the strap through the neck strap channel as far as the chinstrap padding opening. 2. Thread the chinstrap through the cheek pad and then through the neck band loop. 3. Zip up the zipper 4.
- Page 27 INSTALLATION NECK PAD 1. Feed the neck pad into the tracks on each side 2. Attach the plastic hooks between the helmet shell and the lining 3. Relocate the neck pad onto its fixing between the helmet shell and lining, and do up the buttons on the front tab of the neck pad.
-
Page 28: Ventilation Systems
14. VENTILATION SYSTEMS VENTILATION DEVICE 1 – FACE SHIELD SETTING The C4 BASIC has a face shield that adjusts to several positions. Depending on your road speed and the tendency of the face shield to mist up, open the face shield sufficiently wide to stop it misting up but so that it still protects your eyes from excessive draft. - Page 29 VENTILATION DEVICE 2 – INLET VENT IN CHIN AREA (face shield ventilation) The C4 BASIC features an air inlet in the chin section for visor ventilation. Air flows through the open air inlet regardless of riding position. A...
-
Page 30: Additional Safety Features
Black reflective patches on the neck pad and forehead area make the motorcyclist more visible. With solid-colour helmets (no decals) the SCHUBERTH logo on the back of the helmet is also made of reflective film. Note: Keep the reflective safety areas clean. -
Page 31: Putting On The Helmet And Taking It Off
D. PUTTING THE HELMET ON AND TAKING IT OFF Note: Please note the information on the handling of the chin strap. 1. PUTTING ON THE HELMET 1. Open and lock the chin bar. Make sure the sun visor is retracted into the helmet shell. -
Page 32: Taking Off The Helmet
D. PUTTING THE HELMET ON AND TAKING IT OFF 2. TAKING OFF THE HELMET 1. Open and lock the chin bar. Make sure the sun visor is retracted into the helmet shell. 2. Open the chinstrap. 3. Grasp the ends of the chinstrap and pull the chinstrap ends apart. 4. -
Page 33: Before Every Journey
E. BEFORE EVERY JOURNEY For your safety, check the following points before every journey: 1. CHECKING THE HELMET Check the helmet regularly for damage. Small superficial scratches will not impair the protective function of your helmet. In the case of more serious damage (cracks, dents, flaking and cracking paint, etc.), the helmet should no longer be used. -
Page 34: Checking The Face Shield And Sun Visor
E. BEFORE EVERY JOURNEY 3. CHECKING THE FACE SHIELD AND SUN VISOR Before every journey, check that the mechanisms of the face shield and sun visor are working properly and that the face shield and sun visor will provide sufficiently clear visibility. Any dirt should be removed before riding. Check the face shield and sun visor for physical damage and cracks. -
Page 35: For Your Safety
F. FOR YOUR SAFETY 1. SAFETY ADVICE CONCERNING THE HELMET Motorcycling is associated with particular risks and dangers for the rider and passenger. These risks and dangers can be reduced, but not eliminated completely, by wearing a helmet. It is impossible to state precisely what the protective effect of a helmet will be in the event of an accident. -
Page 36: Safety Advice Concerning The Face Shield/ Sun Visor
F. FOR YOUR SAFETY Examine the helmet for damage at regular intervals. Small scratches will not impair the protective function of your helmet. The helmet should be replaced after 5 to 7 years, depending on use and care. Although the outer shell is in principle capable of a longer service life, the occurrence of material fatigue and wear to other components, as well as the overall action of the helmet and the unknown conditions in which the helmet has been used, make it advisable for your own safety to replace... -
Page 37: Safety Advice Concerning Modifications / Accessories 37 En
ECE certification and all warranty and insurance claims invalid. Use only original parts, replacement parts and accessories that SCHUBERTH has expressly approved for your helmet! -
Page 38: Maintenance And Care
Alterations to the strap buckle are not permitted. In particular, you should not oil or grease the metal components of the chin section lock. Repairs may only be carried out by the SCHUBERTH Repair Service. 3. FACE SHIELD AND SUN VISOR OUTER SURFACE OF THE FACE SHIELD Use a soft cloth and a mild soap solution (<... - Page 39 ANTI-FOG LENS The Anti-fog lens must only be cleaned with a soft cloth, which may be slightly dampened if required (we recommend a mocrofibre cloth). Do not use any cleaning agents. SUN VISOR The sun visor should only be cleaned with a soft and, if necessary, slightly damp cloth (we recommend a microfibre cloth).
-
Page 40: Inner Lining
4. INNER LINING The inner lining of the C4 BASIC can be removed completely. The head and cheek pads can be washed by hand using a mild soap solution (e.g. with highly diluted standard mild detergent) at a maximum temperature of 30 °C. Allow the lining to dry at room temperature and with good ventilation. -
Page 41: Retention System
2. After cleaning, re-attach the ventilation cowl by sliding it into the mechanism and applying pressure until it clicks back into its original position. 3. Then use the ventilation slider to set to an optimum position for ventilation. 6. RETENTION SYSTEM The metal components of the retention system do not require maintenance. -
Page 42: Accessories And Spare Parts
An overview of all available accessories and spare parts can be found on the Internet at WWW.SCHUBERTH.COM We recommend that you only use original SCHUBERTH accessories and spare parts for your SCHUBERTH helmet as they are specially adapted to your helmet model. Caution: For safety reasons, all other parts of the helmet should only be replaced by your specialist dealer. -
Page 43: Schuberth Service
I. SCHUBERTH SERVICE Please contact your dealer if necessary, or you can call our service centre directly. Find your local dealer as well as the contact details for our service centre on the SCHUBERTH website at WWW.SCHUBERTH.COM... -
Page 44: Warranty
J. WARRANTY Please check your statutory warranty entitlement in your country. You can also enjoy the benefits of the “5 YEARS SCHUBERTH STANDARD GUARANTEE”. Register your C4 BASIC on the internet at WWW. SCHUBERTH.COM to enjoy the privileges of your extended guarantee. -
Page 45: How To Contact Us
K. HOW TO CONTACT US HEADQUARTERS Phone +49 (0)391 8106-0 Address SCHUBERTH GmbH Stegelitzer Straße 12 39126 Magdeburg Germany Internet WWW.SCHUBERTH.COM... - Page 46 Änderungen vorbehalten. Keine Gewährleistung auf Irrtümer und Druckfehler. Subject to change. Not responsible for mistakes or printing errors. WWW.SCHUBERTH.COM...
Need help?
Do you have a question about the C4 BASIC and is the answer not in the manual?
Questions and answers