V-ZUG Combair XSL Operating Instructions Manual
Hide thumbs
Also See for Combair XSL:
- Operating instructions manual (56 pages) ,
- Operating instructions manual (76 pages)
Table of Contents
Advertisement
Quick Links
Advertisement
Table of Contents

Subscribe to Our Youtube Channel
Related Manuals for V-ZUG Combair XSL


Summary of Contents for V-ZUG Combair XSL
- Page 1 Operating instructions Combair XSL | XSLP Oven...
- Page 2 60-450 BCXSLPZ60 21028 60-450 BCXSLPZ60c 21028 60-450 BCXSLZ60Y 21030 60-450 BCXSLPZ60 21063 60-450 Variations depending on the model are noted in the text. Colour operating instructions can be downloaded from the internet from www.vzug.com. © V-ZUG Ltd, CH-6301 Zug, 2017...
-
Page 3: Table Of Contents
Table of contents Recipe book ............ 23 Safety precautions 5 Own recipes............ 24 Symbols used............ 5 BakeOmatic ............ 26 General safety precautions........ 5 Soft roasting............ 27 Appliance-specific safety precautions .... 6 Keep warm *............ 30 Instructions for use.......... - Page 4 11.4 Cleaning the door seal ........ 38 11.5 Replacing the door seal ........ 38 11.6 Replacing the door seal on pyrolysis appliances 38 11.7 Replacing the halogen light bulb ..... 39 11.8 Cleaning the accessories and shelf guides ... 39 11.9 Pyrolytic self-cleaning ......... 40 Trouble-shooting 41 12.1...
-
Page 5: Safety Precautions
Safety precautions Symbols used General safety precautions Denotes important safety precau- tions. Failure to observe said precautions ▪ Read the operating instruc- can result in injury or in damage to tions before using the appli- the appliance or fittings! ance for the first time! Information and precautions that should be observed. -
Page 6: Appliance-Specific Safety Precautions
1 Safety precautions ently installed electrical install- lishments; by guests in hotels, ation in accordance with the motels and other accommod- installation regulations. ation establishments; in bed ▪ If the mains cable of this ap- and breakfast establishments. pliance is damaged, it must ▪... -
Page 7: Instructions For Use
1 Safety precautions ▪ Any repairs, modifications or manipula- rooms where there are spe- tions to the appliance, especially any cial conditions such as, for in- electrically live parts, may only be car- stance, a corrosive or explos- ried out by the manufacturer, its Cus- tomer Services or a similarly qualified ive atmosphere (dust, steam person. - Page 8 1 Safety precautions Caution: Risk of burns! Caution: Risk to life! ▪ The appliance gets very hot when in ▪ Danger of suffocation! Keep packaging use. The appliance door also gets hot. material, e.g. plastic film and poly- ▪ Steam and/or hot air may escape from styrene, away from children.
-
Page 9: Using For The First Time
Using for the first time Before operating the newly installed appliance for the first time, the following steps should be taken: ▸ Remove packaging and transport materials as well as any protective blue film from out of the cooking space. ▸... -
Page 10: Appliance Description
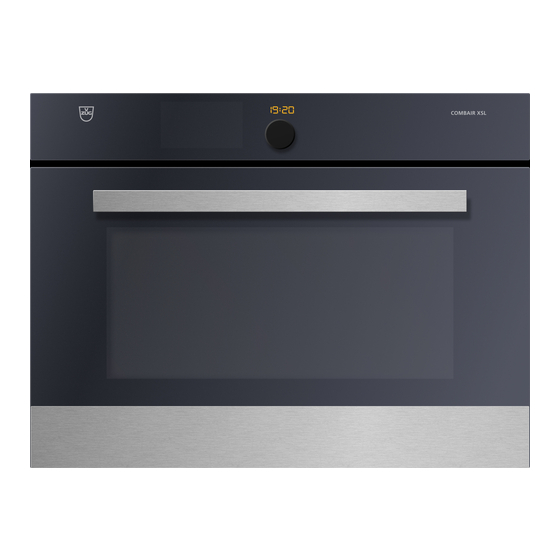
3 Appliance description Appliance description Construction Operating and display elements Ventilation opening Door handle Appliance door Operating and display elements 12:00 Display Action buttons Digital display Adjusting knob / switching on (duration/timer/time) appliance Menu buttons Overview of touch buttons Operating modes GourmetGuide EasyCook User settings... -
Page 11: Cooking Space
3 Appliance description Cooking space Using protective inserts or aluminium foil can damage the appliance. Do not place any protective insert or aluminium foil on the floor of the cooking space. Appliance door Cooking space ventilation Door seal Grill/top heat Hot air blower Temperature sensor Cooking space illumination... -
Page 12: Plate Warmer
3 Appliance description Wire shelf ▪ For standing roasting and baking tins on ▪ For standing meat, frozen pizza, etc. on ▸ Ensure that the cross strut 1 is to the back of the cook- ing space. It enables the food to be removed safely from the cooking space. -
Page 13: Operating Modes
4 Operating modes Operating modes Overview of operating modes All the operating modes and fast heating are described below. Follow the advice given in «Tips and tricks» (see page 32) and in «EasyCook». Top/Bottom heat Temperature range 30–280 °C Recommended value 200 °C Level 1 or 2... -
Page 14: Pizzaplus
4 Operating modes PizzaPlus Temperature range 30–250 °C Recommended value 200 °C Level 2 (or 1) The cooking space is heated by hot air and bottom heat. The base of the food is baked particularly intensively. Uses ▪ Pizza ▪ Flans and quiches Use a dark enamelled tray or a black tray or tin without baking paper for very crispy results. -
Page 15: Top/Bottom Heat Humid
4 Operating modes ▸ Put food for grilling in a porcelain or glass dish or directly on the wire shelf. ▸ Line the baking tray with aluminium foil and then place it underneath the wire shelf. Top/Bottom heat humid Temperature range 30–250 °C Recommended value 200 °C... -
Page 16: Fast Heating
5 Using the appliance Uses ▪ Baking flan bases ▪ Making preserves Use a dark enamelled tray or a black tray or tin for crispy results. 4.10 Fast heating For fast heating , the cooking space is heated using hot air and bottom heat, which shortens the preheating time. -
Page 17: Selecting And Starting The Operating Mode
5 Using the appliance Selecting and starting the operating mode ▸ If the appliance is switched off: first press the adjusting knob. ▸ If the appliance is in another menu: press the touch button. – The selection of operating modes appears in the display. ▸... -
Page 18: Setting A Duration
5 Using the appliance Setting a duration The operating mode selected ends automatically when the operating time is up. ▸ Select the desired operating mode. ▸ Select in the operating mode settings. ▸ Set the desired duration – max. 9 hours and 59 minutes – and confirm. –... -
Page 19: Food Probe Temperature
5 Using the appliance Food probe temperature Only use the supplied food probe. Do not clean the food probe in the dishwasher. Always keep the plug clean. The food probe is used to measure the temperature inside the food (referred to as the food probe temperature). -
Page 20: Cancelling/Ending The Operating Mode Before Time
5 Using the appliance Cancelling/ending the operating mode before time ▸ In the operating mode settings, select or press the touch button. – An acoustic signal is emitted. – The selected operating mode is cancelled. – The following appears in the display: « Residual heat»... -
Page 21: End Of Operation
5 Using the appliance Checking and changing ▸ Press the touch button. – The countdown to the time remaining appears in the display. ▸ Shorten or extend the time by turning the adjusting knob. ▸ Confirm this shortening or extending of the time. When the timer finishes When the set duration is up: –... -
Page 22: Switching The Appliance Off
5 Using the appliance For appliances with a retractable handle, the displays and touch buttons do not go out until the handle can be retracted. « Residual heat» is still displayed, even when it falls below 80 °C. Removing food from cooking space Risk of burns! Hot air may escape from the cooking space when the appliance door is opened. -
Page 23: Gourmetguide
6 GourmetGuide GourmetGuide GourmetGuide encompasses several programmes which make preparing meals as easy as possible for you. The following programmes can be called up: Recipes Soft roasting BakeOmatic Keep warm * * Depending on the software version Recipe book A recipe book contains recipes which are tailored to suit the particular appliance. These are already programmed into the appliance and run automatically once started. -
Page 24: Own Recipes
6 GourmetGuide Cancelling the recipe ▸ In the recipe settings, select . – The following appears in the display: «Should the current recipe be cancelled?» ▸ To abort the recipe, select «Yes». – The recipe is cancelled. Own recipes Up to 24 of your own favourite recipes can be created and saved. A recipe can consist of several steps with any operating modes, pauses and hold times, which run automatic- ally once started. - Page 25 6 GourmetGuide The table below shows the priorities in descending order: Setting Target temperature Duration Temperature / temperature level Cancelling recipe entry/change ▸ Select in the overview of the set steps. – The following appears in the display: «Do you really want to cancel the recipe entry?»...
-
Page 26: Bakeomatic
6 GourmetGuide Deleting a step ▸ Select . – An overview of the steps in the recipe is displayed. ▸ Select the step. – The following appears in the display: «Do you want to delete this step?» ▸ To delete the step, select «Yes». –... -
Page 27: Soft Roasting
6 GourmetGuide When used for frozen products, the approximate duration indicated on the pack- aging must be selected instead of the degree of browning. Frozen products are prepared in a variety of ways. Duration When BakeOmatic starts, sensors determine the optimum duration. The effective duration is displayed after about 10–15 minutes. - Page 28 6 GourmetGuide Tips for an optimal result ▪ Take the meat out of the refrigerator some 30–60 minutes before soft roasting. ▪ Weight of meat: 500–2000 g ▪ Meat thickness: at least 4 cm ▪ Quality: lean, high-quality meat Soft roasting table for «Soft roasting seared» Cut of meat Degree of doneness Recommended target temperature °C...
- Page 29 6 GourmetGuide ▸ Start «Soft roasting seared» (see page 29). Selecting and starting soft roasting The longer the meat is cooked, the more tender and succulent it becomes. This applies particularly for thicker pieces of meat. The target temperature cannot be changed once soft roasting has started. ▸...
-
Page 30: Keep Warm
7 EasyCook Keep warm * * Depending on the software version Cooked foods can be kept warm using the «Keep warm» setting. If the cooking space is already hot, open the appliance door and allow the cooking space to cool down for 3 to 4 minutes before starting the «Keep warm» function. This ensures that the food does not overcook. -
Page 31: Favourites
8 Favourites – Preheating necessary / not necessary – Accessories needed – Level – Possible tips ▸ Select ▸ The operating mode summary is displayed. ▸ To start operation, select . You can change the set values to a limited extent. Favourites Up to 24 operating modes, GourmetGuide and EasyCook applications together with the settings made can be saved as favourites. -
Page 32: Tips And Tricks
9 Tips and tricks Tips and tricks Unsatisfactory cooking result... … when baking and roasting Result Solution ▪ The baking or roast looks ▸ Next time, set a lower temperature and lengthen good on the outside but is still the operating time. doughy or raw on the inside. -
Page 33: User Settings
10 User settings User settings 10.1 Overview of user settings Language Assistance functions Display Temperature Date Childproof lock Clock Appliance information Notifications Demo mode Pyrolytic self-cleaning (depending Factory settings on model) Loudness 10.2 Adjusting user settings ▸ If the appliance is switched off, first press the adjusting knob. ▸... -
Page 34: Date
10 User settings Start screen * * Depending on the software version With this user setting, you can determine the menu that is displayed when you start the appliance. The following menus can be selected: ▪ Operating modes (factory setting) ▪... -
Page 35: Loudness
10 User settings 10.9 Loudness The acoustic signal can be set at one of two levels of loudness or can be completely switched off. An acoustic signal is emitted in the event of a malfunction even if the setting is set to «off». -
Page 36: Childproof Lock
11 Care and maintenance Default value for soft roasting The default value is the target temperature that is automatically set when soft roasting. With this user setting, it can be increased or decreased by up to 4 °C; the setting then applies for all cuts of meat. -
Page 37: Cleaning The Cooking Space
11 Care and maintenance 11.2 Cleaning the cooking space Damage to the appliance from incorrect treatment! Do not bend the temperature sensor or heating elements. Do not scour the surface. Scouring will damage the surface. ▸ Remove any soiling from the cooking space while still hand warm using a soft cloth dampened with water and a little washing-up liquid. - Page 38 11 Care and maintenance 11.4 Cleaning the door seal ▸ Clean the door seal with a soft cloth dampened with water, but do not use any clean- ing agent. ▸ Wipe dry with a soft cloth. 11.5 Replacing the door seal ▸...
- Page 39 11 Care and maintenance ▸ Ensure that only the thinner part 4 of the seal is pressed into the groove; the thicker part 5 must not be in the groove. ▸ Starting from the bottom, press the seal evenly into the groove.
- Page 40 11 Care and maintenance Removing and reassembling the shelf guides ▸ Swing the shelf guides 1 at the front into the middle of the cooking space. ▸ Take the shelf guides out of the opening at the back. ▸ Put back in reverse order. 11.9 Pyrolytic self-cleaning Danger of explosion through deposits and cleaning agents!
- Page 41 12 Trouble-shooting ▸ Close the appliance door. ▸ If the appliance is switched off: first press the adjusting knob. ▸ Press the touch button. ▸ Select ▸ Select the degree of soiling. – The calculated end time for the pyrolytic self-cleaning process is shown in the dis- play above ▸...
- Page 42 12 Trouble-shooting … the appliance is not working Possible cause Solution ▪ A household fuse or circuit ▸ Change the fuse. breaker has tripped. ▸ Reset the circuit breaker. ▪ The fuse or circuit breaker ▸ Call Customer Services. keeps blowing. ▪...
- Page 43 12 Trouble-shooting ... the food probe temperature is not displayed Possible cause Solution ▪ The food probe is not plugged ▸ Check whether the food probe is correctly plugged in correctly. into the socket. ▸ Check whether the food probe is correctly inserted in the food: The tip must be in the centre of the thickest part.
- Page 44 12 Trouble-shooting … the following appears in the display UX/EXX see operating instructions FN XXX XXXXXX Possible cause Solution ▪ An interruption in the power ▸ Cancel the error message by pressing the but- supply. ton. ▸ Disconnect from the power supply for about 1 minute.
- Page 45 13 Accessories and spare parts ▸ Select – The following appears in the display: «Do you want to continue with the initial start- up?» ▸ To change other user settings, select «Yes». – The relevant user settings menu appears in the display. ▸...
- Page 46 14 Technical data Halogen light bulb Door seal Door seal for pyrolytic appliances The halogen light bulb is also available from specialist retailers. Technical data External dimensions ▸ See installation instructions Electrical connection ▸ See identification plate 1 14.1 Note for testing institutes The energy efficiency class according to EN 50304 / EN 60350 is determined using the operating modes.
- Page 47 14 Technical data 14.3 Product fiche In accordance with EU Regulation No.: 66/2014 Brand – V-ZUG Ltd Type of appliance – Compact oven Model designation – BCXSL | BCXSLP Mass of appliance 36 | 37 Number of cavities – Heat source per cavity –...
- Page 48 15 Disposal Disposal 15.1 Packaging Never allow children to play with packaging material due to the danger of injury or suffocation. Store the packaging material in a safe location or dispose of it in an environmentally-friendly way. 15.2 Safety Render the appliance unusable to prevent accidents caused by improper use (e.g. through children playing): ▸...
- Page 49 Index Recipe step........... 24 Accessories ..........11, 45 Cleaning ............ 39 EasyCook ........... 30, 45 Acoustic signals ..........34 Food groups .......... 30 Appliance disposal .......... 48 EcoStandby............47 Appliance door Electrical connection ........46 Cleaning ............ 37 End ..............18 Removing ............
- Page 50 Shelf guides Cleaning ............ 39 Mains synchronization ........34 Removing ............ 40 Maintenance ............. 36 Socket ..............11 Model number ..........2, 36 Soft roasting............27 Default value.......... 36 Positioning the food probe ...... 28 Operating and display elements....10 Seared ............
- Page 51 V‑ZUG service centre. Technical questions, accessories, warranty extensions V-ZUG is happy to help you with any general administrative or technical queries, to take your orders for accessories and spare parts and to inform you about our progressive service agreements.
- Page 52 You can use the adjusting knob to operate and navigate within the menu; additional submenus can also be called up. The function buttons give you direct access to independent functions such as the timer or switching off the appliance . J21023352-R06 V-ZUG Ltd, Industriestrasse 66, CH-6301 Zug info@vzug.com, www.vzug.com...
Need help?
Do you have a question about the Combair XSL and is the answer not in the manual?
Questions and answers