V-ZUG Combair SL Operating Instructions Manual
Hide thumbs
Also See for Combair SL:
- Operating instructions manual (20 pages) ,
- Operating instructions manual (80 pages) ,
- Operating instructions manual (56 pages)
Table of Contents
Advertisement
Quick Links
Advertisement
Table of Contents

Related Manuals for V-ZUG Combair SL


Summary of Contents for V-ZUG Combair SL
- Page 1 Operating instructions Combair SL | SLP Oven...
- Page 2 60-600 BCSLPZ60c 21025 60-600 BCSLZ60Y 21029 60-600 BCSLZ60Y 21061 60-600 BCSLPZ60 21062 60-600 Variations depending on the model are noted in the text. Colour operating instructions can be downloaded from the internet from www.vzug.com. © V-ZUG Ltd, CH-6301 Zug, 2017...
-
Page 3: Table Of Contents
Table of contents Safety precautions 5 GourmetGuide 25 Symbols used............ 5 Recipe book ............ 25 General safety precautions........ 5 Own recipes............ 26 Appliance-specific safety precautions .... 6 BakeOmatic ............ 28 Instructions for use.......... 7 Soft roasting............ 29 Keep warm *............ - Page 4 11.3 Cleaning the appliance door ...... 40 11.4 Cleaning the door seal ........ 40 11.5 Replacing the door seal ........ 41 11.6 Replacing the door seal on pyrolysis appliances 41 11.7 Replacing the halogen light bulb ..... 42 11.8 Cleaning the accessories and shelf guides ... 42 11.9 Pyrolytic self-cleaning ......... 43 Trouble-shooting...
-
Page 5: Safety Precautions
Safety precautions Symbols used General safety precautions Denotes important safety precau- tions. Failure to observe said precautions ▪ Read the operating instruc- can result in injury or in damage to tions before using the appli- the appliance or fittings! ance for the first time! Information and precautions that should be observed. -
Page 6: Appliance-Specific Safety Precautions
1 Safety precautions ently installed electrical install- lishments; by guests in hotels, ation in accordance with the motels and other accommod- installation regulations. ation establishments; in bed ▪ If the mains cable of this ap- and breakfast establishments. pliance is damaged, it must ▪... -
Page 7: Instructions For Use
1 Safety precautions ▪ Any repairs, modifications or manipula- rooms where there are spe- tions to the appliance, especially any cial conditions such as, for in- electrically live parts, may only be car- stance, a corrosive or explos- ried out by the manufacturer, its Cus- tomer Services or a similarly qualified ive atmosphere (dust, steam person. - Page 8 1 Safety precautions Caution: Risk of burns! Caution: Risk to life! ▪ The appliance gets very hot when in ▪ Danger of suffocation! Keep packaging use. The appliance door also gets hot. material, e.g. plastic film and poly- ▪ Steam and/or hot air may escape from styrene, away from children.
-
Page 9: Using For The First Time
Using for the first time Before operating the newly installed appliance for the first time, the following steps should be taken: ▸ Remove packaging and transport materials as well as any protective blue film from out of the cooking space. ▸... -
Page 10: Appliance Description
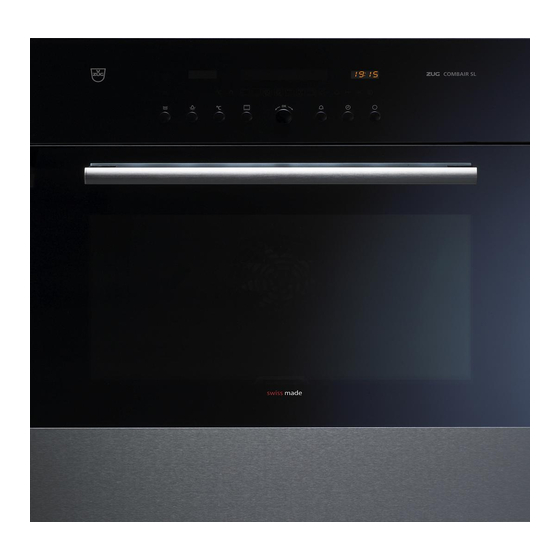
3 Appliance description Appliance description Construction Operating and display elements Ventilation opening Door handle Appliance door Heatable appliance drawer * * Depending on model Operating and display elements 12:00 Display Action buttons Digital display Adjusting knob / switching on (duration/timer/time) appliance Menu buttons... -
Page 11: Cooking Space
3 Appliance description Overview of touch buttons Operating modes GourmetGuide EasyCook User settings Favourites Heatable appliance drawer / plate warmer * * Depending on model Timer Cooking space illumination Switch off Cooking space Using protective inserts or aluminium foil can damage the appliance. Do not place any protective insert or aluminium foil on the floor of the cooking space. -
Page 12: Accessories
3 Appliance description Accessories Incorrect handling can cause damage! Do not use knives or cutting wheels on the accessories. TopClean baking tray ▪ Baking tin for flans and biscuits ▪ Use together with the wire shelf as a drip tray ▪... -
Page 13: Plate Warmer
4 Operating modes Special accessories Place any accessories not included in the scope of delivery on the wire shelf. ▸ Special accessories can be found at: www.vzug.com Plate warmer ▸ If the appliance is switched off, first press the adjusting knob. ▸... -
Page 14: Hot Air
4 Operating modes Hot air Temperature range 30–250 °C Temperature range for pyrolysis appliance 30–280 °C Recommended value 180 °C Level 1 + 3 or 2 (or 1 + 3 + 2) A heating element behind the back wall of the cooking space heats up the air inside the cooking space, which is circulated evenly. -
Page 15: Grill-Forced Convection
4 Operating modes Uses ▪ Flat food for grilling, e.g. steaks, chops, chicken parts, fish and sausages ▪ Gratinating ▪ Toast ▸ Place the food to be grilled directly on the wire shelf. ▸ Line the baking tray with aluminium foil and then place it underneath the wire shelf. For best results, preheat the cooking space for 3 minutes before introducing the food. -
Page 16: Bottom Heat
5 Using the appliance A heating element behind the back wall of the cooking space heats up the air inside the cooking space, which is circulated evenly. The steam produced is largely retained in the cooking space. The food retains its moisture. Uses ▪... -
Page 17: Selecting And Starting The Operating Mode
5 Using the appliance Operating modes GourmetGuide EasyCook User settings Favourites Heatable appliance drawer / plate warmer * * Depending on model Timer Cooking space illumination Switch off Adjusting knob functions Press ▪ Switching on the appliance ▪ Selecting/opening a submenu, setting, etc. ▪... -
Page 18: Checking And Changing The Settings
5 Using the appliance Display overview 1 Operating mode settings 2 Current position of the adjusting knob / selected setting 3 Press and go 4 Operating mode with symbol 5 Set values / recommended values 6 Symbols for settings Checking and changing the settings ▸... -
Page 19: Food Probe Temperature
5 Using the appliance ▸ Set the desired end and confirm. – The time remaining to the start of operation is displayed. – After 3 minutes, the display goes out and the touch button is illuminated in white. The display can be called up again at any time by pressing the adjusting knob. -
Page 20: Rotisserie Spit And Roasting Basket
5 Using the appliance Measuring the food probe temperature If you only wish to measure the food probe temperature without operation stopping auto- matically when the target temperature is reached, proceed as follows: ▸ Select the desired operating mode and set the temperature and, if you wish, the dura- tion. - Page 21 5 Using the appliance Use the roasting basket for larger or asymmetrical cuts of meat such as a roast joint. If using the food probe, ▸ insert it into opening 6 . ▸ Wrap the cable once around hook 8. Ensure the cable between the food probe and the hook is as taught as possible.
-
Page 22: Cancelling/Ending The Operating Mode Before Time
5 Using the appliance ▸ Insert the end 11 of the roasting basket into rotisserie drive opening 7. ▸ Place the roasting basket diagonally across the frame, positioning it between the guides so that positioning groove 4 sits on the frame5. Cancelling/ending the operating mode before time ▸... -
Page 23: End Of Operation
5 Using the appliance Checking and changing ▸ Press the touch button. – The countdown to the time remaining appears in the display. ▸ Shorten or extend the time by turning the adjusting knob. ▸ Confirm this shortening or extending of the time. When the timer finishes When the set duration is up: –... -
Page 24: Switching The Appliance Off
5 Using the appliance For appliances with a retractable handle, the displays and touch buttons do not go out until the handle can be retracted. « Residual heat» is still displayed, even when it falls below 80 °C. Removing food from cooking space Risk of burns! Hot air may escape from the cooking space when the appliance door is opened. -
Page 25: Gourmetguide
6 GourmetGuide GourmetGuide GourmetGuide encompasses several programmes which make preparing meals as easy as possible for you. The following programmes can be called up: Recipes Soft roasting BakeOmatic Keep warm * * Depending on the software version Recipe book A recipe book contains recipes which are tailored to suit the particular appliance. These are already programmed into the appliance and run automatically once started. -
Page 26: Own Recipes
6 GourmetGuide Cancelling the recipe ▸ In the recipe settings, select . – The following appears in the display: «Should the current recipe be cancelled?» ▸ To abort the recipe, select «Yes». – The recipe is cancelled. Own recipes Up to 24 of your own favourite recipes can be created and saved. A recipe can consist of several steps with any operating modes, pauses and hold times, which run automatic- ally once started. - Page 27 6 GourmetGuide The table below shows the priorities in descending order: Setting Target temperature Duration Temperature / temperature level Cancelling recipe entry/change ▸ Select in the overview of the set steps. – The following appears in the display: «Do you really want to cancel the recipe entry?»...
-
Page 28: Bakeomatic
6 GourmetGuide ▸ To delete the step, select «Yes». – The step is deleted. Saving a changed recipe ▸ Select ▸ Select storage space, enter the recipe name and confirm by pressing – The changed recipe is now saved. A storage space that is already being used can be overwritten. Recipes that have been amended from recipe books are not saved in the recipe book, but under «Own recipes». -
Page 29: Soft Roasting
6 GourmetGuide Before starting, the cooking space must have cooled down and be dry in order to determine the optimum duration. The appliance door must not be opened whilst the duration is being determined. Preheating In the case of the «Flan»... - Page 30 6 GourmetGuide Soft roasting table for «Soft roasting seared» and «Soft roasting with grill» Cut of meat Preparation Degree of Recommended method doneness target temperature °C Fillet of veal seared rare seared medium Rump or loin of veal seared medium Shoulder of veal seared medium with grill...
- Page 31 6 GourmetGuide The food probe must be inserted as far into the middle of the meat as possible to get a correct reading of the food probe temperature. The temperature inside the meat is crucial for optimal results at the end of cooking. ▸...
-
Page 32: Keep Warm
7 EasyCook The appliance door must be closed during operation. If the appliance door is opened while soft roasting is running, the operation is interrupted and then, after a short time, cancelled. Inadvertently interrupting the programme ▸ If the touch button is pressed, the soft roasting programme is interrupted. –... -
Page 33: Selecting And Starting Foods
8 Favourites The following food groups can be selected: Fruit Fish and seafood Mushrooms Flans and pizza Potatoes Bakery products Meat Baked dishes and gratins Poultry Selecting and starting foods A delayed start is only possible for applications where preheating is not required and is only suitable for food that does not need to be refrigerated or to rise. -
Page 34: Selecting And Starting Favourites
9 Tips and tricks Selecting and starting favourites ▸ Press the touch button. ▸ Choose the desired favourite and select «Yes». ▸ To start the favourite, select . – The favourite starts. Changing favourites ▸ Select the desired favourites. ▸ Adjust the settings as required. ▸... -
Page 35: Saving Energy
10 User settings Result Solution ▪ The baking has browned un- ▸ Next time, set a lower temperature and adjust evenly. the operating time. ▸ If using , check that the levels used correspond to «EasyCook». ▸ Do not push baking tins or bulky foodstuffs right to the back of the cooking space. -
Page 36: Adjusting User Settings
10 User settings 10.2 Adjusting user settings ▸ If the appliance is switched off, first press the adjusting knob. ▸ Press the touch button. ▪ The user settings main menu appears in the display: ▸ Select the desired user setting or submenu. ▸... -
Page 37: Date
10 User settings 10.5 Date The date can be called up and changed. 10.6 Clock The following time functions are available: ▪ Time ▪ Time format ▪ Time display ▪ Mains synchronization Time format The time can be displayed in the European 24-hour time format or the US 12‑hour format (a.m./p.m.). -
Page 38: Assistance Functions
10 User settings 10.10 Assistance functions Illumination The «Automatic» setting switches on the cooking space illumination: ▪ 3 minutes before a cooking process ends, e.g. in the case of an automatic pro- gramme or an operating mode with a set duration, or ▪... -
Page 39: Appliance Information
11 Care and maintenance The childproof lock activates 3 minutes after the appliance is switched off. 10.13 Appliance information Under «Appliance information», you will find: ▪ The article number and serial number (FN) of your appliance ▪ The software versions of your appliance as well as the acoustic signals and back- ground images currently being used (depending on model) 10.14 Demo mode... - Page 40 11 Care and maintenance Never clean appliances with pyrolysis using oven cleaner as the surface could otherwise be damaged. ► Carry out pyrolysis in the case of stubborn dirt deposits (see page 43). 11.3 Cleaning the appliance door ▸ Clean the appliance door with a soft cloth dampened with water and a little washing- up liquid.
- Page 41 11 Care and maintenance 11.5 Replacing the door seal ▸ Remove the damaged door seal. ▸ Clean the groove 1 with a slightly damp cloth. ▸ Press the ends of the new door seal 2 into the groove in the centre of the frame at the bottom.
- Page 42 11 Care and maintenance ▸ Starting from the bottom, press the seal evenly into the groove. 11.7 Replacing the halogen light bulb WARNING: Risk of electric shock! Disconnect the appliance from the mains power supply before replacing the halo- gen light bulb. Risk of burns from hot surfaces! Allow the halogen light bulb and the appliance to cool down before replacing the halogen light bulb.
- Page 43 11 Care and maintenance Removing and reassembling the shelf guides ▸ Push the shelf guides at the top back- wards and take out of the opening. ▸ Swing the shelf guide into the middle of the cooking space and remove from the opening at the bottom.
- Page 44 12 Trouble-shooting Selecting and starting pyrolytic self-cleaning Damage to accessories from self-cleaning! Remove accessories, shelf guides, full extension roller runners, cookware and any other objects from out of the cooking space. Otherwise they can become discol- oured and their surface rough. The rolling properties of full extension roller runners deteriorate.
- Page 45 12 Trouble-shooting … the appliance is not working Possible cause Solution ▪ A household fuse or circuit ▸ Change the fuse. breaker has tripped. ▸ Reset the circuit breaker. ▪ The fuse or circuit breaker ▸ Call Customer Services. keeps blowing. ▪...
- Page 46 12 Trouble-shooting ... the food probe temperature is not displayed Possible cause Solution ▪ The food probe is not plugged ▸ Check whether the food probe is correctly plugged in correctly. into the socket. ▸ Check whether the food probe is correctly inserted in the food: The tip must be in the centre of the thickest part.
- Page 47 12 Trouble-shooting … the following appears in the display UX/EXX see operating instructions FN XXX XXXXXX Possible cause Solution ▪ An interruption in the power ▸ Cancel the error message by pressing the but- supply. ton. ▸ Disconnect from the power supply for about 1 minute.
- Page 48 13 Accessories and spare parts ▸ Select – The following appears in the display: «Do you want to continue with the initial start- up?» ▸ To change other user settings, select «Yes». – The relevant user settings menu appears in the display. ▸...
- Page 49 14 Technical data 13.3 Spare parts Shelf guides left/right Halogen light bulb Door seal Door seal for pyrolytic appliances The halogen light bulb is also available from specialist retailers. Technical data External dimensions ▸ See installation instructions Electrical connection ▸ See identification plate 1 14.1 Note for testing institutes The energy efficiency class according to EN 50304 / EN 60350 is determined using the...
- Page 50 Own measurements can be im- precise and are not suitable for checking the accuracy of the temperature. 14.3 Product fiche In accordance with EU Regulation No.: 66/2014 Brand – V-ZUG Ltd Type of appliance – Oven Model designation – BCSL | BCSLP...
- Page 51 15 Disposal Disposal 15.1 Packaging Never allow children to play with packaging material due to the danger of injury or suffocation. Store the packaging material in a safe location or dispose of it in an environmentally-friendly way. 15.2 Safety Render the appliance unusable to prevent accidents caused by improper use (e.g. through children playing): ▸...
- Page 52 Index Accessories ..........12, 48 EasyCook ........... 32, 48 Cleaning ............ 42 Food groups .......... 32 Acoustic signals ..........37 EcoStandby............50 Appliance disposal .......... 51 Electrical connection ........49 Appliance door End ..............18 Extending operation ........23 Cleaning ............ 40 External dimensions ........
- Page 53 16 Index General ............. 5 Saving energy..........35, 50 Mains synchronization ........37 Self-cleaning ............. 43 Maintenance ............. 39 Cancelling ............. 44 Model number ..........2, 39 Starting............ 44 Service & Support..........55 Setting the time ..........36 Notes ..............54 Shelf guides Cleaning ............
- Page 54 Notes...
- Page 55 V‑ZUG service centre. Technical questions, accessories, warranty extensions V-ZUG is happy to help you with any general administrative or technical queries, to take your orders for accessories and spare parts and to inform you about our progressive service agreements.
- Page 56 You can use the adjusting knob to operate and navigate within the menu; additional submenus can also be called up. The function buttons give you direct access to independent functions such as the timer or switching off the appliance . J21021352-R06 V-ZUG Ltd, Industriestrasse 66, CH-6301 Zug info@vzug.com, www.vzug.com...
Need help?
Do you have a question about the Combair SL and is the answer not in the manual?
Questions and answers