Table of Contents
Advertisement
Advertisement
Table of Contents

Related Manuals for KitchenAid 5KCM1204


Summary of Contents for KitchenAid 5KCM1204
- Page 1 5KCM1204...
-
Page 2: Table Of Contents
TABLE OF CONTENTS COFFEE MAKER SAFETY ..................6 Important safeguards ..................6 Electrical requirements ...................9 Electrical equipment waste disposal ..............9 PARTS AND FEATURES ..................10 Parts and accessories ..................10 Display and control panel features ...............11 OPERATING THE COFFEE MAKER ..............12 Installing the water filter ................12 Setting the clock ...................14 Setting brew strength ...................14 Filling the Coffee Maker with water for brewing .........15... -
Page 3: Coffee Maker Safety
COFFEE MAKER SAFETY IMPORTANT SAFEGUARDS When using electrical appliances, basic safety precautions should always be followed, including the following: 1. Read all instructions. Misuse of appliance may result in personal injury. 2. The heating element surface is subject to residual heat after use. - Page 4 COFFEE MAKER SAFETY 4. This appliance can be used by children aged from 8 years and above, and persons with reduced physical, sensory, or mental capabilities or lack of experience and knowledge if they have been given supervision or instruction concerning use of the appliance in a safe way and understand the hazards involved.
- Page 5 COFFEE MAKER SAFETY 13. Do not use appliance without lid properly placed on carafe. 14. The carafe is designed for use with this appliance. It must never be used on a range top or in a microwave oven. 15. Do not set a hot carafe on a wet or cold surface. 16.
-
Page 6: Electrical Requirements
COFFEE MAKER SAFETY ELECTRICAL REQUIREMENTS Volts: 220-240 VAC Hertz: 50-60 Hz Wattage: 1100 Watts NOTE: This Coffee Maker has a grounded plug. To reduce the risk of electrical shock, this plug will fit in an outlet only one way. If the plug does not fit in the outlet, contact a qualified electrician. -
Page 7: Parts And Features
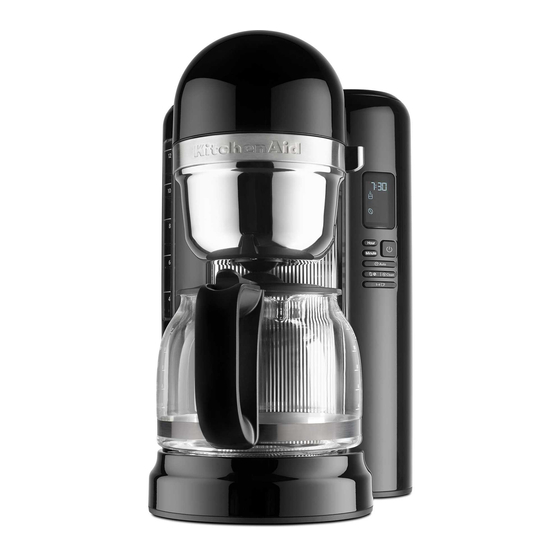
PARTS AND FEATURES PARTS AND ACCESSORIES Water tank lid Gold Tone permanent filter Programmable display Water tank Brew head Filter basket Brew basket Water tank window Carafe lid Glass carafe Cord storage in base Warming plate (not shown) Filter assembly Charcoal filter 10 | PARTS AND FEATURES... -
Page 8: Display And Control Panel Features
PARTS AND FEATURES DISPLAY AND CONTROL PANEL FEATURES Programmable display Clock Brewing status icon Warming status icon Auto indicator Regular strength indicator Bold strength indicator Small batch indicator Clean indicator Control panel PARTS AND FEATURES | 11... -
Page 9: Operating The Coffee Maker
OPERATING THE COFFEE MAKER INSTALLING THE WATER FILTER Before first use Wash the Gold Tone permanent filter, filter basket, and carafe in hot, soapy water; then rinse with clean water and dry. Do not use abrasive cleansers or scouring pads. NOTE: These parts can also be washed in the top rack of the dishwasher. - Page 10 OPERATING THE COFFEE MAKER Electrical Shock Hazard Place the filter assembly in the well Plug into an earthed outlet. at the bottom of the water reservoir. Do not remove earth prong. Push the filter assembly slightly to make sure it fits snugly. Do not use an adapter.
-
Page 11: Setting The Clock
OPERATING THE COFFEE MAKER SETTING THE CLOCK NOTE: When the Coffee Maker is first plugged in or when power is restored after an interruption, the display will initially show 12:00. To set the minutes: Press MINUTE. The Hour setting will switch to a solid display and the Minute setting To set the hour: Press HOUR. -
Page 12: Filling The Coffee Maker With Water For Brewing
OPERATING THE COFFEE MAKER FILLING THE COFFEE MAKER WITH WATER FOR BREWING TIP: Brew two pots of fresh, cool water and discard before brewing the first pot of coffee. Lift the water tank lid and fill Place the carafe in the Coffee Maker. with enough fresh, cool water to Make sure the bottom of the carafe make the desired amount of coffee. -
Page 13: Filling The Filter Basket
OPERATING THE COFFEE MAKER FILLING THE FILTER BASKET NOTE: Do not operate the Coffee Maker without the filter basket in place. NOTE: If you do not wish to use the Gold Tone permanent filter, you may use a 12-cup, flat bottom paper coffee filter instead;... -
Page 14: Coffee Dosage Guide
OPERATING THE COFFEE MAKER COFFEE DOSAGE GUIDE For best results, use a kitchen scale and the chart below when filling the filter basket with coffee grounds. As a baseline, use medium ground coffee (see picture to the left). Alter grind and/or dosage to taste. -
Page 15: Programming The Auto Feature
OPERATING THE COFFEE MAKER PROGRAMMING THE AUTO FEATURE To set the time the Coffee Maker should begin brewing: Press the HOUR button. The hour digits will To program the Coffee Maker to change with each press; or press and brew coffee at a preset time: Press hold to scroll rapidly. -
Page 16: Using The Previously Programmed Auto Time
OPERATING THE COFFEE MAKER USING THE PREVIOUSLY PROGRAMMED AUTO TIME These steps can be followed to save the Auto time after following the steps in the “Programming the Auto feature” section. To save the current displayed time and exit Auto: Wait for 10 seconds, Press the AUTO button ( or press any button ( The Auto indicator will flash and the... -
Page 17: Brewing Coffee
OPERATING THE COFFEE MAKER BREWING COFFEE TIP: Brew two pots of fresh, cool water and discard before brewing the first pot of coffee. Press the Brew button ( ) to begin brewing coffee. The Coffee Maker The Coffee Maker will beep will beep 1 time, and the Brew icon three times when the Brew cycle will light up when the Brew cycle... -
Page 18: Care And Cleaning
CARE AND CLEANING CLEANING THE COFFEE MAKER Calcium deposits (scale) from water will build up in the Coffee Maker over time and impair brewing efficiency and coffee quality. If you notice that it takes longer than usual to brew or that the Coffee Maker is making unusual noises, then it is time to descale. - Page 19 CARE AND CLEANING When the Clean indicator begins to flash on the display, run a clean cycle: Press the Clean button ( ). The Clean indicator will stop flashing. Then press the Run at least two water-only cycles Brew button to begin after the Clean cycle is complete.
-
Page 20: Troubleshooting
TROUBLESHOOTING 3. If you hear three rapid tones: • There is no water in the water tank. The Coffee Maker will not brew. Fill the water tank with fresh, cool water and continue with the brewing cycle as described in the “Brewing coffee”... -
Page 21: Warranty And Service
Contact number for Ireland: Tollfree number +44 (0) 20 8616 5148 E-mail contact for U.K. and Ireland: Go to www.kitchenaid.co.uk, and click on the link “Contact Us” at the bottom of the page. Address for U.K. and Ireland: KitchenAid Europa, Inc. - Page 22 ©2017 All rights reserved. Specifications subject to change without notice. W10842644B 03/17...
Need help?
Do you have a question about the 5KCM1204 and is the answer not in the manual?
Questions and answers