Carrier AquaEdge 19DV series Start-Up, Operation And Maintenance Instructions Manual
Two-stage back-to-back centrifugal liquid chillers
with pic5 controls and hfo r-1233zd(e)
50/60 hz
Hide thumbs
Also See for AquaEdge 19DV series:
- Installation, operation and maintenance instructions (116 pages) ,
- Operation and troubleshooting (92 pages) ,
- Start-up, operation and maintenance instructions manual (88 pages)
Table of Contents
Advertisement
Quick Links
Start-Up, Operation, and Maintenance Instructions
SAFETY CONSIDERATIONS
Centrifugal liquid chillers are designed to provide safe
and reliable service when operated within design specifi-
cations. When operating this equipment, use good judg-
ment and safety precautions to avoid damage to
equipment and property or injury to personnel.
Be sure you understand and follow the procedures and
safety precautions contained in the chiller instructions
as well as those listed in this guide.
DANGER
Failure to follow these procedures will result in severe per-
sonal injury or death.
DO NOT VENT refrigerant relief valves within a building.
Outlet from rupture disc or relief valve must be vented out-
doors in accordance with the latest edition of ANSI/
ASHRAE 15 (American National Standards Institute/
American Society of Heating, Refrigerating, and Air-
Conditioning Engineers). The accumulation of refrigerant
in an enclosed space can displace oxygen and cause
asphyxiation.
PROVIDE adequate ventilation in accordance with ANSI/
ASHRAE 15, especially for enclosed and low overhead
spaces. Inhalation of high concentrations of vapor is harm-
ful and may cause heart irregularities, unconsciousness, or
death. Misuse can be fatal. Vapor is heavier than air and
reduces the amount of oxygen available for breathing.
Product causes eye and skin irritation. Decomposition
products are hazardous.
DO NOT USE OXYGEN to purge lines or to pressurize a
chiller for any purpose. Oxygen gas reacts violently with
oil, grease, and other common substances.
NEVER EXCEED specified test pressures; VERIFY the
allowable test pressure by checking the instruction litera-
ture and the design pressures on the equipment nameplate.
DO NOT USE air for leak testing. Use only refrigerant or
dry nitrogen.
DO NOT VALVE OFF any safety device.
BE SURE that all pressure relief devices are properly
installed and functioning before operating any chiller.
RISK OF INJURY OR DEATH by electrocution. High
voltage can be present on motor leads even though the
motor is not running. Open the power supply disconnect
before touching motor leads or terminals.
Manufacturer reserves the right to discontinue, or change at any time, specifications or designs without notice and without incurring obligations.
Catalog No. 04-53190048-01
Two-Stage Back-to-Back Centrifugal Liquid Chillers
Printed in U.S.A.
Form 19DV-CLT-1SS
with PIC5 Controls and HFO R-1233zd(E)
Failure to follow these procedures may result in personal
injury or death.
DO NOT USE TORCH to remove any component. System
contains refrigerant under pressure.
To remove a component, wear protective gloves and gog-
gles and proceed as follows:
a. Shut off electrical power to unit.
b. Recover or isolate refrigerant from system using
high-pressure and low pressure ports as appropriate.
Note that R-1233zd(E) will be less than atmospheric
pressure until a temperature of about 65°F (18.5°C).
c. Traces of vapor should be displaced with nitrogen
and the work area should be well ventilated. Refrig-
erant in contact with an open flame produces toxic
gases.
d. Cut component connection tubing with tubing cutter
and remove component from unit.
e. Carefully unsweat remaining tubing stubs when
necessary.
DO NOT USE eyebolts or eyebolt holes to rig chiller sec-
tions or the entire assembly.
DO NOT work on high-voltage equipment unless you are a
qualified electrician.
DO NOT WORK ON electrical components, including
control panels, switches, or starters until you are sure ALL
POWER IS OFF and no residual voltage can leak from
capacitors or solid-state components.
LOCK OPEN AND TAG electrical circuits during servic-
ing. IF WORK IS INTERRUPTED, confirm that all cir-
cuits are de-energized before resuming work.
AVOID SPILLING liquid refrigerant on skin or getting it
into the eyes. USE SAFETY GOGGLES. Wash any spills
from the skin with soap and water. If liquid refrigerant
enters the eyes, IMMEDIATELY FLUSH EYES with
water and consult a physician.
NEVER APPLY an open flame or live steam to a refriger-
ant cylinder. Dangerous overpressure can result. When it is
necessary to heat refrigerant, use only warm (110°F
[43°C]) water.
VERIFY that refrigerant storage cylinders are clean with
no residual moisture, oil, or refrigerant that can contami-
nate the refrigerant charge.
DO NOT REUSE disposable (nonreturnable) cylinders or
attempt to refill them. It is DANGEROUS AND ILLE-
GAL. When cylinder is emptied, evacuate remaining gas
pressure, loosen the collar, and unscrew and discard the
valve stem. DO NOT INCINERATE.
(Warnings continued on next page.)
Pg 1
AquaEdge
50/60 Hz
WARNING
8-18
Replaces: New
®
19DV
Advertisement
Table of Contents
Troubleshooting

Subscribe to Our Youtube Channel
Related Manuals for Carrier AquaEdge 19DV series


Summary of Contents for Carrier AquaEdge 19DV series
-
Page 1: Safety Considerations
® AquaEdge 19DV Two-Stage Back-to-Back Centrifugal Liquid Chillers with PIC5 Controls and HFO R-1233zd(E) 50/60 Hz Start-Up, Operation, and Maintenance Instructions SAFETY CONSIDERATIONS WARNING Centrifugal liquid chillers are designed to provide safe and reliable service when operated within design specifi- Failure to follow these procedures may result in personal cations. -
Page 2: Table Of Contents
Chiller Information Nameplate ....4 (latest edition). Contact Carrier for further information on System Components ......4 use of this chiller with other refrigerants. -
Page 3: Introduction
Ordering Replacement Chiller Parts ....46 Carrier Inhibitor ........46 CAUTION TROUBLESHOOTING GUIDE . -
Page 4: Abbreviations And Explanations
Frequently used abbreviations in this manual include: heat-carrying refrigerant from the cooler to the condenser. ® The 19DV utilizes a two-stage back to back direct drive — Carrier Comfort Network ECDW — Entering Condenser Water configuration. — Entering Chilled Water —... - Page 5 4 4 G 4 4 – Special Order Indicator – — Standard Description S — Special Order 19 — High Efficiency Semi-Hermetic Motor Voltage Code Centrifugal Chiller Code Volts-Phase-Hertz D — Low Pressure 3 — 380-3-60 4 — 416-3-60 V — Variable Speed Drive 5 —...
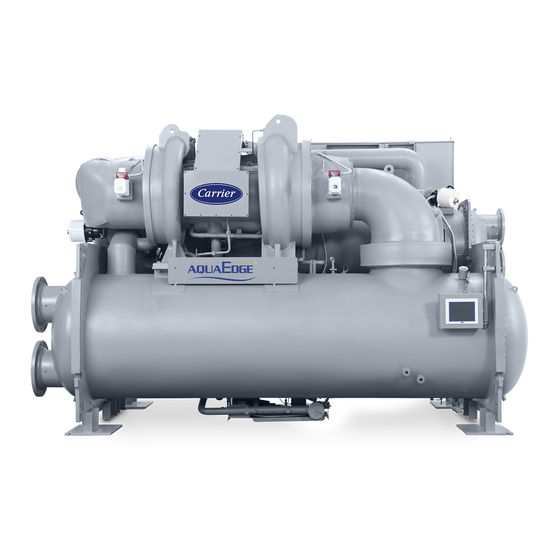
- Page 6 FRONT VIEW INTERCONNECTING COMPRESSOR PIPING VFD DRAIN (FIELD DRAIN PIPING REQUIRED) CONDENSER CONDENSER WATERBOX RETURN END ECONOMIZER ISOLATION VALVE (OPTION) ECONOMIZER EVAPORATOR WATERBOX RETURN END VACUUM/CHARGING VALVE (HIDDEN) PIC5 HMI TOUCHSCREEN PANEL 10 - EVAPORATOR BUNDLE SIGHT GLASSES 11 - RUPTURE DISC 12 - SUCTION ELBOW...
-
Page 7: Refrigeration Cycle
chamber, some liquid will flash into a vapor and cool the re- REFRIGERATION CYCLE maining liquid. The separated vapor flows to the second stage The compressor continuously draws refrigerant vapor from of the compressor for greater cycle efficiency. The second the evaporator at a rate set by the amount of first stage guide stage guide vane on the compressor acts as a pressure regulat- vane opening and motor speed. -
Page 8: Refrigerant Lubrication Cycle
start-up liquid level in the high side condenser float chamber is maintained by pumping refrigerant liquid from the evapo- CAUTION rator to the high side float chamber until level sensor is satis- fied. If liquid high side float level is not satisfied the pump To avoid adverse effects on chiller operation, consider- will move refrigerant from the evaporator to the condenser. -
Page 9: Inhibitor Reclaim System
FROM EVAPORATOR STRAINER TO COMPRESSOR/ MOTOR BEARINGS FILTER ACTUATOR AND REFRIGERANT 3-WAY VALVE PUMP FROM PUMP HIGH SIDE ACTUATOR SUCTION FLOAT PUMP CHAMBER DISCHARGE Fig. 5 — Refrigerant Lubrication Assembly and control panel are the main field wiring interfaces for the The inhibitor reclaim Inhibitor Reclaim System —... - Page 10 SOLENOID VALVE MOISTURE MOISTURE INDICATOR INDICATOR CONDENSER COMPRESSOR MOTOR COOLING SYSTEM COOLER Fig. 6 — Motor/VFD Cooling System LIFTING LUGS LIFTING LUGS Fig. 7 — 32VS 850A...
- Page 11 EXTRA FILTERS PURGE PUMPOUT (SV03) WITH STRAP HEATERS (NOT SHOWN) PURGE TANK VACUUM PUMP COMPRESSOR VOLUTE (SV02) CONTROL PANEL CONDENSER (SV01) COMPRESSOR SUCTION MOTOR DRAIN (SV05) VENTING (SV06) CONDENSER ASSEMBLY COMPRESSOR STRAINER PURGE DRAIN (SV04) (REFRIGERANT PUMP INLET) Fig. 8 — Purge System VENT VALVE VACUUM...
-
Page 12: Controls
3 minutes and then 10 min- open protocols to support the competitive BMS system and utes off, alternating during reg_tim minutes. can be integrated into Carrier’s Lifecycle System Manage- ment for remote monitoring and data management. Upon regeneration completion, purge system will wait for another 4 hours to let carbon filter cool down before it will op- Table 1 —... -
Page 13: Lubrication Control
guide vanes are more than 4% open, the start-up waits until the PIC5 control system closes the vanes. If the vanes are closed and the refrigerant pump pressure difference is less than 2.5 psid (17.2 kPa), the refrigerant pump relay energizes. The PIC5 control system then waits until the refrigerant pres- sure (REF PRESS VERIFY TIME, operator-configured, de- fault of 40 seconds) reaches 12 psid (82.7 kPa). - Page 14 START INITIATED: prestart checks are made; cooler pump started.* MACHINE SAFETIES EVAPORATOR PUMP Condenser water pump started (5 seconds after A). Water flows verified (30 seconds to 5 minutes maximum CONDENSER WATER PUMP after B). Chilled water temperatures checked against control point.
-
Page 15: Shutdown
-in. female NPT evaporator charging To test for leaks add a small refrigerant holding charge to unit valve (for Carrier Inhibitor injection) and pressurize with nitrogen up to 20 psig to determine and • mechanic’s tools (refrigeration) correct the origin of the leak. Use an electronic leak detector •... - Page 16 The chiller should be charged with refrigerant. Follow the during the leak test process, or any time refrigerant is being leak test procedure (page 18). transferred. Adjust the springs when the refrigerant is in op- erating condition and the water circuits are full. Any piping If the chiller is spring isolated, keep all springs blocked weights are to be separately supported.
- Page 17 19DV Field Procedure for new units with less than 15 psig holding charge or units suspected of leaking. 1. Attach compound gage to vessel 2. Note ambient temperature Raise pressure to 20 psig (138 kPa) using Nitrogen with added tracer gas for electronic leak detection Leak check Pass...
-
Page 18: Refrigerant Tracer
Carrier recommends the tank to the chiller. Recover any gas used for leak detec- following leak test procedure. Refer to Table 5 for refrigerant tion purposes as required per local jurisdiction. - Page 19 Table 5 — HFO R-1233zd(E) Pressure and Temperature TEMP. PRESSURE PSIA PSIG IN HG KPAG KPA ABS MMHG (VAC) % VACUUM 20.0 -6.7 -9.54 5.16 -19.4 -65.8 35.6 493.5 22.0 -5.6 -9.27 5.43 -18.9 -63.9 37.4 479.4 24.0 -4.4 -8.98 5.72 -18.3 -61.9...
-
Page 20: Chiller Dehydration
100°F (38°C) may be required. tial of tube damage due to corrosion, scaling, or erosion. Carrier assumes no responsibility for chiller damage result- ing from untreated or improperly treated water. Be sure safety valves have Check Safety Valves —... -
Page 21: Check Purge Compressor Operation
Satisfactory readings in this sec- properly lubricated and have proper electrical supply and ond test indicate the fault is in the power leads. proper rotation. Carrier must maintain pump control for freeze protection algorithm. Enter Check Purge Compressor Operation —... -
Page 22: Checking The Installation
WARNING quately supported. Do not apply power unless a qualified Carrier technician is 9. Check that specified branch circuit protection is in- present. Serious personal injury may result. stalled and correctly rated. -
Page 23: Carrier Comfort Network
100% foil shield and an outer jacket of PVC, PVC/ inhibitor out of the refrigerant system. A dose of Carrier in- nylon, chrome vinyl, or Teflon with a minimum operating hibitor is supplied in the lubrication assembly by the facto- temperature range of –4°F to 140°F (–20°C to 60°C) is... -
Page 24: Software Configuration
EVAPORATOR SIDE FACTORY CLOSED BALL VALVE CONDENSER SIDE FACTORY CLOSED BALL VALVE Fig. 20 — Factory Inhibitor Charge Isolation Software Configuration CAUTION WARNING The transfer, addition, or removal of refrigerant in Do not operate the chiller before the control configurations spring isolated chillers may place severe stress on exter- have been checked and a Calibration and Control Test has nal piping if springs have not been blocked in both up... - Page 25 All 19DV units are field charged. Charge the unit from re- over to charge liquid by either lifting refrigerant cylinder above frigerant cylinders. Use Table 8 to find expected approximate charging valve to allow for gravity feed or if charge isolated in charge by adding cooler and condenser charge together.
- Page 26 IMPORTANT: Be sure to remember the password. Retain a copy for future reference. Without the pass- word, access will not be possible unless accessed by a Carrier representative. Factory password is required to enter configuration menus required for chiller setup. Fig. 24 — Main Menu The Setpoint screen is displayed.
- Page 27 INPUT TIME AND DATE — Set day and time and, if appli- cable, Holidays through MAIN MENU CONFIGURATION MENU and then select appropriate icon. See the Controls Op- eration and Troubleshooting guide for details. Because a sched- ule is integral to the chiller control sequence, the chiller will not start until the time and date have been set.
- Page 28 0 to 1 44PSI=0, 72PSI=1 0 to 999 Country Code No/Yes Per selection Free Cooling Option VFD Option No=0,FS VFD=1,Carrier=2, 0 to 5 Rockwell LF2=3, Eaton=4, Rockwell STD=5 0 to 1 IOB3 Option (19XR2~E/D/V) No/Yes IOB4 Option Guide Vane1 Type,...
- Page 29 Table 12 — UM VFD Config Main Menu Configuration Menu UM VFD Configuration [CFGUMVFD] DESCRIPTION RANGE UNITS DEFAULT VALUE Compressor Speed 100% 47 to 110 Nameplate Rated Line Voltage 200 to 13800 Volts Nameplate Motor Nameplate Current 10 to 1500 AMPS Nameplate Motor Rated Load Current...
- Page 30 Table 14 — Option Configuration Main Menu Configuration Menu Option Configuration [CONF_OPT] DESCRIPTION RANGE UNITS DEFAULT VALUE Dsable/Enable Dsable Jobsite specific Auto Restart Option Dsable/Enable Dsable Jobsite specific Common Sensor Option EC Valve Option 0 to 3 2 (if selected) No=0, Cont.=1,ON/OFF=2, mA=3 EC Selection 0 to 3...
-
Page 31: Field Set Up And Verification
• VFD Nameplate data - located on the right side of the VFD. MODIFY EQUIPMENT CONFIGURATION IF NECES- SARY — The EQUIPMENT SERVICE table has screens to select, view, or modify parameters. Carrier’s certified drawings have the configuration values required for the jobsite. Modify these values only if requested. Modifications can include: •... - Page 32 required for all modulating analog actuators. Upon successful 4. A high pressure point can be calibrated between 10-30 calibration go Main Menu → Quick Test and verify operation on psig (68.9 -206.8 kPa) by attaching a regulated pressure desired components. Note that this is a very useful feature for source (usually from a nitrogen cylinder with high resolu- troubleshooting.
-
Page 33: Initial Start-Up
3. Chiller is charged with refrigerant and all refrigerant valves are in their proper operating positions. IS CLOCKWISE WHEN VIEWED 4. Carrier inhibitor is located and available to be added THROUGH SUCTION PIPE through evaporator charging valve. LEADING TO COMPRESSOR 5. - Page 34 COOLER-CONDENSER — High side float chamber, relief • CONDENSER REFRIG TEMP devices, refrigerant charging valve, temperature sensor loca- • CONDENSER PRESSURE tions, pressure transducer locations, Schrader fittings, water- • ACTUAL GUIDE VANE POSITION boxes and tubes, and vents and drains. •...
-
Page 35: Operating Instructions
2. If ACTUAL GUIDE VANE POSITION is still less than 30% and Step 1 failed, increase the value of SURGE LINE SHAPE FACTOR in steps of 0.01 up to 2 times. For example, if surge is encountered when shape factor is –0.06, increase the SURGE LINE SHAPE FACTOR to –0.05. -
Page 36: Check The Running System
If the chiller is stopped by an alarm condition, do not restart such as the Data Collection module and a Building Supervi- the chiller until the problem is diagnosed and corrected. sor. Contact a Carrier representative for more information. No special preparations After Limited Shutdown —... - Page 37 REFRIGERATION LOG CARRIER 19DV SEMI-HERMETIC CENTRIFUGAL REFRIGERATION MACHINE PLANT______________________ MACHINE MODEL NO.______________________ MACHINE SERIAL NO. _______________________ DATE DESCRIPTION PRESSURE SAT REFRIGERANT LIQUID TEMP LEVEL COOLER FLOW WATER TEMP IN TEMP OUT PRESSURE REFRIGERANT TEMP SAT CONDENSER FLOW WATER TEMP IN...
-
Page 38: Pumpout And Refrigerant
PUMPOUT AND REFRIGERANT TRANSFER PROCEDURES WARNING For refrigerant side service work the Preparation — During transfer of refrigerant into and out of the optional refrigerant can be isolated in a storage tank. The following pro- storage tank, carefully monitor the storage tank level gage. cedures and Fig. - Page 39 PUMP-OUT WITH STORAGE TANK RELIEF PUMP-OUT VALVE COMPRESSOR CONDENSER SEPARATOR PUMP-OUT CONDENSER ECONOMIZER HS FLOAT AND LS FLOAT CHECK VALVE COOLER STORAGE VESSEL Fig. 38 — Refrigerant Transfer Schematic The following procedures assume that system is piped in When vacuum pressure is fully equalized, close agreement with Fig.
- Page 40 d. Open valves 3 and 4, and place valves in the fol- d. Turn off the pumpout compressor. lowing positions. VALVE VALVE CONDITION CONDITION e. To prepare for removal of remaining refrigerant vapor in storage tank, close pumpout valves 3 and e.
-
Page 41: General Maintenance
(see Fig. 39-40): Carrier recommends that leaks totaling less than the above 1. Remove the set screw in the guide vane coupling. rate but more than a rate of 0.1% of the total charge per year 2. - Page 42 Fig. 39 — Guide Vane Actuator...
-
Page 43: Trim Refrigerant Charge
NOTE: For first stage, rotate coupling clockwise to close guide vanes; rotate coupling counterclockwise to open guide vanes. For second stage, rotate coupling counter- clockwise to close guide vanes; rotate coupling clockwise to open guide vanes. Fig. 40 — Guide Vane Actuator Detail 4. -
Page 44: Inspect The Purge
MOISTURE INDICATOR SIGHT GLASS FOR INSPECTION NOTE: SECOND INDICATOR IS LOCATED IN THE MOTOR/VFD COOLING LINE (ON THE CONDENSER SIDE) COMING OFF THE BOTTOM OF THE HIGH SIDE FLOAT CHAMBER. Fig. 41 — Moisture Indicator Sight Glass for inspection float downstream of condenser). The float refrigerant level With unit off drain, purge tank Inspect the Purge —... -
Page 45: Compressor Bearing Maintenance
Contact WARNING your Carrier representative to obtain these brushes. Do not use The disconnect on the starter front panel does not always wire brushes. Hard scale may require chemical treatment for its de-energize all internal circuits. -
Page 46: Recalibrate Pressure Transducers
Carrier Inhibitor — RESISTANCE CHECK — Turn off the control power and, after every 5 years of service. Carrier Inhibitor (Carrier Materi- from the module, disconnect the terminal plug of the sensor in al Spec RW01-26) should be added to 500 ppm concentration question. - Page 47 Table 16 — Thermistor Temperature (F) vs. Resistance/Voltage Drop TEMPERATURE RESISTANCE TEMPERATURE RESISTANCE TEMPERATURE RESISTANCE VOLTAGE VOLTAGE VOLTAGE (OHMS) (OHMS) (OHMS) DROP (V) DROP (V) DROP (V) –25 4.700 97,706 2.565 6,568 0.630 –24 4.690 94,549 2.533 6,405 0.619 –23 4.680 91,474 2.503...
- Page 48 Table 17 — Thermistor Temperature (C) vs. Resistance/Voltage Drop TEMPERATURE RESISTANCE TEMPERATURE RESISTANCE VOLTAGE VOLTAGE (OHMS) (OHMS) DROP (V) DROP (V) –33 4.722 105 616 1.338 2 272 –32 4.706 99 640 1.300 2 184 –31 4.688 93 928 1.263 2 101 –30 4.670...
-
Page 49: Checking Pressure Transducers
CHECK SENSOR ACCURACY — Place the sensor in a COOLER, CONDENSER, REFRIGERANT PUMP SUC- medium of known temperature and compare that temperature TION AND DISCHARGE, BEARING INLET AND OUT- to the measured reading. The thermometer used to determine LET PRESSURE TRANSDUCER CALIBRATION — Cal- the temperature of the medium should be of laboratory quality ibration can be checked by comparing the pressure readings with 0.5F (0.25C) graduations. -
Page 50: High Altitude Locations
3. Access the PRESSURE or (if water side pressure) The PIC5 control system does not allow calibration if the HYDRAULIC STATUS screen and view the particu- transducer is too far out of calibration. In this case, a new trans- lar transducer reading. To calibrate pressure or water- ducer must be installed and re-calibrated. - Page 51 Table 18 — Component Weights DV4 COMPRESSOR COMPONENT SUCTION PIPE ASSEMBLY (INCLUDES FLANGES) INTERSTAGE PIPING DISCHARGE PIPING HMI PANEL CONTROL PANEL HIGH SIDE FLOAT CHAMBER COVER LOW SIDE FLOAT CHAMBER COVER PURGE ASSEMBLY ENVELOP CONTROL VALVE / HGBP (OPTION) ECONOMIZER BYPASS VALVE (OPTION) FREE COOLING VALVE (OPTION) LIQUID BYPASS AND ISOLATION VALVE (OPTION) VFD 32VSS0850...
- Page 52 Table 20 — 19DV Two-Stage Compressor Frame Size DV4 Heat Exchanger Weights (English) DRY RIGGING WEIGHT (lb)* REFRIGERANT WEIGHT (lb) WATER WEIGHT (lb) CODE† EVAPORATOR CONDENSER EVAPORATOR CONDENSER EVAPORATOR CONDENSER ONLY ONLY ONLY ONLY ONLY ONLY 8547 — — 1764 —...
- Page 53 Table 21 — 19DV Two-Stage Compressor Frame Size DV4 Heat Exchanger Weights (SI) DRY RIGGING WEIGHT (kg)* REFRIGERANT WEIGHT (kg) WATER WEIGHT (kg) CODE† EVAPORATOR CONDENSER EVAPORATOR CONDENSER EVAPORATOR CONDENSER ONLY ONLY ONLY ONLY ONLY ONLY 3877 — — — 3947 —...
- Page 54 Table 22 — 19DV Two-Stage Compressor Frame Size DV4 Economizer Weight ECONOMIZER DRY WEIGHT REFRIGERANT OPERATION DRY WEIGHT REFRIGERANT OPERATION SIZE (lb)* WEIGHT (lb) WEIGHT (lb) (kg)* WEIGHT (kg) WEIGHT (kg) 12 in. 1961 2303 1044 14 in. 2330 2672 1057 1212 *Includes standard economizer weight and all connecting piping to...
- Page 55 BEARING VOLUTE SUPPORT HOUSING MOTOR HOUSING 2ND STAGE 1ST STAGE MOTOR BEARING SHAFT HOUSING LABY IMPELLER SPACER/ NOSE PIECE SIZER EYE LABY SHROUD BEARING/FLANGE IMPELLER ROLLER ELEMENT IMPELLER SHIM LABYRINTH BEARING ASSEMBLY Fig. 46 — 19DV Compressor 7TB IN HMI PANEL FOR CUSTOMER COMMUNICATION CONNECTION...
- Page 56 DETAI L A , F I G . 52 REFR IG PU MP PW R D E TAI L B, F IG. 5 2 CTL POWER ECON VENT PWR GUIDE VANE 1 PWR PURGE PWR GUIDE VANE 2 PWR FRE E C OOLIN G PW R ENVELOPE/HGBP PWR D E TA IL C, FIG.
- Page 58 Fig. 50 — 19DV Input Output Board (IOB) Schematic...
- Page 59 Fig. 50 — 19DV Input Output Board (IOB) Schematic (cont)
- Page 60 Fig. 50 — 19DV Input Output Board (IOB) Schematic (cont)
- Page 61 Fig. 50 — 19DV Input Output Board (IOB) Schematic (cont)
- Page 62 Fig. 51 — 19DV Input Output Board (IOB) Schematic Abbreviations...
- Page 63 — Refrigerant Pump Contactor — Liquid Bypass Valve Contactor (Option) — Economizer Vent Valve Contactor (Option) — Free Cooling Valve Contactor (Option) — Control Power Circuit Breaker — Control Power Circuit Breaker — L1, L2, L3 – Main 3-Phase Power —...
- Page 64 Fig. 53 — Control Panel Schematic...
- Page 65 (devices job specifications. not supplied by Carrier) must have 24 vac rating. Max current 1.2 The routing of field-installed conduit and conductors and the is 60 mA, nominal current is 10 mA. Switches with gold- location of field-installed devices must not interfere with plated bifurcated contacts are recommended.
- Page 66 — Transformer — Transformer 7TB 1,2 — 24VAC Low Voltage Wiring Terminal Block 7TB LL1, LL2 — Main One Phase Power 7TB PE — Ground — Purge Compressor/Fan Contactor — Purge Heater Contactor — High Level Switch Relay — Low Level Switch Relay —...
- Page 68 — FLEX BAR — DCIB — COIL ASSEMBLY — TRANSFORMER 4 kVA — DC REACTOR — CURRENT TRANSFORMERS — RECTIFIER — AC REACTOR — RECTIFIER FAN ASSEMBLY — INVERTER FAN ASSEMBLY — INVERTER — COIL ASSEMBLY — DCIB/HVIB (BACK) CONTROL ASSEMBLY —...
- Page 69 DRIVE CONTROL INTERFACE BOARD TRANSFER SWITCH FOR SINGLE PHASE SERVICE POWER (IF PROVIDED) Fig. 57 — VFD Power Panel Assembly...
-
Page 71: Structure
APPENDIX A — PIC5 SCREEN AND MENU STRUCTURE HOME MAIN MENU LOG IN/LOG OUT CONFIRM STOP CHOOSE OPERATING MODE ALARM MENU a19-2238 Fig. A — Screen Structure, Basic Level (All) Access (No Password Required) -
Page 72: Appendix A - Pic5 Screen And Menu
APPENDIX A — PIC5 SCREEN AND MENU STRUCTURE (cont) HOME MAIN MENU LOG IN/LOG OUT CONFIRM STOP CHOOSE OPERATING MODE ALARM MENU Main Menu Fig. B — Screen Structure, User Level Access (User Password Required) - Page 73 APPENDIX A — PIC5 SCREEN AND MENU STRUCTURE (cont) HOME MAIN MENU LOG IN/LOG OUT CONFIRM STOP CHOOSE OPERATING MODE ALARM MENU Fig. C — Screen Structure, Service (Advanced User) / Factory Level Access Password Required...
- Page 74 APPENDIX A — PIC5 SCREEN AND MENU STRUCTURE (cont) Main Menu Description ICON DISPLAYED TEXT* ACCESS ASSOCIATED TABLE† General Parameters Basic, User, Factory GENUINT Temperatures Basic, User, Factory TEMP Pressures Basic, User, Factory PRESSURE Inputs Status Basic, User, Factory INPUTS Outputs Status Basic, User, Factory OUTPUTS...
-
Page 75: Appendix B - Ccn Communication Wiring For Multiple Chillers (Typical)
APPENDIX B — CCN COMMUNICATION WIRING FOR MULTIPLE CHILLERS (TYPICAL) DRAIN WIRE BLACK (G) WHITE (-) RED (+) NOTE : Field-supplied terminal strip must be located in control panel. -
Page 76: And Log Sheets
None. Inspect float valves and strainers. Perform eddy cur- CONDENSER PURGE None. rent test. EVERY 5 YEARS Add dose of Carrier Inhibitor (500 ppm). Replace gas COMPRESSOR strainer prior to eductor (or when refrigerant is CONTROLS None. removed). COOLER None. -
Page 77: Appendix D - Remote Connectivity
APPENDIX D — REMOTE CONNECTIVITY COMMISSIONING Introduction Installation during commissioning Cellular Remote Connectivity is a system developed by Car- 1. Disconnect unit power. Use proper lockout-tagout proce- rier to remotely monitor a chiller. It consists of a PIC5 control- dures to ensure safety while installing this equipment ler, IP Switch, cellular modem and an antenna. - Page 78 APPENDIX D — REMOVE CONNECTIVITY COMMISSIONING (cont) Table A — Customer Gateway Data Submittal Information Submittal Data: Fill out all white fields. Scan or photograph and submit per Customer Gateway instructions. CHILLER INFORMATION Parameter Write Values Below Description PIC5 Software ____________________ Shown at bottom of start-up screen, or in the menu under Configuration >...
- Page 79 APPENDIX D — REMOVE CONNECTIVITY COMMISSIONING (cont) Signal strength can also be evaluated with a smart phone if Signal Evaluation operating on AT&T network. Path to see the phone’s current Test the antenna at various positions where it can possibly be dBm signal varies by phone make and model.
- Page 80 APPENDIX D — REMOVE CONNECTIVITY COMMISSIONING (cont) From the Setup Menu, select “Network”. The PIC5 Net- work Setup menu will display; see Fig. J. Fig. J — PIC5 Network Setup Fig. K — PIC5 Network Configuration Menu (page 3 of 5) In Network Configuration do the following: Verify that “Enable DHCP”...
-
Page 82: Index
Water Inspecting before start-up, Leaks, Maintenance, Treatment, © Carrier Corporation 2018 Manufacturer reserves the right to discontinue, or change at any time, specifications or designs without notice and without incurring obligations. Catalog No. 04-53190048-01 Printed in U.S.A. Form 19DV-CLT-1SS Pg 82... -
Page 83: Initial Start-Up Checklist For 19Dv Semi-Hermetic Two-Stage Centrifugal Liquid Chiller
Charging ....Operating Instructions Hrs. Add dose of Carrier Inhibitor (500 ppm) during initial commissioning. Yes No START-UP TO BE PERFORMED IN ACCORDANCE WITH APPROPRIATE MACHINE START-UP INSTRUCTIONS JOB DATA REQUIRED: Yes No ... - Page 84 B: Take at least two sets of operational log readings and record. C: Give operating instructions to owner’s operating personnel. Given at: Hours D: Call your Carrier factory representative to report chiller start-up. F: Return a copy of this checklist to the local Carrier Service office. SIGNATURES: CARRIER CUSTOMER...
- Page 85 19DV PIC5 SET POINT TABLE CONFIGURATION SHEET DESCRIPTION RANGE UNITS DEFAULT VALUE Cooling ECW Set point -9.4 to 48.9 °C 15.6 EWT Control Option DISABLE/ENABLE — DSABLE Ice Build Set point -9.4 to 15.6 °C Cooling LCW Set point -12.2 to 48.9 °C Base Demand Limit 10.0 to 100.0...
- Page 86 Water =0, Brine =1 19DV Comp Design Press 0 to 1 44PSI=0 72PSI=1 Free Cooling Option 0 to 1 VFD Option No=0,FS VFD=1,Carrier=2 0 to 5 Rockwell LF2=3, Eaton=4 Rockwell STD=5 IOB4 Option 0 to 1 Guide Vane1 Type 0 to 1...
- Page 87 19DV PIC5 CFGUMVFDUM VFD CONFIGURATION TABLE CONFIGURATION SHEET DESCRIPTION RANGE UNITS DEFAULT VALUE Compressor Speed 100% 47 to 200 Motor Rated Line Voltage 200 to 13800 Volts Motor Nameplate Current 10 to 2000 AMPS Motor Rated Load Current 10 to 2000 AMPS Motor Nameplate Voltage 200 to 13800...
- Page 88 © Carrier Corporation 2018 Manufacturer reserves the right to discontinue, or change at any time, specifications or designs without notice and without incurring obligations. Catalog No. 04-53190048-01 Printed in U.S.A. Form 19DV-CLT-1SS Pg CL-6 8-18 Replaces: New...
Need help?
Do you have a question about the AquaEdge 19DV series and is the answer not in the manual?
Questions and answers