Table of Contents
Advertisement
Quick Links
Advertisement
Table of Contents

Related Manuals for ATEN VP1920


Summary of Contents for ATEN VP1920
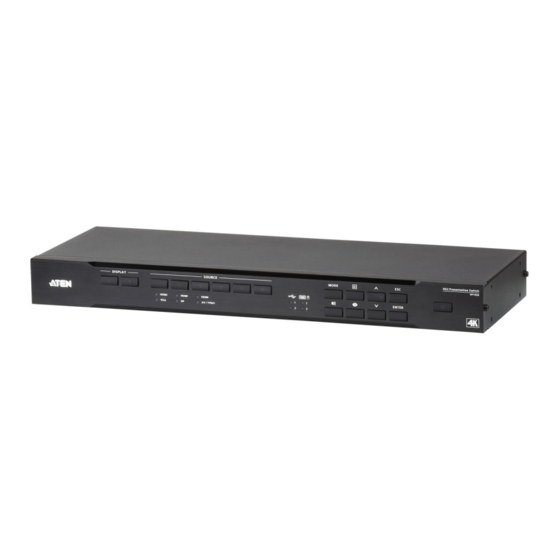
- Page 1 9 x 2 4K Presentation Matrix Switch VP1920 User Manual www.aten.com...
-
Page 2: Rohs
VP1920 User Manual Preface EMC Information FEDERAL COMMUNICATIONS COMMISSION INTERFERENCE STATEMENT: This equipment has been tested and found to comply with the limits for a Class A digital device, pursuant to Part 15 of the FCC Rules. These limits are designed to provide reasonable protection against harmful interference when the equipment is operated in a commercial environment. -
Page 3: User Information
VP1920 User Manual User Information Online Registration Be sure to register your product at our online support center: International http://eservice.aten.com Telephone Support For telephone support, call this number: International 886-2-8692-6959 China 86-400-810-0-810 Japan 81-3-5615-5811 Korea 82-2-467-6789 North America 1-888-999-ATEN ext 4988... -
Page 4: Package Contents
VP1920 User Manual Package Contents 1 VP1920 9 x 2 4K Presentation Matrix Switch 1 Power Cord 1 IR Receiver 1 IR Remote Control 1 User Instructions Make sure that all of the items are present and in good order. If anything... -
Page 5: Table Of Contents
VP1920 Front View ........ - Page 6 VP1920 User Manual Operation..........20 Locking the Panel Pushbuttons .
-
Page 7: About This Manual
VP1920 User Manual About this Manual This user manual is provided to help you get the most from the VP1920 unit. It covers all aspects of installation, configuration, and operation. An overview of the information found in the manual is provided below. -
Page 8: Conventions
Indicates critical information. Product Information For information about all ATEN products and how they can help you connect without limits, visit ATEN on the Web or contact an ATEN Authorized Reseller. Visit ATEN on the Web for a list of locations and telephone numbers: International http://www.aten.com... -
Page 9: Introduction
With streamlined control from front-panel pushbuttons, IR remote controller, OSD, and RS-232, the VP1920 reduces not only system device count, but also lowers operation complexity. It is suitable for all small-to-medium sized corporate and education presentation environments, such as meeting rooms, classrooms, training rooms, or any other presentation setting, such as in exhibition centers or hotels. -
Page 10: Benefits
Chapter 1. Introduction Benefits Fast Multi-format Audio-video Switching The VP1920 allows for fast switching among 6 HDMI and 3 combo inputs (HDMI/VGA, HDMI/DisplayPort, HDMI/Component/Composite) to 2 HDMI outputs and supports Coaxial, Toslink, Stereo audio outputs. USB Control Routing for PCs and Touch Panels The VP1920 integrates PC and touch panel controls with other devices into one system with its USB ports. -
Page 11: Features
VP1920 User Manual Features Multi-format AV Switching with Simplicity Supports 9 multi-format inputs and 2 HDMI outputs: 3 combo inputs (HDMI/VGA, HDMI/DisplayPort, HDMI/AV/YPbPr) 3 HDMI inputs 2 HDMI outputs VGA port supports universal analog input formats (RGBHV/RGBs/YCbCr/ YPbPr) Embed/de-embed audio-HDMI/DisplayPort audio signals can be extracted to digital/analog audio signals;... - Page 12 Chapter 1. Introduction Extended Flexibility for USB Peripherals USB ports enable keyboard/mouse or touch panel control over the connected computers Control focus for keyboard/mouse and USB peripherals can be individually switched to a designated computer source...
-
Page 13: Planning The Installation
A set of keyboard and mouse for accessing computers connected as Source 1 and 2 A software or hardware controller to configure the settings of the VP1920 using RS-232 interface For information on the number of equipped ports for each connection interface,... - Page 14 Chapter 1. Introduction This Page Intentionally Left Blank...
-
Page 15: Hardware Setup
Chapter 2 Hardware Setup 1. Please review the safety information regarding the placement of this device in Safety Instructions, page 25. 2. Do not power on the VP1920 until all the necessary hardware is connected. Components VP1920 Front View No. Component... - Page 16 Pushbuttons Navigate up and down the OSD. Press to lock or unlock the panel pushbuttons. You can also set the VP1920 to automatically lock the panel pushbuttons. For more information, see Locking the Panel Pushbuttons, page 21. : Goes to the next level of settings in the OSD or selects a setting.
-
Page 17: Vp1920 Rear View
VP1920 User Manual VP1920 Rear View 11 12 8b 10 No. Component Description Source 1 A combo port that can receive up to two source devices (one VGA In with a Stereo Audio In and one HDMI In). Source 2 A combo port that can receive up to two source devices (one DisplayPort In and one HDMI In). - Page 18 Chapter 2. Hardware Setup No. Component Description 13 Grounding Grounds the VP1920 to prevent damages to the Terminal VP1920 from power surge or static electricity. Note: Source 1, 2, and 3 of the unit can each receive more than one input, but...
-
Page 19: Ir Remote Control
VP1920 User Manual IR Remote Control Buttons Description On/Off Button Turns the VP1920 on or off. Source Buttons Press a Source button to assign the source to a focused display. Navigation Buttons : Press these buttons to navigate up and down the OSD. - Page 20 Menu Opens the OSD of system settings for the VP1920. For more details about system settings, see Setting the Display Mode, page 19. Press the button twice to close the OSD. Audio : Opens the OSD for setting the source of local audio output.
-
Page 21: Led Indicators
VP1920 User Manual LED Indicators You can find the LEDs of the VP1920 on the top panel as illustrated below. See the table below for details about LED indication. No. LED Indication System Status Display Pushbuttons Light amber The display device (Display A or B) is focused. -
Page 22: Rack Mounting
Chapter 2. Hardware Setup Rack Mounting The VP1920 can be mounted in a 19” (1U) system rack. To conveniently access the front-panel pushbuttons for configuration and operation, mount the unit at the front of the rack so that the front panel faces outward. -
Page 23: Installation
VP1920 User Manual Installation Follow the steps below to safely install the VP1920 to sources, display devices, and other equipment as required. 1. Ground the unit with a grounding wire. Connecting one end of the grounding wire to the grounding terminal, and the other end to a suitable grounded object. - Page 24 Chapter 2. Hardware Setup 3. Use HDMI cables to connect HDMI displays to the HDMI Out ports. Note: If you are only using one display, make sure to connect it to Display A where the OSD menu displays. 4. Connect your audio devices to the Stereo Audio Out or Digital Audio Out ports.
-
Page 25: Operation
Switching the Display Source Auto Switching By default, VP1920 automatically switches to a new source on Display A as soon as the source is detected. To disable automatic switching, press the Menu button/pushbutton, and then go to Source > Auto Switch to disable the setting. -
Page 26: Changing The Source For Mirror Mode
Chapter 3. Operation 2. Press a Source button/pushbutton to assign the source to the focused display. The pushbutton for the selected source lights green. Note: For combo ports (Source 1, 2, and 3), the latest connected input will be automatically selected as the output source for the set. To manually change the source of a combo port, press the Source button/pushbutton twice. -
Page 27: Display Modes
Display B is inserted into Display A in a mini window. Setting the Display Mode By default, the VP1920 is set to the matrix mode with which you can assign different sources to the connected displays. To change the display mode, following the steps below:... -
Page 28: Operating Pcs/Laptops/Tablets
Hardware Setup Follow the steps below to correctly install your PCs and/or laptops. 1. Connect your PC or laptop to Source 1 or Source 2 of the VP1920 depending on the equipped interface (VGA, DisplayPort, or HDMI). 2. Use a USB cable to connect your device to the USB host port of the Source group on the VP1920 that you use in step 1. -
Page 29: Locking The Panel Pushbuttons
VP1920 User Manual Locking the Panel Pushbuttons You can have your panel pushbuttons locked to avoid accidentally changing your configuration. Manual Lock Press and hold the pushbutton until the Lock icon on the pushbutton lights red. To unlock, press and hold the pushbutton until the Lock icon dims. -
Page 30: System Settings
2. Navigate to the setting you wish to configure. 3. Press the Enter button/pushbutton to select an option. The selected option appears in square brackets for the setting. Refer to the table below for an overview of the VP1920’s settings. System Setting Description Note: Default settings are indicated in bold. - Page 31 Display A. Note: The source device must be a laptop, PC, or tablet, and is connected to the USB host port on the VP1920. For details on the required setup, see Operating PCs/Laptops/Tablets, page 20. Audio...
- Page 32 Maintenance Firmware Upgrades Upgrades the VP1920 firmware. Note: Save the firmware file to a USB drive and plug it into the VP1920 before the upgrade. Reset to Default Sets the VP1920 to its default settings. Exit Closes the OSD.
-
Page 33: Appendix
Appendix Safety Instructions General This product is for indoor use only. Read all of these instructions. Save them for future reference. Follow all warnings and instructions marked on the device. Do not place the device on any unstable surface (cart, stand, table, etc.). If the device falls, serious damage will result. - Page 34 Appendix Do not allow anything to rest on the power cord or cables. Route the power cord and cables so that they cannot be stepped on or tripped over. If an extension cord is used with this device make sure that the total of the ampere ratings of all products used on this cord does not exceed the extension cord ampere rating.
-
Page 35: Rack Mounting
VP1920 User Manual Rack Mounting Before working on the rack, make sure that the stabilizers are secured to the rack, extended to the floor, and that the full weight of the rack rests on the floor. Install front and side stabilizers on a single rack or front stabilizers for joined multiple racks before working on the rack. -
Page 36: Technical Support
Support Documentation Software Updates Telephone Support 1-888-999-ATEN ext 4988 1-949-428-1111 When you contact us, please have the following information ready beforehand: Product model number, serial number, and date of purchase Your computer configuration, including operating system, revision level, expansion cards, and software... -
Page 37: Specifications
VP1920 User Manual Specifications Function VP1920 Video Input Interfaces 6 x HDMI Type-A Female (Black) 1 x DP Female (Black) 1 x HDB-15 Female (Blue) 1 x Component (3 x RCA Female, Blue/Green/Red) 1 x Composite (1 x RCA Female, Yellow) - Page 38 Appendix Function VP1920 Control RS-232 1 x DB 9 Female (Black) 1 x Mini Stereo Jack Female (Black) Switches Power 1 x Pushbutton 1 x Rocker Video Input Port Selection 6 x Pushbuttons Video Output Port Selection 2 x Pushbutton...
-
Page 39: Limited Warranty
ATEN will provide a repair service, without charge, during the Warranty Period. If a product is detective, ATEN will, at its discretion, have the option to (1) repair said product with new or repaired components, or (2) replace the entire product with an identical product or with a similar product which fulfills the same function as the defective product.
Need help?
Do you have a question about the VP1920 and is the answer not in the manual?
Questions and answers