Advertisement
Available languages
Available languages
Quick Links
INSTRUCTION MANUAL
Keep this manual in a safe place for future reference
UNIVERSAL THERMOSTATIC TRAPS FL SERIES
EINBAU- UND BETRIEBSANLEITUNG
Gebrauchsanleitung leicht zugänglich aufbewahren
THERMISCHE KONDENSATABLEITER FL SERIE
MANUEL D UTILISATION
Conserver ce manuel dans un endroit facile d'accès
PURGEURS DE VAPEUR THERMOSTATIQUES GAMME FL
QuickTrap
FL5/FL21/FL32
FL5-C/FL21-C/FL32-C
Trap Unit
L5/L21/L32
L5-C/L21-C/L32-C
Option
(
)
BD2
Copyright (C) 2016 by TLV Co., Ltd. All rights reserved.
F46+F32
Advertisement

Related Manuals for TLV QuickTrap FL Series


Summary of Contents for TLV QuickTrap FL Series
- Page 1 THERMISCHE KONDENSATABLEITER FL SERIE MANUEL D UTILISATION Conserver ce manuel dans un endroit facile d'accès PURGEURS DE VAPEUR THERMOSTATIQUES GAMME FL QuickTrap FL5/FL21/FL32 FL5-C/FL21-C/FL32-C Trap Unit L5/L21/L32 L5-C/L21-C/L32-C Option Copyright (C) 2016 by TLV Co., Ltd. All rights reserved. F46+F32...
- Page 2 * Configuration of F32 differs slightly from that of F46 1 MPa = 10.197 kg/cm 1 bar = 0.1 MPa For products with special specifications or with options not included in this manual, contact TLV for instructions. The contents of this manual are subject to change without notice.
- Page 3 •The three above types of cautionary items are very important for safety; be sure to observe all of them as they relate to installation, use, maintenance, and repair. Furthermore, TLV accepts no responsibility for any accidents or damage occurring as a result of failure to observe these precautions.
- Page 4 •Diese drei Warnzeichen sind wichtig für Ihre Sicherheit. Sie müssen unbedingt beachtet werden, um den sicheren Gebrauch des Produktes zu gewährleisten und Einbau, Wartung und Reparatur ohne Unfälle oder Schäden durchführen zu können. TLV haftet nicht für Unfälle oder Schäden, die durch Nichtbeachtung dieser Sicherheitshinweise entstehen.
- Page 5 • Ces 3 indicateurs sont importants pour votre sécurité ; observez les précautions de sécurité énumérées dans ce manuel pour l'installation, l'utilisation, l'entretien et la réparation du produit. TLV n'accepte aucune responsabilité en cas d'accident ou de dommage survenant à la suite d'un non-respect de ces précautions.
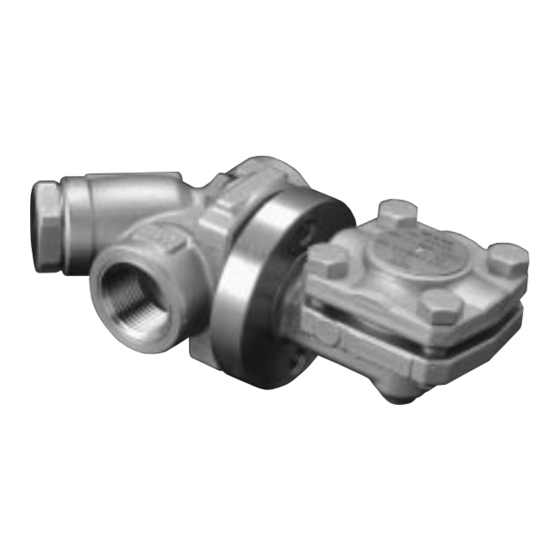
- Page 6 2. Configuration Aufbau Configuration Description Description Description Trap Body Connector Bolt Nameplate Connector Body** Trap Cover (Trap Unit) Connector Flange Cover Gasket Spring Clip Snap Ring Screen** Cover Bolt Outer Connector Screen Holder Flange Gasket Gasket** Check Valve Ball Inner Connector Screen Holder** X-element Screen Gasket...
- Page 7 3. Specifications Technische Daten Données techniques Refer to the product nameplates on the trap unit AND on the connector body for detailed specifications. The specifications displayed on each nameplate apply only to the unit on which it is mounted. When the trap unit is installed on a connector unit and the PMA/TMA and/or PMO/TMO values displayed on the two nameplates differ, the specifications for the assembled product are restricted to the lower values.
- Page 8 3.1 Maximum Operating Temperature FL32S(-C) FL21S(-C) FL5S(-C) 235˚C 240˚C 225˚C 455˚F 464˚F 437˚F (428˚F) Saturated Steam Curve (75) (150) (215) (300) (350) (450) 1 MPa = 10.197 kg/ cm Pressure MPaG (psig) 3.1 Maximale Betriebstemperatur FL32S(-C) FL21S(-C) FL5S(-C) 235˚C 240˚C 225˚C Sattdampfkurve Betriebsdruck (bar ü)
- Page 9 4. Exploded View Einzelteile Pièces détachées Nameplate* Cover Bolt* Typenschild* Gehäuseschraube* Plaquette nominative* Connector Gasket* Boulon de couvercle* Dichtring* Trap Cover* Joint de raccord* Gehäusedeckel* Couvercle du purgeur* Connector Body** Universal-Anschlussstück** Spring Clip* Unité de raccord** Spannbügel* Clip à ressort* Connector Nameplate** X-element* Typenschild Anschlussstück**...
- Page 10 5. Proper Installation • Installation, inspection, maintenance, repairs, disassembly, adjustment CAUTION and valve opening/closing should be carried out only by trained maintenance personnel. • Take measures to prevent people from coming into direct contact with product outlets. • Install for use under conditions in which no freeze-up will occur. •...
- Page 11 (When conducting a visual inspection, flash steam is sometimes mistaken for steam leakage. For this reason, the use of a steam trap diagnostic instrument such as TLV TrapMan is highly recommended.)
- Page 12 8. Inspection and Maintenance Operational inspections should be performed at least twice per year, or as called for by trap operating conditions. Faulty steam traps may result in losses due to steam leakage. Follow the instructions below for disassembly and reassembly when cleaning or repair is necessary. •...
- Page 13 8.1 Separating/Attaching Trap and Connector Bodies Loosen and remove the connector bolts, remove the entire trap unit from the connector body and take it to a repair area where it can be supported in a vise during disassembly. 2. A When reinstalling the original trap: a.
- Page 14 Instructions for Plug / Holder Disassembly and Reassembly The seal on the threaded plugs/holders found on TLV products is formed by a flat metal gasket. There are various installation orientations for the gaskets, such as horizontal, diagonal and downward, and the gasket may be pinched in the thread recesses during assembly.
- Page 15 9. Troubleshooting If the expected performance is unachievable after installation of the steam trap, read chapter 5 and chapter 6 again and check the following points to take appropriate corrective measures. Problem Cause Remedy Condensate X-element is stuck to the valve Clean is not seat...
- Page 16 10. Optional Blowdown Valve BD2 • Installation, inspection, maintenance, repairs, disassembly, adjustment and valve opening/closing should be carried out only by trained maintenance personnel. 10.1 Reassembly of Blowdown Valve • When disassembling or removing the product, wait until the internal CAUTION pressure equals atmospheric pressure and the surface of the product has cooled to room temperature.
- Page 17 5. Einbauhinweise • Einbau und Ausbau, Inspektion, Wartungs- und Reparaturarbeiten, VORSICHT Öffnen/Schließen von Armaturen, Einstellung von Komponenten dürfen nur von geschultem Wartungspersonal vorgenommen werden. • In sicherer Enfernung von Auslassöffnungen aufhalten und andere Personen warnen. • Kondensatableiter in frostsicherer Umgebung einbauen. •...
- Page 18 Falls der Kondensatableiter das Kondensat ins Freie abführt, können visuelle Inspektionen einen Hinweis geben, ob sofortige Wartung oder Reparatur notwendig ist. An Kondensatrückführleitungen angeschlossene Kondensatableiter können mit geeigneten Messgeräten, z. B. TLV TrapMan oder Pocket TrapMan (innerhalb ihrer Messwertgrenzen) geprüft werden.
-
Page 19: Table Of Contents
8. Inspektion und Wartung Es wird empfohlen, mindestens zweimal pro Jahr oder, je nach Betriebsweise, in kürzeren Zeit- abständen eine Prüfung mit einem geeigneten Instrument, z. B. TLV TrapMan durchzuführen. Fehlerhafte Kondensatableiter führen zu unerwünschten Dampfverlusten. Folgen Sie den nachfolgend beschriebenen Anweisungen für Wartung und Reparatur. -
Page 20: Spannbügel
8.1 Trennen/Zusammenbau von Anschlussstück und KA Die beiden Schrauben am Anschlussflansch lösen, den Kondensatableiter abnehmen und in einer geeigneten Werkstatt in den Schraubstock spannen. 2. A Bei Wiederverwendung des ursprünglichen Kondensatableiters: a. Die alten Dichtringe mit einem kleinen Schraubenzieher herausheben und ihr Gehäuse mit einem geeigneten Werkzeug reinigen. - Page 21 Aus- und Einbau-Anleitung für Entwässerungsstopfen Die Gewindedichtung der Entwässerungsstopfen an TLV-Kondensatableitern besteht aus einem flachen Metallring. Stopfen und Dichtung können in verschiedenen Lagen eingebaut werden - horizontal, diagonal oder nach unten zeigend. Wird der Metallring dabei im Gewinde gequetscht, verliert er seine Funktionstüchtigkeit.
- Page 22 9. Fehlersuche Falls der Kondensatableiter nicht zufriedenstellend arbeitet, lesen Sie nochmals Kapitel 5 und Kapitel 6. Dann gehen Sie die nachfolgende Fehlerliste durch, um den Fehler zu orten und zu korrigieren. Symptom Fehler Gegenmaßnahmen Kondensat X-Element klebt an Ventilsitz Reinigen fließt nicht Schmutzsiebe und/oder Einlass/ Reinigen...
-
Page 23: Siebhaltestopfen
10. Ausblaseventil BD2 (Option) • Inspektion, Ausbau von Teilen, Einstellungen, Öffnen/Schließen von Ventilen, sowie Wartungs- und Reparaturarbeiten dürfen nur von geschultem Wartungspersonal vorgenommen werden. 10.1 Zusammenbau des Ausblaseventils • Vor Öffnen des Gehäuses und Ausbau von Teilen warten, bis der VORSICHT Innendruck sich auf Atmosphärendruck gesenkt hat und das Gehäuse auf Raumtemperatur abgekühlt ist. - Page 24 5. Installation correcte • Tout installation, inspection, entretien, réparation, démontage, réglage ATTENTION et ouverture/fermeture de vanne doit être fait uniquement par une personne formée à l’entretien. • Éviter que des personnes n'entrent en contact direct avec les ouvertures du produit. •...
- Page 25 à l’atmosphère. Utiliser du matériel de diagnostic, comme le TLV TrapMan ou Pocket TrapMan (en respectant les limites de pression et de tempé- rature indiquées pour la mesure), si le condensât n’est pas évacué directement dans l’atmosphère.
- Page 26 Des inspections périodiques devraient être faites au moins deux fois par an, ou bien aux intervalles habituels. Le purgeur doit être inspecté en utilisant du matériel de diagnostic, comme le TLV TrapMan. La défaillance d’un purgeur peut entraîner des fuites de vapeur. Suivre les instructions de démontage et de remontage données ci-dessous s’il est nécessaire de réparer ou de nettoyer...
- Page 27 8.1 Séparation/connexion purgeur et corps du raccord Desserrer et retirer les boulons de raccord, retirer I'ensemble du purgeur du corps du raccord et le déplacer vers un atelier possédant un étau pour le démonter. 2.A Lors de la réinstallation du purgeur d'origine : a.
- Page 28 Instructions pour le démontage/remontage du bouchon/support Le dispositif d’étanchéité des bouchons/supports filetés compris dans les produits TLV est constitué d’un joint en métal plat. Les joints peuvent être orientés différemment (horizontalement, diagonalement, vers le bas), et ils peuvent se bloquer dans la saignée du filet au cours de l’assemblage.
- Page 29 9. Détection des problèmes Si le fonctionnement du produit n'est pas satisfaisant, consulter les parties 5 et 6 à nouveau, et vérifier les points suivants : Problèmes Causes Remèdes Peu ou pas de L’élément X colle au siège de soupape Nettoyer purge de condensât...
- Page 30 10. Robinet de purge BD2 (optionnel) • Tout installation, inspection, entretien, réparation, démontage, réglage et ouverture/fermeture de vanne doit être fait uniquement par une personne formée à l’entretien. 10.1 Remontage du robinet de purge BD2 • En cas de démontage ou de retrait du produit, attendre que la pression ATTENTION interne soit égale à...
- Page 31 2) Champ d’application de la garantie : TLV CO., LTD. garantit à l’acheteur originel que ce produit est exempt de tout vice de fabrication ou de qualité du matériau. Sous cette garantie, le produit sera réparé ou remplacé, au choix de TLV CO. LTD., sans aucun frais de pièces ou de main d’œuvre.
- Page 32 For Service or Technical Assistance: Contact your representative or your regional office. Für Reparatur und Wartung: Wenden Sie sich bitte an Ihre Vertretung oder an eine der Niederlassungen. Pour tout service ou assistance technique: Contactez votre agent ou votre bureau régional USA and Canada: T e l: [1]-704-597-9070 USA und Kanada:...
Need help?
Do you have a question about the QuickTrap FL Series and is the answer not in the manual?
Questions and answers