
Related Manuals for Midtronics GR8 1100


Summary of Contents for Midtronics GR8 1100
- Page 1 November 2008 168-822C GR8 1100 INNOVATION TECHNOLOGY QUALITY WORLDWIDE INSTRUCTION MaNUal INNOVATION TECHNOLOGY QUALITY WORLDWIDE...
- Page 2 This page intentionally left blank.
-
Page 3: Table Of Contents
GR8 1100 Contents Contents Contents Chapter 3: Getting Started Logging In for the First Time Safety Guidlines Bootup General Safety Precautions Initial User Login Personal Precautions Preparing To Charge The Battery Chapter 4: Setup Menu Grounding And AC Power Cord Connections... - Page 4 Contents GR8 1100 Chapter 6: Charging Menu Chapter 8: Power Supply Mode Diagnostic Charging Modes Chapter 9: Info Menu Selecting the Charging Parameters Initial Analysis Print/View Deep Scan Test Totals Diagnostic Charging Transfer Recovery Mode Version Aborting a Charge Session...
-
Page 5: Safety Guidlines
GR8 1100 Safety Instructions Safety Guidlines General Safety Precautions IMPORTANT SAFETY INSTRUCTIONS. IT IS OF UTMOST Remove marine “boat” batteries and IMPORTANCE THAT BEFORE USING YOUR CHARGER, charge them on shore. YOU READ THIS MANUAL AND FOLLOW THE SAFETY Charging marine batteries on-board requires AND OPERATING INSTRUCTIONS EXACTLY. -
Page 6: Preparing To Charge The Battery
Safety Instructions GR8 1100 properly installed and grounded in accordance with all lo- cal codes and ordinances. Non-rechargeable batteries may burst when charging causing personal injury and damage. Hazardous voltage. An improper connection can result in O n l y c h a r g e r e c h a r g e a b l e l e a d - a c i d... -
Page 7: Charger Location
GR8 1100 Safety Instructions Recommended minimum AWG* size for extension cords for battery chargers AC input rating amperes AWG* size of cord Length of cord, feet (m) Equal or greater than: But less than: (7.6) (15.2) (30.5) (45.6) *American Wire Gauge 5. - Page 8 Safety Instructions GR8 1100 7.8 For positive-grounded vehicle, connect the NEGATIVE 8.1 Check the polarity of battery posts. POSITIVE (POS., P, +) (BLACK) clamp from the charger to the NEGATIVE (NEG., post usually has larger diameter than NEGATIVE (NEG., N, –) ungrounded post of battery. Then connect the POSI- N, –) post.
-
Page 9: Chapter 1: Before You Begin
GR8 1100 Chapter 1: Before You Begin Chapter 1: Before You Begin Battery acid is highly corrosive. If acid enters your eyes, im- Safety Reminder mediately flush them thoroughly with cold running water for at least 15 minutes and seek medical attention. If bat-... -
Page 10: Registering Your Gr8
BACK Registering Your GR8 Before using the GR8, we recommend that you register it To register, log on at www.midtronics.com/warranty.html online to activate your warranty. Registration will also make and have your serial numbers ready. If your charger needs it faster and easier for you to obtain technical support and repair, call Midtronics Customer Service 1.800.776.1995. -
Page 11: Attaching The Charger Cables
GR8 1100 Chapter 1: Before You Begin Center the holes on the bottom of the control module Slide the cover (C) down the cables until it seats against with the bolts, and lower the module onto the top of the the sheetmetal. -
Page 12: Chapter 2: Overview
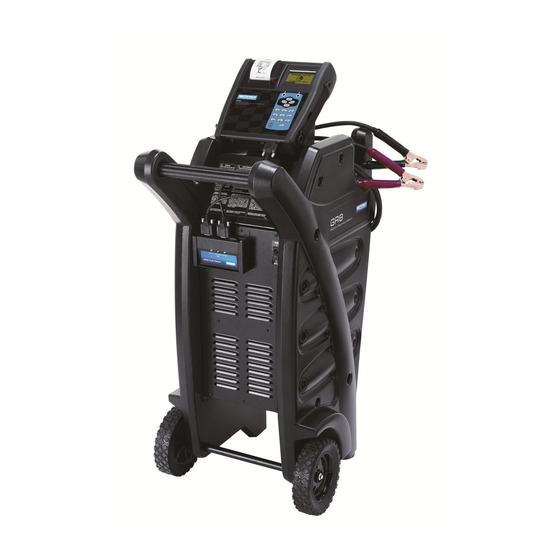
Chapter 2: Overview GR8 1100 Chapter 2: Overview Front of GR8 The controls to the GR8 are accessible on the front of the charger: the control module (user interface) and the ON/OFF switch. Control module Backlit graphical display and keypad for data entry. -
Page 13: Back Of Gr8
GR8 1100 Chapter 2: Overview Back of GR8 In addition to containing the outlets for the charger cables and power cord, the back of the GR8 is the location for the serial numbers for the charger engine and the control module. Both numbers are necessary for warranty registration. -
Page 14: Display And Keypad
Chapter 2: Overview GR8 1100 Display and Keypad The GR8 display and keypad work together to help you quickly find and use the right tools at the right time. The display also keeps you on track with onscreen navigation aids, directions and messages. The illustration shows how the elements on the screen relate to the keypad. -
Page 15: Data Entry Methods
GR8 1100 Chapter 2: Overview Data Entry Methods Scroll Bar To perform a particular test or function, the GR8 requires Another navigational aid is the scroll bar on the right side of different types of information. This means that the methods the screen. -
Page 16: Alphanumeric Entry
Chapter 2: Overview GR8 1100 Alphanumeric Entry Value Boxes S o m e s e l e c t i o n s Value boxes contain items that extend above and require you to use the below the selection box that alphanumeric keypad. -
Page 17: Charging Menu
GR8 1100 Chapter 2: Overview Charging Menu The Charging Menu provides three charging op- tions: Diagnostic Charging, Jump Start, and Manual Charging.. CHARGING MENU Automatically tests, charges, Makes high output current Provides a timed charge that and makes a decision on a... -
Page 18: Setup Menu
Chapter 2: Overview GR8 1100 Setup Menu (Admin PIN required to access the Setup Menu) The Setup Menu lets you customize options in the GR8 to suit your needs. Before using the GR8 for the first time, check the default values to see what options you may want to change, add, or delete. -
Page 19: Chapter 3: Getting Started
GR8 1100 Chapter 3: Getting Started Chapter 3: Getting Started Initial User Login The GR8 is initially set to require a default USER ID and PIN to access the Main Menu. In addition, it requires a default ADMIN USER ID: The default User ID 0 UNREG appears. Press the PIN to access the Setup Menu. -
Page 20: Chapter 4: Setup Menu
Chapter 4: Setup Menu GR8 1100 Chapter 4: Setup Menu The Setup Menu has several functions to custom- ize the use of your GR8—from the language of the user interface to the contrast of the display. The most important, however, is the ADMIN (adminis- trative) function which controls user access. -
Page 21: Clock
GR8 1100 Chapter 4: Setup Menu Clock Format Use the UP (p ) or DOWN (q ) ARROW or press the The CLOCK ADJUST utility has four settings. Use the corresponding numerical key (1 or 2) to move the dot to the UP (p) or DOWN (q) ARROW key to highlight the option button of your choice. -
Page 22: Deleting A User Id
Chapter 4: Setup Menu GR8 1100 To clear the default characters, press the LEFT (t) ARROW The GR8 displays: key. To add a space, move the cursor forward by pressing USER ID, PIN AND the RIGHT (u) ARROW key. USER TEST TOTAL WILL ENTER USER ID BE DELETED. -
Page 23: Shop
GR8 1100 Chapter 4: Setup Menu Shop The SHOP INFO utility allows you to create a header Screen 1 Screen 2 for your printed test results showing your business 1–YOUR SHOP NAME 5–YOUR COUNTRY — — location information. Its three information screens 2–1000 ANY STREET... -
Page 24: Coupon
Chapter 4: Setup Menu GR8 1100 Coupon Its two information screens contain eight lines of text with a maximum of 17 characters per line. (The COUPON utility The COUPON SELECT utility allows you to print one allows you to select which coupon to print at the bottom of the three custom coupons or messages created of your test results.) -
Page 25: Language
This section explains how to administer password save. The default PIN is 12345. If you forgot your Administrator access to the GR8. It also describes functions that PIN, call Midtronics at 1.800.776.1995 for assistance. clear test totals and restore settings to factory de- faults. -
Page 26: Reset Defaults
Chapter 4: Setup Menu GR8 1100 Reset Defaults Buzzer This function allows you to reset Administrative options to The BUZZER utility allows you to enable or dis- their original settings. It will clear all registered users and able the beep that alerts you that your attention is restrict access to the GR8. -
Page 27: Chapter 5: Preparing To Charge
• Corroded or loose battery terminals, tray and hold-down provides troubleshooting information and phone numbers fixture. Tighten or replace as needed. for Midtronics Customer Service, in case you encounter a problem and/or need technical assistance. Connecting the Clamps Connect the charging clamps to the battery in accordance with all precautions and safety instructions. -
Page 28: Chapter 6: Charging Menu
Chapter 6: Charging Menu—Diagnostic Charging GR8 1100 Chapter 6: Charging Menu Diagnostic Charging Modes In the Main Menu the CHARGING icon is highlighted. Press the SELECT key. Diagnostic Charging has four modes that the GR8 may use to determine the State-of-Health of the battery while bringing it to a full State-of-Charge. -
Page 29: Initial Analysis
GR8 1100 Chapter 6: Charging Menu—Diagnostic Charging Initial analysis 5. Use the UP (p) or DOWN (q) ARROW key to select the battery type. When you select the last charge parameter the GR8 begins the REGULAR FLOODED initial battery analysis. The progress of the analysis is shown by the left to right movement of a progress bar. -
Page 30: Recovery Mode
Chapter 6: Charging Menu—Diagnostic Charging GR8 1100 Aborting a Charge Session NOTE: The actual time needed to charge the battery may be less than the estimated time depending on If you need to abort the charging session, press the STOP key. -
Page 31: Diagnostic Charge Results
GR8 1100 Chapter 6: Charging Menu—Diagnostic Charging Diagnostic Charge Results BAD CELL-REPLACE Results: Diagnostic Charge Mode The GR8 displays one of three battery decisions (GOOD Screen 1 of 3 BATTERY, REPLACE BATTERY, REPLACE-BAD CELL) and an Selected B a t t e r y analysis, which includes the battery State-of-Health (SOH). -
Page 32: Manual Charging
Chapter 6: Charging Menu—Manual Charging GR8 1100 Battery Decisions: Diagnostic Charge Battery Decision Recommended Action GOOD BATTERY Return the battery to service. REPLACE BATTERY A REPLACE BATTERY result may also mean a poor connection between the battery cables and the battery. After disconnecting the battery cables, retest the battery using the out-of-vehicle test before replacing it. -
Page 33: Jump Start
GR8 1100 Chapter 6: Charging Menu—Jump Start 1. In the Main Menu, the BATTERY CHARGE icon is Select a charge duration from 5 to 120 minutes, or se- highlighted. Press the SELECT key. lect a duration greater than 120 minutes for Continuous charging. -
Page 34: Chapter 7: Battery Test
Chapter 7: Battery Test GR8 1100 Chapter 7: Battery Test 5. Select a test option and press the NEXT soft key. This test evaluates a battery using the parameters you select (Model, Stock #, CCA, JIS, etc.) and with TEST BY: option of performing a Diagnostic Charge on a good battery. -
Page 35: Battery Results
This results in irreversible T h e r e s u l t s i n c l u d e a Midtronics infomation code for physical and chemical changes until eventually the battery ALL decisions. -
Page 36: Chapter 8: Power Supply Mode
Chapter 8: Power Supply Mode GR8 1100 Chapter 8: Power Supply Mode Power Supply Mode tests and maintains battery If the battery is safe to charge, the GR8 begins maintaining voltage in the vehicle at 13.5 volts to allow for un- the battery voltage at 13.5 volts. -
Page 37: Chapter 9: Info Menu
GR8 1100 Chapter 9: Info Menu Chapter 9: Info Menu The Info Menu has six utilities to help you print and LAST 100 LOG view your test data and track the usage and history Last 100 tests performed by User ID (and by UNREG of your GR8. -
Page 38: Chapter 10: Test Messages
Chapter 10: Test Messages GR8 1100 Chapter 10: Test Messages The table below will help you troubleshoot test messages. If troubleshooting does not solve the problem, call Midtronics Customer Service at 1.800.776.1995. MESSAGE EXPLANATION System Noise The GR8 has detected computer, ignition noise, or parasitic drain, and will attempt to retest. Make Detected sure all vehicle loads are off, doors are closed, and the ignition is in the off position. -
Page 39: Chapter 11: Replacement Printer Paper
GR8 1100 Chapter 11: IR Printer Guide Chapter 11: Replacement Printer Paper Replacing the Paper Roll The IR printer uses thermal paper in a roll with the dimensions 2.25 in x 85 ft (57 mm x 25.9 m). You can purchase replacement rolls at most office supply stores. -
Page 40: Chapter 12: Test Cable Maintenance
Chapter 12: Test Cable Maintenance GR8 1100 Chapter 12: Test Cable Maintenance Here are a few things you can do to protect your test cables from damage and premature wear: • The grease, dirt, and sulfation that build up on battery terminals are highly corrosive and can damage the clamps over time. Before connecting the clamps, ensure accurate test readings and protect the clamps by cleaning the battery case and ter- minals using a wire brush and a mixture of water and baking soda. - Page 42 PATENTS The GR8 Battery Diagnostic Station is made in the U.S.A. by Midtronics, Inc. and is protected by one or more of the following U.S. Patents: 4,816,768; 4,825,170; 4,881,038; 4,912,416; 5,572, 136; 5,585,728; 5,592,093; 5,757,192; 5,821,756; 5,831,435; 5,914,605; 6,051,976; 6,091,245; 6,163,156; 6,249,124; 6,304,087; 6,310,481; 6,316,914;...
Need help?
Do you have a question about the GR8 1100 and is the answer not in the manual?
Questions and answers