
Related Manuals for Midtronics GR1-120


Summary of Contents for Midtronics GR1-120
-
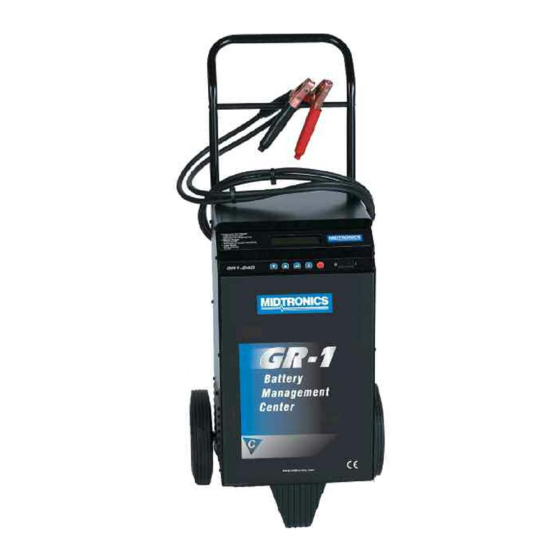
Page 1: Instruction Manual
Battery Management Innovation DIAGNOSTIC CONDUCTANCE CHARGER For testing and charging 12-volt automotive batteries INSTRUCTION MANUAL... -
Page 3: Table Of Contents
Contents Safety instructions ..........................3 Installing the handle ........................... 9 Operation ............................10 Front panel ..........................10 Back panel ..........................10 Charging modes ........................11 Diagnostic fast charge ......................11 Connect the charger to the battery .................. 11 Connect to AC power ...................... 11 Select charging mode ..................... - Page 4 Contents Jump start vehicle ........................20 Connect the charger to the battery .................. 20 Connect to AC power ...................... 20 Select charging mode ..................... 20 Options menu ..........................21 View test codes ....................... 21 View last test data ......................21 Print last test data ......................
-
Page 5: Safety Instructions
GR1-120 Safety Instructions CAUTION: Because of the possibility of personal injury, always use the following precautions when working around batteries. SAFETY INSTRUCTIONS DANGER Never smoke or cause a spark or flame in the vicinity of the battery or engine. Always wear complete eye protection: Explosive gases can... - Page 6 Incorrect reassembly may result in a risk of electric shock or fire. If the charger is in need of service, call Midtronics at 1-800-776-1995 or 1-630-323-2800. 1.10 To reduce the risk of electric shock, unplug the charger from the AC outlet before attempting any maintenance or cleaning.
- Page 7 GR1-120 Safety Instructions NEVER smoke or allow a spark or flame in the vicinity of the battery or engine. Be extra cautious to reduce the risk of dropping a metal tool onto the battery. It might spark or short circuit the battery or other electrical part that may cause an explosion.
- Page 8 GR1-120 Safety Instructions This battery charger is for use on a nominal 120-volt circuit and has a grounding plug that looks like the plug illustrated in Figure A. A temporary adapter, which looks like the adapter illustrated in Figures B and C, may be used to connect this plug to a two-pole receptacle as shown in Figure B if a properly grounded outlet is not available.
- Page 9 Determine which post of battery is grounded (connected) to chassis. If the negative post is grounded (as in most vehicles), see paragraph 7.7. If the positive post is grounded, see paragraph 7.8 or call Midtronics at 1-800-776-1995 or 1-630-323-2800. •...
- Page 10 GR1-120 Safety Instructions For a negative-grounded vehicle, first connect the POSITIVE (RED) charger clamp to the POSITIVE (POS., P, +) ungrounded post of the battery. Then connect the NEGATIVE (black) clamp from the charger to the NEGATIVE (NEG., N, –) post. Do not connect the clamp to the carburetor, fuel lines, or sheet-metal body parts.
-
Page 11: Installing The Handle
GR1-120 Installing the Handle INSTALLING THE HANDLE CAUTION: The charger must be fully assembled before operating. 1. Locate the handle and hardware provided. 2. Position the handle so that the angle faces away from the back of the charger and all mounting holes line up. -
Page 12: Operation
Charging Modes: Diagnostic Fast Charge OPERATION Before using the GR1-120 Diagnostic Conductance Charger, visually inspect the battery. If there are any signs of a leaking or cracked case, discard the battery. Do not attempt to charge a battery that is in this condition. -
Page 13: Charging Modes
Plug the charger into a dedicated, grounded 15-amp AC GR-1 Fast Charger X4.2 outlet. Press the power switch to the ON position. (c) Midtronics, Inc. 2004 If the clamps are not making good contact to the battery posts, the charger will ask you to check the connection. -
Page 14: Select Charging Mode
GR1-120 Charging Modes: Diagnostic Fast Charge 1.3 SELECT CHARGING MODE ↑↓ ↑↓ ↑↓ ↑↓ ↑↓ Mode Use the DOWN/UP buttons to select Diagnostic ↵ ↵ ↵ ↵ ↵ Diagnostic Fast Charge Fast Charge. Press the ENTER ↵ ↵ ↵ ↵ ↵ button to continue. -
Page 15: Diagnostic Charging
GR1-120 Charging Modes: Diagnostic Fast Charge The display will alternate between the result and a message to press ENTER ↵ ↵ ↵ ↵ ↵ for the test code (see “Test Code Generation.” DIAGNOSTIC CHARGING If the analysis finds a battery with insufficient state of 15.5V... -
Page 16: Charge Completion
GR1-120 Charging Modes: Diagnostic Fast Charge During charging, the charger displays the charging voltage, 14.5V 35.5A Tmax=0:32:27 charging current, remaining time to charge, the charging Automatic Charge AH: 4.6 mode, and the amount of charge put back into the battery in amp-hours. -
Page 17: Top-Off Charge Completion
GR1-120 Charging Modes: Diagnostic Fast Charge 13.3V 9.4A Top-Off Good Battery AH: 23.1 13.3V 9.4A Top-Off Cycled messages inform you that the battery is ready to Top-Off Charging AH: 23.1 be put back into service: Good Battery / Top-Off Charging / Hit STOP To End. -
Page 18: Recovery Mode
GR1-120 Charging Modes: Diagnostic Fast Charge RECOVERY MODE Under certain conditions the charger will switch from Automatic Charge to Recovery Mode to fully charge the battery. The maximum charge time in Recovery Mode is 5 hours; however, most batteries will finish charging sooner. -
Page 19: Manual Charge
2.2 CONNECT TO AC POWER GR-1 Fast Charger X4.2 Plug the charger into a dedicated, grounded 15-amp AC (c) Midtronics, Inc. 2004 outlet. Press the power switch to the ON position. If the clamps are not making good contact to the battery posts, the charger will ask you to check the connection. -
Page 20: Enter Battery Rating
Press the ENTER ↵ ↵ ↵ ↵ ↵ button to begin the continuous charge. (The STOP button is used to turn off continuous charging.) Important: During Manual Mode, the GR1-120 charges the battery based on the voltage, current, and charge duration that you select. Because the charger does not monitor the charging progress to optimize charging levels or reduce charging, you should monitor the battery’s state... -
Page 21: Continuous Charging
GR1-120 Charging Modes: Manual Charge CONTINUOUS CHARGING ....If Continuous Charge is selected, the charger will Analyzing Battery analyze the battery, briefly display the measured voltage and available starting current in CCA, and begin charging at the selected levels. -
Page 22: Jump Start Vehicle
3.2 CONNECT TO AC POWER Plug the charger into a dedicated, grounded 15-amp AC GR-1 Fast Charger X4.2 (c) Midtronics, Inc. 2004 outlet. Press the power switch to the ON position. If the clamps are not making good contact to the battery posts, the charger will ask you to check the connection. -
Page 23: Options Menu
GR1-120 Options Menu OPTIONS MENU The following options are available when you press the INFO ( ) button while in the Charging Mode menu. To exit the test codes display and to access the other options, press the INFO ( ) button again. -
Page 24: Print Last Test Data
GR1-120 Options Menu Press the INFO ( ) button to return to the Options menu. Press it again to return to the Charging Mode menu. PRINT LAST TEST DATA ↑↓ ↑↓ ↑↓ ↑↓ ↑↓ Press the INFO ( ) button. Use the DOWN/UP Options ↵... -
Page 25: Troubleshooting
Error Code 10 chargers internal components. If this condition occurs repeatedly, the charger should be sent back to Midtronics for service. Charger operation 1. The ON/OFF switch is toggled to the on position but the charger does not power up. -
Page 26: Maintenance
GR1-120 Maintenance MAINTENANCE Take proper care of your GR1-120: • Clean the display with a standard window cleaning solution. • Never allow the clamps or cables to lay in battery acid • Clean up any acid spills immediately with baking soda and water. -
Page 27: Patents, Service
PATENTS This charger is made in the U.S.A. by Midtronics, Inc. and is protected by one or more of the following U.S. Patents: 6,445,158; 6,441,585; 6,424,158; 6,392,414; 6,363,303; 6,359,441; 6,351,102; 6,329,793; 6,313,608; 6,304,067; 6,259,254; 6,163,156; 6,104,167; 6,091,245; 6,081,098; 6,051,976; 6,037,751; 5,831,435; 5,821,756; 5,757,192; 5,656,920; 5,592,093;... - Page 28 P/N 168-604A 4/04 © 2004 Midtronics, Inc.
Need help?
Do you have a question about the GR1-120 and is the answer not in the manual?
Questions and answers